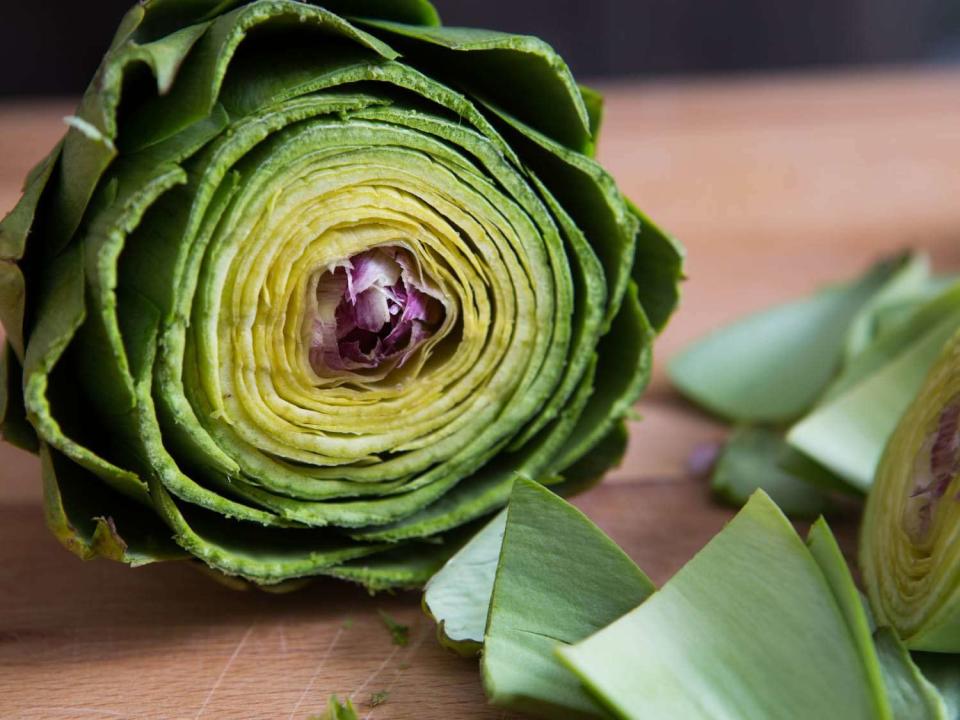
How to Clean, Trim, and Prepare Artichokes
With the right tools and know-how it's easy to get artichokes ready for eating.
Serious Eats / Vicky Wasik
Everything about the artichoke—the edible flower bud of a plant in the thistle family—suggests that it doesn't want to be eaten. How else to explain the armor-like petals,* prickly thorns, and throat-clogging choke? It's enough to scare off even the most intrepid cook.
*Technically, they're bracts, not petals.
But the reality is that preparing artichokes is easy as long as you know how to go about it. Like a lion tamer, with the right tools and approach, you will prevail (and if you don't, you'll make a damned fine viral news story).
Serious Eats / Vicky Wasik
Here are three ways to go about prepping artichokes. One involves cleaning down to the hearts, one is the trimming you'd do before steaming and serving whole, and the third is what's needed for flower-like Roman-Jewish fried artichokes (carciofi alla giudia).
Note that in all cases, I recommend wearing latex gloves if you have them. While not essential, the gloves keep your skin free of the artichoke's bitter raw fluids, which have a way of tainting any other food you touch after handling the artichokes.
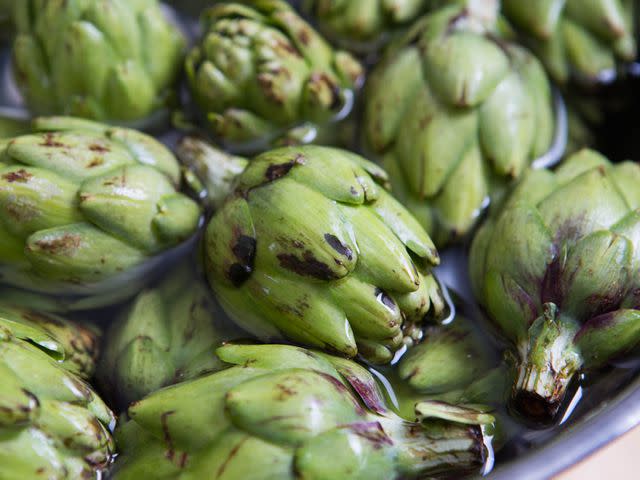
Before you start, fill a large bowl with cold water. Squeeze a couple lemons into it, and drop the lemon halves into the water. I also keep one half of a lemon off to the side in case I need it for rubbing on the cut sides of the artichoke—the citric acid can sometimes help slow browning due to oxidation.
Cleaning Down to the Hearts
Some artichoke recipes call for just the tender hearts and stems, which means trimming the artichoke of every tough, inedible part. If your plan is to steam your artichokes and nibble on each leaf before getting to the heart, this is not the method for you: Scroll on down to the steps for minimally trimming artichokes for basic steaming. But if you want the tender hearts and stems only, follow along here.
When I first published this article, I recommended a method that used the knife more aggressively. With practice, that method is faster, but the risk of accidentally cutting into the heart is greater, particularly if you’re not very experienced with it. In a commercial kitchen, speed matters, but at home you can usually spare a couple extra minutes, especially if it gets you better results.
Step 1: Pull Off Leaves

Serious Eats / Vicky Wasik
Start by pulling off the artichoke’s leaves (again, technically, they're bracts) until you get down to the very fine, thin yellow leaves in the center. This should expose much of the heart.
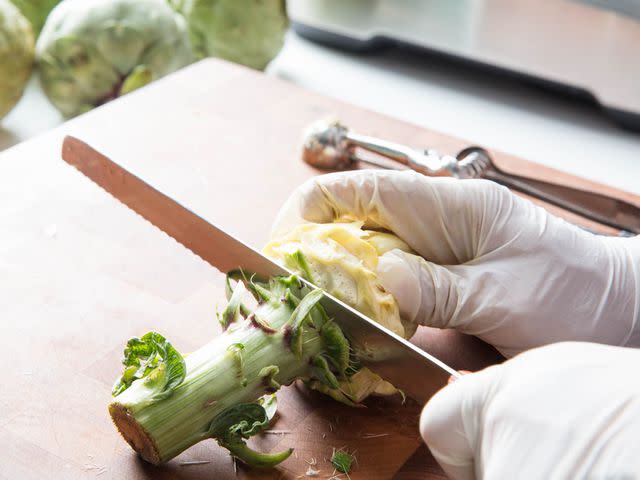
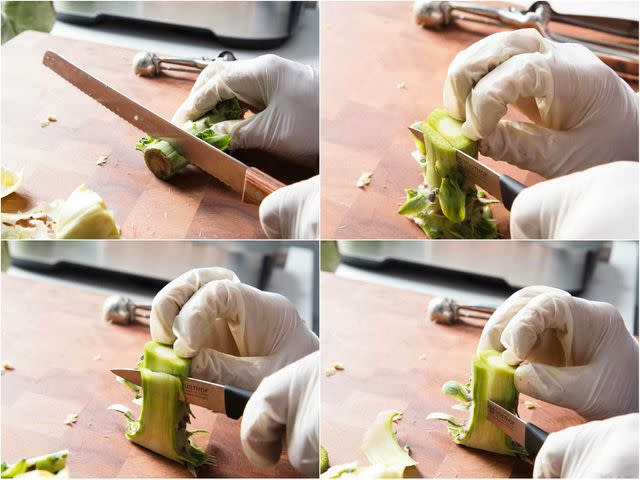
Step 2: Cut Off Stem (or Don’t)
Serious Eats / Vicky Wasik
With a serrated knife (or a paring knife), cut off the stem where it meets the base, and set it aside. You can also leave it attached, if you like, in which case you will need to trim the stem and heart together. The Y-peeler trick (below) is helpful for doing that without gouging the heart or edible core of the stem.
Step 3: Cut Off Remaining Bracts (Leaves)
Serious Eats / Vicky Wasik
Using the same serrated knife, cut off the fine yellow bracts just above where they meet the heart.
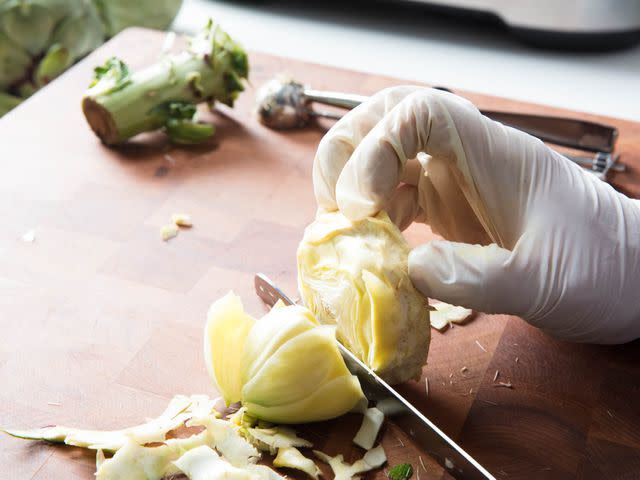
Step 4: Trim Heart of Green Bits
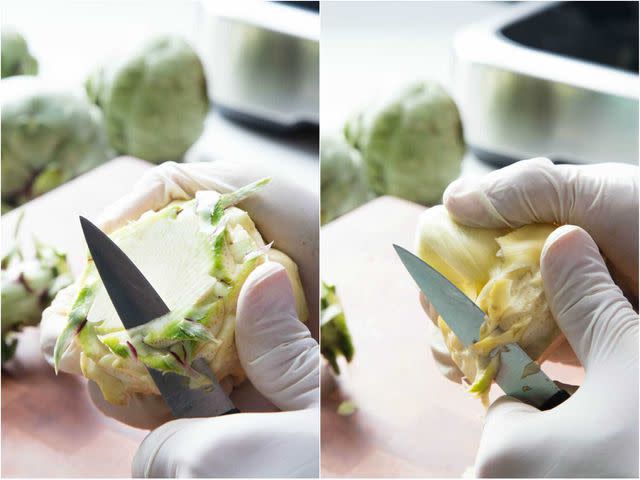
Serious Eats / Vicky Wasik
With a paring knife, carefully trim the top and sides of the artichoke. Your goal is to cut away any remaining green parts; go slowly and carefully so that you don't accidentally gouge the heart itself.
If you’ve left the stem attached, you’ll need to trim it at the same time.
Step 5: Remove Furry Choke
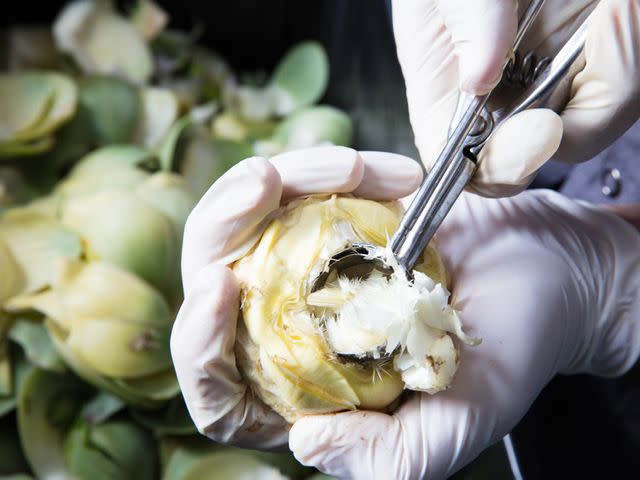
Serious Eats / Vicky Wasik
Next, remove the choke itself. That's the furry stuff in the center of the heart that would have eventually bloomed into a flower had the artichoke not been picked while still a bud. You can do this with a spoon, but a large melon baller, cookie scoop, or ice cream scoop with a thin metal edge works even better—that thin edge shaves the choke out more effectively than the dull edge of a spoon. (If the scoop has an ejection lever, it’s also handy here for shooting out the choke trimmings into the garbage.)

Serious Eats / Vicky Wasik
Step 6: Trim Heart More If Needed, Then Soak
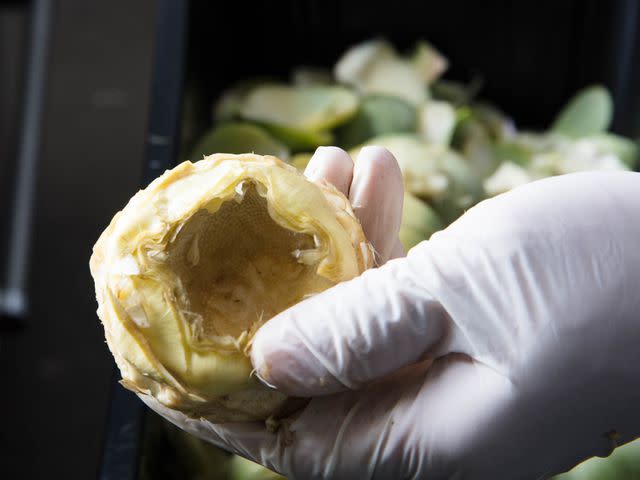
Serious Eats / Vicky Wasik
You may need to pick up your paring knife again to clean up the last bits of the heart. What's left is the cleaned artichoke heart, all totally edible and ready for cooking. Drop it in your lemon water to prevent it from browning.
Serious Eats / Vicky Wasik
Step 7: Trim Stem, If Separate
Serious Eats / Vicky Wasik
Finally, if you’ve removed the stem, use the paring knife to trim away the tough green outer portion and reveal the tender white core within.
Repeat with your remaining artichokes, then cook the hearts as desired.
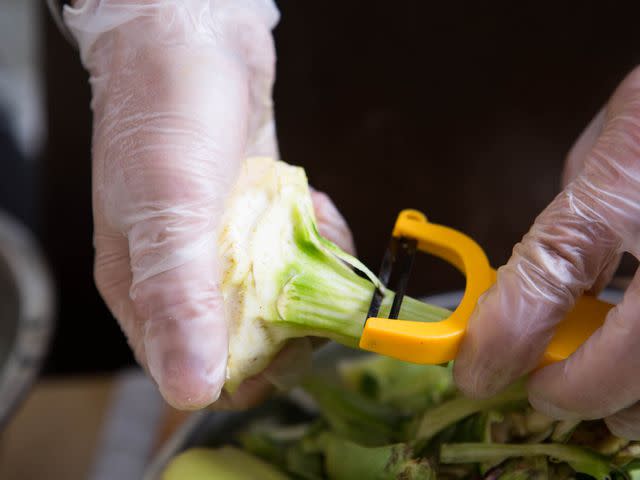
The Y-Peeler Trick
Serious Eats / Vicky Wasik
Do you own a Y-peeler? If you don't, you should—in fact, Y-peelers are an essential kitchen tool for all sorts of reasons.
If you've got one, use it to make the artichoke-cleaning process even easier: Instead of using a paring knife, trim the heart (after pulling off the leaves and trimming off the top and bottom with a serrated knife) with the Y-peeler. One of the benefits of the peeler is that there's no risk of accidentally gouging the heart or stem with an overly deep knife cut. And, because there's no worry about gouging, you can trim the whole thing a lot faster. And, because the blade swivels, it can navigate the curved parts with ease. Unfortunately, other types of vegetable peelers will be more difficult to use here.
Trimming for Steaming
I'll be frank: When I steam an artichoke, I don't go through all of this trouble. I just cut off the top, then steam the thing and eat it. But some folks prefer a slightly more polished presentation, including removing the thorns from the leaf ends and giving the artichoke an overall trim. If that sounds appealing to you, here's how to do it.
Serious Eats / Vicky Wasik
Step 1: Trim Off the Top
Start as above, by using a serrated knife to cut off the top third of the artichoke.
Step 2: Snip Bract (Leaf) Tips
Then, with a pair of good kitchen shears, cut off the top portion of each leaf to remove the thorny part.
Step 3: Remove or Trim the Stem
If you want the artichoke to sit flat, cut off the stem right at the base of the artichoke. I don't like wasting the stem, so I just trim the dry bottom off with a serrated or paring knife, then peel it with a paring knife or Y-peeler, as you can see in the photo above. It won't sit flat, but it still steams well and tastes just as good.

Now the artichoke is ready for steaming.
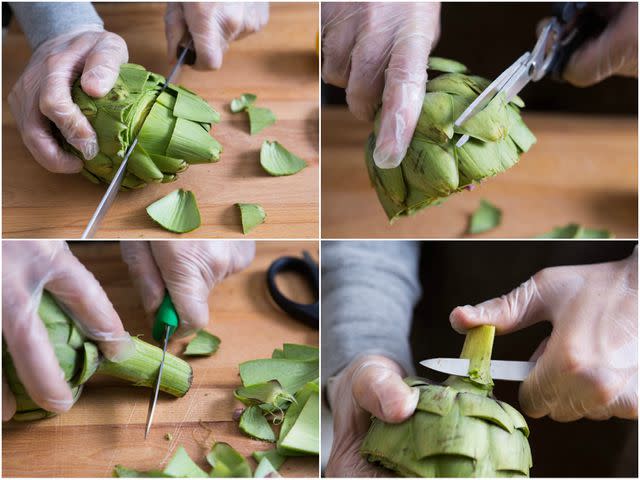
Trimming for Roman-Jewish Fried Artichokes
This is the least common of the preparation methods shown here, but it's handy to see it demonstrated in case you ever want to prepare the classic Roman dish known as carciofi alla giudia (Jewish-style artichokes).
The method is something of a cross between the two others above: The artichokes aren't trimmed all the way down to the heart, but the toughest portions are removed so that what's left is entirely edible.

Serious Eats / Vicky Wasik
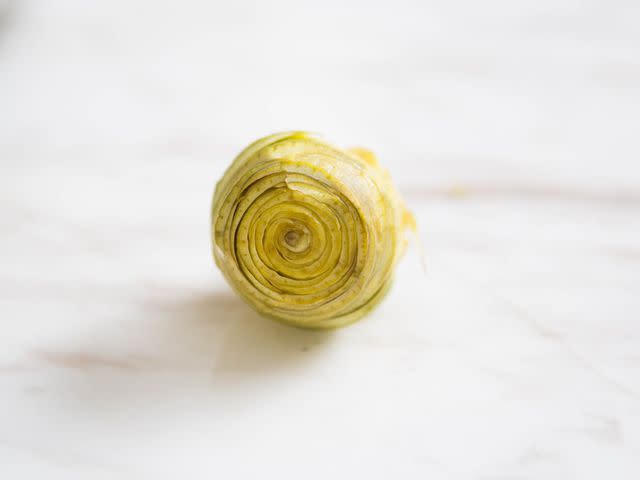
In these photos, I'm using a baby artichoke, but you can also do this with full-size ones.
Start by pulling off the outermost, dark-green leaves to expose the lighter, more tender ones within.
Serious Eats / Vicky Wasik
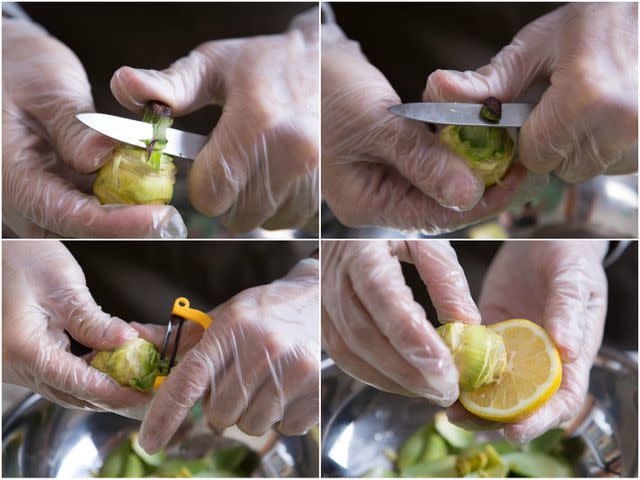
Then, with a paring knife, slice through each leaf to cut off the top, turning the artichoke in your hand as you go. Your goal is to leave the tender, edible lower portion of each leaf attached, while removing the tough, thorn-tipped tops. With a little practice, you can quickly turn the artichoke, almost as if it's on a lathe, while the knife just holds steady, slicing through each leaf as it comes around.

Serious Eats / Vicky Wasik
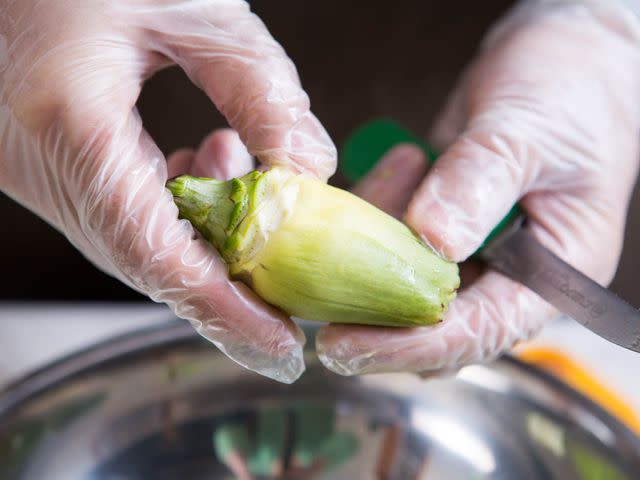
Once you've gotten most of the leaves trimmed like this, you can slice through the top portion of the remaining center leaves. The artichoke should look something like a closed rosebud.
Serious Eats / Vicky Wasik
Trim the stem, using either a paring knife or a Y-peeler to remove all the tough green exterior.
Serious Eats / Vicky Wasik
If you're using baby artichokes, or the thorn-free variety used in Rome (called cimaroli), the artichoke will be ready for cooking and eating at this point. If you have large, thorny artichokes with full chokes in the center, you'll want to remove those, too, by scooping them out with a spoon. This is easiest after the first frying stage, when the leaves have softened and are ready to be spread open like a flower.
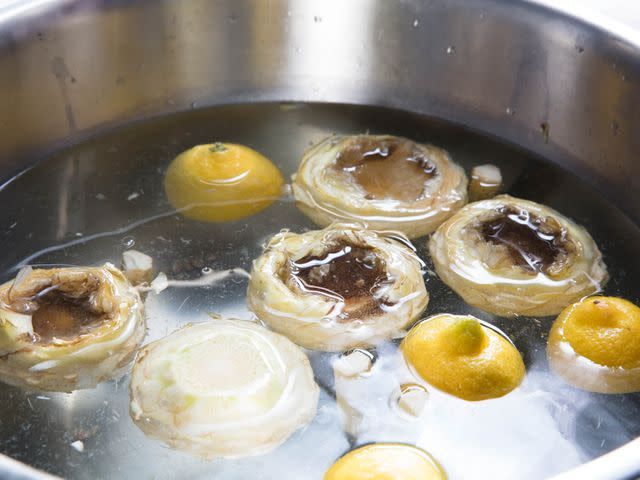
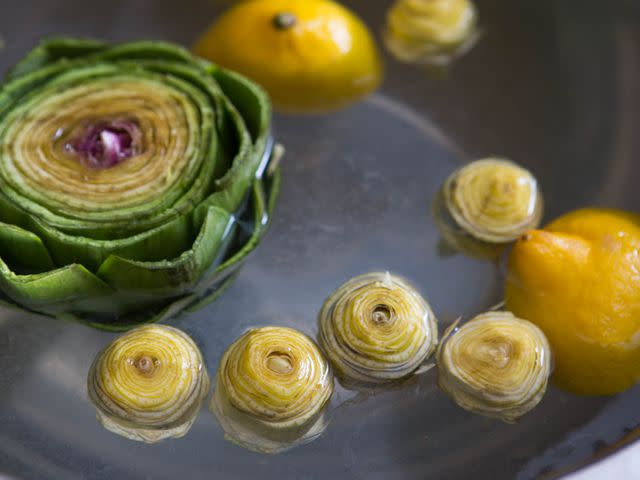
Once again, you can rub these with lemon if you need to. As each artichoke is done, drop it in your bowl of cold lemon water, and cover with a clean, wet kitchen towel to keep the artichokes submerged.
If you have a big artichoke already floating in that water, as I did after prepping these for the photos, it'll look like a mama artichoke with her little brood of baby artichoke-lings. So cute!
Serious Eats / Vicky Wasik
March 2015
This article, originally published in 2015, has been updated with new photos and a slightly different method for cleaning the chokes down to the heart.
Read the original article on Serious Eats.

