How to Clean and Store Fresh Produce
A guide to cleaning and storing fresh vegetables.
Serious Eats / Sasha Marx
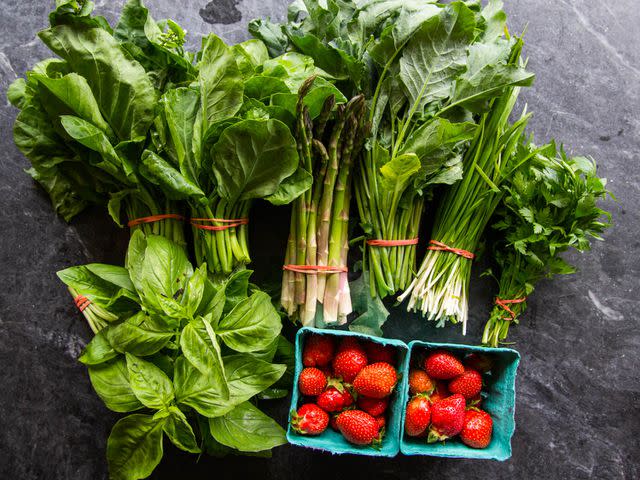
It's prime produce season, which means it's that time of the year when fridge Jenga can quickly get out of hand as you try to fit just one more bag of shishitos into the crisper, decapitating at least one pepper as you try to shove the drawer closed. Properly storing produce can be a bit of a challenge, but there are some tricks and strategies that can help keep veggies organized and fresh for longer.
Separate and Wash For the Short Term, Otherwise Leave Whole and Unwashed
Serious Eats / Sasha Marx
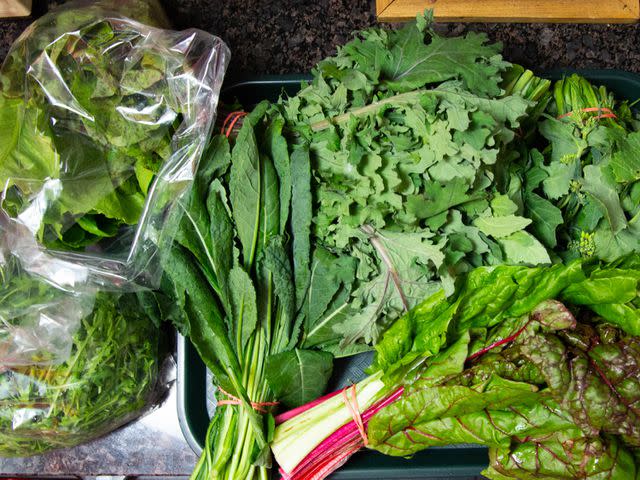
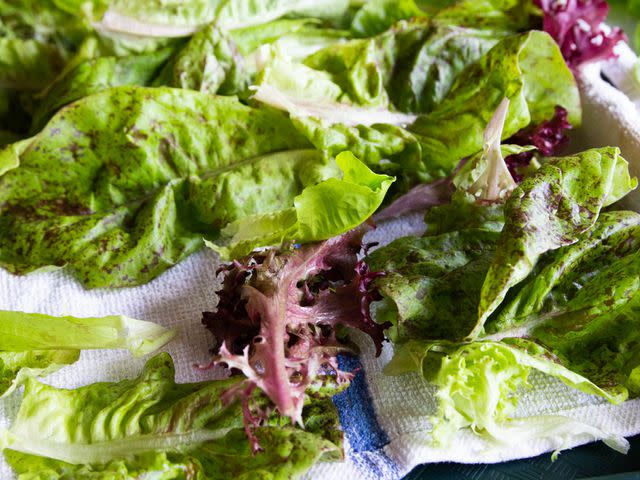
When you bring home a big haul of produce, it's tempting to knock out vegetable cleaning in one go for the sake of efficiency, but that's not always the best approach if you want to keep greens crisp and fresh for more than a couple of days. Leafy vegetables like lettuces and chicories are susceptible to wilting and rot, caused by either too little or too much moisture, so you need to be mindful of how you handle and store them in refrigeration.
The first thing I do when I get home from the farmers market is to run a quick inventory of all the items I've purchased, and come up with a general schedule for when everything will get used. Lettuces and the like get separated into two categories: use within 48 hours, and longer-term storage.
If you've ever purchased one of those clear plastic clamshell containers of "triple-washed" mixed baby greens at the supermarket, opened it up to find that a third of the lettuce is rotting, and then proceeded to spend 15 minutes picking through slimy bits that stick to your fingers in an attempt to salvage enough for a small salad, then you know that not all lettuces have the same shelf life. Generally speaking, tender varieties like red leaf, Bibb, and butter lettuce, along with green medley mixes and delicate, loose leafy greens like young arugula have a smaller freshness window compared to sturdier greens like lacinato kale and whole heads of romaine or radicchio and endive.
The more delicate items go into the "use first" category and should be processed and cleaned right away, while the more resilient ones go into the deal-with-later category, unless there are items that need to be cooked immediately for refrigerator space-saving reasons. For items that won't be eaten within a couple of days, it's best to keep them whole and unwashed until you're ready to use them. This limits the exposure to excess moisture, which can cause rotting, or over-drying after washing, which can lead to wilting.
How to Store Fresh Produce for the Long Haul
Serious Eats / Sasha Marx
I like to store whole heads of lettuce with a paper towel in either a sealed clear container or a zipper lock bag. The paper towels help absorb moisture, while the clear container ensures that I can see what's going on in my fridge—there's less of a chance that I forget about the head of frisée if I can see it.
Before any item goes into refrigeration, I remove any rubber bands holding a bunch of produce together. Rubber bands make selling and purchasing vegetables easier, but they are bad news for storage as they can damage cell walls and accelerate rot. Set aside those bands for tracking the progress of your sourdough starter, and then give everything a once-over to pick out any slimy leaves that could damage the rest.
Serious Eats / Sasha Marx
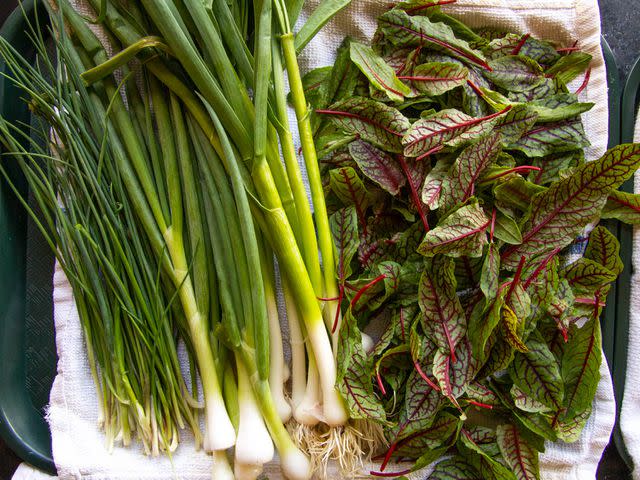
Box or bag up your for-later veg and pop it in the fridge. Zipper lock bags are well-suited for fridges with functioning crisper drawers, just make sure not to crush the vegetables they contain by jamming them into a full crisper or placing heavier items on top. I don't have a full size fridge in my New York City apartment, and instead have designated one of our three mini-fridges for produce only. With limited space and no crisper, plastic boxes usually sold as fancy shoe boxes or junk drawer stand-ins at container stores are the best bet for storing vegetables. Depending on the produce, I can hold different items in individual zipper lock bags in the same box, or place them in the boxes loose, layered between paper or cloth kitchen towels. In the springtime I might have an allium box for scallions, green garlic, and spring onions, or a leafy brassicas box for red Russian kale, rabe, and spigarello. In the summer there's a berry box and one for lettuces.
Serious Eats / Sasha Marx
The hard plastic construction allows for stacking stuff on top of the boxes without damaging the items inside, which is ideal when you don't have a fridge with much shelving. Loose or bagged produce can be easily crushed by other items, or worse, shoved into the back where greens go to turn into sludge until you find them a couple of weeks later while looking for a jar of chili crisp. With the boxes, you can easily find and pull out what you need without having to rearrange your whole fridge.
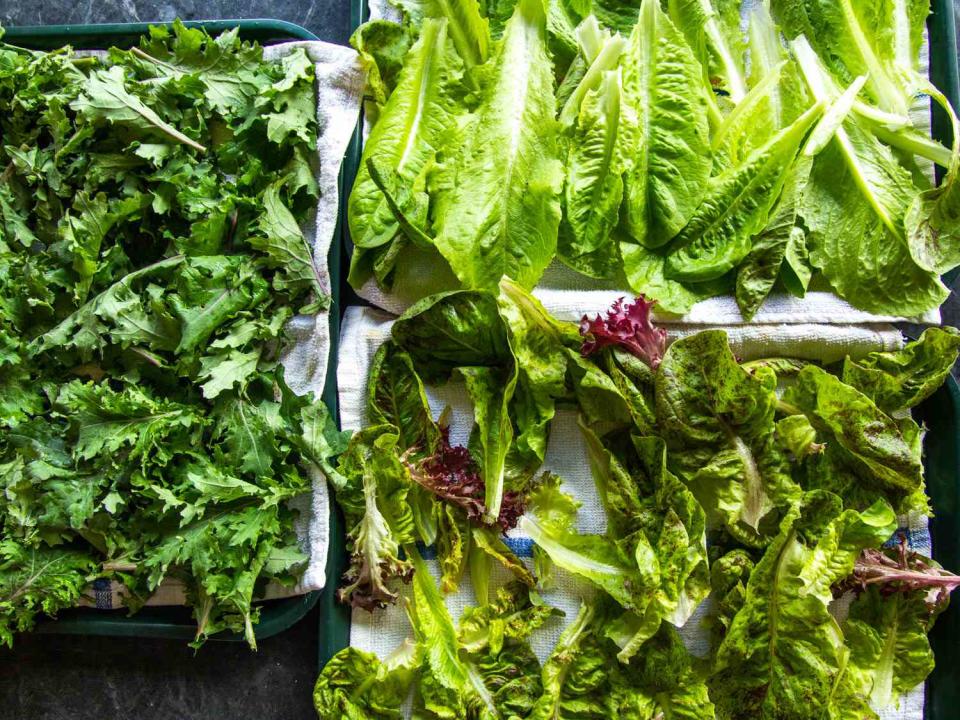
How to Clean and Store Produce for the Short Term
Serious Eats / Sasha Marx
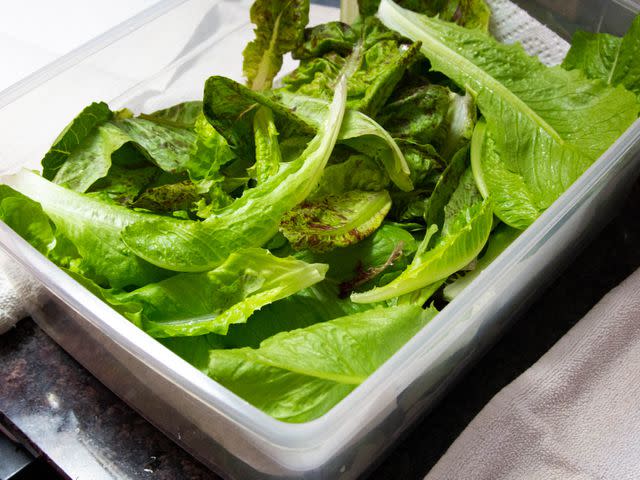
Once you've put away the sturdy stuff, it's time to process the delicate greens. Herbs should be stored following Kenji's guide (although I have found that in my apartment, basil doesn't hold up well stored in a Mason jar with water, so I wrap bunches of basil in paper towels and keep them in a mostly closed zipper lock bag in the fridge). Lettuces and cooking greens need to be washed.
Serious Eats / Sasha Marx
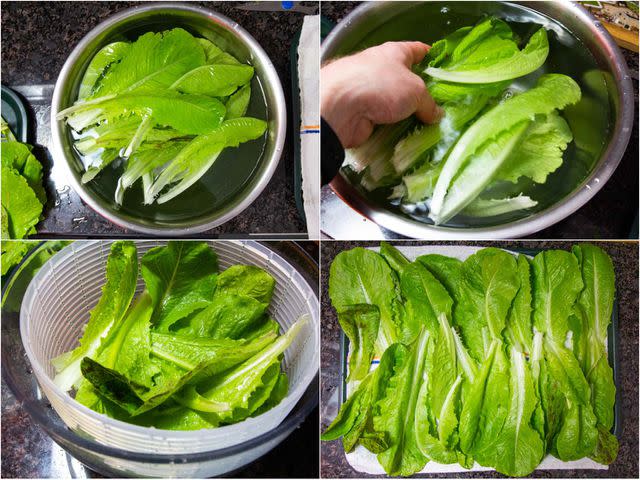
Start by filling the largest bowl you have with cold water. Separate heads of lettuce or chicory into individual leaves discarding any gnarly ones as you go. I prefer to separate leaves by hand, gently pulling them off the head, rather than cutting them away at the base with a knife, which can bruise and discolor the greens' ribs. (A knife is required for separating the leaves of certain types of radicchio and endive, but avoid using one when possible.)
Place a large handful of greens into the bowl of cold water, and gently swish them around to release any dirt, debris, or critters that may have made the journey home with you. Don't overfill the bowl with greens—there needs to be enough room for water to get between the leaves. Work in batches instead. Also, never start with greens in an empty bowl that then gets filled with water because the stream from the faucet can bruise and damage your lettuce.
Serious Eats / Sasha Marx
Once you've given the greens a nice bath, gently lift them out of the water, rather than holding them in the bowl with one hand while pouring out the water with the other. You want to leave the dirt at the bottom of the bowl, not pour it all back over the greens you just cleaned. As you lift the greens out of the bowl, feel them for any residual grittiness. Some vegetables grow deeper in the earth than others, and some farmers rinse off their produce better than others. If the leaves still feel sandy, pour out the water from the bowl, refill it, and repeat the washing process again.
Once the vegetables are dirt-free, give them a shake and transfer the batch to your trusty salad spinner, taking care not to overfill it. Spin the washed greens, and get the next round of dirty ones in the pool for cleaning. If you're not prepping for a salad or dish that will be eaten immediately, resist the urge to immediately bag up the greens straight from the spinner. Those leaves are drier than they were a minute or two ago, but they're still pretty damp. Bagging them right away puts them at a high risk of rotting in the fridge.
Serious Eats / Sasha Marx
Instead, line a tray or baking sheet with a clean kitchen towel, lay the spin-dried greens out in a single layer, and set the tray in a well-ventilated and cool part of your home. In the cooler months, that might be by an open window, or in the summer, maybe close to an air conditioner. When I worked in restaurants, we would place sheet trays of greens to dry by the fan in the walk-in. If you have room in your fridge, you can follow that lead and place uncovered trays in the fridge to dry out.
Serious Eats / Sasha Marx
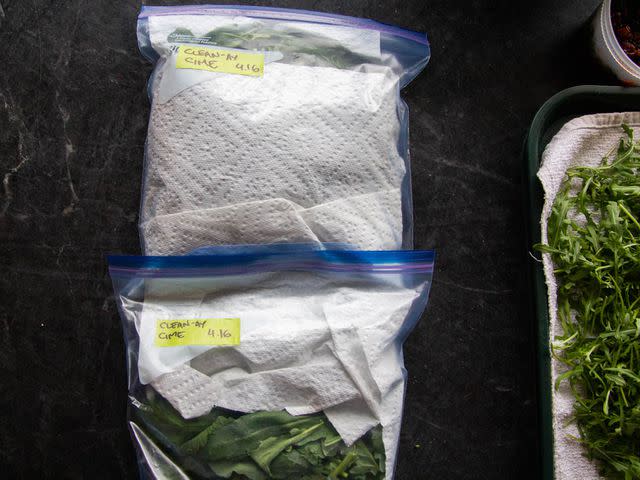
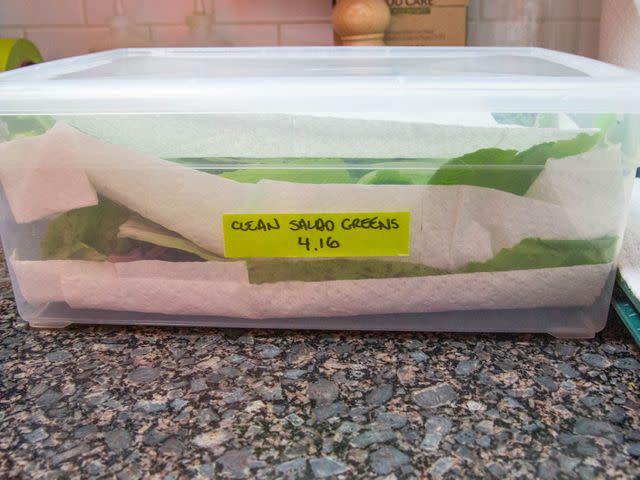
You're not looking to dry the greens completely, more like 90% to 95% of the way. If they are bone dry, then they'll begin to wilt quickly, so you want them to retain a bit of moisture to remain crisp and perky (that's why lettuces get misted in the produce section at supermarkets). When the greens are ready, bag or box them up as you would with sturdier vegetables, but keep in mind that individual leaves are much more delicate than a whole head of lettuce. For boxes, store washed and dried greens between layers of paper or clean kitchen towels, making sure not to overcrowd the box. The towels will absorb excess moisture, and the layering will keep the greens on top from crushing those at the bottom.
Stored this way, lettuces will keep for about three days, and heartier leafy vegetables like kale will keep for five days. The advantage of this approach is that you get the washing out of the way, and have grab-and-go greens for a few days at least.
Tight on Fridge Space? Cook, Ferment, and Pickle Your Vegetables
Serious Eats / Sasha Marx
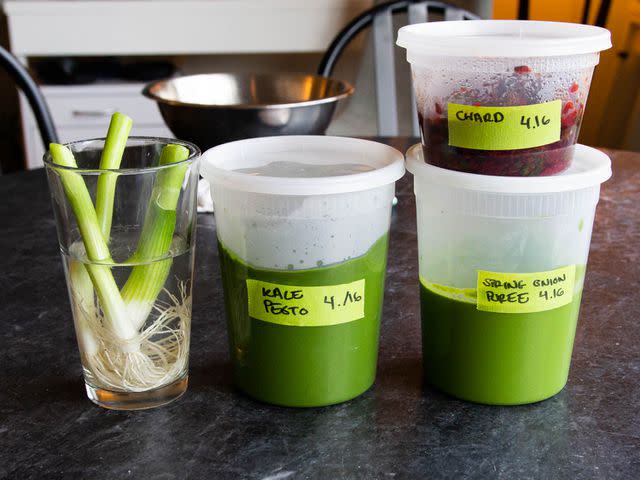
Even with improved storage solutions, you can quickly run out of room in the fridge, especially if you're purchasing a lot of groceries at once. Like most living or once-living things, vegetables are made mostly of water, which takes up a lot of space. Processing and cooking produce is a neat little Honey, I Shrunk the Veg trick that collapses vegetable cell walls and drives out water in the process.
A bulky flat of mushrooms can be reduced to a quart with just a few minutes of roasting. Bunches of kale and arugula can be processed into a pint of pesto-adjacent sauce, and bitter greens like rabe and chard can be wilted down for a week's worth of garlicky greens. Cooking vegetables down gives you both fridge space and easy dinner options for later in the week. And if you want processed produce to last even longer, turn to fermentation and pickling.

Serious Eats / Sasha Marx
A couple heads of cabbage can be easily turned into a batch of sauerkraut with just some knifework and salt. This spring I went big on ramps, using them in pastas and sanmaneul-jeon pancakes, but also preserving some for later by pickling the bulbs and making whole-ramp kimchi, both of which I've been incorporating into meals for the past few months.
Between the short-term payoff of having clean, crisp lettuces ready to go and the long game of fermented and preserved veggies for enjoying later on, you can take full advantage of the best time of year for fresh produce.
July 2020

