How to Clean (and Not Clean) Your Ears
Avoid sticking slender objects inside the ear
Medically reviewed by John Carew, MD
Your ears have built-in protection and self-cleaning measures to keep them free of dirt and germs. Cerumen (earwax) keeps dirt and germs away from your eardrum. When you chew, the skin inside your ear canal moves, pushing the earwax to your outer ear.
Sometimes, your ears may need extra preventive cleaning, especially if you make excessive earwax. If you have symptoms of earwax buildup, you may need to remove it at home or have a professional clean your ears.
This article reviews how to and how not to clean your ears and remove earwax. It also covers the benefits of professional cleaning.
DuxX / Getty Images
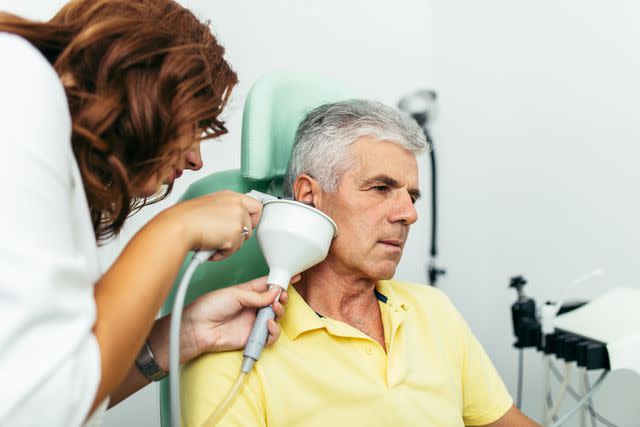
How to Clean Your Ear Canals
If your ears produce more wax than they can naturally clear, use a damp cloth or tissue to clean the outer ear and help remove excess wax. Some people also use hydrogen peroxide or alcohol drops inside their ears to prevent earwax build-up. The reasons for excess earwax might include:
Ear canal shape: Some ear canals are more prone to trapped wax than others.
Hearing aids, earplugs, or cotton swabs: These devices push earwax deeper into the ear.
Age: As you age, you might produce less or drier wax.
Skin changes in the ear canal: Changes in your skin make it difficult for the wax to move.
Related: Excessive Earwax in Children: When to See a Pediatrician
To remove earwax at home, consider using cerumenolytic agents (solutions that soften earwax) or irrigation (flushing it out with water). Some people use both methods, applying the cerumenolytics 15 to 30 minutes before irrigating.
Taking a warm shower before irrigation can also help soften and loosen earwax. Use warm, body-temperature water when irrigating; otherwise, you can get significant vertigo (a spinning sensation).
Cerumenolytic Agents
Cerumenolytic agents soften earwax, making it easier to remove. Avoid cerumenolytics if you have a nonintact eardrum (hole in the eardrum), active dermatitis (inflamed, itchy skin) in your ear, or an ear infection.
You can use two or three drops of the following water-based solutions in the ear 15 to 30 minutes before irrigation or several days in a row (for up to 14 days) if you are not using irrigation:
Acetic acid (half vinegar and half water)
Docusate sodium (an ingredient in some over-the-counter ear drops)
Hydrogen peroxide
Saline (salt water solution)
Sodium bicarbonate (baking soda in water)
Water
You can also use three or four drops of the following oil-based solutions before irrigation or twice daily for four days.
Earex (almond, arachis, or rectified camphor oils)
Cerumol Ear Drops (arachis, chlorobutanol, turpentine oils)
Almond or mineral oil
If you use over-the-counter drops like Earax Advance (choline salicylate plus glycerol) or Addax (ethylene oxide polyoxypropylene glycol), use three drops before irrigation or twice daily for four days. For Debrox (carbamide peroxide), use five to 10 drops before irrigation or twice daily for up to seven days.
How to Instill Ear Drops
Follow these steps to insert ear drops:
Tilt your head to the side.
Place drops into the ear canal of the ear facing upward using a dropper or bulb syringe.
Keep your head slightly tilted for about five minutes.
Tilt your head the opposite way to remove the drops.
Use a tissue or towel at the ear opening to catch fluid.
Ear Irrigation
Ear irrigation, flushing out earwax buildup with water or saline (salt water), can occur 15 to 30 minutes after using a cerumenolytic to soften the wax. You can also irrigate without first using cerumenolytic solutions. Here is how to perform irrigation:
Warm the fluid to body temperature.
Tilt your head to the side.
Gently insert the tip of the bulb syringe into the outer ear canal.
Release a steady stream of solution.
Allow the solution to sit for a few moments.
For stubborn earwax, leave the solution for 15 minutes.
Tilt your head in the opposite direction to drain it.
Use a tissue or towel to catch drainage.
Risks that may occur with ear irrigation include:
Dizziness, especially if the solution is not warm enough
A hole in the eardrum (due to forceful irrigation)
Otitis externa (an outer ear infection, also known as swimmer's ear)
Ear bleeding (if you take blood thinners)
In rare cases, using tap water can lead to an ear infection. Consider using saline or distilled water to reduce the risk. You can also place a few drops of half vinegar/half water solution or alcohol drops after irrigation to reduce the risk of infection.
Avoid ear irrigation if you have a history of:
Perforated eardrum (a tear or hole in the eardrum)
Ear tubes or ear surgery
Unusual ear canal shapes that easily trap water
Only being able to hear out of the affected ear
Swimmer's ear
With Symptoms
If you don’t have any symptoms of earwax build-up, it's OK to leave it alone. But if excessive earwax causes symptoms, removal becomes necessary. Symptoms include:
Clogged ears
Coughing
Earache
Ear fullness
Ear itching
Odor or drainage
Ringing in the ears
Ear itching may be due to atopic dermatitis of the ear canal skin or swimmer’s ear, an outer ear canal infection. This occurs after exposure to water. Remove water from your ears after swimming or bathing to prevent outer ear infections. To alleviate itching and discomfort, you can try:
A warm compress
Distilled alcohol drops
Half vinegar/half water drops
Related: Comparing Swimmer’s Ear Drops
Worst Ways to Clean Your Ears at Home
Avoid the following ear-cleaning methods, which can do more harm than good.
Inserting cotton swabs (Q-tips) or small objects into the ear canal: This technique can push earwax deeper into the ear, causing irritation, infection, or injury.
Ear candling: This method is ineffective and comes with the risks of burns.
High-pressure ear irrigation devices at home: This approach can cause injury to the eardrum.
Related: The Dangers of Using Q-Tips for Earwax
Reasons to Get a Professional Ear Cleaning
Professionals provide a risk assessment before cleanings. They check for narrow ear canals, diabetes, past radiation therapy, or other conditions that could make cleaning risky. This may indicate a need for a special tool or technique.
For instance, your provider may use a microscope for safer cleaning if you have a history of a perforated eardrum or ear tubes. If your ears easily trap water, they may manually remove the wax without water (using a forceps, curette, or suction tip).
If trying different methods to remove the earwax doesn't work and the symptoms continue, the provider can refer you to an otolaryngologist (a healthcare provider who specializes in disorders of the ear, nose, and throat, also called an ENT).
Summary
Your ears naturally clean themselves, but if you have excessive earwax buildup, you can clean them at home using cerumenolytics (earwax-softening solutions) and irrigation.
However, for more stubborn buildup, or if you have underlying health problems, consider a professional ear cleaning. Professionals have the expertise and tools to remove earwax safely, preventing ear canal or eardrum injury.
Read the original article on Verywell Health.

