How To Clean The Needle In Your Keurig Coffee Maker
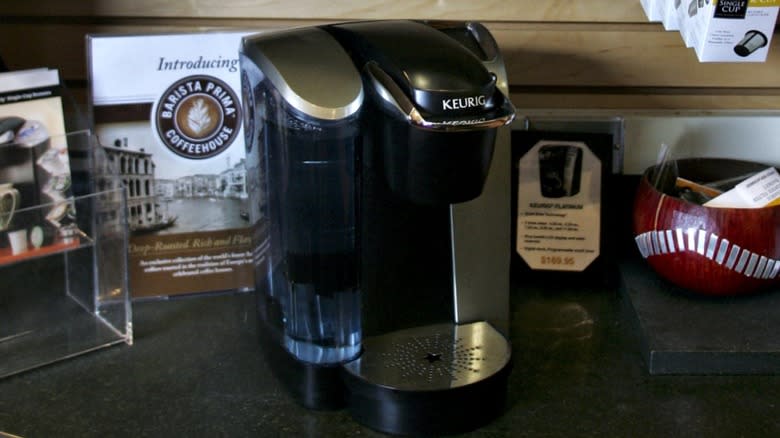
With a Keurig coffee maker, making coffee is convenient, simple, and mess-free. However, if the brew's not tasting great, it can be game over. A Keurig coffee maker has two needles: an entrance needle and an exit needle. They each pierce the coffee pod from either end and filter through the water to make the coffee. Debris, such as coffee granules and tea pieces, can end up lodged in the needles, and that's why it's essential to keep them clean. It's not complicated — you only need a clean paper clip, a large ceramic mug, and a usable sink nearby. (And before you wonder if sticking a paper clip inside your machine is a good idea, these steps are prescribed by Keurig Inc.)
First, ensure that the coffee machine is switched off or unplugged. You don't want to accidentally push the "Add Water" button and scald yourself in the cleaning process. It's also a good idea to clean the machine when it's cooled. If you've just made a coffee, the parts you remove to clean could still be hot.
Once you've followed these preliminary steps, you can remove the pod holder and start cleaning. It's not rocket science — if you want better-tasting coffee, clean your coffee maker.
Read more: 14 Unconventional Ingredients You Should Add To Your Morning Coffee
Cleaning The Exit Needle
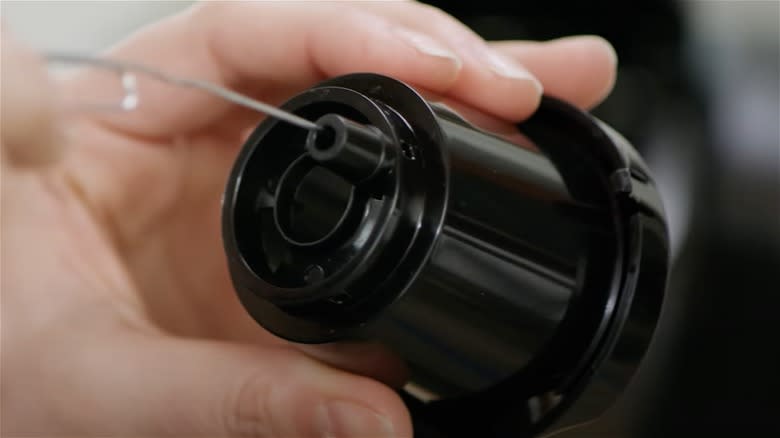
To clean the exit needle, remove the pod holder from the machine. You can achieve this by lifting the handle on the machine, and with one hand remaining on the bottom of the pod holder, pull the small, circular pod holder from the machine. The exit needle is located inside the pod holder, so it's essential to exercise caution when handling it.
Now carefully pull the funnel attachment from the pod holder, and there should now be an exposed tube sticking from the underside of the pod holder. You can then straighten one edge of the paperclip and use this to carefully clear any debris that might be blocking the tube.
After this is complete, wash both the funnel and pod holder in the sink under running water. This will help to remove any other stuck particles in both attachments. This is a reminder again that the exit needle is exposed inside the pod holder, so be careful not to catch your finger while washing this attachment. You can leave these attachments to dry on some kitchen roll while you clean the entrance needle.
Cleaning The Entrance Needle
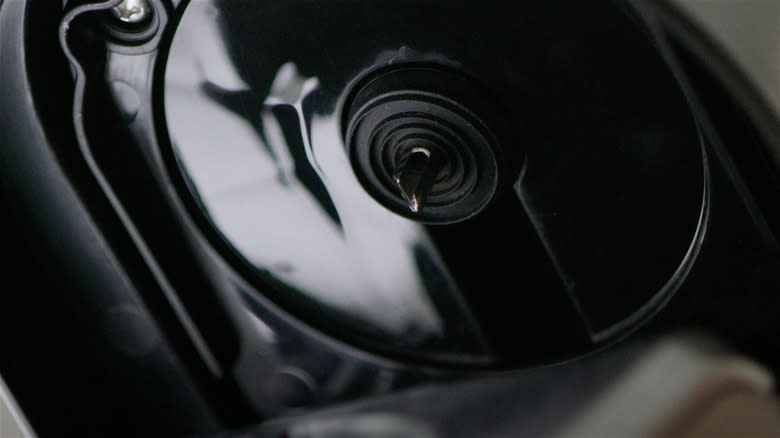
The entrance needle is immediately visible once you've lifted the lid from the machine to remove the pod holder. To clean the entrance needle, place the paperclip into the side holes of the needle and carefully move the paperclip around until all debris is cleared.
You can now place the pod holder with the funnel securely re-attached back into the machine. Ensure the tabs on the pod holder are aligned on the machine before firmly closing the lid. Lift and lower the handle entirely before running two water-only cycles using the largest cup size. (Don't insert a pod during these cycles — it's essential to flush through any dislodged debris before making yourself a drink.) Once these are finished, the machine is ready to use.
It's best to clean all parts of your coffee machine, needle included, once per week. It's not only crucial to keep your machine clean for good-tasting coffee but also for the extended longevity of the machine. Keurig coffee makers have a general shelf life, but regularly cleaning them could see them last much longer. If you keep your coffee maker well-maintained, it may last more than five years. It's time to shed any reservations about the coffee maker needles and dive into the cleaning process — you could have the best-tasting coffee waiting for you at the other end.
Read the original article on Daily Meal.

