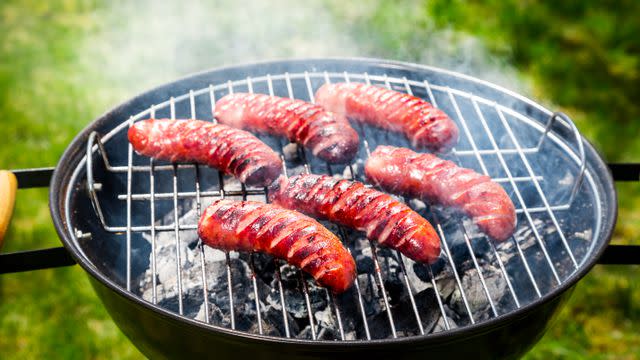
How To Clean Your Grill So It's Ready For Cookout Season

Getty Images
Rising temperatures, school graduations, and pool openings are signs that the summer season is upon is. For many home cooks, it also means it's grilling season. But if your trusty grill spent the winter hibernating, you’ll want to give it a thorough refresh before putting it to work. We consulted a group of professional chefs, pitmasters, and cleaning experts to find out the best ways to clean a grill, and here’s what they shared with us.
Related: 60 Of The Best Barbecue Side Dishes—Because It's Not Just About the Meat
The Equipment Needed For Proper Grill Cleaning
Grill brush
Hot water
Dish soap
Aluminum foil
Vinegar
Baking soda
Vegetable oil or nonstick spray
Vacuum

Getty Images
How To Deep-Clean Your Grill
1. Preheat the grill.
According to Cedric Andrews, owner of Shell Shock'd Tacos in Detroit, Michigan, the very first step to take before beginning your grill-cleaning process should be to turn on said grill and allow it to preheat, which “helps burn off any residual grease or food stuck on the grates.” Andrews recommends preheating both sides of the grates for 30 minutes each or “when all the grease has burned and you no longer see smoke coming from the grates. This is when you will know that this step is complete.”
2. Take apart any removable pieces.
Grills can be cleaned fully-assembled, but for maximum precision, Andrews likes to “let the grill cool off completely, then begin to dismantle the grill. Breaking down the grill involves disconnecting all the removable parts and getting them ready for further cleaning.” Another perk of this step is that it allows you to “check for any repairs or additional maintenance, such as clogged burners or defective burner tubes that might be causing small flame sizes while cooking.”
3. Use a grill brush or aluminum foil to scrub down the grates, walls, and lid.
Removing residue from the grill grates is essential to quality grilling experiences throughout the season, but our experts warn against stopping with the grates alone. “General maintenance for any type of grill or smoker should include a quick refresh of inside the cooking chamber. This is easily accomplished by tearing off an 18”-long piece of aluminum foil and crumpling it, then using the crumpled foil like a scrubbie and removing loose debris from inside the lid and cooking chamber walls as well as the grates,” says Dylan Lipe, partner at Smoque Steak in Chicago, Illinois.
As an alternative, a grill brush can also effectively scrape debris away from your grill grates. But “it's important to look at your grate style when selecting a brush because it's not one-size-fits-all,” advises Tyler Fenton, chef/owner of BATA in Tucson, Arizona.
“For example, if your grill has straight grates, a rigid bristle brush will work well for cleaning, but if you have diamond grates, you're going to have a hard time with that brush and [a brush with] softer bristles will work much better. "
Extremely persistent chunks of burnt food might require some extra force, and in those cases, Fenton says that “a cheap putty knife is also a great tool for cleaning!”
Related: Why You Should Use An Onion To Clean Your Grill
4. Mix up a solution of dish soap and water to remove stubborn bits of grease and residue.
If you’re noticing heavy stains and smears of food or grease on the grates or on the interior walls of the grill, Adonis Icalina, a former chef and meat supplier who now writes recipes and grilling advice for Carnivore Style encourages you to “create a cleaning solution using warm water and dish soap” and scrub again with the grill brush or aluminum foil. “Just be sure to rinse thoroughly afterward to avoid any soapy residue on your next cookout,” Icalina says.
5. Vacuum the bottom of the grill to pick up stray pieces of food or debris.
Taking a vacuum cleaner to your grill might not be your first grill-cleaning instinct, but Marco Niccoli, chef, restaurateur, and co-owner of am.Niccoli, assures us that it’s a smart move. “Over the grilling season, food and drippings can fall to the bottom, and that [can] create burned flavors that you don’t want in the food. So I like to get an outdoor vacuum [and use it to] clean out the pieces of food that have dropped there,” Niccoli tells us.
If you’re using a pellet grill, a Shop Vac or similar type of vacuum can also be used to “clean out the pellet hopper,” says Carey Bringle, the pitmaster and owner of Peg Leg Porker in Nashville, Tennessee.
Related: The South's Best Barbecue Joint In Every State 2024
6. Remove rust stains and polish your stainless steel exterior with white vinegar.
Because most outdoor grills are left outdoors and at the mercy of the elements, rust can become an issue, especially on stainless steel models. “To clean up rust, you'll want to use a mixture of 2 parts vinegar and 1 part baking soda. “Make a paste, brush it on, and let it sit for 20-30 minutes. Then just hose it down and scrub [the rust away] with a wire brush,” Shoults suggests.
Andrews also points out that white vinegar can be a useful tool for shining up a dull stainless steel exterior: “If you have a stainless steel grill, pour roughly 2 ounces of vinegar on a damp towel to shine and polish your grill for a professional finish.”
Related: 5 Things You Should Never Clean with Vinegar
7. Reassemble the pieces and preheat the grill again.
Once you’ve cleaned the grill to your satisfaction, return the grates and other pieces to their proper places. “To remove any remaining foreign contaminants and to ensure that all parts of the grill function properly, preheat the grill [again] for around 20 minutes. Once you have successfully heated it again, your cleaning process is complete,” Andrews says.
8. Season the grate (if you want).
Grate seasoning is a somewhat controversial topic in grilling circles; some swear by this process to prevent food from sticking on the grates during the cooking process, while others prefer to use oil-based marinades on the food itself to reduce stickage. If you do decide to season the grates themselves, Bringle likes to do this by “rubbing the grate down with a rag and vegetable oil.”
For Shoults, the “easiest way to season grill grates is with a nonstick spray such as PAM. The safest way to do it is when the grill is not lit, but it's a lot more fun to apply with the fire burning if you're feeling like a real pit boss. The nonstick spray is highly flammable so when you start applying, the can works like a mini flamethrower. Fun!”
Getty Images
How To Keep Your Grill Clean Through The Season
1. Keep the grill running for a while after cooking to burn off excess marinade and juices.
Maintaining your grill once the cookout season starts only calls for a few simple steps. "Letting your grill run for a bit after cooking always makes cleaning easier, if you've just grilled something with a marinade, letting that marinade fully carbonize will be a much easier cleaning task than trying to clean it up while it still has some life left in it,” says Fenton.
2. Clean the grates after every single cook, using a brush, onion, or lemon.
It may be tempting to skip the post-grilling cleanup of your grates, but Bringle insists that “regular maintenance should include cleaning your grates after every cook.”
“I like to clean my grill after each use, right after I remove the meat from the grates,” Shoults says in support of this rule. He accomplishes his cleaning by “cranking up the heat to high, and that'll get rid of most of it for you. Anything that's left can be easily removed with a grill brush, a wire bristle brush, and a soft bristle brush. If you don't have one, wad up aluminum foil and wipe the grill grates down with that.”
He adds that some effective spot-cleaning can also be done with a produce staple: “When the grates are still hot, you can take an onion or lemon, cut it in half, hold on to it with your tongs, and just wipe it back and forth to help scrub and clean the top of those gates off.”
Related: How To Clean A Flat Top Grill
Additional Cleaning Tips
Check for nests.
There’s no surprise more unpleasant than opening your grill to find an angry hornet’s nest or some confused nesting birds. “When you pull out your grill or smoker for the first time in the spring, be sure and check for wasps and birds’ nests and any other critters that may have decided to hibernate in your grill over the winter. Nothing like being chased through the backyard by angry wasps, bees, or who knows what else!” Shoults reminds us.
Consider taking it to a car wash or doing an at-home steam clean.
We’re not here to judge you if you haven’t cleaned your grill in many moons. But if that’s the case, you may want to try out a cleaning process that’s more intense than the at-home DIY version. “I like to take my grill to a self-service car wash and use their high-pressure sprayer.
Take a scouring pad and a wire brush to clean the grill rack of debris.
Depending on the grill model you have, you can partially disassemble most of them.
Lay all the pieces out on the concrete and just choose the rinse cycle.
Use the high-powered pressure hose and rinse the parts down with super-hot water. You'll be surprised how effective this cleaning process can be without using soap or other harsh chemicals,” Shoults says.
But if dragging your grill to a car wash doesn’t appeal to you, Brian Boyle, co-owner of MaidThis Cleaning, has a steam-cleaning solution that you can do at home. “If it has been a while (or never) since your last deep cleaning, I recommend using the steam cleaner. At this point, the heat and moisture will literally melt the grease away and will save you time and energy. The best part is that you can use the steam cleaner on any surface of your grill, including the inside/outside of the hood and all parts of the base. Follow the instructions on your cleaner to get the water in the reservoir and get the unit heated up.”
Be sure to read the manual.
This recommendation might seem obvious, but most grill owners will admit that they haven’t consulted their instruction manual since they first set up their grill. But Eric Rowse, lead chef-instructor of culinary arts at the Institute of Culinary Education's Los Angeles campus, thinks that it’s worthwhile to give that manual a second look if you want to properly clean your grill. “[The manual] gives you important tips and lets you understand your equipment. This is important because different grill grate and body materials don’t act the same and can't be cleaned the same. Cast iron grates need seasoning sessions but retain heat well, stainless is easy maintenance, and enameled grates are more delicate because you could break the porcelain coating,” Rowse explains.
For more Southern Living news, make sure to sign up for our newsletter!
Read the original article on Southern Living.

