How to Clean Every Inch of Your Kitchen Sink (Using Things You Already Have!)

The kitchen sink sees a lot of action. It’s where you prep your produce, soak your most-used pots and pans, and rinse off any mysterious substance you get on your hands while cleaning the kitchen. Since it’s a kitchen hot spot, it can get dirty pretty quickly, building up gnarly gunk and grime. That’s why it’s important to know how to properly clean a sink to help it stay in tip-top shape.
While cleaning the kitchen sink may not be everyone’s favorite chore, it’s a quick and easy task that leaves a good impression on both the eyes and the nose. Plus, you don’t have to buy fancy sink cleaners to get the job done; you can use a few common household items and sink cleaning tools to make it shine!
Not sure where to get started? Don’t worry — I talked to cleaning professionals to get the scrub-down on how to clean a sink naturally, from the drain to the faucet.
Meet the cleaning pros
Katie Lambert, owner of Clean Queen
Elizabeth Shields, operations manager of Super Cleaning Service Louisville
Vanessa Terra Bossart, owner of Geen Terra Cleaning
How often should you clean your kitchen sink?
All three of the cleaning pros recommend wiping down your sink daily to help prevent buildup. “I like to put a few drops of dish soap, get scrubbing, and rinse it with hot water,” Shields says. “Once you’re done, get a paper towel and dry it off.”
While daily wipe downs are helpful, the kitchen sink is a high-traffic area, so you’ll still likely see buildup over time — which is a sign it’s time for a deep-clean. Lambert recommends cleaning the sink more thoroughly two to three times a week to keep it sparkling and smelling fresh.
What you’ll need:
a pair of dish gloves
a sponge
a toothbrush (optional)
How to prepare for cleaning your kitchen sink
Yep, there’s a little prep work to be done before cleaning a kitchen sink. The cleaning experts advise doing these three things to help make the cleaning process more efficient:
Inventory your cleaning products: You don’t want to get in the cleaning groove just to realize you’ve run out of baking soda (which is an amazing cleaner, by the way). Before you clean your kitchen sink, make sure you have enough of the key items you need, like baking soda, white vinegar, and dish soap.
Clear the clutter from your sink: Any extra dishes or sponges should be put to the side so you have enough room for scrubbing.
Do a hot water rinse: Run the hot water for a minute to loosen up grease or debris that’s made itself at home in your pipes.
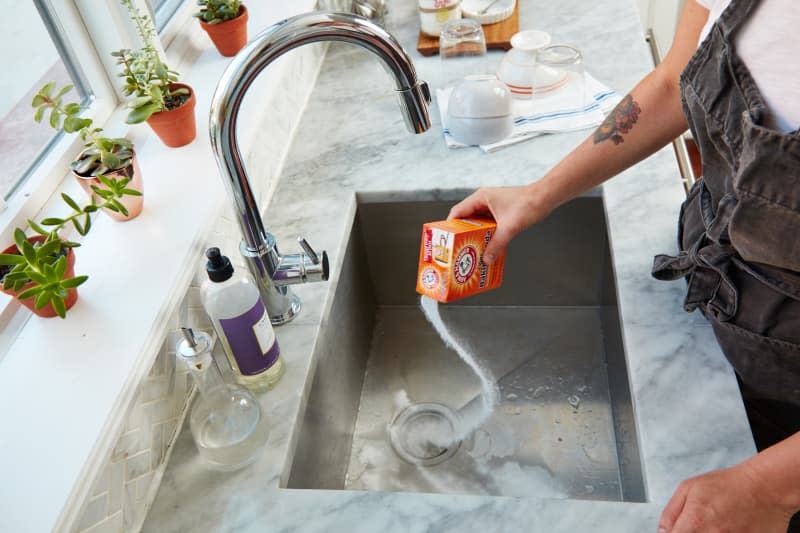
How to clean your kitchen sink’s drain
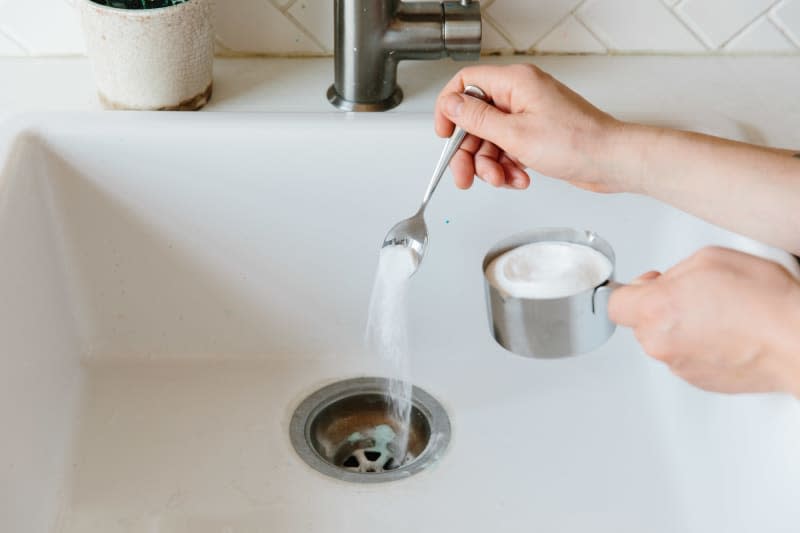
Smelly sink drains are no fun for anyone, especially your nostrils. Use this cleaning method from Lambert to refresh the kitchen sink drain within a half hour or less.
Pour ½ cup of baking soda down the drain, followed by one cup of white vinegar, and let the fizz commence!
Allow the mixture to sit for 15 to 30 minutes.
Run hot water for one minute to flush out the drain.
How to clean your kitchen sink’s garbage disposal
A garbage disposal is a handy appliance, but popping all those dinner scraps in it can create a stinky situation. Cleaning your garbage disposal not only helps it stay odor-free, but helps it run better by preventing clogs. Shields recommends using the method below to clear the gunk and funk out of your garbage disposal.
Turn off your garbage disposal either by unplugging it or turning off the breaker powering it.
Put on gloves and run hot water down the disposal for a few minutes to loosen debris.
Use a long-handled scrub brush to clean the inside of the disposal, as well as the rubber flaps and splash guard.
Rise with hot water to remove loose debris.
Pour ½ cup of baking soda down the disposal, followed by one cup of vinegar. Let the mixture fizzle for about 30 seconds and then rinse with hot water.
Turn the disposal back on.
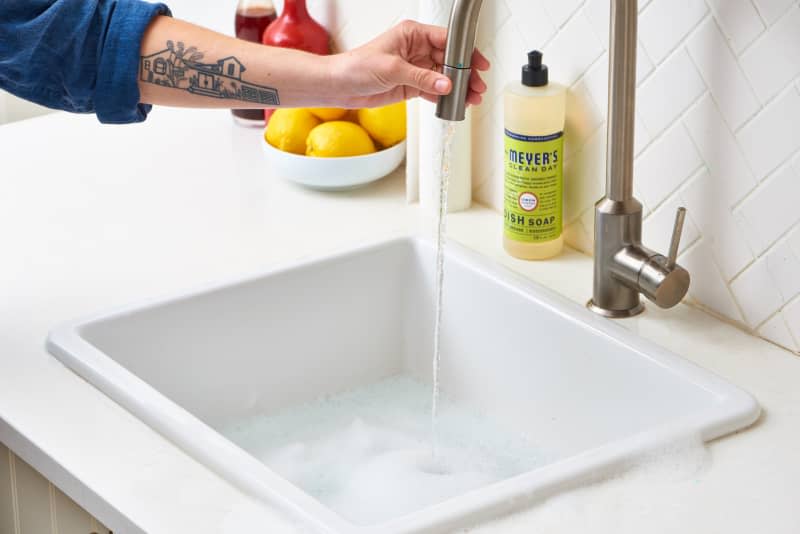
How to clean your kitchen sink’s basin
Your sink’s basin catches so many things, from food rinsed off dinner plates to the drippings from a container of leftovers you accidentally left in the fridge for two weeks (no shame, everyone’s been there!). The basin can get scuzzy, which is why Bossart recommends using this method to clear it up quick and leave it good as new:
Sprinkle baking soda until the basin’s surface is covered.
Add a few drops of dish soap across the baking soda-covered surface.
Use a sponge to scrub the basin, paying extra attention to areas with stubborn buildup.
Rinse the basin with hot water.
How to clean your kitchen sink’s faucet and handles
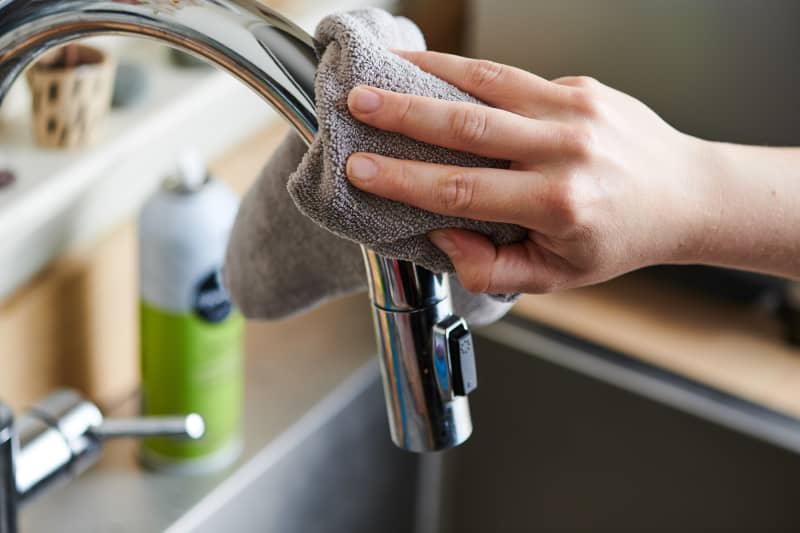
The faucet and handles are high-touch areas of the kitchen sink, and regularly cleaning them helps reduce the spread of germs on top of leaving them sparkling. Use Lambert’s process below to clean the faucet and handles efficiently and easily.
Fill a spray bottle with a mixture of equal parts white vinegar and water.
Spray the faucet and handles, leaving the mixture to sit for a few minutes to loosen up any gunk.
Wipe clean with a microfiber cloth.
And if your faucet head needs a little more TLC, use Shields’ process to get it looking new in no time:
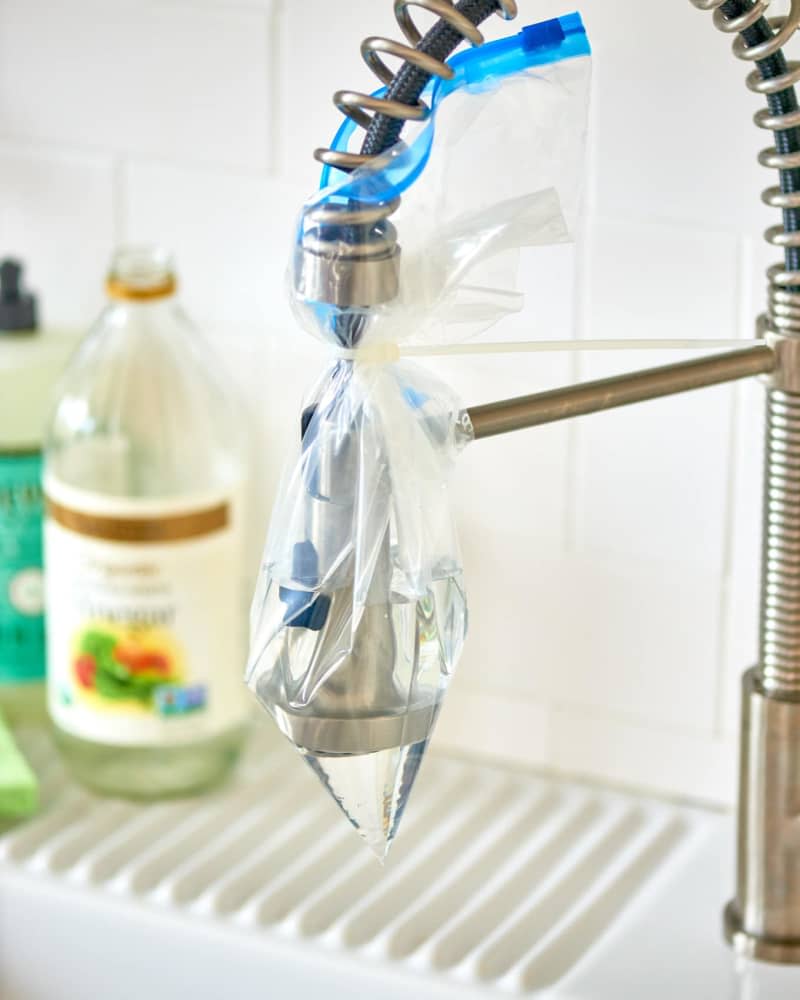
Put equal parts white vinegar and water in a plastic bag.
Soak the faucet head in the bag overnight.
The next day, remove the plastic bag and run hot water for a few minutes to flush out debris.
Scrub the nozzles with a sponge. If you want to get a closer scrub, use a toothbrush.
Run the hot water again for a minute to remove any loose debris.
Dry the faucet with a microfiber cloth.

