How to Clean Your Entire Kitchen Range, From Your Oven and Stovetop to the Vent Hood
Justin Paget / Getty Images
TABLE OF CONTENTS
On This Page
Stovetop
Oven Interior
Vent Hood
The kitchen might be the stomach of any home, but it's safe to say that your range is the room's crown jewel. Unless you're breaking out your pressure cooker or heating last night's leftovers in the microwave, every delicious meal starts in the oven or on the stovetop. Since this does-it-all appliance is one of the most (if not, the most) used appliances in your home, it's important to clean it on a regular basis. And, no, we don't mean simply swiping the stovetop when you spot a big dollop of marinara sauce—or just giving your oven's inner chamber a once-over when spring cleaning rolls around.
But, where to start? To help keep your kitchen range in pristine shape, we asked three cleaning experts to share their best care tips for everything from your vent hood to your oven's interior. For the best results, our experts recommend giving this appliance a deep, thorough clean every three months; however, avid home chefs might find themselves spiffing up those high-trafficked areas more often.
Related: 4 Simple Steps to a Glass Cooktop That's So Clean It Sparkles
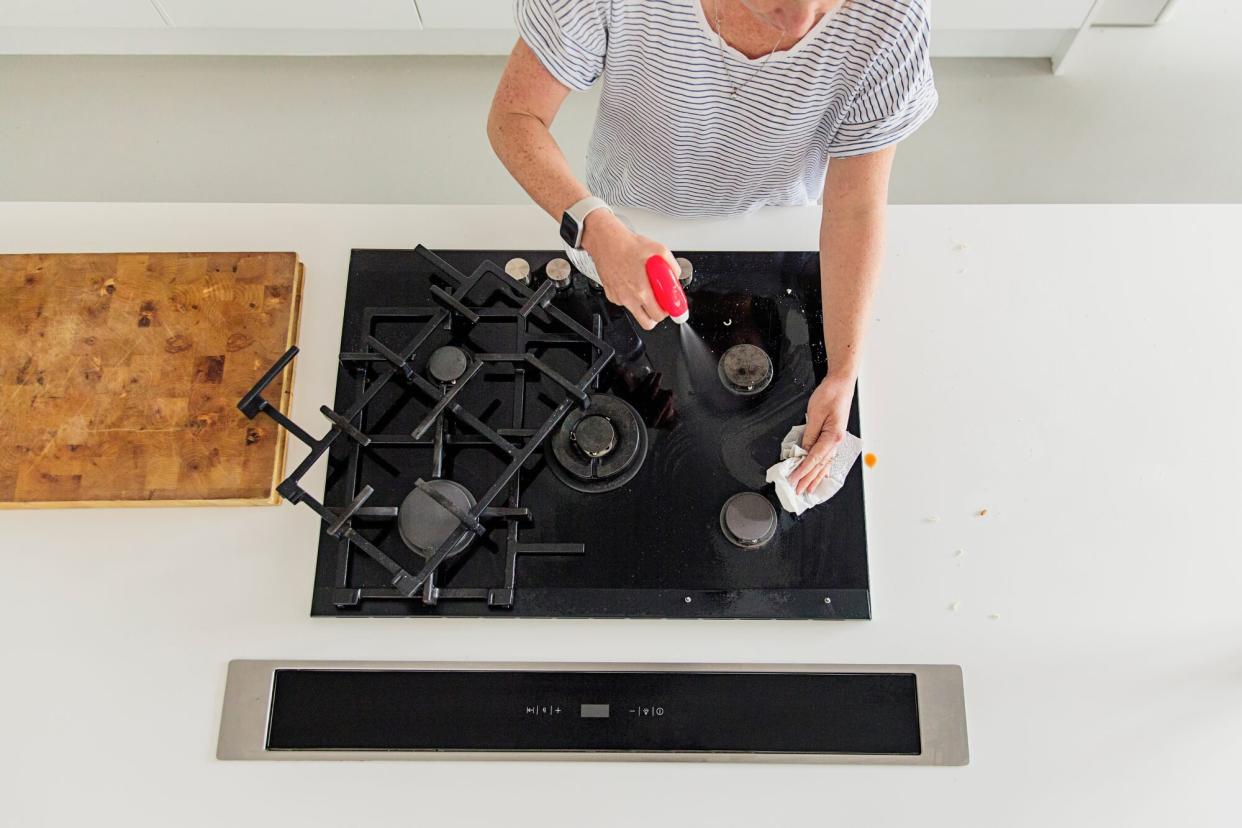
How to Clean Your Stovetop
From stir-frying vegetables to heating up chicken noodle soup, your stovetop sees a lot of action on a regular basis. The good news is that it's straightforward to clean.
What You'll Need
While the exact tools will vary based on the type of cooktop you have—glass or burners—here are a few essentials to get you started:
Baking soda
Warm water
Microfiber cloth
Vinegar
Plastic spatula
Follow These Steps
Before you start to clean this part of your kitchen range, it's critical that the stovetop is completely cool. The above ingredients need a cool, dry space to work their magic—and you also don't want to burn yourself during this process. Our advice? Follow these steps in the morning, when your stove has had the entire night to cool down.
Place your burners and stovetop caps in warm, soapy water (it's a good idea, however, to wipe down cooled grates after every use for easy maintenance).
If you have a glass stovetop, remove any crumbs or debris from the corners or rim with a plastic spatula. "We like this better than using a single edge razor blade or anything else sharp that may scratch the glass top surface. It is flexible and safe," explains Vera Peterson, president of Molly Maid, a Neighborly company.
Next, Steve Evans of Memphis Maids recommends mixing baking soda and warm water until you get a paste-like texture. "Apply to the surface of your stovetop, cover with a damp, warm microfiber cloth, and let it sit for 15 to 30 minutes," he says.
Have a stain that needs some extra elbow grease? Peterson recommends adding a sprinkle of distilled vinegar to your baking soda mixture. "Some people use the Mr. Clean Magic Erasers for extremely tough burn marks," she shares. "These do work, but please use them cautiously as this substance is like a micro-fine sandpaper and can scratch the surface if you're not careful."
Once time is up, remove your baking soda mixture with a dry microfiber cloth and wipe clean.
Helpful Tips
Consider your stovetop's materials: "Ceramic stovetops, such as electric and induction cooktops, should be handled differently," says Evans. "You can't use metal pads or abrasive cleaners. Instead, you should go for soft sponges or microfiber cloths."
Skip abrasive cleaners entirely: "The biggest mistake people make when cleaning their stovetops is using incorrect products," says Justin Carpenter, founder of Modern Maids, a national house cleaning service. "Using improper tools, such as an abrasive sponge, can remove paint from the stovetop or cause discoloration."
Don't rule out soap and water: While a baking soda paste can work nicely on gas and glass stovetops, Peterson shares that warm water and a little bit of dish soap will work nicely on an electric surface.
Related: How to Deep Clean Your Oven with Baking Soda

Getty Images
How to Clean the Inside of Your Oven
"There are two important reasons you want to clean your oven," says Carpenter. "A dirty oven increases the chances of starting a kitchen fire due to grease build-up and diminishes the quality and taste of the food; grease and grime can fall off into uncovered baking dishes."
What You'll Need
Ready to eliminate grease stains and food particles from the depths of your oven? For a comprehensive clean, add these essentials to your shopping list:
Aluminum foil
Commercial oven cleaner
Gloves and protective eyewear
Baking soda
Vinegar
Microfiber cloths
Vacuum
Follow These Steps
So, how do you clean your oven's interior? Ultimately, it depends on the type of cleaner you'd like to use. According to Peterson, a conventional commercial oven cleaner is a sound choice—however, some people may want to work with an eco-friendly formula. Whatever your preference, we have steps for each option below.
Before you get started, Peterson recommends covering your oven's heating elements, wiring, and thermostat with aluminum foil. Though this step is a must when using a commercial cleaner, it will also give you peace of mind if you're working with a green solution.
For commercial cleaners: Put on protective gear—such as rubber gloves and goggles—and carefully follow the cleaner's directions (yes, it's that simple!). Before you get started, note whether you are using a formula designed for cold or hot cleaning; some oven pre-heating might be needed if you opted for the latter.
For eco-friendly cleaners: "Spray the inside of your oven with water and apply a baking soda paste," Peterson says. "Let [it] sit overnight and scrub with a wet sponge. Use steel wool on problem areas."
Next, clean your oven's glass doors. To start, carefully remove it. "Once the glass is removed, you will have access to the in-between layers of your oven which, many times, is filled with crumbs and dust," Peterson shares. "Take a vacuum hose in that section, then wipe it down with a wet rag."
From there, combat stained areas with a sprinkle of baking soda and a quick spritz of vinegar. "The mixture will begin to bubble which helps to remove the buildup," Peterson adds. "It also acts as a great non-toxic alternative to harsh chemical stain removers."
Polish your glass with some cleaner and reattach the paneling.
Helpful Tips
Utilize the self-cleaning feature: Why double down on the elbow grease when your oven can clean itself? While this setting is safe to use if your oven is in good working order, Peterson says it does have some drawbacks. "It can create some inconveniences and is best done when your home can be well ventilated," she shares. "Fumes, including carbon monoxide from incinerating food particles, can emanate from a self-cleaning oven. This mode can also produce smoke that sets off your fire alarms and chokes your home."
To err on the side of caution, Peterson recommends opening your windows and using the range hood's vent. Keep in mind that enlisting your hood means loud white noise for hours at a time—and perhaps humid or cold, drafty air coming into your home (so time this task accordingly).
Related: How to Clean Your Stovetop's Vent Hood

Johnny Miller
How to Clean Your Vent Hood
Want to make your kitchen range really shine? You'll need to clean your the hood, too.
What You'll Need
Fortunately, this process is as easy as employing some mineral oil, microfiber cloths, and warm, soapy water. (And, if you want some extra oomph, pick up baking soda and vinegar.)
Mineral oil
Microfiber cloths
Warm, soapy water
Baking soda
Vinegar
Soft brush
Follow These Steps
In addition to cleaning the exterior of your hood, Peterson says you'll want to clean your oven's filter once every six months. Check out the steps below to give your hood a 360-degree clean.
For super-greasy hoods, apply a thin coat of mineral oil with a microfiber cloth.
Let the oil sit for a few minutes before wiping the solution off with warm, soapy water.
Meanwhile, remove the filter and insert it in a tall pot of hot water. "Bring to a boil and then set it to simmer," Peterson says. "Add dishwasher detergent or a small amount of white vinegar and a half teaspoon of baking soda—add slowly, [as] it will bubble."
Don't have a tall pot that can hold your filter? Place your filter on a baking sheet, carefully pour over hot water, and add some baking soda and white vinegar. "This softens the grease to a point where it easily comes off with a soft brush," says Peterson.
Helpful Tips
Don't forget the area behind the stove: While cleaning your oven's hood is a rather easy endeavor, Peterson says it's not the last spot you need to focus on when it comes to your range. "It's important to also clean behind the stove sweep," she says. "From dust bunnies to crumbs, the ground underneath your stove hides many unwanted kitchen gunk. Shimmy your stove out from the wall so you can sweep the ground behind it and wipe down the greasy sides, too."

