How to Carve a Ham, According to Our Test Kitchen Experts
Make no bones about it, this is the absolute best way to carve a bone-in ham (as well as a spiral and boneless cuts).
A juicy, showy ham roast is the centerpiece of many Christmas and Easter menus, a co-star with turkey at some Thanksgivings, yet it's easy enough to add to your weekly Sunday dinner line-up. Beyond being tasty and crowd-pleasing, ham is easier to prep than most other large cuts, plus it’s one of the most budget-friendly protein options available. Leftovers are incredibly versatile, too. (More on that shortly.) Clearly, it’s a wise idea to go ham every so often.
Most store-bought hams are already cured, smoked, or baked, which means that they’re all set to doctor up with your desired glazes or sauces, reheat, and devour. But there’s one missing step in that process, and it can derail your dinner success if you don’t ace it: carving a ham.
To help set you up for slicing success, we asked Sarah Brekke, M.S., Better Homes & Gardens Test Kitchen culinary specialist, to dish about how to carve a ham. No matter if you’re starting with a bone-in cut, a spiral ham, a boneless ham, or a ham steak, we have solutions to make the task a cinch.

Jason Donnelly. Food Styling: Holly Dreesman. Prop Styling: Joseph Wanek
What You’ll Need to Carve Ham
A cooked ham. Start by following your favorite ham recipe. If bone-in is your ham, try Garlic- and Pineapple-Glazed Ham. On the spiral side, we swear by Berry Crisp Spiral Ham. For a surefire boneless winner, opt for Chutney Glazed Ham with Roasted Asparagus, and for an ultra-easy ham steak, whip up Apple Butter-Glazed Ham (it takes a mere 40 minutes). “Regardless of the style of ham, after it comes out of the oven, let it rest at least 15 minutes before carving to allow the juices to redistribute throughout the entire cut of meat,” Brekke says. Tent the protein with foil during that timeout to keep the ham warm.
A meat cutting board. Seek out a style that’s generously-sized so you don’t drip over the edges. Ideally, it would have a slip-proof bottom. Otherwise, place it on top of a damp kitchen towel or an extra piece of mesh shelf liner to help the surface stay secure as you slice.
A sharp chef’s knife. An 8- to 10-inch knife is ideal for the job. If the blade seems dull, pass it through a knife sharpener before carving your ham.
A carving fork or large, sturdy dinner fork, or large set of tongs. This will help keep the ham steady as you slice, and can also aid in transferring the slices to your serving platter or dinner plates.
Related: How to Cook Ham for a Classic Holiday Dinner You’ll Remember
How to Carve a Ham
Before we dive into exactly how to carve a ham (no matter what style you’ve cooked), it’s important to address what Brekke deems “the biggest mistakes when it comes to carving ham. Focus on safety,” she advises. “Make sure your ham is sitting on a flat side to keep it from tipping; you can always trim one side to make it have a flatter base to sit on. Also, use a carving fork or large set of tongs to help stabilize the meat during the slicing process.”

Jason Donnelly
How to Carve a Bone-In Ham
Most bone-in hams have two different bones running through the meat, Brekke explains:
Femur bone: Runs lengthwise through the ham and has a distinct circular shape that can be seen protruding through one side.
Aitch bone: The other bone, which you’ll find near the top of the ham.
“For the most impressive ham slices, you’ll want to cut away large portions of boneless meat from these 2 bones,” Brekke says.
If the cut just contains the femur, it’s usually labeled as a ham shank. That will save you a step, but whether you’re working with two or one bone, the same technique holds true for how to cut a bone-in ham. Simply skip step 2 if you’re wondering how to carve a ham shank.
Place the bone-in ham on a large cutting board with the fat-side up.
Using your knife, make a cut down through the center of the ham, right along one side of the aitch bone. Follow the edge of that bone with your knife working toward the exterior side of the ham.
Insert the knife at the beginning of that first cut, but this time work the knife along the side of the femur bone working toward the end of the ham. This should result in a fairly large, boneless, piece of meat that can be set aside for easy slicing.
Repeat the same process as many times as necessary to work your way around the ham. The key is to just keep following the lines of the bones.
Use your knife to trim off any areas of excess fat.
If needed, use your knife to create a flat area on one side of the ham portion.
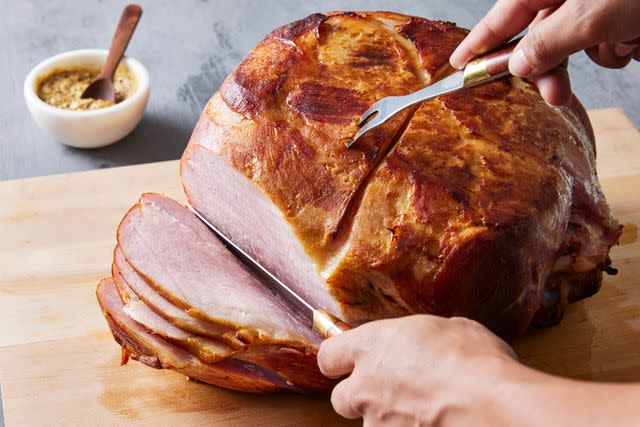
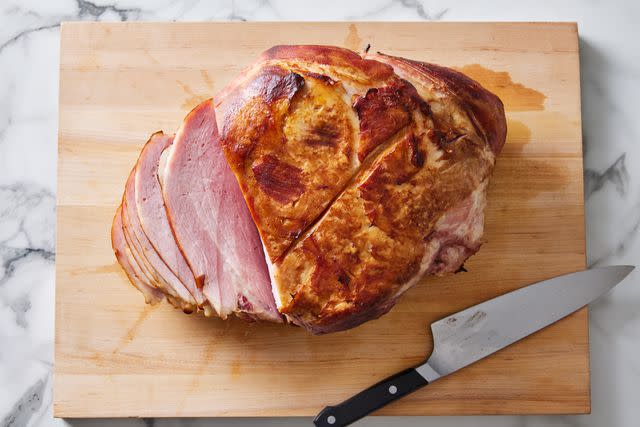
Arrange the piece of meat with the cut-side down for the most stability, and use a carving fork to help hold the ham in place. Using your knife, cut evenly-thick slices off of the ham.
Test Kitchen Tip: Don’t toss those bones! After dinner, use a paring knife to trim any meat remaining on the ham bones to use in soups, stews, casseroles, breakfast hashes, or frittatas. Keep the bone handy (it can last in an airtight container in the freezer for up to 6 months) to infuse flavor into recipes such as soup, braised greens, or baked beans.
How to Carve a Spiral Ham
The machine that spiralizes a ham does nearly all of the work for you, Brekke admits: “Learning how to carve spiral ham is fairly straightforward. Just slice and serve.”
Place the spiral ham on a large cutting board.
Using your knife (ideally, a thinner-bladed knife), run the blade around the bone to free the thin slices from the larger ham.
If needed, run the knife between the spiral slices to help free the meat from the bone.
Related: 15 of the Best Side Dishes for Ham

Jason Donnelly
How to Carve a Boneless Ham
There’s no bones about it: Slicing a boneless ham is even easier still.
Place the boneless ham on a large cutting board.
Using your knife, slice the boneless ham like a loaf of bread.
Test Kitchen Tip: If the ham is too large to manage, cut it in half before slicing to make the task easier,
How to Carve a Ham Steak
Curious about how to carve a ham steak? It’s essentially already carved for you. A ham steak is a sliced piece of ham that is ready to serve once it’s cooked. If you’re dividing the ham steak between separate diners, simply use your knife to divvy up even portions.
You’re now well-equipped to carve all of the most common types of ham. From here, all that’s left to do is savor the slices you’ve so beautifully trimmed. If you happen to have extras, study up on our tricks for the best way to reheat ham. Or if you’d like to transform your bonus protein into something new, don’t miss these leftover ham recipes you’ll look forward to making.
For more Better Homes & Gardens news, make sure to sign up for our newsletter!
Read the original article on Better Homes & Gardens.

