Burst onto the scene! How to achieve a stunning starburst effect in your photos
Watch video: Achieve stunning starbursts in your images
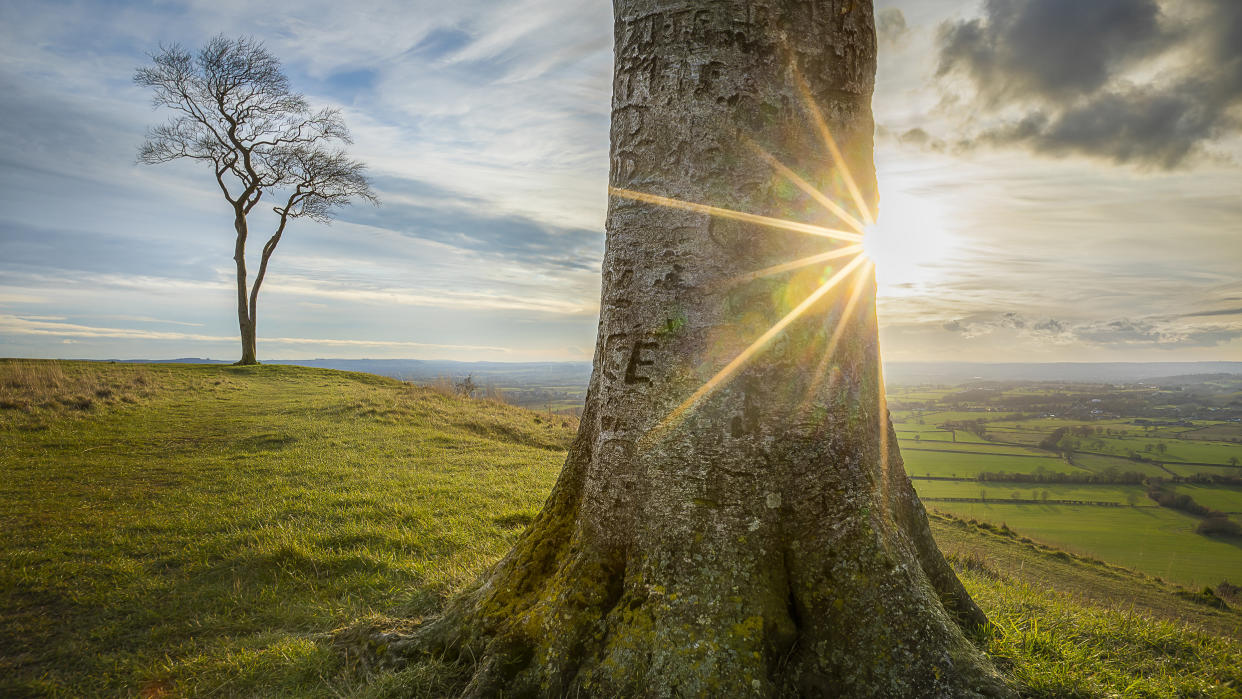
Starbursts can be a wonderful addition to your landscapes and night scenes. Point your lens towards any small highlight and it can become a stunning star shape.
There’s no great secret to shooting starbursts; we simply use a narrow aperture like f/16, f/22 or higher. However, the technique poses a distinct dilemma: the narrow aperture results in diffraction, wherein light passes through the small opening in the lens and spreads out along the aperture blades, causing the pinpoints on the star (known as ‘diffraction spikes’).
So in this instance diffraction is our friend but, more often than not, it’s also the enemy – because it results in a softening of fine detail in our landscape lenses. So the dilemma is whether to capture the starburst and settle for a softer scene, or prioritize sharpness.
With a bit of simple image blending we can have the best of both worlds. We shoot one frame for the starburst, then another at a wider aperture nearer to the lens’ sweet spot for the rest of the scene. We blend them for the starburst without compromising on image quality.
Another consideration is that, with wider apertures, we can compromise our depth of field. However, there is a workaround; after shooting at f/22 we took two more frames at f/8, one focused on the distance, the other on the foreground. We blended them for ultimate sharpness along with that gorgeous sunstar.
1. Curved or straight
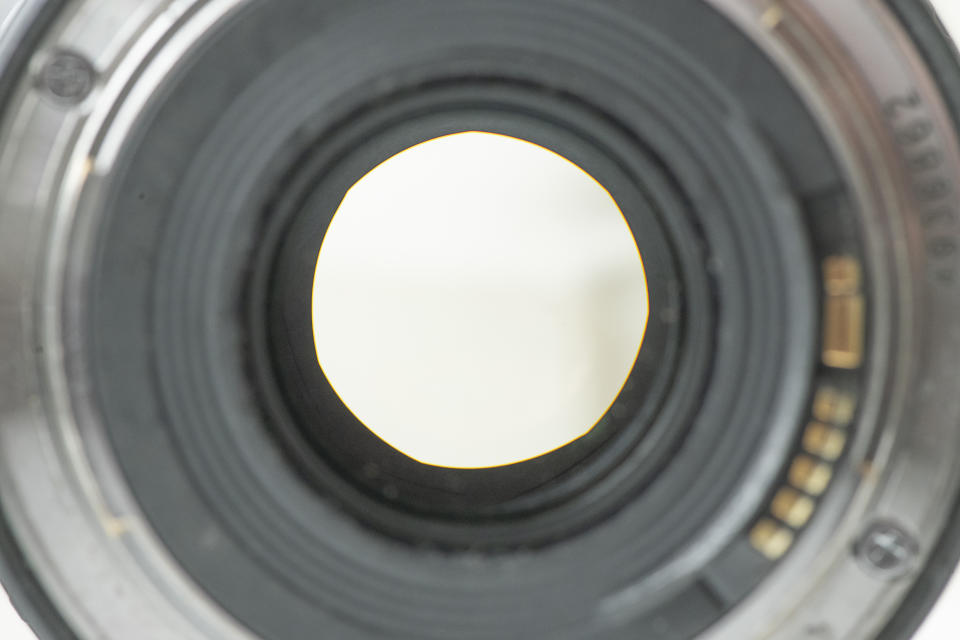
The starburst effect can vary dramatically depending on the aperture blades in your lens. There are two key factors – if the blades are curved or straight. Straight-edge blades create sharper rays in your starburst. With curved blades, the star is more mushy.
2. Blades and spikes

The second factor is the number of aperture blades in your lens. If it’s an even number of blades you’ll get the same number of rays. If it’s an odd number, like the Canon 16-35mm f/2.8 lens used here, then you’ll get double the number of rays, giving a 14-point star.
3. Block the sun with your hand
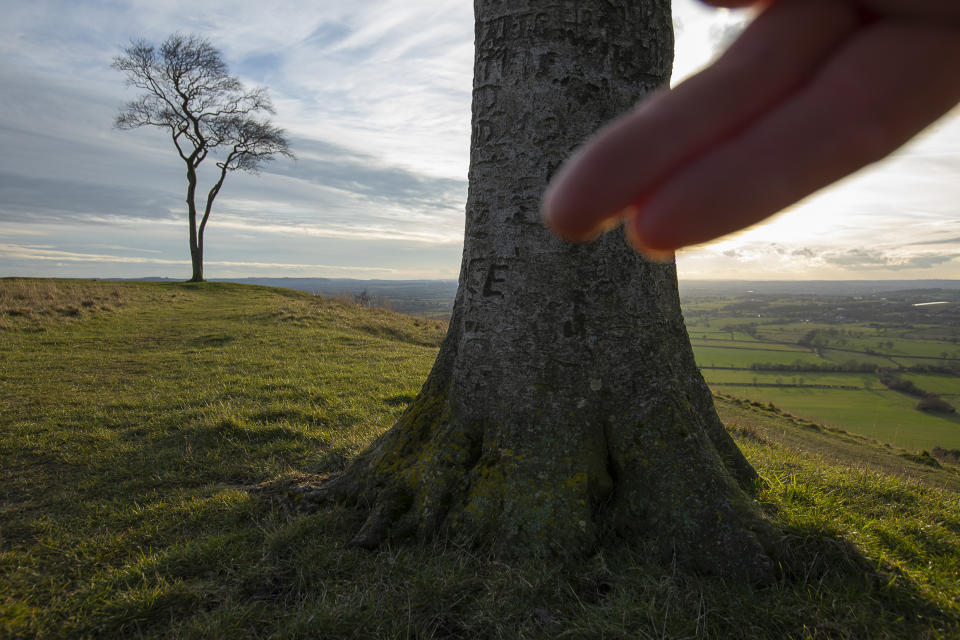
When shooting into the sun, lens flare is inevitable. Firstly, make sure the front element of your lens is spotless. If you still find flare, try snapping an extra frame with your fingers covering the sun. You can then combine this with your other shots later.
4. Bracket your exposures
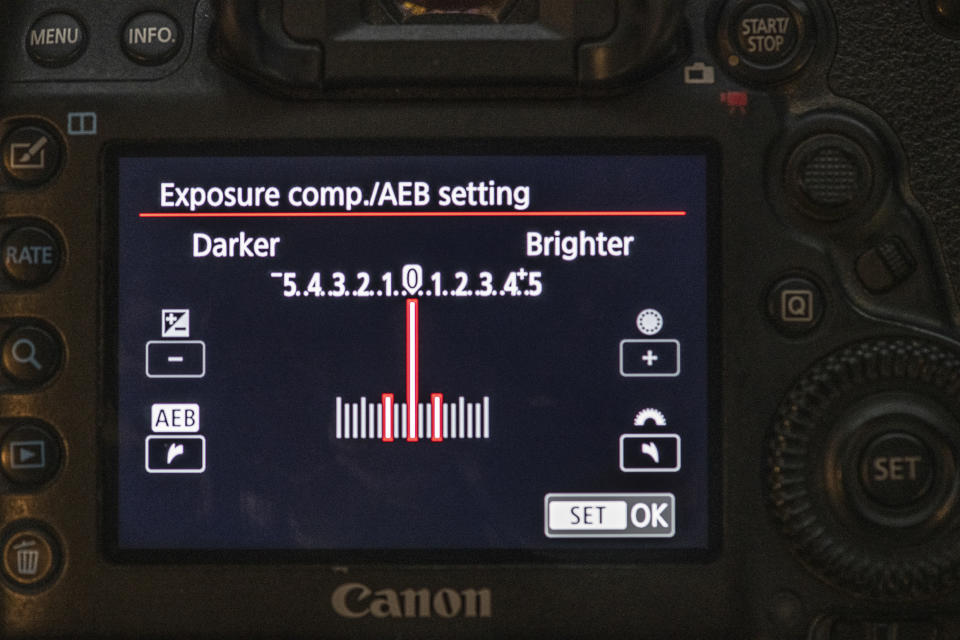
When shooting into a bright light, your camera metering might be fooled into underexposing the scene. Give yourself a bit of a safety net by bracketing your shots. This will also give you the option to create an HDR or perform exposure blending later.
5. Plan the position of the sun
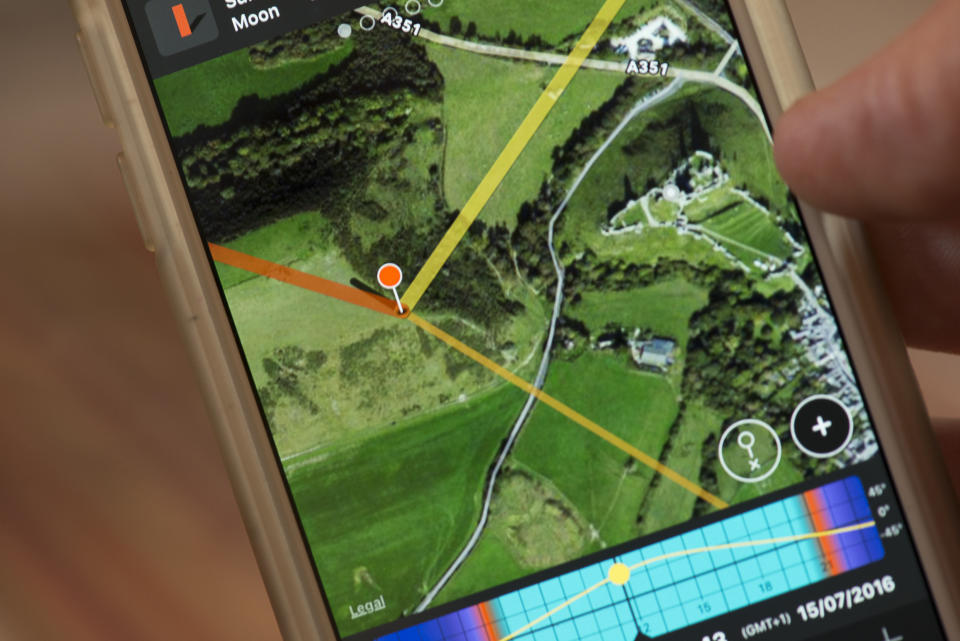
If you want the sunburst to appear in a certain spot in your composition, you can plan ahead by using an app like PhotoPills. This maps the position of the sun over your phone camera feed, so you can know in advance exactly where the sun will be at any time of day.
6. Use dark edges

A dark edge can help to create contrast with the sunstar, as demonstrated in the opening image. If the surrounding sky is too bright, the sunstar tends to get lost, as is the case with this shot. Here there’s less dark tree, consequently the sunstar is less obvious.
7. Open into layers
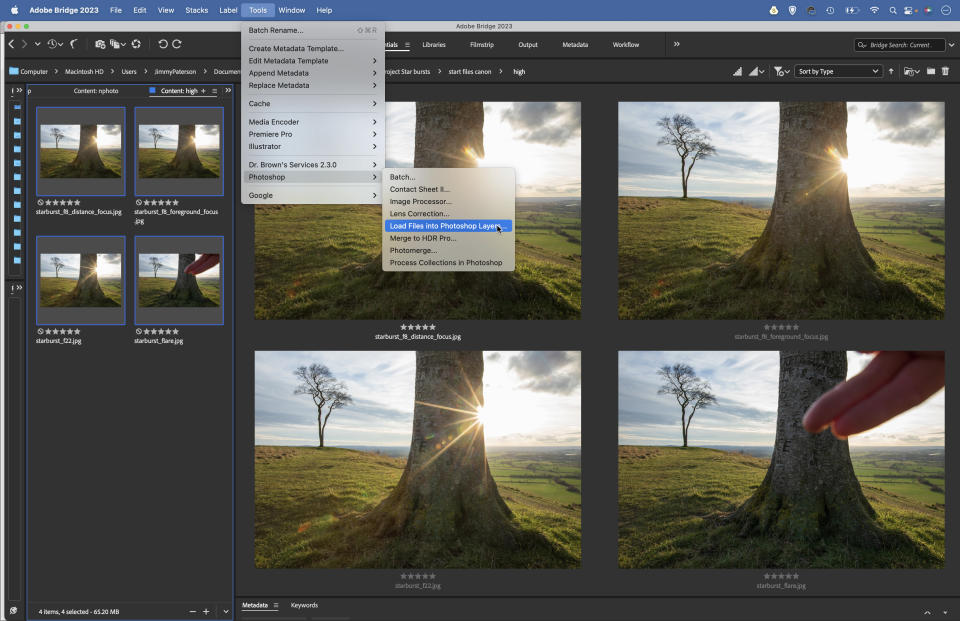
We took 4 frames here – an f/22 frame, a pair of f/8 frames focused on foreground and background, and a shot with our hand blocking the sun. Make any initial changes you like in Camera Raw or Lightroom to the set of photos. Once done, highlight them all and go to Tools > Photoshop > Load Files into Photoshop Layers.
8. Stack the focus
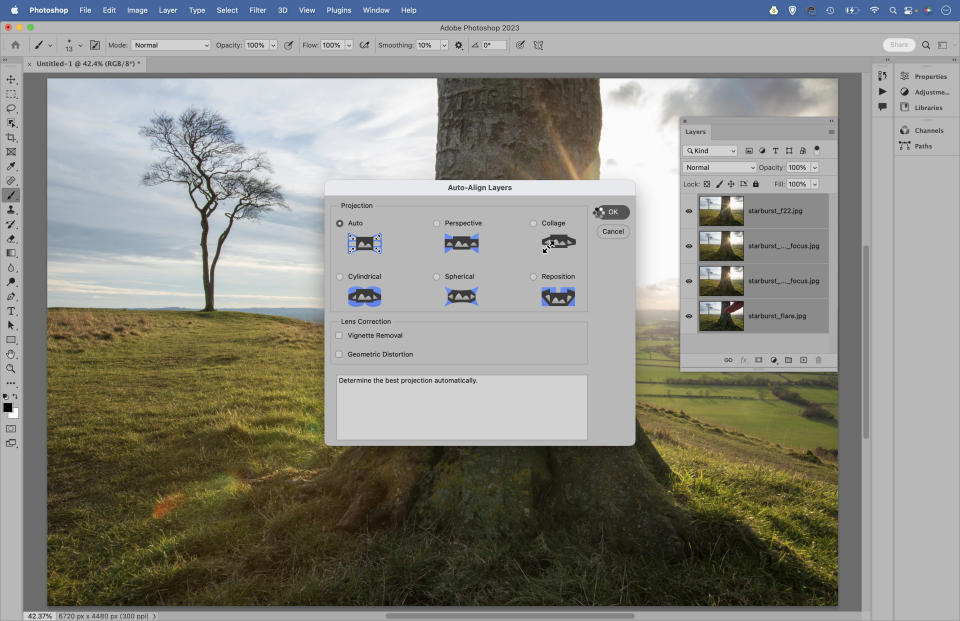
Once open, Cmd/Ctrl + click on the four layers to highlight them, then go to Edit > Auto-Align Layers, choose Auto and hit OK. Next highlight just the f/8 layers (excluding the starburst layer) and go to Edit > Auto-Blend Layers, choose Stack Images and hit OK. This combines the sharp parts from each layer.
9. Blend the star
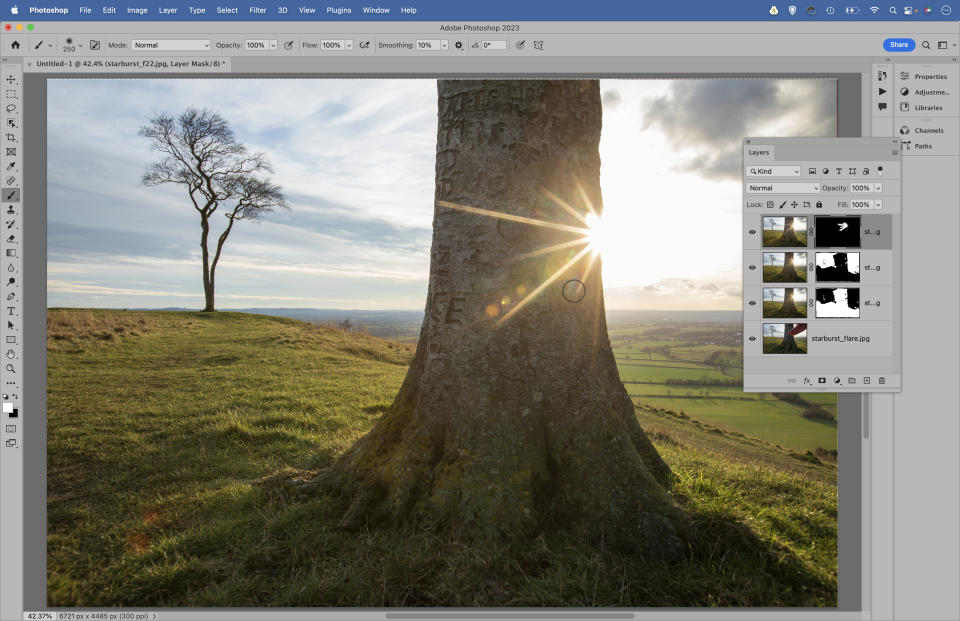
Next we can blend the sunburst layer. Drag it to the top of the layer stack. Hold Alt and click the Add Layer Mask icon at the bottom of the Layers Panel to add a full black mask that hides the whole layer, then grab the brush tool and paint white to reveal the area around the sun. Repeat for the flare-free hand layer.

PhotoPlus: The Canon Magazine is the world's only monthly newsstand title that's 100% devoted to Canon, so you can be sure the magazine is completely relevant to your system. Every issue comes with downloadable video tutorials too.
If you're serious about scenery, take a look at the best cameras for landscape photography along with the best lenses for landscapes.

