How to Use a Bundt Pan
Bundt cakes have a reputation for being tricky, but with the right techniques, you can be certain of beautiful results every time.
Serious Eats / Vicky Wasik
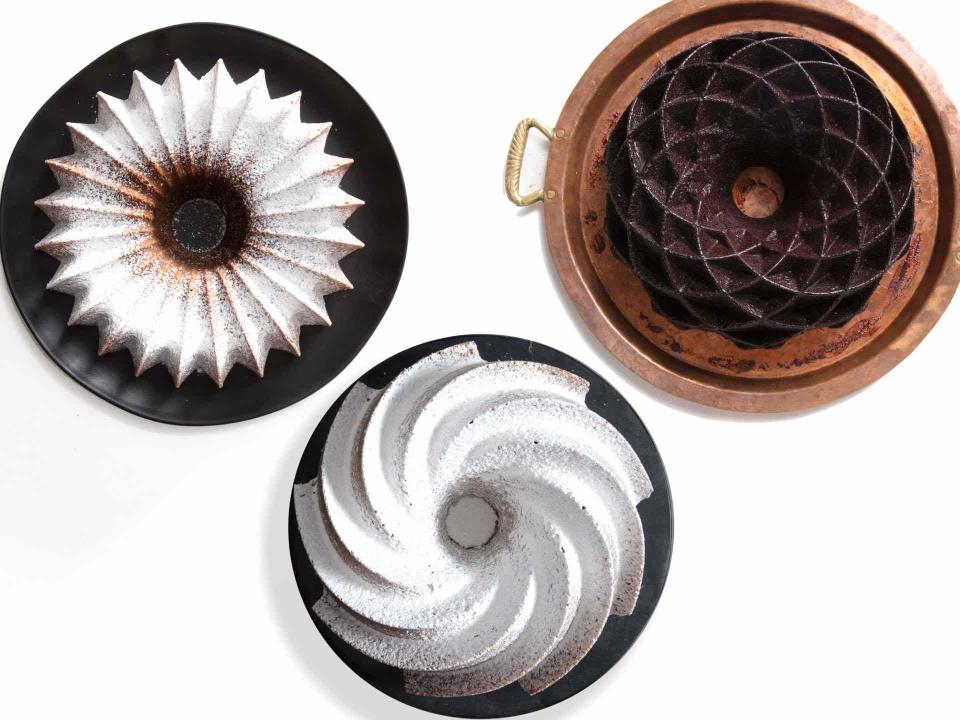
Few cakes can feel both "cozy and inviting" and "dramatic and spectacular," but that dichotomy is what Bundt cakes do best. From a classic fluted ring to more intricate designs, Bundt pans have an undeniable visual allure.
Nordic Ware Platinum Collection Nonstick Heritage Bundt Pan
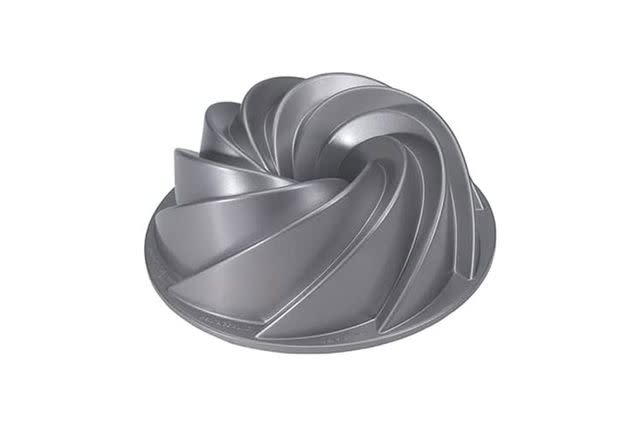
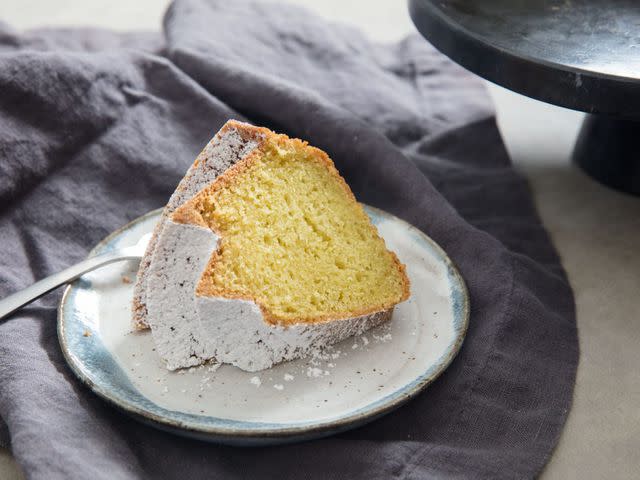
Aside from the obvious beauty of the cake in its entirety, many Bundt designs turn each slice into a striking cross section as well. (Pictured below is a double batch of my olive oil cake in Nordic Ware's Heritage Bundt Pan.)
Serious Eats / Vicky Wasik
While Bundts have a reputation for being tricky, that's largely because they're vulnerable to all the same issues any other cake may face (such as those related to ingredient substitution, an oven that runs too hot, or bad technique), along with additional problems unique to a particular pan—namely, one that's cheap, damaged, or poorly prepared.
Fortunately, those Bundt-specific issues are easy to identify and address up front.
Choosing the Right Pan
Making a beautiful Bundt cake starts with using the right pan, one that's durable and well designed. While ring-shaped cakes are a long-standing European baking tradition, the word Bundt itself originates with Nordic Ware, so it's a brand I trust to make a reliable Bundt.
Serious Eats / Vicky Wasik
I like baking layer cakes in aluminum pans, and that's my preference for Bundt pans as well. I find that Nordic Ware's cast aluminum pans limit excess browning and perform better than those made from steel (whether brushed, aluminized, or carbon steel).
Serious Eats / Vicky Wasik
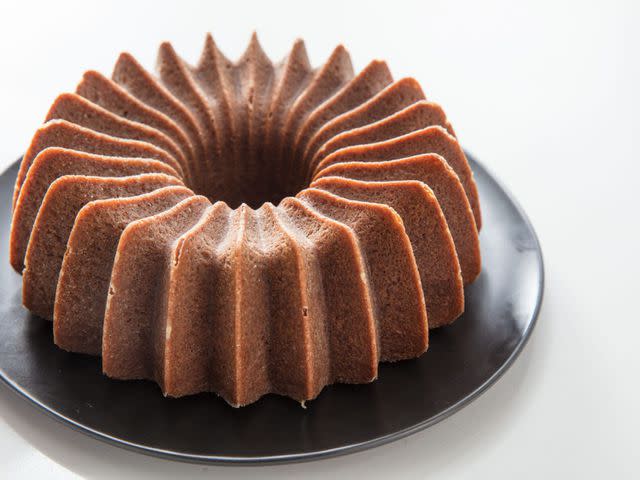
This is a single batch of my gingerbread sheet cake made in the Brilliance Bundt Pan.
Nordic Ware Brilliance Bundt Pan

Whether it's a thrift-store find or a family heirloom, a vintage Bundt pan may be among a baker's most treasured possessions, but if the interior surface of an old pan is scratched or scuffed, you may not be able to get a clean release for your cakes.
If you've had good luck with these pans even so, don't let me stand in your way! But if you ever get the feeling your Bundt pan is cursed, it might be because the interior is no longer in good condition for baking, and it may be time to invest in a new pan.
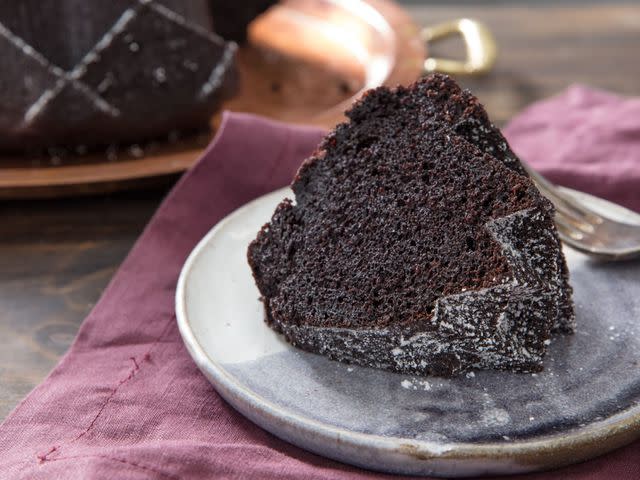
Serious Eats / Vicky Wasik
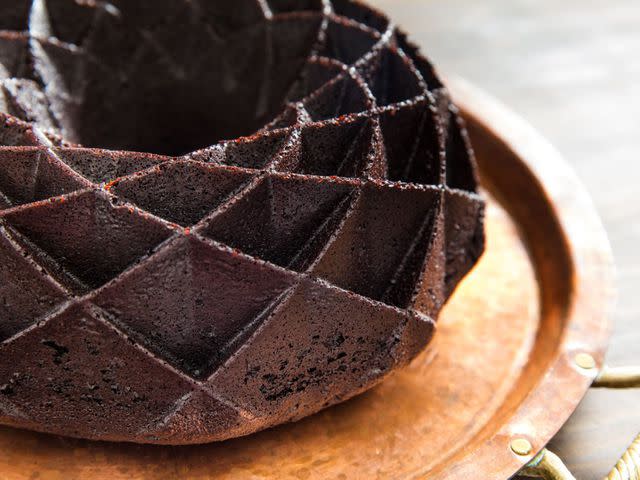
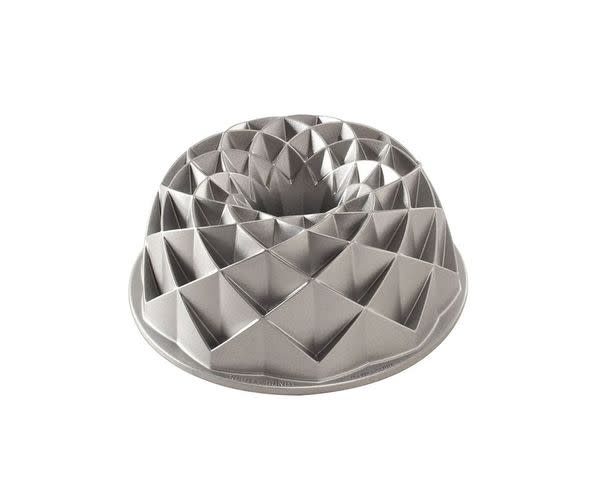
Pictured here is a double batch of my dairy-free chocolate cake in Nordic Ware's Jubilee Bundt Pan.
Nordic Ware Jubilee Bundt Pan
Greasing the Pan
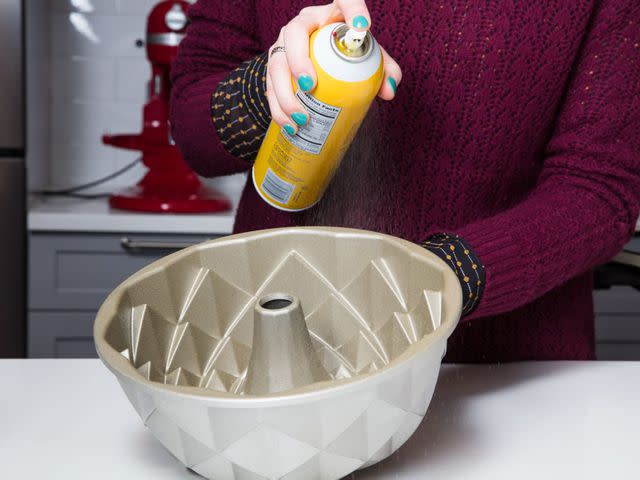
Because of their ornate design, Bundt pans require a bit of special prep in order to ensure that cakes can be removed without sticking or tearing—generally a thin coat of fat, followed by a thin coat of flour. This step is best done immediately prior to baking, so that the prepared coating won't dry out while the batter is prepared.
Many brands, including Nordic Ware, expressly advise against greasing a Bundt pan with traditional cooking spray, as the combination of aerosolized fat and dry heat can lead to a polymerized residue that's difficult to remove, especially over time. For that reason, most of these companies (and most baking experts) recommend applying melted butter or oil to the pan with a pastry brush, or else using a cooking spray that contains flour.
The trick is to work carefully and patiently to ensure an even layer of fat, with absolutely no gaps in coverage or excess oil that may pool in the nooks and crannies of the pan. Flour-based sprays should be used sparingly, for an even coating with no lumps or puddles.
Whatever the method, a rush job will almost inevitably make for an unattractive Bundt, as bare patches lead to sticking and tearing, while greasy areas will leave hollow craters on the surface of the cake.
Now that I've offered up the generic advice you'll read on any other site, the truth is that I don't use any of these methods myself, and honestly can't speak to the tips and tricks behind their success.
My personal approach to baking often involves breaking the rules: I add the sugar to my egg whites all at once for the easiest angel food cake. I replace all the water in my sandwich bread with pumpkin purée. I make French buttercream with a water bath. And, well, I grease my Bundt pans with Pam Original.
Serious Eats / Vicky Wasik
I find it fast and effective, and have never experienced any sort of residue or buildup over time,* but I'm also (like many pastry chefs) rather meticulous when it comes to cleaning my gear.
*I have not tested the full spectrum of cooking sprays on the market today, nor the other offerings in Pam's product line; these products can contain a diverse array of oils and additives that may behave differently. Which is to say, I am not vouching for cooking sprays on the whole, only my successful experiences with a specific product from a particular brand.
After preparing and filling a Bundt pan, I wipe the edges of the pan clean with a paper towel that's damp with hot water. This removes excess cooking spray, minimizing the potential for residue to form around the rim of the pan. After unmolding my cake, I let the pan cool until it's comfortable to the touch, then give it a brief soak in a sinkful of hot, soapy water. After a few minutes, I gently scrub the entire pan, inside and out, with a soft washcloth.
This removes any residual cooking spray before it has a chance to build up, and, with diligence, this can be done successfully every time. It's a risk I'm willing to take, and—while it may not be an Officially Sanctioned TechniqueTM—it felt disingenuous to write this article without talking about how I've always baked in restaurants, bakeries, test kitchens, and at home.
Dusting the Pan
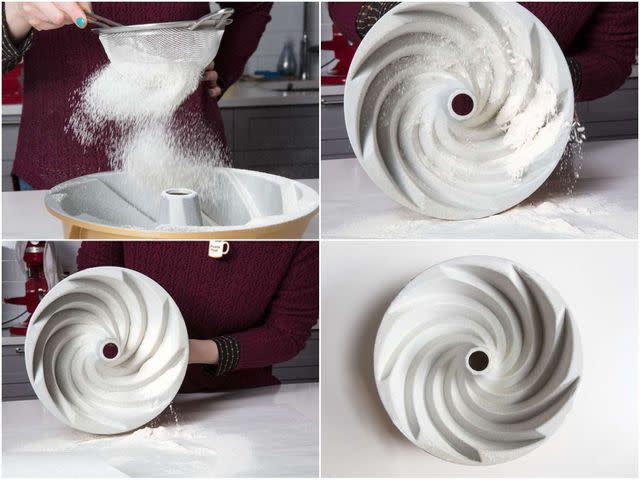
Once the pan is lightly but evenly greased, I place it on a large sheet of parchment and sift in a generous amount of cake flour. Next, I hold the pan on its side and slowly rotate it in a full circle, tapping it against the counter with each turn to dislodge the excess flour. If necessary, I'll rotate it again in the other direction, tapping and turning until every surface is lightly coated and the extra flour has spilled out.
Serious Eats / Vicky Wasik
That initial shower from the sieve goes a long way in coating all the hard-to-reach parts of the pan, while the tap-and-twist technique sends little avalanches of flour down the ridges and valleys of the pan. Having a sheet of parchment underneath it all allows me to work freely, without any worry about the mess.
Serious Eats / Vicky Wasik
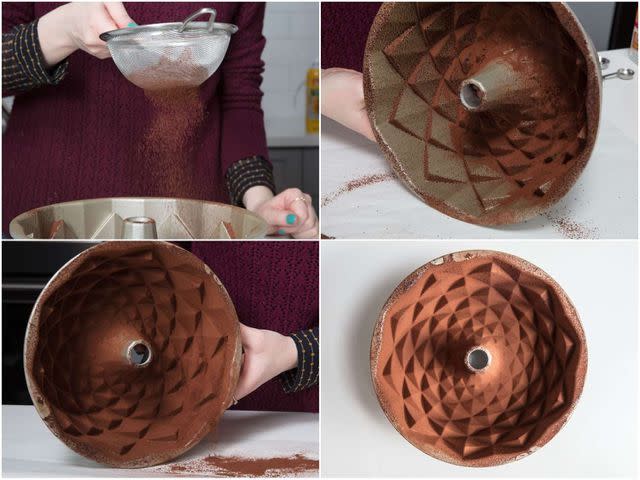
This can also be done with cocoa powder, to keep the exterior of a chocolate cake invitingly dark. The idea is to use this technique for recipes that call for cocoa already, whether Dutch or natural, so dust with whichever style the recipe calls for.
If it happens to be a cake made with chocolate but not cocoa, either will get the job done (but I do find the deep color of Dutch to be especially attractive). For more information on what qualities to look for when shopping for cocoa, see our guide to high-fat Dutch cocoa powder and the best natural cocoas for baking.
Serious Eats / Vicky Wasik
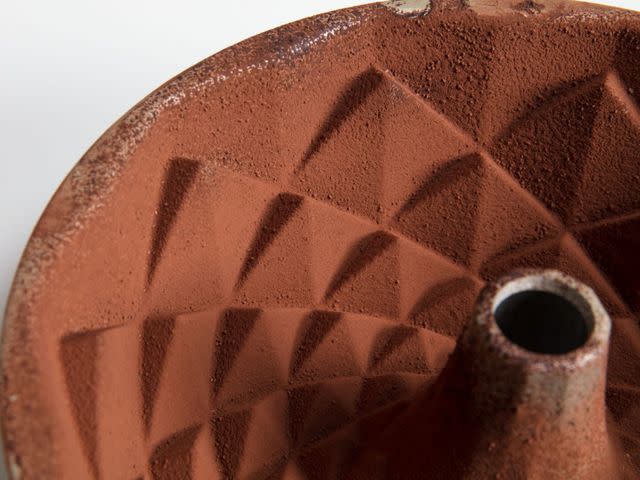
Where many bakers go wrong is with a scant coating of lumpy flour or cocoa, which can only prime the pan for disaster. The coating must be fine, light, and even, without any pockets of dry matter lurking in the crevices of the pan. So before pouring in a batter, inspect your work to be sure it's done right!
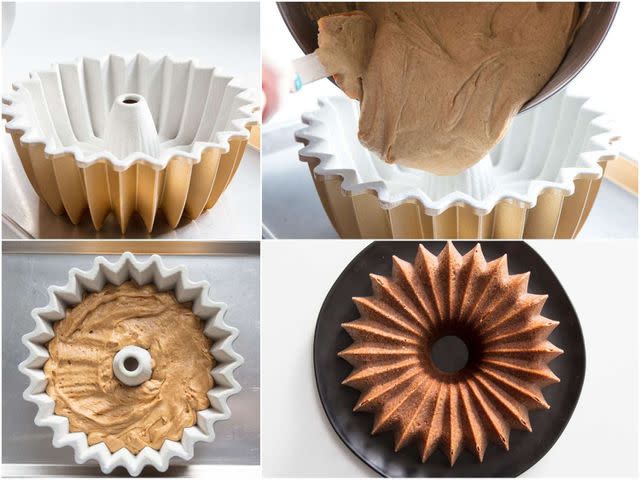
Filling the Pan
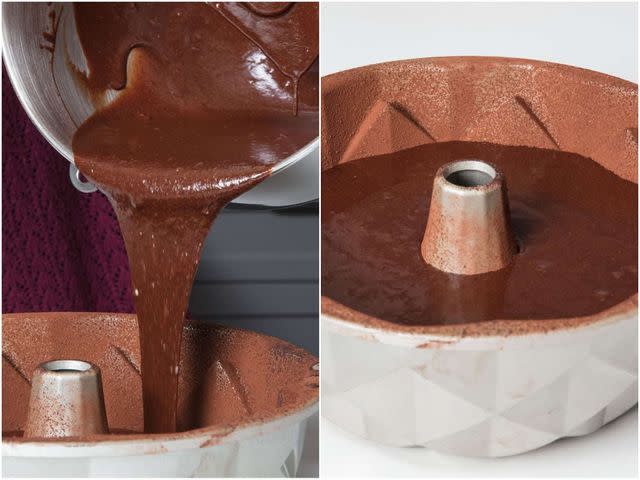
How much batter should go into a Bundt pan? Broadly speaking, a classic 10-cup pan should contain enough batter to reach the two-thirds mark, but should be no more than three-quarters full. That's a good rule of thumb, but pretty meaningless when you're staring at a recipe with no way to calculate the total volume of batter it will produce.
I've found that 10-cup Bundt pans do best with somewhere between 40 and 50 ounces of cake batter, particularly with recipes intended to produce light and fluffy cakes. That range leaves plenty of room for the batter to rise in the pan, so the cake turns out as light as it should.
Serious Eats / Vicky Wasik
When working with cakes that aren't high-rising, or those that traditionally have a finer crumb (such as a pound cake), bakers can generally get away with somewhere between 50 and 60 ounces of batter.
To scale the recipe, tally up the weight of the ingredients and multiply (or divide) accordingly to hit the proper range. Because there's some wiggle room when it comes to the exact amount of batter, I'll usually round up or down to the nearest whole egg.
Baking a Bundt Cake
Bundt cakes should always be baked on a sheet pan, as their uneven shape may cause them to tip to one side when placed on a wire oven rack. This can also be handy for catching overflow, should the amount of batter be miscalculated.
When adapting a recipe to a Bundt pan, it can be tricky to guess how much time it will need in the oven. Sometimes you just have to play things by ear, but I generally budget about one minute per ounce of batter at 350°F (180°C) in a conventional oven. (I don't use or recommend convection for any of my recipes.)
Serious Eats / Vicky Wasik
It's hard to speak in universal truths when addressing the vast array of cakes in this world, but I've found this to be a reliable way to estimate the amount of time I may need. Still, I always start checking on my cakes before the time is up. Most Bundts are done when they reach an internal temperature of about 200°F (93°C).
When adapting a recipe as a Bundt for the first time, rules of thumb can land you in the right ballpark, but it takes experience to dial in the details!
Unmolding a Bundt Cake
After baking, I let my Bundt cake cool for about 10 minutes to give its crumb a chance to firm up. Then I use my fingers to gently pull the cake away from the side of the pan. Next, I'll place a serving platter or cake stand on top, then quickly flip the whole thing over (using oven mitts to protect my hands).
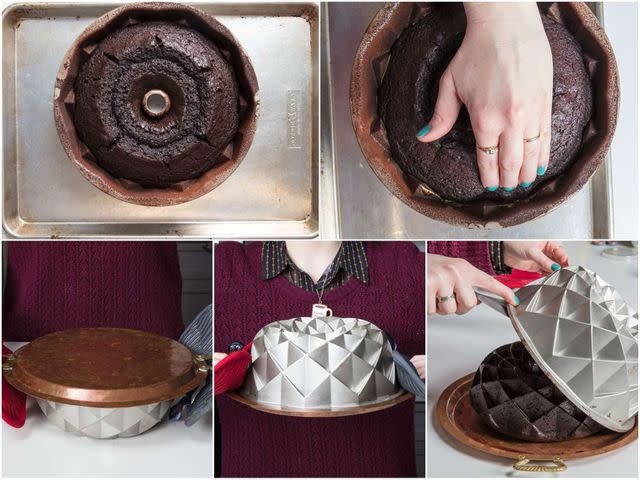
Serious Eats / Vicky Wasik
Once it's flipped, I let the cake sit a moment or two, and give the platter a firm tap against the counter to dislodge anything that may be stuck. Finally, I remove the Bundt pan as carefully as I can.
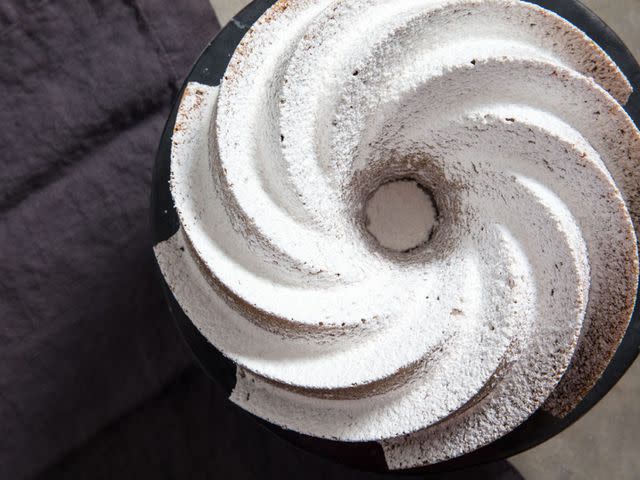
With the right batter, in a pan that's prepared correctly, a fully baked Bundt cake should release cleanly from the pan, leaving its beautiful design on full display.
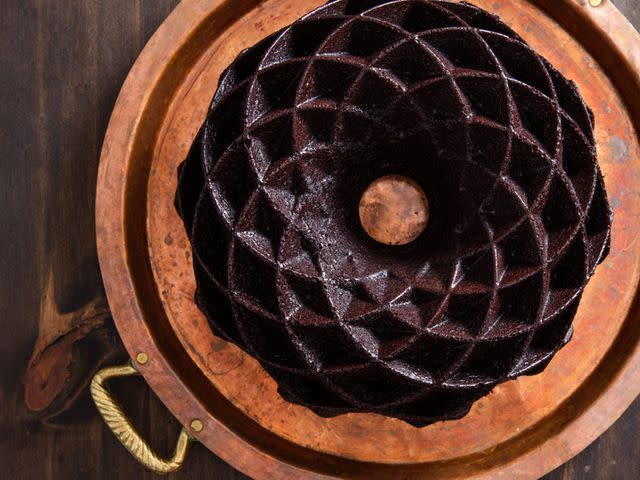
Serious Eats / Vicky Wasik
Serving the Bundt Cake
Bundt cakes are amenable to many types of glaze, but more often than not, I find myself finishing them with a simple dusting of powdered sugar (after they've had a chance to cool, of course).
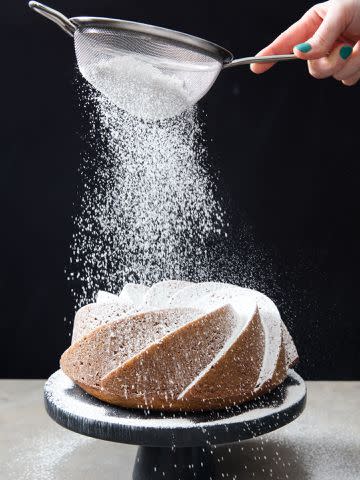
Serious Eats / Vicky Wasik
Whether you want to try one of the recipes featured here or adapt one of your own favorites, give yourself room to learn—about the recipe itself, the technique, and the pan. Save your experiments for a lazy weekend, rather than a high-stakes birthday party or family affair, and you'll learn the ropes in no time.
Serious Eats / Vicky Wasik
April 2019

