I Built a Raised Garden Bed in 2 Hours for Under $200 (Without a Single Tool!)
Two apartments ago, my boyfriend and I experienced a special kind of New York City euphoria: We moved into an apartment with a small backyard. It was a very, very happy accident, and it meant we could put aside our small-space indoor gardening and actually build our own DIY raised garden bed and grow our own veggies. For two years, we harvested everything from kale and herbs to zucchini and eggplant.
We’ve since moved and have had to get creative with our green thumbs (we’re big balcony garden and hydroponic garden fans). We’ve also turned others in our orbit into gardeners, and when my sister bought her first home two years ago about 45 minutes north of NYC, my boyfriend and I built her a raised garden bed as a housewarming gift.
She loved her garden so much that when she said she wanted another bed this spring, it was an immediate yes from me. The goal this time around was to cut out most (if not all) of the work involved, so we decided on a DIY raised garden bed plan that used no power tools — just wood and these concrete planter wall bricks.
Here’s every step I followed to build a DIY raised garden bed in under two hours for under $200.
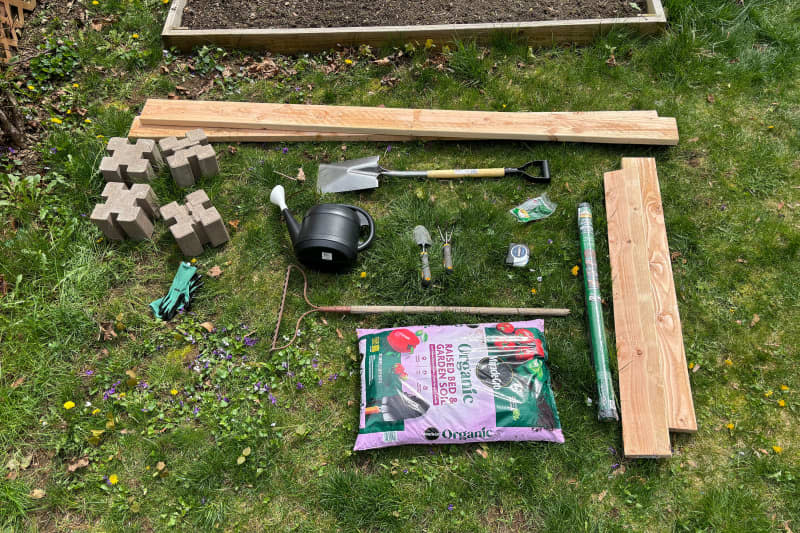
Tools and Materials for a DIY Raised Garden Bed
8 pieces of 2×6 cedar wood, cut to size
Landscape fabric garden staples
Gardening gloves
Watering can
Spade shovel (I used from this one from The Home Depot; you could also make do with a regular shovel)
Plants or seeds of your choice
Advice for Buying Tools and Materials
Before you run to the store, it’s worth ordering whatever you can for in-store pickup so you don’t have to gamble on available inventory. Some items, like the concrete blocks or bags of soil, might not be eligible for online pickup orders, so for those, you can give the store a call to see if they’re in stock.
What Type of Wood to Use for a Raised Garden Bed
The best type of wood for this project is cedar, which has some natural moisture resistance and will hold up better over time than cheaper lumber like pine. Avoid pressure-treated lumber, which can leach chemicals into your soil.
How to Buy and Cut the Lumber
You’ll see above that you need eight pieces of cedar for this project. That’s because you’ll be stacking two boards on top of each other to create each side of the garden bed.
The plans for this DIY raised garden bed are super versatile — your only size limit is the length of board you’re able to buy — but you can only make a garden bed with a square or rectangular shape. That means you’ll need to size your cedar boards in groups of four — that’s two pieces per side, with two matching sides.
My garden bed measures 4×8 feet, so I got four cedar boards cut to a 4-foot length and was able to keep four at their off-the-shelf 8-foot length.
Remember how I said this was a no-tools project? I meant it! You can get whatever lumber you purchase cut to size on location at The Home Depot and Lowe’s. Make sure to bring your measurements with you to the store.
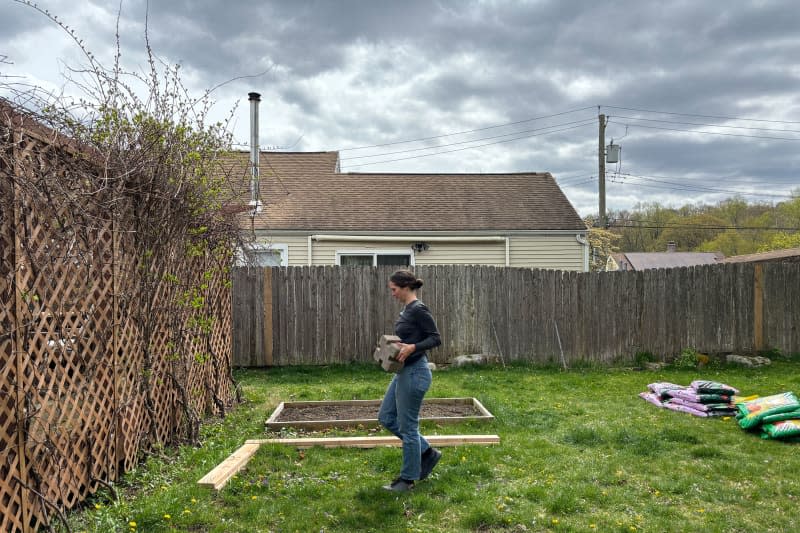
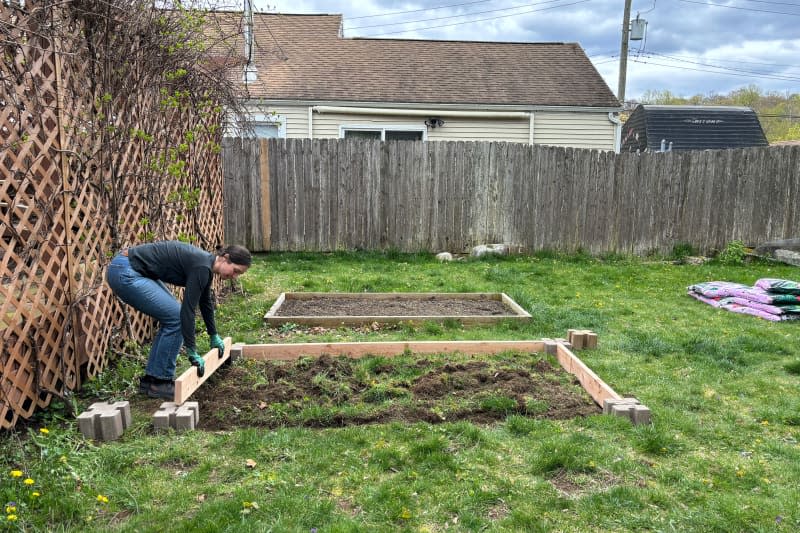
Figuring Out Where to Put the Raised Garden Bed
Before you actually build the raised garden bed, use your boards and blocks to help visualize what it will look like in the space and make any adjustments needed. We wanted the new bed to sit alongside the bed that’s already there (even if they look slightly different), and we measured to make sure we left enough space between the two beds for a lawn mower to get through.
We ended up shifting things over a few times, especially because the beds aren’t a perfect match. But because we hadn’t done any work yet, this was easy.
How to Build Your DIY Raised Garden Bed

1. Frame the bed and clear the grass.
Use the trowel to outline the entire exterior of the bed so you’ll know where you’ll need to clear away grass and level the soil. Then, use the spade shovel to dig out the first level of grass in that area.
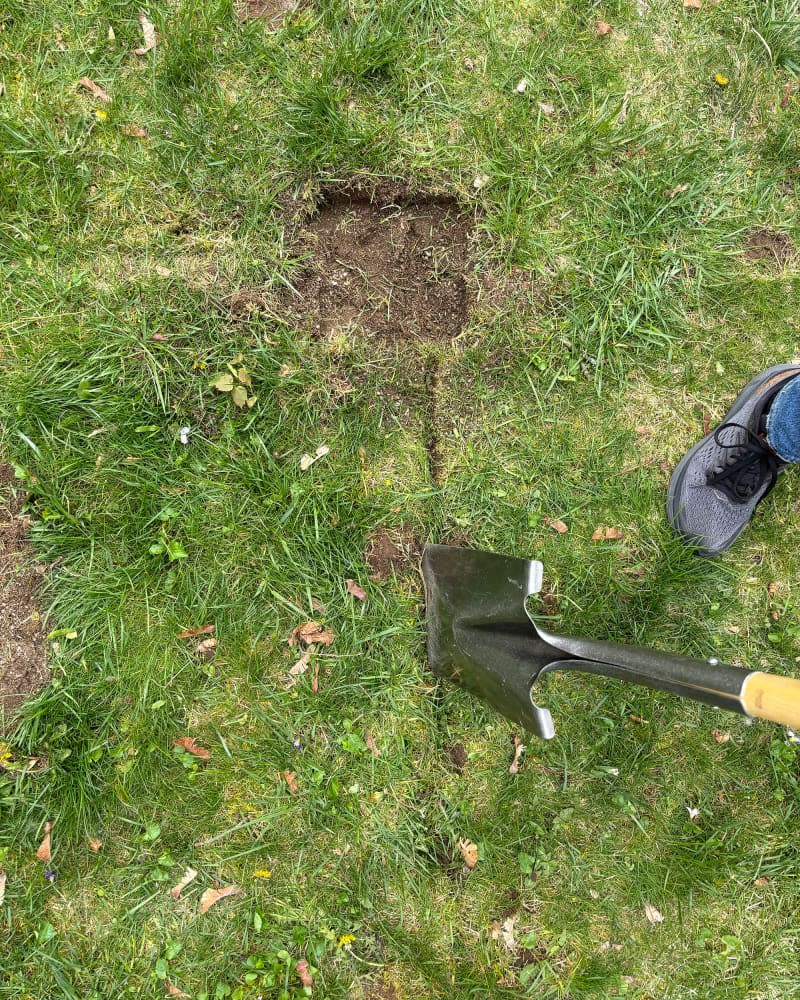
If there’s one part of the process that feels like “backbreaking garden work,” it might be this, since you’re using the shovel and bending down constantly to dig up and pull out the grass.
Since we had a team of four on this project, it was relatively quick work. But if you’re working alone, or if you want to fast-track this project, you can definitely minimize this step by only leveling out the area where the boards and blocks will sit and not the space inside your outline.
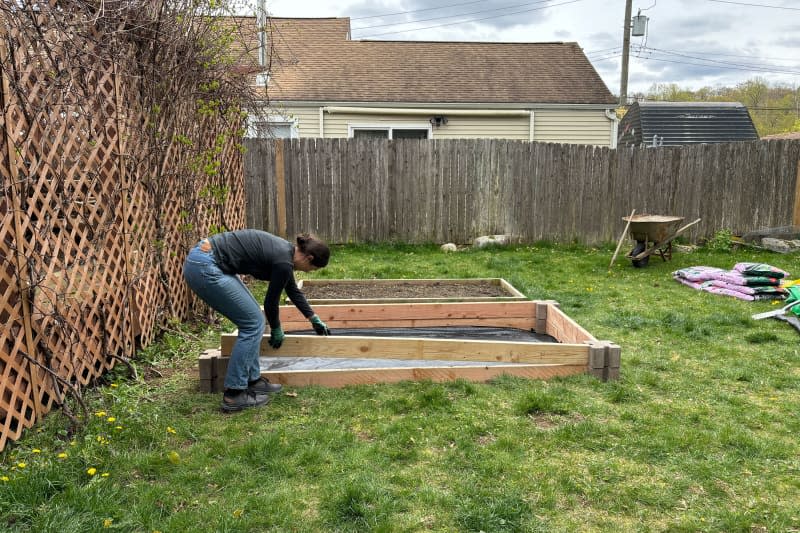
2. Build the first level of your garden bed.
The concrete planter walls went to each corner of the garden bed first — this framed everything that was to come, so we wanted to make sure the corners were placed correctly before we started to fit the wood.
Next, we took the first layer of the wood and slotted it into each corner of the planter wall, and we realized quickly that this worked best if you lowered the wood into its slot at the same time for both sides, rather than trying to do one after the other.
We saved the second level for after we laid landscaping fabric to make that job easier.
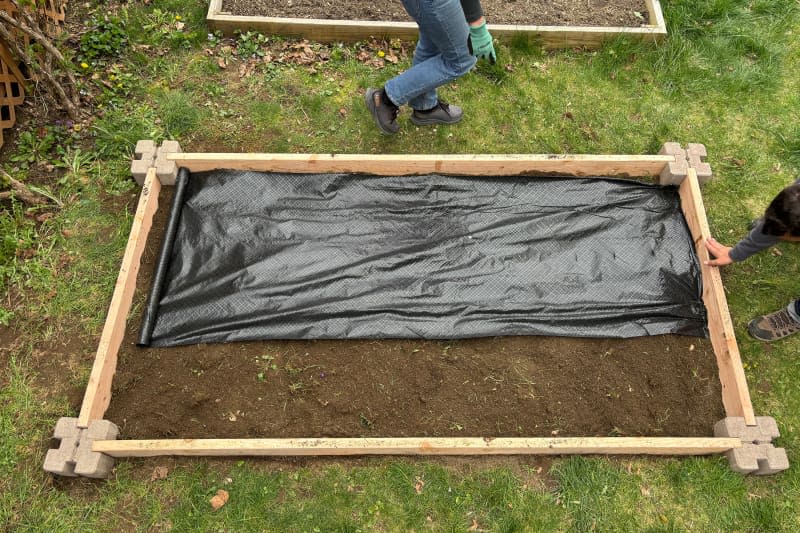
3. Lay landscaping fabric.
We picked up the landscaping fabric and garden staples as a gift to our future selves — you won’t have to worry about weeding your garden every weekend if you take the time to prevent weeds in the first place.
If you’ve never used it, landscaping fabric rolls out exactly like wrapping paper does, but you do still need to be careful; it feels a lot like a trash bag, so be gentle not to stretch or tear it. (Trust me, I made this mistake … several times.)
I started in one corner, rolled out the length of the bed, and cut. I then made cuts in the corners to make sure the landscaping fabric sat flat against the ground, using the gardening staples to secure it. Then I did the same thing on the other side of the bed.
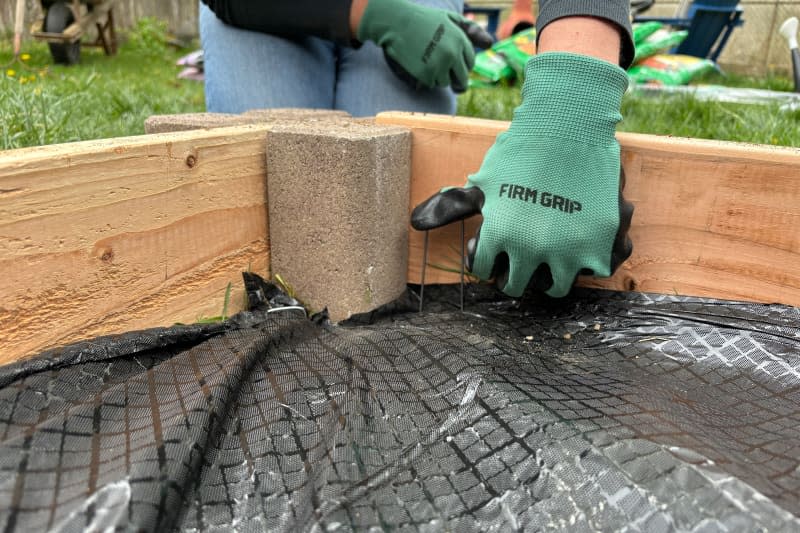
The gardening staples can be pushed in by hand, so they’re very easy to use. Just decide where you want yours to go — I picked the corners and at the midway point — and press them into the ground so they sit flush on top of the fabric.
If you’re looking to simplify the process (and materials) for a more budget-friendly raised garden bed, you could cut out the landscape fabric and garden staples and fill it with grass clippings, leaves, and twigs, but this isn’t a weed-proof alternative. You’ll probably still need to weed.
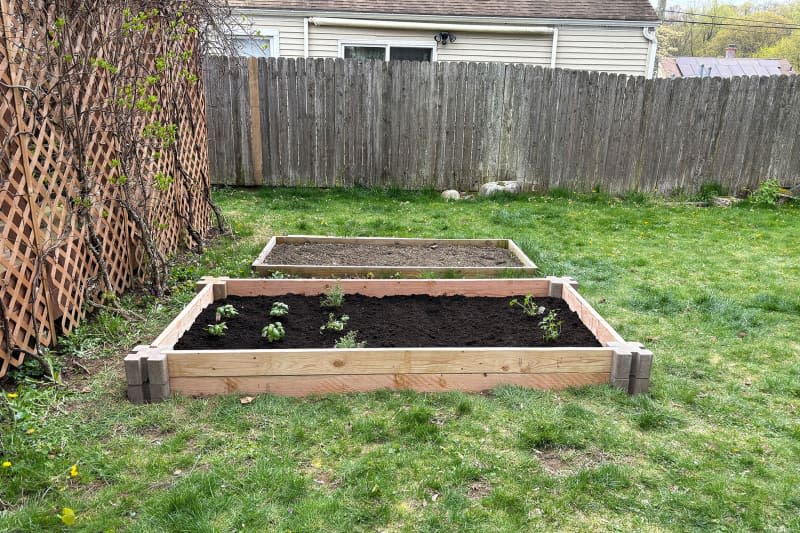
When you’ve finished, add your second level of concrete blocks and boards.
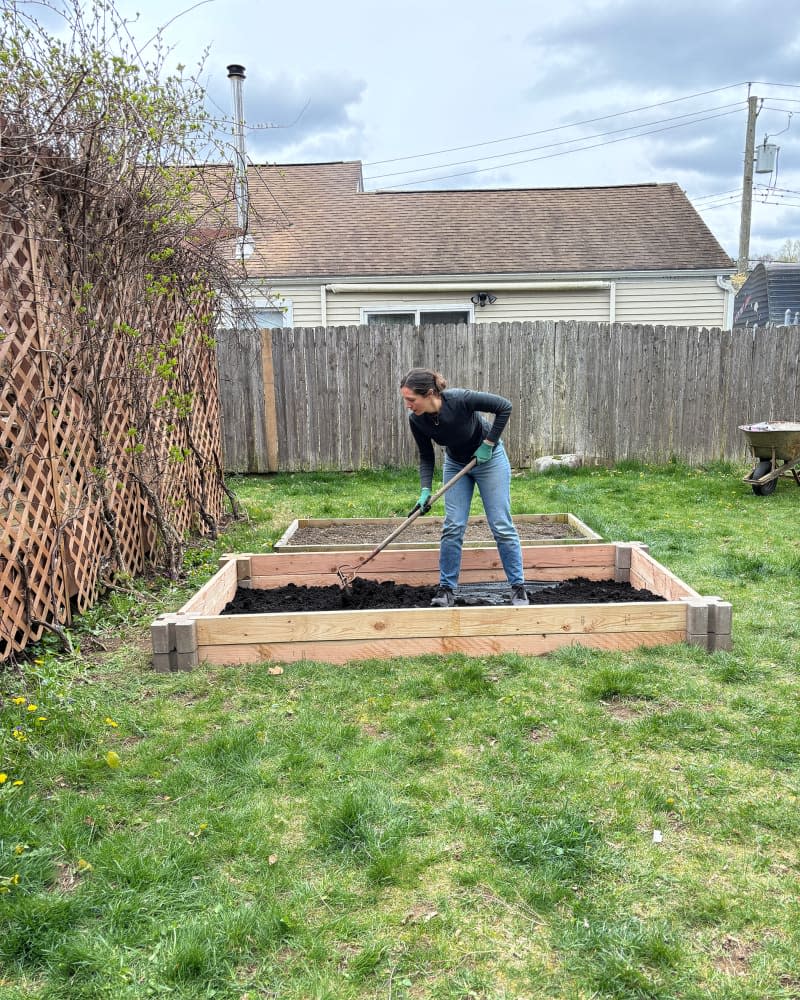
4. Add soil and rake.
I’m not going to lie, this was the hardest step in the entire DIY process for me, mainly because garden soil is just so heavy. (In hindsight, I wish we’d tried this unbelievably clever hack for opening garden soil, which would have saved so much work.)
We laid the soil directly on top of the landscape fabric, using six of the soil bags and raking in between each layer so that the soil sat mostly even.
We decided not to load the garden bed up to the top for a few reasons. Last year, wild rabbits and squirrels invited themselves to feast on my sister’s herbs, so we thought keeping things lower than eye level might work in her favor in the long term. The other reason is that we decided to mix in some Black Kow manure as fertilizer for the seeds and plants, and because my sister has a dog, we thought it was better to play it safe and make the garden a little bit more of a climb for him to get into.
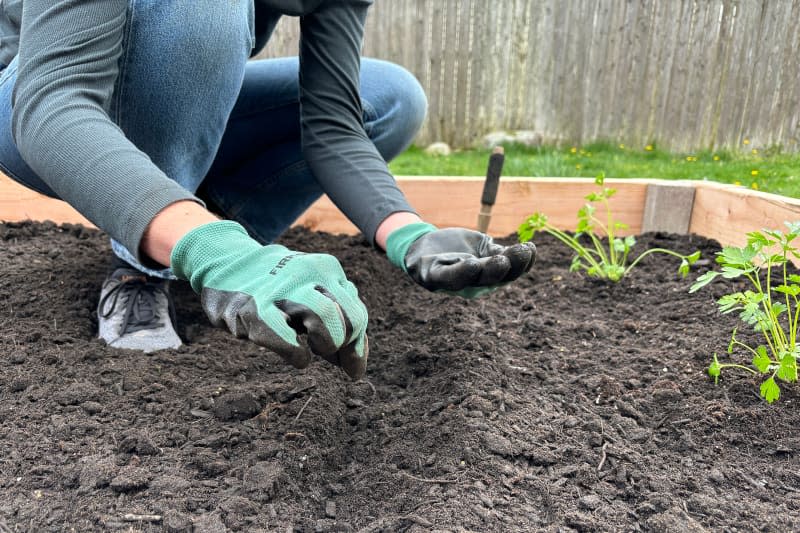
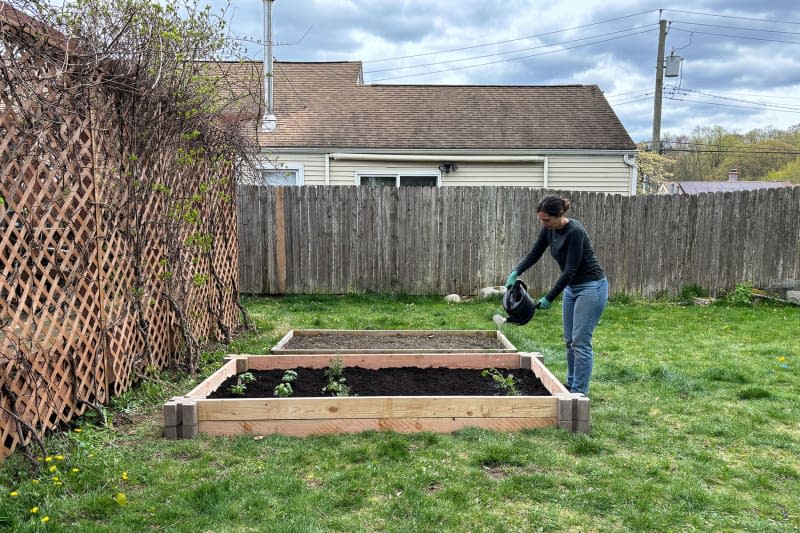
5. Transplant your veggies, herbs, or seeds.
We did this step in two parts. First, we put everything on top of the soil to get a sense of spacing, and then we transplanted the herbs. My sister wanted to add to the garden later, so we left space for cucumbers, tomatoes, and basil later.

Once the herbs were transplanted, we made rows for the seeds. My sister picked kale and lettuce, which she’d gotten from Johnny Seeds (my favorite for garden veggies). The kale and lettuce are cool-weather crops, so spring is their time. We did two rows of each, spacing them out according to the package directions for sowing directly into the ground.

