Bucket List Trips: Japan Gear Guide
Powder aims to feature only the best products and services. If you buy something via one of our links, we may earn a commission.
NOTE: We all have a bucket list of ski trips, but prepping for your next big adventure can seem pretty overwhelming when it comes to choosing what to bring. I’ve been fortunate enough to travel the world for the last decade with skis in tow, and have learned a thing or two worth sharing about what kind of gear to bring to maximize the fun and minimize the stress. It’s worth noting that my recommendations are independent, come from learning from my own mistakes, and highlight things I’m truly excited about. This series is aimed at the generalist skier who’s interested in it all - powder, freeriding, some hiking and touring, the occasional shit-your-pants steep skiing moment, and most of all, adventure!
Japan. It’s a place so legendary for its powder snow that they named an entire month after it. It’s also a safe bet that a pilgrimage to the mountains of the Hakuba Valley or the volcanoes of Hokkaido are high on the bucket list of any skier. But with snow so deep, and weather so intense, what are you going to pack into your ski bag to make the most out of your time in between bowls and ramen and onsen soaks? You’re going powder skiing, so definitely bring the big skis, but let’s think about your kit as a whole, including apparel and accessories. Everything needs to fit into a travel bag, be versatile enough for bottomless pow, potentially short tours, and riding groomers back to the lift. Here’s a deep dive into what I’ll be bringing on my next trip to the land of pow.
Skis: The Fattest You Can Get
You’re going to Japan to go powder skiing, so bring a ski designed specifically for surfing the deepest, lightest pow out there! There’s lots of fantastic pow skis out there, but I find for the kind of snow you’ll find in Japan every last bit of float helps, plus I prefer something more playful than a ski built for all-out speed. A minimum of 110mm underfoot will go a long way, and the more rocker, the better. Some great choices would be the Black Crows Nocta, the reverse-camber WNDR Reason 120, or if you’re looking to get a little more surfy, a fishtail ski like the Line Pescado or Season Forma. One thing to consider is also how well the skis will perform in cut-up snow and on-piste - which some dedicated backcountry pow skis do not do well.
Bindings: Heavy-Duty Freeride Touring Binding
Most of the best powder runs can be easily accessed via short hikes or skins, so unless you’re planning on exclusively touring, a heavier downhill-oriented freetouring binding makes the most sense here. Many of the good stashes require no touring at all to get you, but having the flexibility for uphill travel means you’ll only need to bring one pair of skis. A lightweight tech binding might be enticing, but given how little actual touring is necessary, it’s worth going a little heavier.
There are great options like the Salomon Shift or Marker Duke PT, but CAST Touring’s Freetour system might just be the perfect binding solution for this kind of trip - it’s nothing more than a Look Pivot 15 or 18 with the ability to tour. Just swap out the removable Look toepiece for CAST’s Dynafit-style pintech toepiece and you’re ready to go uphill. At the top of your run, rip your skins and swap back to the Look toes and you’re ready to rip. It’s not the lightest, but that’s not the point. Another point worth mentioning: if anything goes wrong with a binding while you're overseas, most shops will likely have replacement parts for a Pivot over a less-popular tech binding.
Boots: Freetouring Boots
Like a freetouring binding, choosing boots that are heavily downhill-focused with the ability to tour will work best. Remember, this is a trip where you’ll be getting most of your vert by mechanical means and then shredding as hard as you want on the way down. If you’re in the market for new boots, consider going to your bootfitter and trying on anything in the freetouring category - it’s what we used to call “hybrid” boots, but they actually tour and ski well now. Most boot makers have a freetouring option in their line up - and I’m not going to recommend a particular one because the best boot for you is the one that’s the most comfortable.
Pack: 15-25L Battery-Powered Avalanche Airbag
While there’s no substitute for professional training and backcountry know-how, skiing with an airbag, especially in new-to-you terrain is never a bad idea. However, traveling with an airbag has often presented challenges when it comes to getting them on board an airplane. Most airlines will let you fly with canister bags only if you can show the bag has been deployed and the can is empty. I’ve done this before with canister-powered airbags only to find them impossible to refill at my destination.
Similarly, until now, battery-powered airbags have also been bulkier and heavier than their counterparts, but thanks to the new electronic LITRIC system available in bags from Ortovox and Arc'teryx, getting through airport security screenings should be a breeze. There’s no gas canister, and you can simply unplug the airbag to make it non-deployable. I’ve found that the newest Arc’teryx and Ortovox bags are incredibly well thought out backpacks, and I’d choose something in the 15-25 liter size to carry everything you need for a day of riding pow. Fill it with extra goggle lenses, an additional layer or two, and your safety gear, and there will be just enough room left over for all the weird Japanese snacks you grabbed at 7-11. It’s also a comfortable size as a carry on bag for your travels.
Outerwear: Gore-Tex Everything
A very nice part of skiing in Japan mid-winter is that it typically doesn’t actually get that cold. We’re talking mid-twenties, even on storm days. That being said, when it snows it DUMPS, so be ready to get really wet, especially if you’re out earning your turns. Hardshell Gore-Tex kits work magic in climates like this, keeping you dry and at a comfortable operating temperature on repeat visits to the white room.
A longer-fitting jacket and bibs will also go a long way in terms of keeping you happy and dry until it’s time for the onsen, and a slightly burlier construction is helpful to prevent tears from errant branches while smashing through perfectly-spaced trees. There’s lots of great Gore-Tex kits out there, but look for something with a roomier fit, heavier fabric (typically Gore Tex Pro), and bib pants! I’ve found Patagonia’s Untracked Jacket and Bibs to hit the nail on the head. Similar in fit and style to the older Powslayer bibs and pants, these are now made of recycled Gore-Tex fabric, and come with some updated features like better straps and more usable pockets. They are available in both a men’s and women’s model.
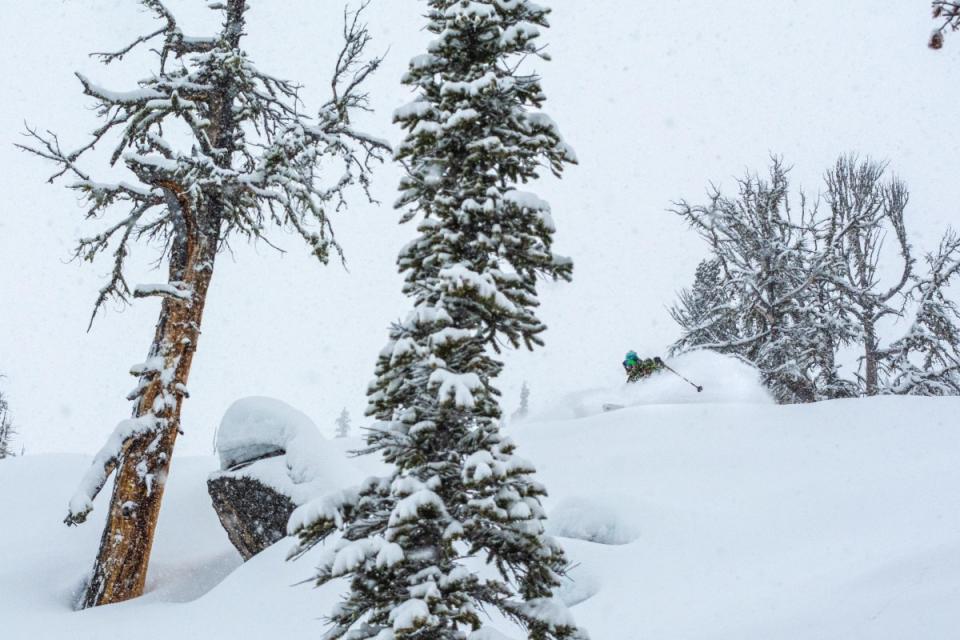
Photo: Max Ritter
Mid Layer: Breathable Mid-Weight Fleece
Midlayers are truly the unsung heroes of any ski kit - doing double duty keeping you warm and dry, but also preventing you from overheating during heavier aerobic outputs. There’s lots of great options, but I’ll go ahead and plug my all-time favorite: Rab’s Vapour Rise Summit (yes, very British).
It’s hands-down one of the versatile and comfortable jackets in this category I’ve ever worn. I typically run hot when skiing (inbounds and touring) and I’ve found it keeps me in the goldilocks zone - not too warm, not too cold. It fits nicely under a Gore Tex shell for descending and while touring on storm days, but tends to be all I wear over a merino baselayer while touring when the sun is out. Rab makes men’s and women’s versions.
Baselayers: Merino Top and Bottom
Fact: we all get smelly. Especially when we’re out having fun in the mountains. The good news is, there’s a simple way to keep your ski partners happy: merino baselayers. There’s nothing better for traveling and skiing than merino simply because you can wear the same baselayers multiple days in a row before they start getting smelly. Another plus is the fact that merino wool stays warm even when soaking wet, which you will get. There are great choices from Mons Royale, Smartwool, Icebreaker, and more.
Travel Kit: Ski Bag + Backpack
Getting your ski gear across an ocean in one piece is asking a lot of your luggage, and not every ski bag is built the same. I’ve tested quite a few different ski bags over the years, and one stands out because it’s the only one that hasn’t broken - Dakine’s Fall Line Ski Roller. It’s a simple, large bag with a cavernous main compartment, a removable interior bag for your boots (do yourself a favor and just carry those on), and a small external sleeve for extras. It comfortably fits two pairs of skis and your clothes, and easily rolls through airports, lodge lobbies and over cobblestone streets. When traveling, wear your airbag as your carry-on piece since most airlines in fact require these to go in the cabin, strap your boots to the outside, and you’ll actually be pretty mobile while navigating downtown Tokyo after a 12-hour flight.
Accessories:
Don’t forget your favorite headwear, buff, goggles, and gloves - bring an extra set of everything for the wet days. I’m not your mom, so I’m not going to tell you to wear a helmet, but you should probably ski with a helmet.
A simple backcountry kit for short tours should include skins (I find mohair mix skins work best in deep snow and are the most packable), your full avalanche rescue kit, and a basic repair and survival kit. NOTE: Radio usage is highly regulated in Japan, and your typical BCA or similar radio is actually illegal to use in-country without a license. If you can’t live without them, consider buying or renting a set of two-way radios when over there to avoid fines.
Please do your research when heading into the backcountry. Unlike North America or Europe, there isn’t a whole lot of publicly-available information on snow and avalanche conditions for Japan, so don’t hesitate talking to or hiring accredited local guides. They’re more than happy to show you where the truly good stashes are - both for skiing and for apres.

