Bucket List Trips: Chamonix Steeps Gear Guide
Powder aims to feature only the best products and services. If you buy something via one of our links, we may earn a commission.
NOTE: We all have a bucket list of ski trips, but prepping for your next big adventure can seem pretty overwhelming when it comes to choosing what to bring. I’ve been fortunate enough to travel the world for the last decade with skis in tow, and have learned a thing or two worth sharing about what kind of gear to bring to maximize the fun and minimize the stress. It’s worth noting that my recommendations are independent, come from learning from my own mistakes, and highlight things I’m truly excited about. This series is aimed at the generalist skier who’s interested in it all - powder, freeriding, some hiking and touring, the occasional shit-your-pants steep skiing moment, and most of all, adventure!
Chamonix, France. The land of extremes. Its reputation precedes it - steep, gnarly, unforgiving, the home of leathery French ski guides who are physically incapable of performing anything but a hop-turn on skimo toothpicks. I’ll let you in on a little secret, though - you don’t actually have to get that gnarly in Chamonix to enjoy it. Yes, there are lift-access 50+ degree couloirs, but there’s also plenty of much friendlier technical terrain for you to ease into and still get the full experience. Go slightly off the beaten path, and you won’t be stuck in a traffic jam rappelling into a line filled with questionable snow.
Besides, the best thing about spring in Cham isn’t even the skiing. It’s the fresh baked goods, espressos, and walking around town in flip flops to people watch after a big day out. For me, a mid-to-late April trip makes the most sense. Prime flip-flop season. Any earlier, and the high-alpine snowpack hasn’t really developed yet. Any later, and you’ll be walking from the valley floor as the lifts usually stop running May 1. That being said, all that glaciated terrain is still an easy place to get yourself into real trouble, so become an expert in using all your dangly and pointy bits beforehand, and show up with a high level of fitness. These mountains are as real as they get, and will change your life.
Skis: 100-105 Underfoot Midweight Ski
The French have a pretty good name for the type of skiing Cham is so well known for: Ski de Haute Montagne. High Mountain Skiing. While the super scary steeps tend to get all the press, the vast majority of your time will be spent touring around on glaciers, skiing mellower slopes and enjoying yourself in the sun before potentially dropping into something steep. Springtime in the Mont Blanc area means a wide variety of conditions, everything from fresh pow up high, lots of smooth corn, all the way to navigating heinous refrozen snow amidst glacial debris down low.
Yes, you will also ski moguls on a glacier. I find that a mid-weight directional freetouring ski in the 100-108 underfoot range covers your bases here well. I would look for something in the 1700-1900g per ski range with some traditional camber underfoot, which will give you enough heft to ski through manky conditions and provide a more solid edging platform on the steeps, but won’t weigh you down on big days of walking.
Somewhat confusingly, I think a longer-turning radius ski performs better in conditions where I’m hop-turning a lot, so I personally prefer something with a 20m+ radius, but that’s personal preference. I also think a flat tail is necessary here to use your ski for anchors. There are many great options in this category, like Black Crows’ Navis or Corvus Freebird, Salomon QST Echo, DPS Pagoda Tour 100, Atomic Backland 100, Dynastar M-Tour 108, or last year’s K2 Dispatch 101.
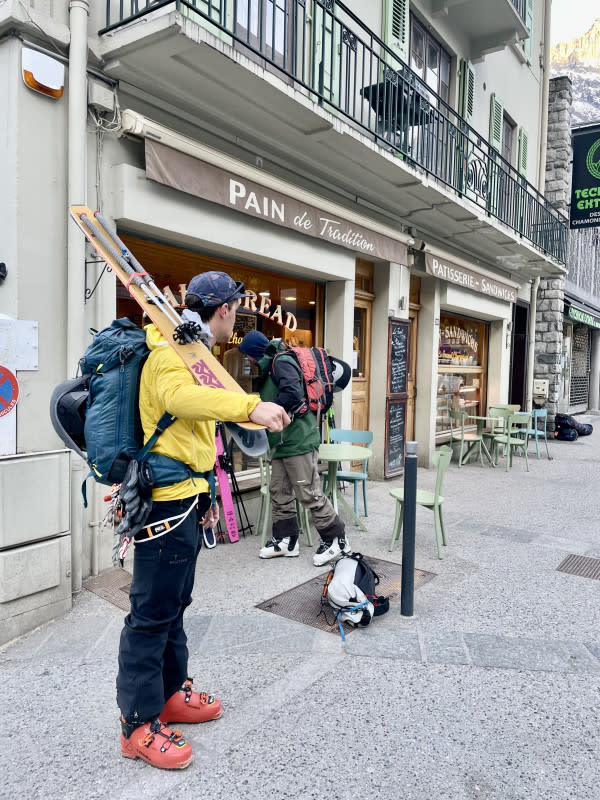
Photo: Max Ritter
Bindings: Light tech bindings
Pairing a lightweight all-metal ski-mo inspired tech binding with slightly heavier skis works magic here. Yes, it might look a bit dainty, but you’re not in Cham to bash moguls and huck 30-footers. In the last few years, we’ve seen a quantum leap forward in the performance of tech bindings that weigh in at or below the 300-gram mark, and that’s what you’ll want. Fun fact: most of those bindings were all developed intentionally with skiing here in mind.
When choosing a binding, lose the binding brakes and consider skiing with leashes if you’re walking on a glacier (in case you fall into a crevasse, this will allow you unclip your skis and not drop them into the center of the earth). Most of these bindings now have a decent amount of elastic heel travel built in, so gone are the days of locking out your toes and choosing between risking an ACL or losing a ski mid-couloir. There are fantastic choices from ATK (rebranded by several other brands like Moment, Hagan, DPS, and Black Diamond), Plum, and Marker. My two favorites these days are the ATK Kuluar 12LT, and the old standby Marker Alpinist.
Boots: Light 4-Buckle Touring Boots
I’ve brought a few sets of boots to the Alps over the years, and keep being reminded that I actually like lightweight and stiff 4-buckle touring boots better than ultralight skimo slippers. Maybe I’m just not a good enough skier, but I find that beefier boots ski better in bad snow, particularly if you’re carrying a heavy pack. Both of which you will be doing alongside a lot of walking.
Look for something in the 1500-1600g range, with tech fittings, and a generous walk mode range of motion. Maybe add a Booster Strap if that’s your thing. Luckily, there’s some great options in this category, and my main recommendation is to ski the boot that is the most comfortable on your feet! Your friend might swear by something else, but odds are, your feet aren’t shaped the same, so go try stuff on and see a bootfitter with questions! I would also suggest sizing up from your resort boots - your feet will swell in the warmer spring temps, and if you’re doing any technical climbing, the extra toe room is nice to have. A few great options are the Tecnica Zero G Pro Tour, Scarpa 4 Quattro XT, Scarpa Maestrale RS 4.0 or Gea RS 4.0, or the new Lange XT3 Tour 2.0 130.
Pack: 30-40L Light pack
For ski mountaineering, I want to pare my kit down to the essentials, but the reality of skiing in Chamonix is that you’re carrying a LOT of extra stuff and will need a place to put it. That means ropes, crampons, emergency gear, potentially a pair of approach shoes, and as many fresh croissants, baguettes, and elaborate pastries as the friendly ladies at the cafe will let me buy every morning. I find that a simple 35-40L ski mountaineering pack works perfectly.
I’ll look for as simple and light a design as possible - Dyneema packs are super light and durable, but very pricey, and often skip functional (read: necessary) features in the name of saving a few grams. I want a good amount of shoulder and hip padding, easy access to the inside and to a separate avalanche safety pocket, and a usable diagonal/vertical ski and ice axe carry system. I like to be able to get inside my pack even when skis are mounted to the outside.
There’s many great options on the market these days, like Patagonia’s Descensionist 32, Mountain Hardwear’s Snoskiwoski, Hyperlite Mountain Gear’s Crux 40, or the new Raide Research LF 40L. If you’re looking for something fun, custom, and that might get you some street cred in the tram line, check out Apocalypse Equipment’s handmade ski packs. And for the record, I think it’s perfectly acceptable to strap a baguette to the outside of your pack - I’ve seen IFMGA guides do it.
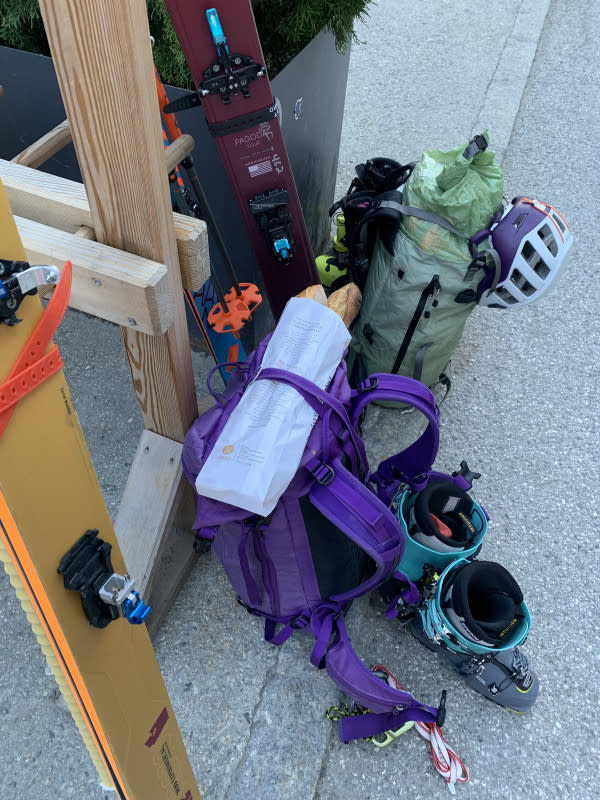
Photo: Max Ritter
Outerwear: Softshells, a Sun Hoodie, and a packable emergency hardshell
Despite the lift access, you’ll still be doing a lot of walking to get to the goods here, and by mid-April the temps will get very warm in the mountains. While I love wearing hardshells most of the season, spring skiing in the high mountains is the perfect use case for breathable soft shells.
You’re likely only going out when it’s sunny, so I don’t worry too much about waterproofness, instead focusing on breathability and temperature regulation. However, on days where I know I might be racing a weather window, I’ll toss a lightweight packable hardshell jacket in my pack just in case the skies open. I’ll wear softshell ski pants with a reinforced cuff to protect against crampon points and ski edges, and a thin softshell jacket or anorak over a sun hoodie. I’ll go ahead and plug my all-time favorite sun hoodie: REI’s Sahara Shade hoodie. They’re cheap, really comfortable and breathable, and have a hood that fits over a ski helmet.
Helmet: Skimo Helmet + Sunglasses
Yes, you should definitely wear a helmet around here, especially if you plan on riding anything technical. The unfortunate reality of climate change in the Alps means that these mountains are literally crumbling by the second and there is loose rock everywhere. That, combined with many people out riding on sunny days, means you’ll experience some serious rockfall nearly every day.
Your favorite ski helmet will work great, but I’m a fan of ski-mountaineering specific helmets or even a traditional lightweight climbing helmet, like Black Diamond’s Vision MIPS, Sweet Protection’s Ascender, or the new POC Calyx Carbon. They’re much lighter, more packable, and way less hot - a plus for when you’re wearing it while booting up a couloir or hanging out at a rappel in the sun. I pretty much have never worn goggles in these mountains, instead finding that wraparound sunglasses work way better to regulate heat and prevent fogging. Besides, it’s one less thing to carry. I like to wear a simple cap underneath my helmet for extra sun protection.
Dangly Bits: Ultralight skimo harness, Glacier Kit, 2x 30m ropes, anchor gear
Traveling through technical and glaciated terrain means you’ll be carrying quite a bit of extra safety gear than your average ski tour. Luckily, over the past few years, brands have been focusing on perfecting their offerings for ski-specific mountaineering gear. For basic glacier travel and technical skiing, I’ll wear an ultralight skimo harness like Petzl’s Fly, the Blue Ice Choucas or the Black Diamond Couloir LT. Thanks to their use of really thin webbing, these harnesses are easy to tour and ski in, pack down to the size of a cellphone, and are well-suited for crevasse rescue and rappelling.
If you plan on doing any lead climbing, consider something a little more beefy for comfort. For rappelling, I’ll carry a belay device, 2 locking carabiners, a short prusik cord and a personal tether to extend my rappel and clip into anchors. My glacier kit consists of the lightest I can find of the following: 3 locking carabiners, 2 non-locking carabiners, 2 ice screws (short and long), 3 Dyneema slings (2 long and 1 short), a Petzl Micro Traxion pulley, a Petzl Tibloc ascender, and a small non-locking pulley.
This stuff can be bought as a whole kit from various manufacturers or can be pieced together from your existing stash of climbing gear. Within my ski party, I’ll distribute two 30-meter <6mm static ropes. There’s lots of great options in that world these days, like the Petzl Rad Line, Beal Backup Line, Edelrid Rap Line, and Mammut Glacier Cord. I like to stash these ropes in a stuff sack inside my pack, and only break them out when needed for a rappel or a rescue. I will also usually carry an oh-shit anchor kit made up of a few miscellaneous pitons, nuts, and cord.
Pointy Bits: Light Ice Axe, Hybrid Crampons
On top of all the dangly bits, here’s the stuff you’ll actually be using every day in technical terrain. A short ultralight ice axe with a pinky rest like the Petzl Gully, Black Diamond Venom LT, or Blue Ice Akila will serve you well in steep snow and any occasional ice climbing you might encounter (real talk: if you’re going skiing, you probably won't). Pair that with some collapsible ski-boot-compatible crampons like the Petzl Irvis, Blue Ice Harfang, or Dynafit Mezzalama crampons. These choices all have steel front points, which despite the added weight, I prefer for security and longevity on rock and any true ice. Aluminum front points are great for pure snow climbing and are much lighter.
Accessories: Approach Shoes and a Cellphone
It’s the must have ski accessory of 2024 - lightweight approach shoes. No really, it’s quite sad that the glaciers here are all melting, and it means you’re going to be walking on dry ground to get home most days. That’s especially true if you make the mistake I did last time I was in Cham and missed the Montenvers train back to town after a big mission, meaning my friends and I were forced to descend an extra 5 miles and 3,000 feet on foot along the tracks. Some of us did not bring shoes, and they were jealous. Besides the end-of-day walking, having shoes is great if you plan to spend a night at a hut for an early mission, or even want to explore the skiing a little further away from Mont Blanc. I look for something light and packable, because they will end up spending most of the time inside my pack.
Secondly, having a cellphone in these mountains is crucial. There is cell service pretty much everywhere, and a phone can be a great tool for checking location, weather and conditions while out - not to mention it can be a lifeline if something goes wrong. I’ve witnessed the Gendarmerie respond to an emergency phone call in under 10 minutes via helicopter. For reference, the emergency number is 112.
Some Beta:
If you’ve never been, it’s very much worth hiring a guide here, at least for a few days. European guides are generally affordable and will get you to the goods. They don’t expect, but will appreciate a 10% tip if your day was great. If you’re looking to go it alone, there is plenty of information on routes in guidebooks and online, but do check the age of the information - the Mont Blanc Massif is one the most rapidly changing mountain ecosystems in the world, and standard routes from even just a few years ago may no longer be safe for travel.
However, finding info on current conditions and the avalanche report can be challenging, but you can see weather reports at MeteoBlue, a basic avalanche report at MeteoFrance (use google translate if you’re no francophone), and a weekly conditions update at LaChamoniarde. Don’t be afraid to walk into the mountain guides bureau near the city center to get updates from guides on route conditions, hut status, and lift closures.
