How to Make Bread Even if You're a Beginner in the Kitchen
For most of my life, I assumed that baking bread was exclusively for professionals—or at least, home cooks with exceptional talent. From what I knew, the process was long and complicated and easy to mess up, especially if you had as little bread baking knowledge as I did.
What I found out over the past week, when I decided to try my hand at baking bread for the first time, is that it's way simpler than I'd been led to believe. The truth is, you only need a few ingredients, a handful of tools that you probably already have, and a little know-how to make your whole kitchen smell like a boulangerie in no time.
While you definitely don't need to be a pro to bake bread, I also wouldn't suggest jumping into it without doing any research at all. So to help you uncover your own bread-baking skills, I created this guide—with advice from professional bakers—that will give you all the knowledge you need before you begin. Here's everything they told me to keep in mind, plus what I learned firsthand from my very first bread baking experience.
The only ingredients you absolutely need to make bread are water, flour, salt, and yeast.
Odds are you already have at least three of these ingredients in your pantry. Like me, though, you might have to head to the store to pick up some yeast, which is an essential element to making bread because it's what makes it rise. "Yeast makes the bread rise by consuming carbohydrates in the flour and converting that into gas, which becomes bubbles trapped in the protein structure of the dough," Zachary Golper, owner of Brooklyn bakery Bien Cuit and James Beard Award nominee, tells SELF.
Golper says that you can also use a sourdough starter, which is a level up from the most basic bread making techniques because you generally have to make it yourself. But you can also buy sourdough starter kits online (like this one here) and in some cases you can find them at health food stores. But if you can't find one, don't want to spend the money, or don't want to make the commitment to keeping it alive (it takes about five days or more to make it right), yeast is a perfectly good alternative.
You'll want to use a recipe to guide you through the right measurements.
It's easy to make things like smoothies and salad dressing without a recipe because they're more forgiving, but bread is a different story—use a cup of flour too much and the whole thing could be off. The amount of flour, yeast, water, and salt you use varies depending on the type of bread you're making. For example, it'll be a very different whether you're making a ciabatta or a bagel. As you're starting out, follow the measurements from recipes to guarantee the best results. I used this simple bread recipe from Leite's Culinaria as a resource for flour, water, yeast, and salt measurements, and thought it came together seamlessly when I applied the tips from my expert sources.
But you can get experimental with the other ingredients you use.
Once you've made the basic dough, you can add anything else that you want for flavor. "Trying out new things often results in great bread," says Golper. "You can always add some nuts, dried fruits, olives, flavorful oils, butters, honey, molasses, other sweeteners, seeds, soaked grains, or some combination of these items," he explains.
As far as equipment goes, you don't need to have a stand mixer or a Dutch oven.
While researching bread recipes for this piece I noticed that a lot of them called for stand mixers and Dutch ovens—stand mixers make the process of kneading easier and Dutch ovens provide an even temperature that can help your bread get that crusty, crackly texture. And since I have neither of those in my kitchen right now (they're gathering dust in a storage unit), I asked the experts if I could get the job done without them.
Golper told me I totally don't need a stand mixer. "Almost every great bread can be mixed by hand," he says. "You do not need an electric mixer to make amazing loaves." In fact, that's because a lot of bread recipes require little to no kneading (more on that in a bit).
And you don't need a Dutch oven either, Jordann Windschauer, CEO and founder of Base Culture, tells SELF. She says that you can use a loaf pan or a baking sheet. Even a casserole dish could work. I ended up using a baking sheet and I had no problems.
There is some equipment you do need.
At the very least, Golper says you'll need a large mixing bowl and a wooden spoon to mix the flour with. A metal dough scraper can also be helpful for removing sticky leftover dough from countertops, and a plastic bowl scraper can make it easier to handle the dough and remove it from the mixing bowl, but you can make bread without these tools.
You'll always need to give the dough time to rise, but you can cut it short if you need to.
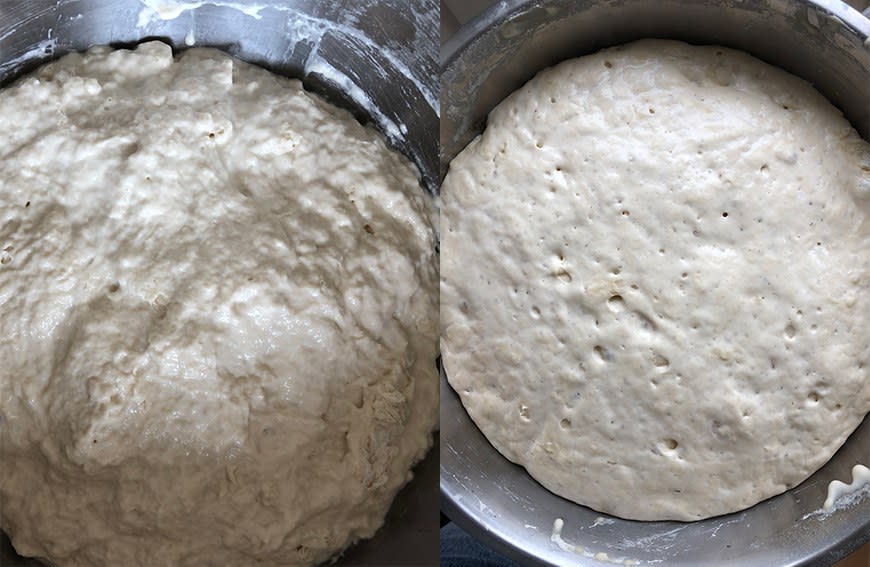
"Resting, or proofing, is needed for natural leavening to occur when using yeast," says Windschauer. Unlike other leavening agents, like baking soda and baking powder, yeast doesn't react instantly because it's a living organism rather than a chemical compound. When you add water to flour, salt, and yeast, a fermentation process begins, Golper explains. "Water hydrates the flour and activates the proteins, and allows the yeast to begin feeding on the carbohydrates and creating gas bubbles."
Golper says you only have to let the dough rise for several hours at room temperature and it will double in volume and be ready to bake. However, he says it will taste better if you let it sit in the fridge for another 12 to 18 hours. That's because bread gets a lot of its flavor from fermentation, so the longer you let it ferment, the more flavor it will have.
I split my batch of dough in half, so I could use one right away and save the other one for the next day to see if it really impacted the flavor. The verdict: It totally did! That's not to say the first loaf was bad, rather that the bready flavor was stronger and more apparent in the second batch. So if you have the time to wait, you should wait, but if you don't, you'll still have edible bread in the end.
Skip kneading and embrace the stretch-and-fold method.
Kneading dough helps develop the gluten proteins in bread, which is what gives it its famously chewy texture. However, it's not always necessary, says Golper. For basic bread recipes, he explains that simply hydrating your ingredients will be enough to activate gluten development.
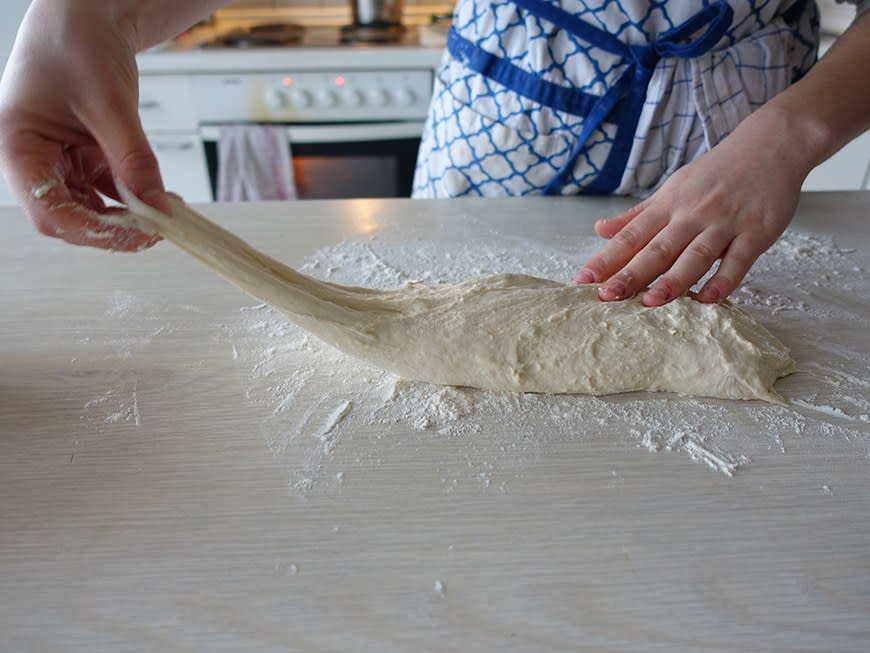
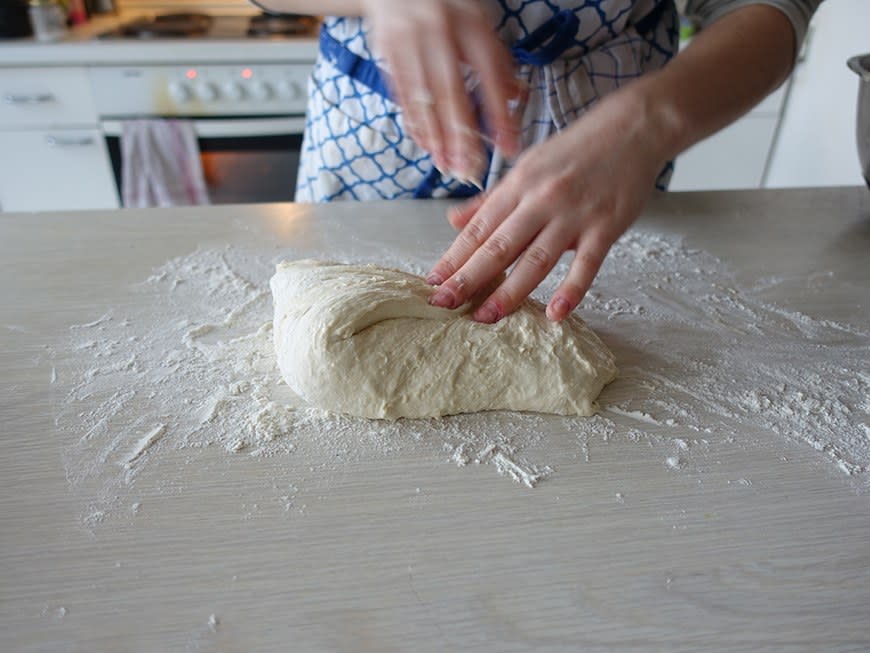
You don't have to knead, but there is another (easier) technique Golper says you should always use. Called the stretch and fold, it is what it sounds like: You repeatedly stretch the dough and fold it in on itself throughout the rising process, which helps it expel carbon dioxide, strengthens the gluten proteins, and ultimately gives it a better rise. To do it, pull your dough from one side and then fold it in as demonstrated in the photos. Go all the way around so the entire ball of dough gets evenly stretched.
During the initial rise, be sure to stretch and fold your dough about three times, or once every hour. Then use the method one last time to mold it into your desired shape just before you put it in the oven.
The dough will get sticky as you work with it, so keep flour handy.
If you don't keep your hands and countertop well floured, dough will stick to both of them. Keep flour handy so you can reach for it easily. And whenever you notice that your dough is starting to get too sticky again, add a sprinkle or two.
Preheat your oven and the pan you're using.
Golper always recommends preheating whatever pan you're using before you add the dough and stick it in the oven. If it's not preheated, the cold temperature of the pan will bring the temperature of the entire oven down, which could negatively impact the way your bread bakes.
As for what temperature the oven should be, Golper says 425 degrees F will work for most bread recipes. One-pound loaves will only need about 25 to 30 minutes before they're finished, and two-pound loaves will need between 35 and 40 minutes. He says you'll know it's done, "when the loaf sounds hollow when thumped by your finger or knuckle."
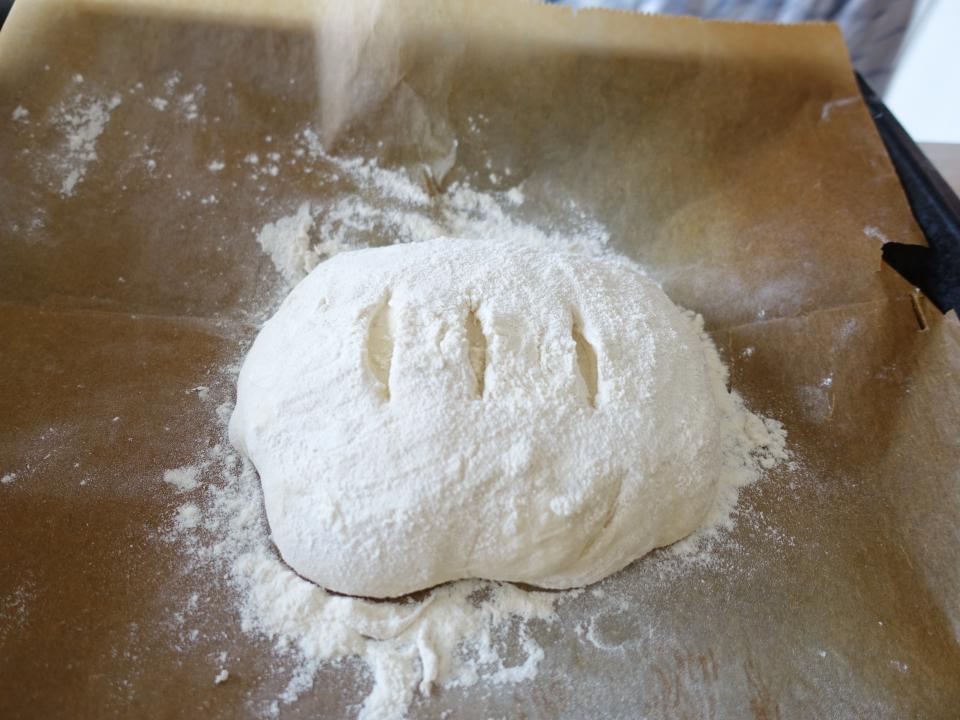
Before popping the loaf into the oven, dust the dough with flour and then slash it across the top for a decorative flare.
Let cool, and enjoy however you like!
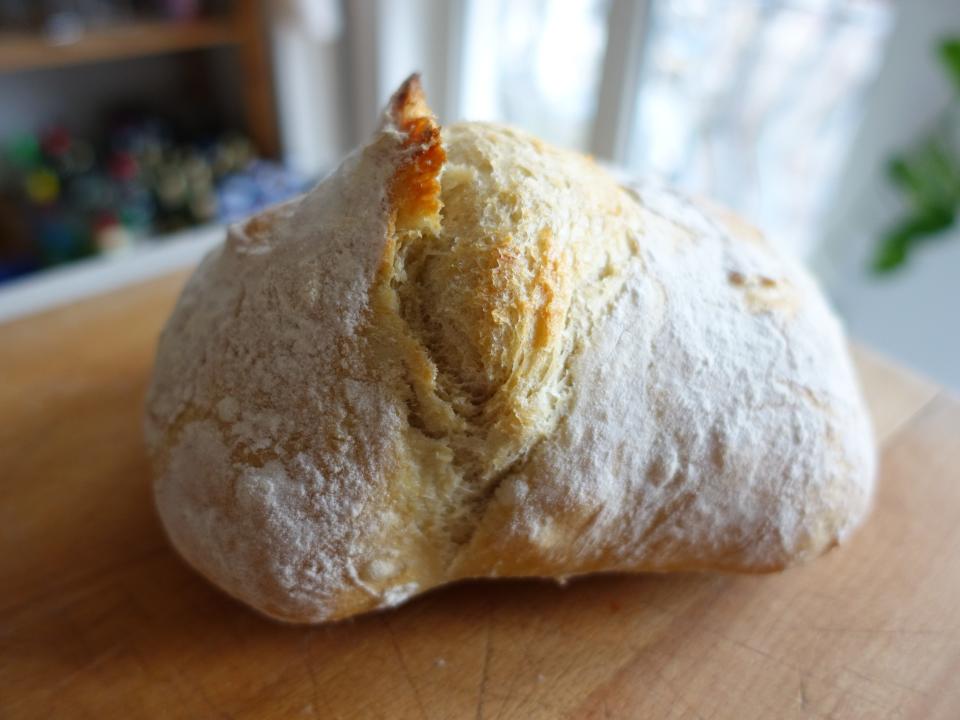
Take the bread out of the oven when it's crisp and brown and to your liking, and let it rest until it's cool enough to handle. Eat it while it's still a bit warm, because there's really nothing better than hot, freshly baked bread.
Related:

