How to Make a Bow for Presents and Decor
Get the finishing touches just right with these simple steps.

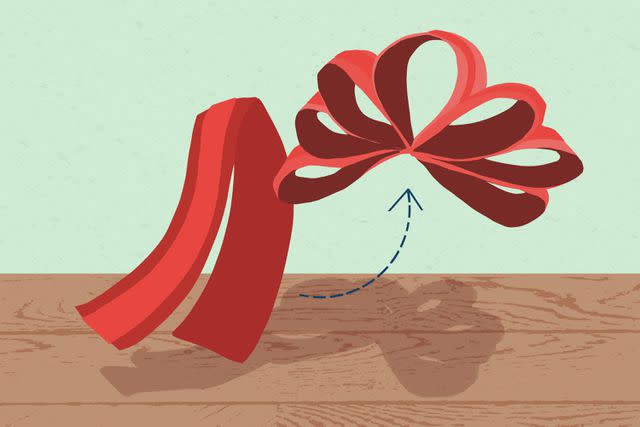
Fiordaliso/Getty Images
There's something about handing over a perfectly wrapped present that satisfies both the giver and receiver to their core. It’s pretty to look at, of course, but it also shows the thought and care you took to make something with added time and intention.
“Bows add that extra special detail to presents and holiday home décor," says Jenna Snyder, crafter extraordinaire and senior scenics and props design manager at RWS Entertainment Group. "It’s a little touch that has a big impact. I personally have a box of bows that I’ve collected from friends and family over the years. They can be a sentimental keepsake, similar to cards.”
Learning how to make a bow is a skill that translates elsewhere. You can place bows practically anywhere, including wreaths, bouquets, in your child’s hair, on curtain drawbacks, or even on a fence post.
:How to Wrap a Present Like a Pro
How to Make a Simple, Standard Bow
Let’s start with the basics by learning how to create a simple, two-loop bow.
What You’ll Need
Ribbon (wire preferred)
Measuring tape or ruler
Scissors
Florist wire
Hot glue gun and glue sticks
Instructions
Step 1. Choose a ribbon style. This can be a solid color or a pattern. Snyder says that a wider ribbon with a built-in wire is preferred since it will help maintain the structure and shape.
Step 2. Cut your florist wire. Cut about five to 10 inches of florist wire and set aside for later.
Step 3. Measure and cut the ribbon. Choose your desired length. About 10 to 16 inches is perfect for small to medium sized bows, but add or subtract length depending on how big you want your bow. If you’re unsure of what size you want, just work from the spool without cutting and feel it out.
Kailey Whitman
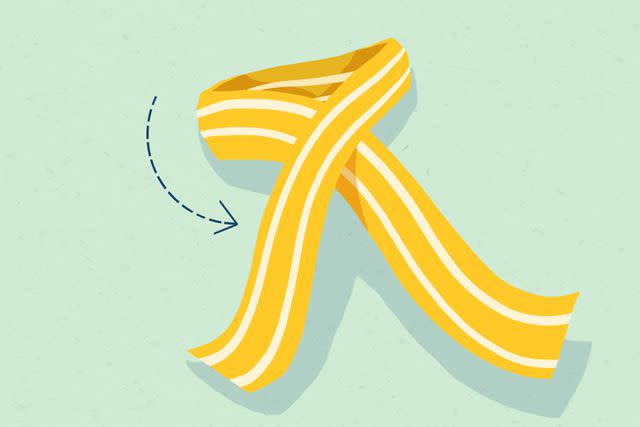
Step 4. Create the loops. Create one large loop by crossing one end of the ribbon over the other, leaving long tails.
Kailey Whitman
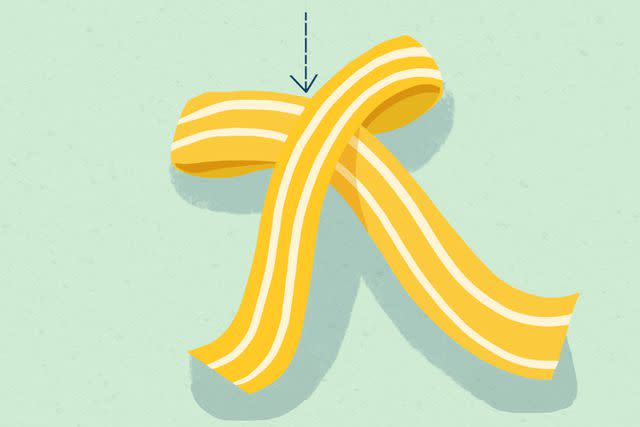
Step 5. Form the bow. Secure the intersection of the ribbon with your fingers. Then, bring the top center of the loop down and hold it against the back of that intersection.
Kailey Whitman
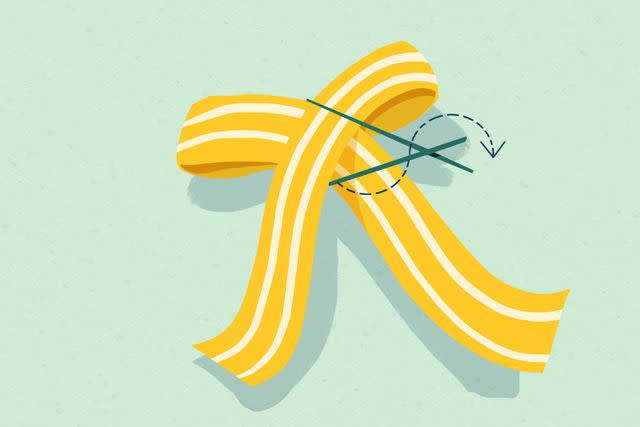
Step 6. Secure with florist wire. Wrap the florist wire around the center of the bow, twisting tightly on the backside to secure everything in place.
Kailey Whitman
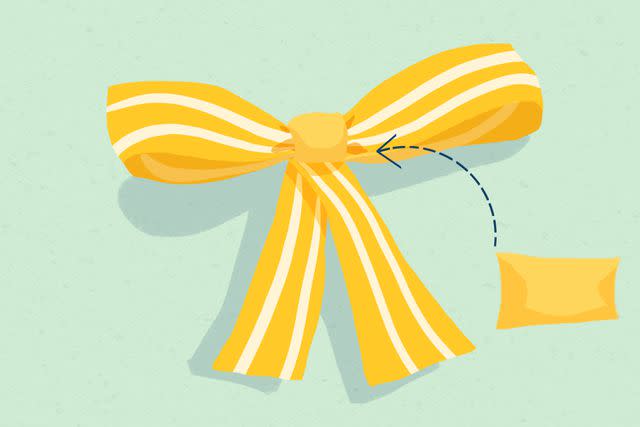
Step 7. Cover the middle. For a more polished look, cut another small piece of ribbon and wrap it around the center of the bow to cover the wire. You can use the same ribbon or a different ribbon for contrast. Secure with hot glue.
Kailey Whitman
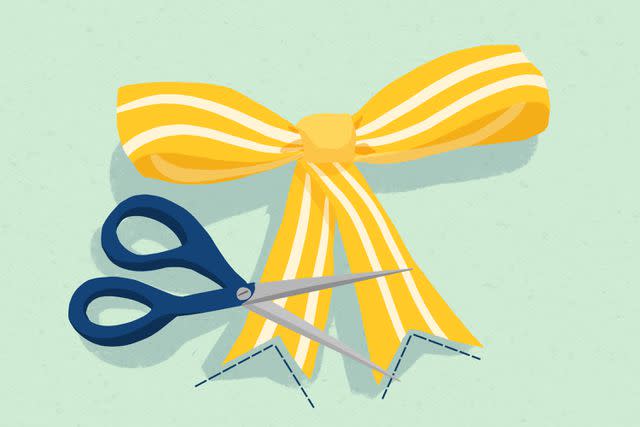
Step 8. Cut the tails. Cut the ends of each tail at a 45-degree angle. Or, cut a triangle into the bottom of either tail to create a dove tail effect.
Pro Tip: When creating a bow for decor, “attach Velcro or a snap to the back of the bow so you can interchange different bows throughout the seasons,” Snyder advises. This is particularly effective for wreaths.
How to Make a Multi-Layered Bow
Want to try something a bit more challenging? Opt for a multi-layered bow, which offers more volume and drama.
What You'll Need
Ribbon (wire preferred)
Measuring tape or ruler
Scissors
Florist wire
Instructions
Step 1. Choose your ribbon. This can be a solid color or a pattern. For this type of bow, you’ll definitely want a style with built-in wire to help create the most beautiful shape.
Step 2. Measure and cut the ribbon tails. For a medium to large bow, opt for about 36 inches. You can add more or fewer inches depending on how small or big you want the bow. On either end, cut the ribbon at a 45-degree angle or with a dovetail effect. Set this ribbon aside for later.
Step 3. Cut your florist wire. Cut about 10 inches of florist wire and set aside for later. You’ll want to keep it handy. If you plan to make a very large bow, you may need two or three pieces of florist wire.
Kailey Whitman
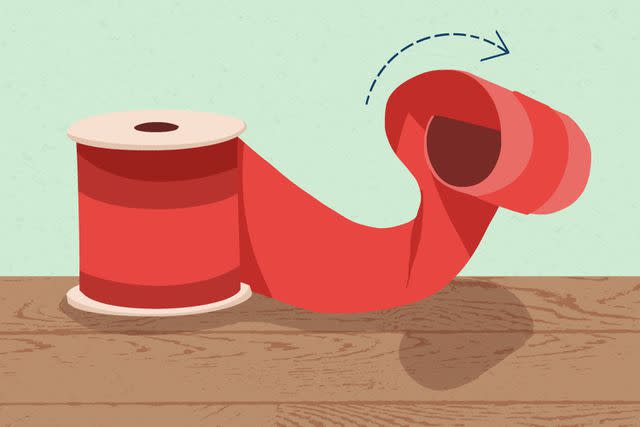
Step 4. Start the bow. Working right from the ribbon spool and without cutting, roll the ribbon over itself one time to create a loop, which will be the bow’s center.

Kailey Whitman
Step 5. Create the loops. Holding the center roll securely, fold the excess ribbon in half to create a slightly larger loop on the left side of the center loop. Then, using more excess ribbon, create another same-sized loop on the right side. (If your ribbon is two-sided, you’ll want to twist the ribbon 180 degrees before each fold to make sure the correct side is showing on the outside.)
Kailey Whitman
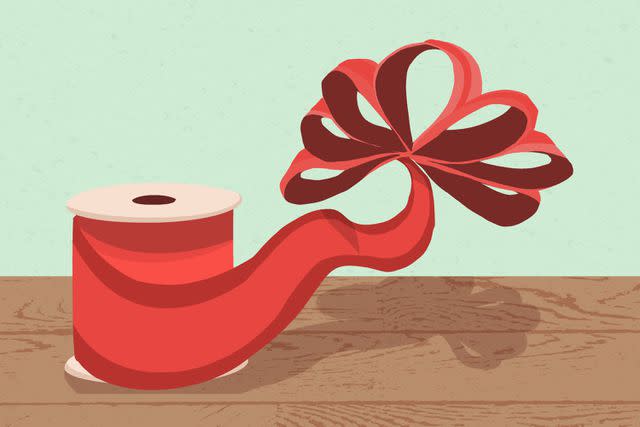
Step 6. Continue creating loops. Repeat this process to create another layer of loops—one on the left side and one on the right side—which should be larger than the previous layer. You can continue repeating this process to create as many layers as you’d like. While you work, make sure to hold the center securely so the ribbon doesn’t unwind.
Kailey Whitman
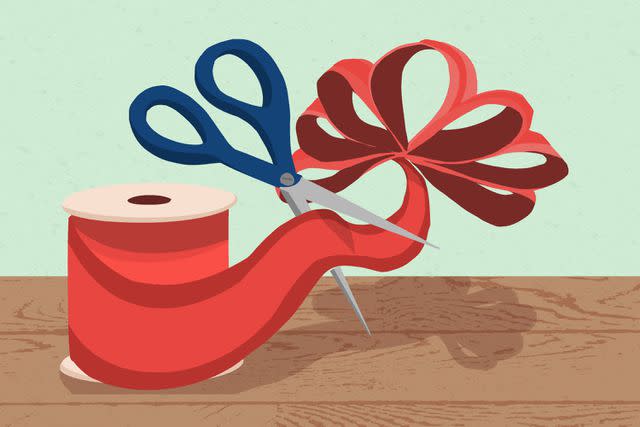
Step 7. Cut the ribbon. Once you’ve reached your desired shape, carefully cut the ribbon to free it from the spool.
Kailey Whitman
Step 8. Place your tails. Take the tail ribbon you cut earlier and fold it in half. Center it directly underneath the center loop of your bow.

Kailey Whitman
Step 9. Secure with florist wire. Run your florist wire through the center loop and wrap it around the bottom, twisting tightly to fasten the tail and secure everything into place.
Step 10. Fan and fluff. Once secure, shape your bow. Some people like the look of stacked layered loops, while others prefer to fan their loops out to create more of a circular shape. This is up to you! The wired ribbon allows you to manipulate the shape as much as you desire, so don’t be afraid to play around with different looks.
Common Mistakes When Making Bows
Learning how to make a bow is pretty straightforward, but there are some common mistakes that can compromise the beauty of your end result. These include:
Not using wire ribbon. This is by far the easiest to work with when making decorative bows.
Mismatched loops. Making one set of loops bigger than the other can create a very obvious imbalance. Take your time and try to be precise.
Not rotating the ribbon. Failing to rotate the ribbon 180 degrees after creating a loop in a multi-layered bow can create inconsistencies in the bow’s appearance. This is particularly important if you’re using a patterned fabric or a fabric where one side is shiny and the other is matte.
Foregoing the loop-fluffing. “The loops can easily slide to one side and deflate, but that can be fixed with just a few adjustments,” Snyder says.
For more Real Simple news, make sure to sign up for our newsletter!
Read the original article on Real Simple.

