What’s the Best Way to Cut a Cake?

I have always suspected I was cutting cake wrong. With the typical segment approach, it’s hard to anticipate the results; the first piece is always ruined, and people who request “just a sliver” usually end up with a crumbly mess. The internet has some truly stupid ideas about how to cut cake (including wine glasses), but other suggestions seem, dare I say, ingenious. To determine the best method, I bravely destroyed several cakes.
Cake Slicing Method #1: Vertical cuts
How to: Using a large chef’s knife, cut a slice off the end that has a good ratio of cake/frosting. Hold a cutting board up against the sliced section and let the slice fall onto the cutting board. Next, cut that big slice into three or four long, skinny pieces, depending on the overall size of the cake and/or the crowd you’re feeding.
Good for: Tall, circular cakes and people who don’t want big pieces or too much frosting. By using the cutting board to catch the slice, you avoid ruining the first piece by pulling it out of the whole cake. This method also makes it way easier to get smaller, more uniform slices.

Bad for: Frosting fanatics. I purposefully tried this method with German chocolate cake, since the exterior chocolate frosting is vastly different from the coconut-studded goop inside. If you don’t love chocolate ganache but do love the dark cake and the nutty goo, this is fine—but we missed the exterior chocolate frosting from the inner slices.
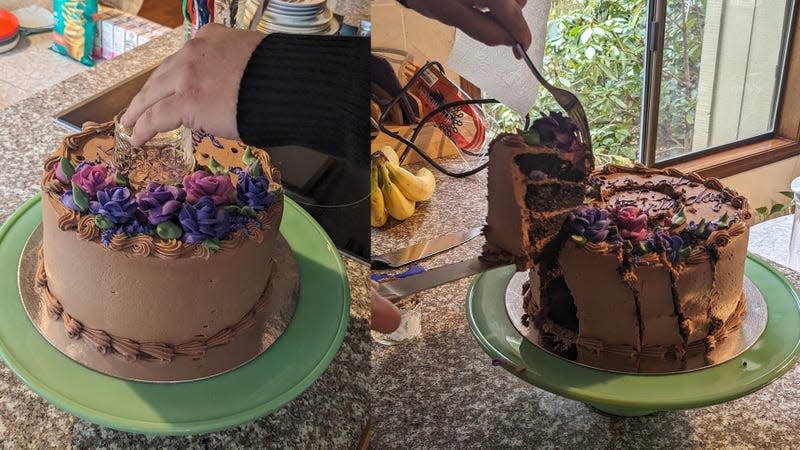
Cake Slicing Method #2: Wedding cake cut
How to: Using a long knife (I used a bread knife), cut a circle in the center of the cake, then cut uniformly thick slices out from around the perimeter in a circular motion. The remaining circular column of cake in the middle can be sliced into the desired number of pieces.
Good for: Wide and tall cakes without a lot of toppings or decor. I tried this one with an 8" two-layer cake. It had flower decorations that the children (and adults) wanted intact, so I had to make a very small circle in the center to avoid them. I used a miniature jam jar to help guide my circular cut. Then, very inexpertly, I cut slices around the perimeter, customizing them to everyone’s specifications (thick slices, narrow slivers, etc.). I did a bad job, but I will say this was my favorite method for achieving even frosting distribution. I didn’t miss the triangular tip that you lose by omitting the center of the cake. In the end, I was the one who ate the center circle slice, and it was about the size of two cupcakes, with enough frosting to satisfy.
Bad for: Smaller cakes. A 6" round cake isn’t stable enough to have a center column removed, nor are the resulting slices big enough (they’re mostly frosting at that point). Compared to other methods, this one also required more skill to get clean, even cuts.
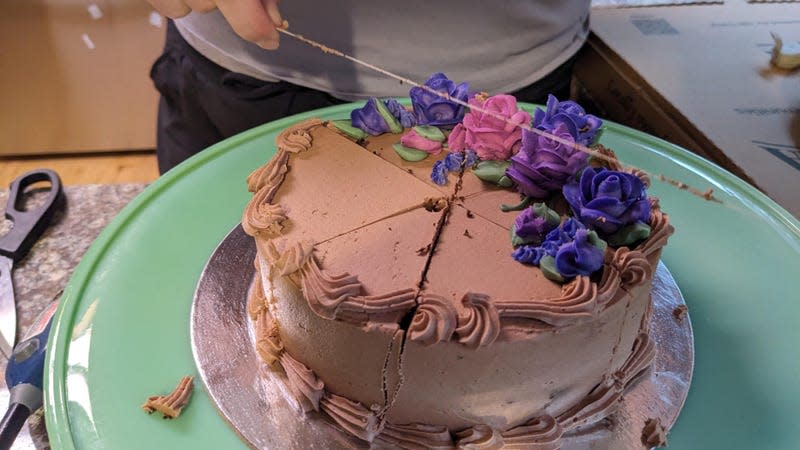
Cake Slicing Method #3: Flossing
How to: Take a length of unscented floss longer than the length of your cake, then press it firmly down into the cake to create uniform, even cuts. I’ve seen dental floss used to halve cake layers for filling, but the idea of using floss to slice a finished cake was new to me.
Good for: Sheet cakes. With one- or two-layer cakes, you can also use the floss to score the top with traditional slice marks for later cutting. I didn’t have unflavored floss, and I didn’t want to go buy more, so I used mint floss on a homemade vanilla almond cake. I’m pleased to report the mint flavor didn’t transfer to our dessert. This method makes clean lines and makes it easier to measure equal slices.
Bad for: Me. Either because of my weak wrists, the thickness of the floss, or the lip of the cake stand, I couldn’t get the floss to go all the way down through the cake. I ended up having to cut it along the lines of the floss. (My neighbor suggested I garrote it next time with proper wire.) I tried the floss method again with a one-layer store-bought cake and had much more success than with the homemade cake (see above). The stickiness of the bottom of the cake comes into play, though: You will still need a pie server for removing the slices.
Cake Slicing Method #4: Center cut and slide
How to: This method, which sounds like a dance move, was invented by mathematician Francis Galton for the purposes of keeping a cake fresh longer. Simply cut a slice from across the middle of the entire cake, removing it to a cutting board with a spatula. Divide that center cut into multiple slices. Then push the remaining two halves of the cake together so the interior isn’t exposed to air.
Good for: Homemade cakes, people with enough fridge space to store the cake whole instead of having to slice it up into pieces for storage. Also good for ruining any intricate frosting designs you might want to keep intact.
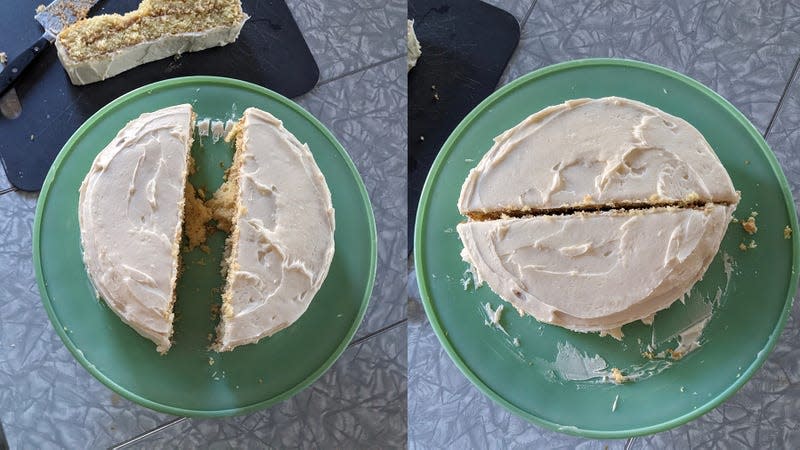
Bad for: Most cakes, honestly. If you get a cake from a bakery, they almost always use frosting to cement the bottom layer to a piece of cardboard. This makes it very difficult to “simply push the two remaining halves together.” I tried it with a homemade cake in the hopes that using no “glue” on the bottom would make it possible. First of all, I had trouble removing the center layer. I did get it with a spatula on each side of the center aisle, but the cake was only eight inches across; if it had been softer or wider, I think I would have lost the middle in a wobbly tumble. As was, bits of the slice stuck to the bottom instead of coming away with the center slice. Cutting up the extracted center slice presents the same results as the sideways method: reasonably sized slices, but not a lot of frosting. Also, pushing the cake halves together ruins the frosting on the side.
To test the alleged freshness of the Galton slice, I left one wedge exposed as a control and closed the gap on the other half. Then I kept it under the glass of my cake stand, not in a sealed plastic container like I would if I’d cut up the whole cake. I went back later to check if the air-exposed side seemed considerably dryer than the smushed together side. Nope! Same texture. I waited overnight. No discernible difference. So, I don’t think this one is worth it.
Cake Slicing Method #5: Tongs
How to: If you like the classic triangular shape, this nutty method says to use a set of tongs backward to cut triangular slices and then pull them out in one motion.
Good for: Small, round cakes; giant, triangular slices; if you lost your knife; if you’re looking to go insane.
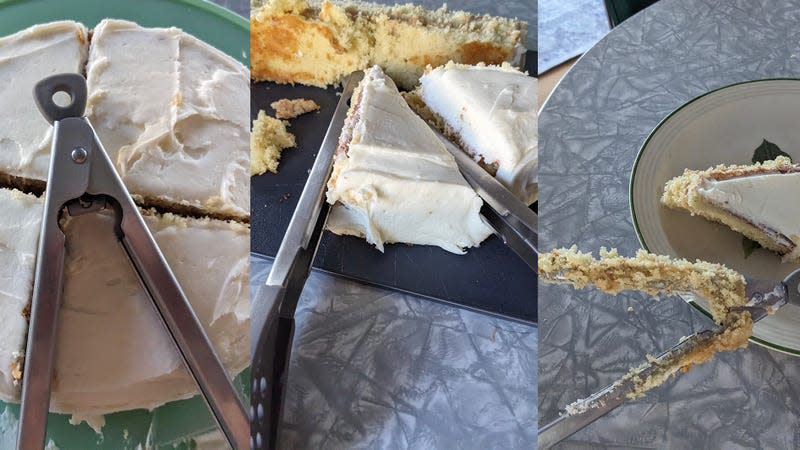
Bad for: Almost all cakes. I didn’t have the catering tongs used in the video, only grilling ones. My neighbors loaned me their “inside tongs,” but these still had springs and a little knob on the end. Unless you have a truly bare-bones set of tongs, the cake makes the tongs disgusting, with frosting and crumbs smushed all up in the springs. Tongs are harder to clean than a knife. Tongs aren’t a sharp cutting utensil, nor should they be. The piece I removed from a circular cake collapsed and fell apart on one side, but did transfer more or less intact to a plate.
When I sent the neighbors a photo of what I did to their tongs, one said, “Sweet Enola Gay! What is happening at your house?!” followed by, “What is this article, ‘If you need to slice a cake on the run, here are 10 useful alternatives’?”
Even I, as someone who really does like a big ol’ piece of cake, found that the tongs method made too big of a slice; it’s impractical for kids and for those who don’t have a huge sweet tooth. As fun as it is to watch videos of tongs cutting cake, this is the worst method of all.

