The Best From Our Tests: A Review of the Solo Stove Pi Fire Pizza Oven
Dotdash Meredith and Yahoo Inc. may earn commission or revenue on some items through the links below.
Solo Stove's new pizza oven is the perfect backyard pizza party machine
TripSavvy / Nathan Allen
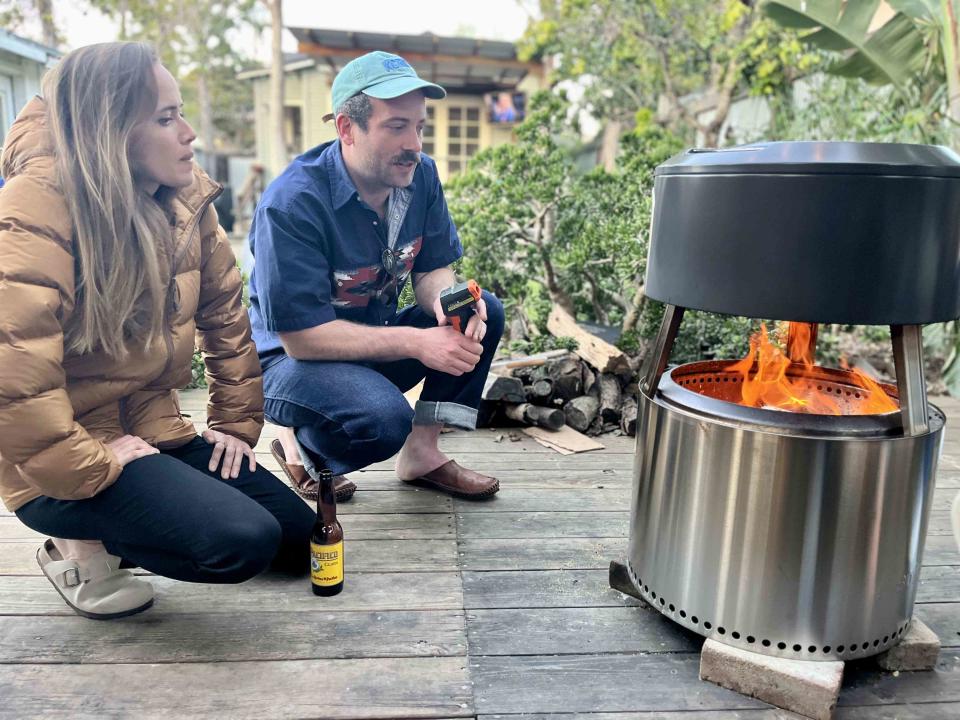
For seven years, I was fortunate enough to have a stone fire pizza oven in my backyard. Alas, the pandemic happened, and I did like many urban dwellers and ditched expensive rents for a more affordable locale, sacrificing my beloved backyard pizza oven. Since then, I've searched for a more portable fire pizza oven. After a couple of years of searching, I've found the ideal backyard pizza oven in Solo Stove's recently launched Pi Fire pizza oven.
The Pi Fire is Solo Stove's second pizza oven but the first that's compatible with three of its portable fire pits—the Bonfire, Ranger, and Yukon. Long legs lift it high above the portable fire pit, allowing users to cook pizza and cook things like s'mores over an open flame. Solo Stove claims the oven's stone reaches the required 500 to 600 degrees F within 30 to 45 minutes of lighting the flame, and pizzas take only five to ten minutes to cook.
We recently put the Bonfire-sized pizza oven to the test, cooking multiple meals for up to a dozen people at a time, and think this is one of the best—if not the best—backyard pizza ovens we've used.
Solo Stove Pi Fire Pizza Oven

A simple setup to quickly get your pizza party started
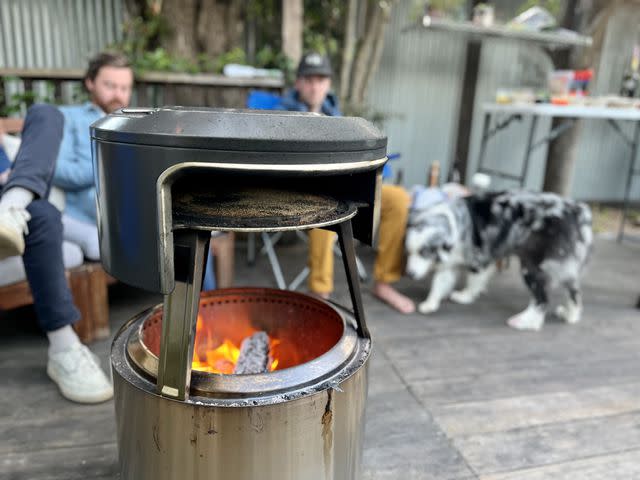
The Pi Fire's setup is straightforward. If you've assembled anything from Ikea, you'll be fine with the Pi Fire. Three legs need to be attached, each with two screws and washers. That's it. If this is your first time using the Pi Fire, we recommend lighting the fire in your portable fire pit and assembling the pizza oven while the fire gets going. Place the Pi Fire on the portable fire pit after its assembled to begin heating the stone for quicker cooking.
The Pi Fire includes a carrying case and heat-resistant gloves, which are clutch. We highly recommend using them while cooking for extra heat protection. We also recommend purchasing Solo Stove's Pi Fire tools (sold in a bundle with the Pi Fire or separately) or buying your own tools separately. A board for placing and removing the pizza is key, as is a flame-resistant spatula to help rotate and remove the pizza from the pit. A laser thermometer isn't as necessary, but it is definitely helpful, especially if you're really trying to hone your pizza cooking.
TripSavvy / Nathan Allen
A simple and chill cooking experience
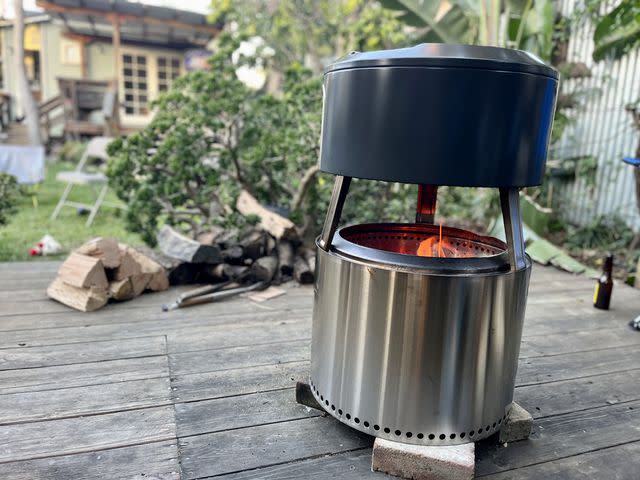
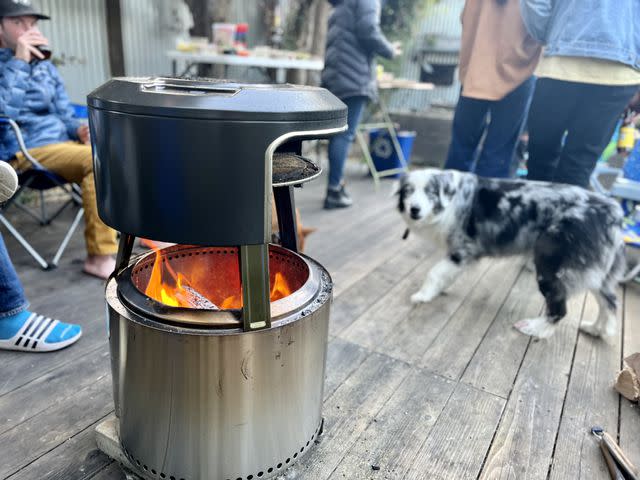
It's easy to romanticize cooking a pizza in an oven over an open flame in your backyard. But those that have tried it know that's not always the case. Certain sides of the pizza can burn while others remain undercooked. It's easy to char both the top and bottom of a pizza. And soot can make its presence known.
But when done right, Pi Fire creates a fun and chill experience. We cooked for about a dozen people over a few hours with only one mishap. While the cooking stone temperature was correct (between 500 and 600 degrees F), we jumped the gun and began cooking our pizza before the flame was back inside the portable fire pit. For those familiar with Solo Stove's system, air from the fire pit walls superheats and re-enters the fire pit, extinguishing the smoke from the flame. But if the flames are too high, the superheated air cannot remove the smoke. When that happens, your pizza will turn black from the smoke. Not ideal.
We recommend taking your time to get the best burn with the proper heat. A laser thermometer is clutch here. Once the fire and temperature are right, the pizza should cook for five to ten minutes. Some pro tips: Spread cornmeal between your pizza crust and wooden pizza board so your pizza easily slides off onto the pizza stone, use a spatula to rotate your pizza multiple times while cooking (the opening on one side creates an uneven cook), and use the spatula to remove the pizza from the oven.
Nathan Allen / TripSavvy
A thorough cleanup is necessary, and easy
Cleaning both your fire pit and pizza oven after use is necessary. Removing ash from the fire pit helps with the product's longevity. And removing soot or cooked-on residue from the pizza oven improves future cooking experiences. Wait till each product has cooled before beginning cleaning. We found using a wire brush while cleaning the cooking stone helpful. We also found cleaning all sides of the pizza oven important to help reduce soot in future cooks.
A couple things to consider
There are a couple of things to consider before purchasing the Pi Fire. First, if you don't already own a Ranger, Bonfire, or Yukon fire pit, you'll need to buy one. Second, while the fire pit and pizza oven come with separate carrying containers, they are both fairly large and can take up a lot of space. Just consider that, especially if you live in a smaller home with little storage space.
Anyone looking to add a little fun and variety to their backyard setup! Solo Stove's portable fire pits alone are good for backyard gatherings. And the Pi Fire pizza oven is excellent if you want to add some fun cooking together during backyard gatherings. We've had loads of fun inviting friends and family over, putting out lots of toppings and doughs, and having people make and share their own pizzas. While the initial investment might be a bit high, it's worth the cost.
TripSavvy / Nathan Allen
Why Trust TripSavvy
Nathan Allen is TripSavvy's senior commerce editor. He's been cooking pizzas by wood fire in backyards for about a decade. Before that, he worked at a local pizza place while earning his graduate degree in Columbia, Missouri. Nathan loves gathering friends and family for outdoor meals and has found the Pi Fire pizza oven perfect for just that.

