How to benchmark an SSD
Whether you're building a new gaming PC or you're upgrading your work laptop with some extra storage, knowing how to benchmark an SSD for performance and drive health is a critical part of any PC owner's toolbox.
Running SSD benchmarks are an important step in confirming the assembly of a PC or upgrade installation, and they can be the only way to confirm defective drives before the grace period for returns to a retailer passes, so they're important for everyone to run, regardless of circumstance.
If you're wondering how to benchmark an SSD properly to ensure your system is in tip-top shape, we're here to walk you through the process.
Method one: Steps for how to benchmark an SSD
Download and install benchmark tools
Run each SSD benchmark test three times and average the scores
Compare your results against manufacturer's performance targets and online results databases
Tools and Requirements
An internet connection
About 200MB for benchmark tool installation
Several GB of free SSD space to perform the test
Skill level: Beginner
Step by step guide
Before we show you how to benchmark an SSD, you need to make sure that your antivirus is up to date. The benchmarking tools in this guide are downloaded from the internet, and it's vital to check anything you download from the internet with the best antivirus software to keep your computer safe.
That said, the sites hosting the benchmarking tools are well known and trusted, so our advising precaution doesn't mean there's anything suspect about the sites or tools in question.
1. Download and install HWiNFO to confirm proper installation

(Image: © Martin Malík, REALiX, s.r.o. / Future)
Head over to the HWiNFO download page and grab the Windows installer for this tool, which we'll use to check drive health and monitor our SSD temperature during testing.
Once you've downloaded and run an antivirus scan on the installer and its confirmed safe, install the tool wherever you'd like, but make sure to launch it after it finishes installing. When you see the small popup window on launch, press start to open up the system information panel.
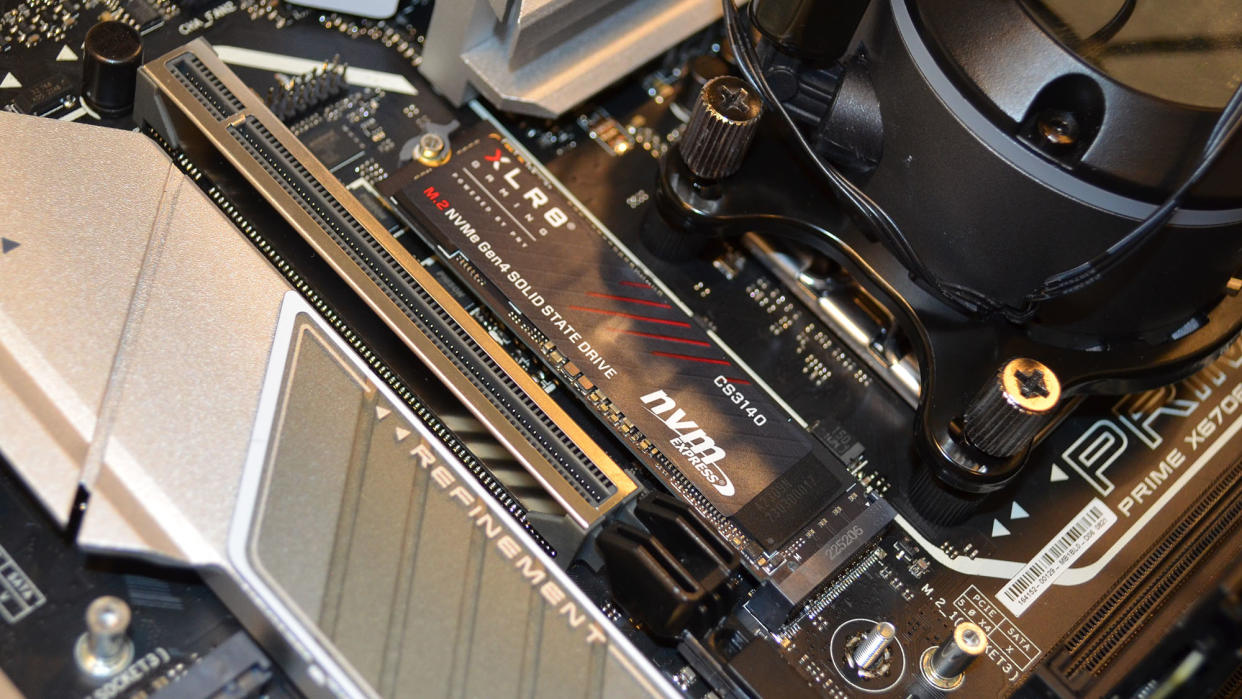
There is going to be a lot of information suddenly on the screen, but the only thing we're interested in is making sure that the SSD is plugged into the right slot on the motherboard or SATA port.
If you are using a PCIe 4.0 or PCIe 5.0 SSD, make sure that the interface for the SSD in the bottom left of the System Summary panel matches the SSD's rated speed.
A PCIe 4.0 SSD will run in a PCIe 3.0 slot, but its speed is going to be greatly reduced. Likewise a PCIe 5.0 SSD in a PCIe 4.0 slot.
For SATA III SSDs, any modern motherboard will only have SATA III ports, but for the odd ducks out there, make sure you're using the properly rated interface for your SSD regardless.
2. Download and install benchmarking tools
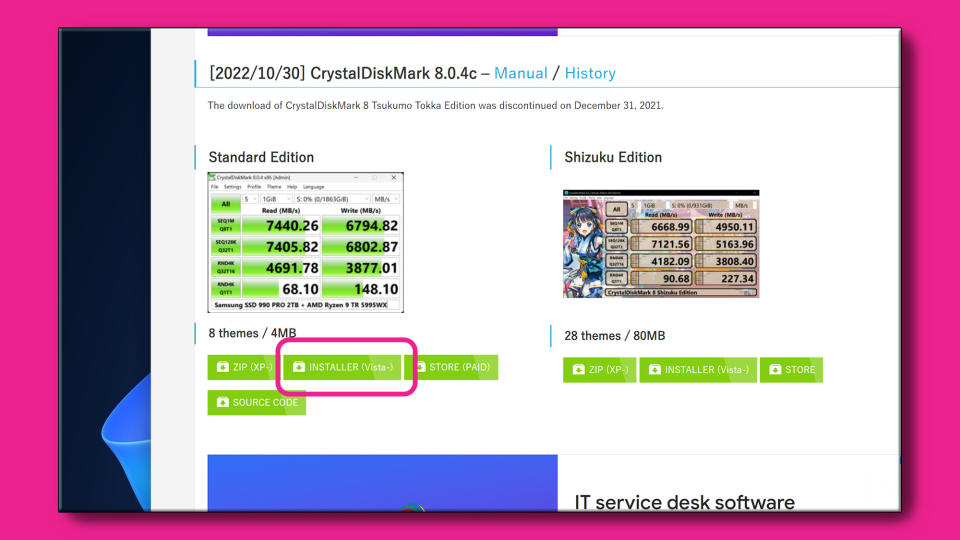
(Image: © Crystal Dew World / Future)
There are several benchmarking tools out there for SSDs, but we're just going to stick with the free ones for now: CrystalDiskMark (download here) and PassMark PerformanceTest (Download here). The former is fully freeware, while the latter is a professional tool that offers a free trial for 30 days, which should be more than enough to get your system in order.
Select the Windows installer for both tools for simplicity's sake, and download them.
After scanning them for viruses and determining that they are safe to run, install the two tools to the directory of your choice.
3. Find your real-time SSD sensor information before testing
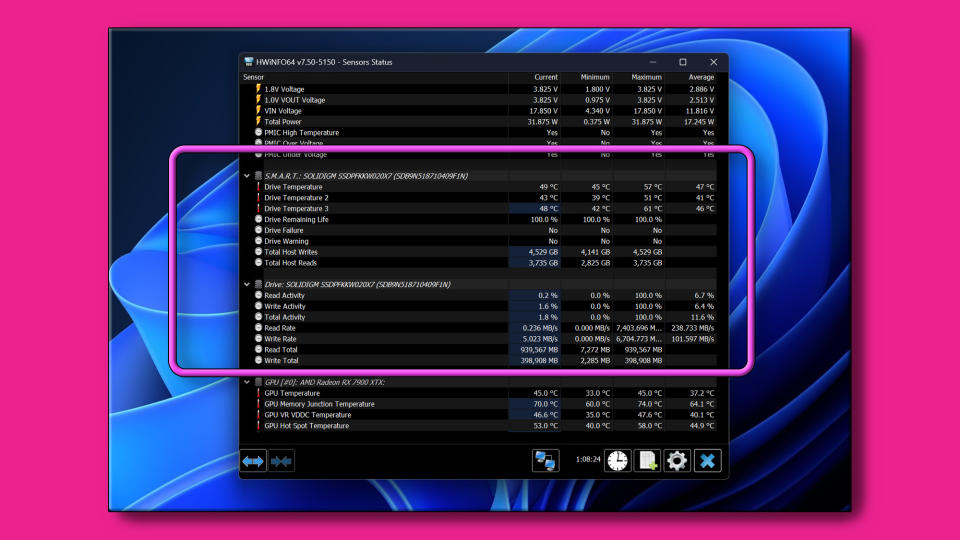
(Image: © Future)
In HWiNFO's main window, you'll see a number of buttons along the top ribbon. Find the one labeled 'Sensors' and click on it. This will open up the Sensor Status screen, which you can move off to the side of your desktop, but leave it visible.
In the sensor list, scroll down until you find the SSD you want to benchmark, which should be prefixed with the label 'S.M.A.R.T.' and a second set of readings under the label 'Drive:'. Note the Total Remaining Life percentage in the S.M.A.R.T. section. For a new SSD, this should be 100%, so if it's lower than the drive might be defective or previously used.
Make note of the maximum temperature column and find Drive Temperature 2 on the list. This is the usually the ASIC controller in the SSD, the part that actually coordinates the read/write/copy operations and it's the part that's most sensitive to heat damage, so you'll want to keep an eye on it.
During testing, if the temperature approaches the maximum safe temperature for the drive provided by the manufacturer, you'll probably need to reseat the SSD with better contact with the M.2 SSD slot's heatsink. This number will be around 70C / 160F in many cases, but check with your manufacturer.
4. Run the benchmarks
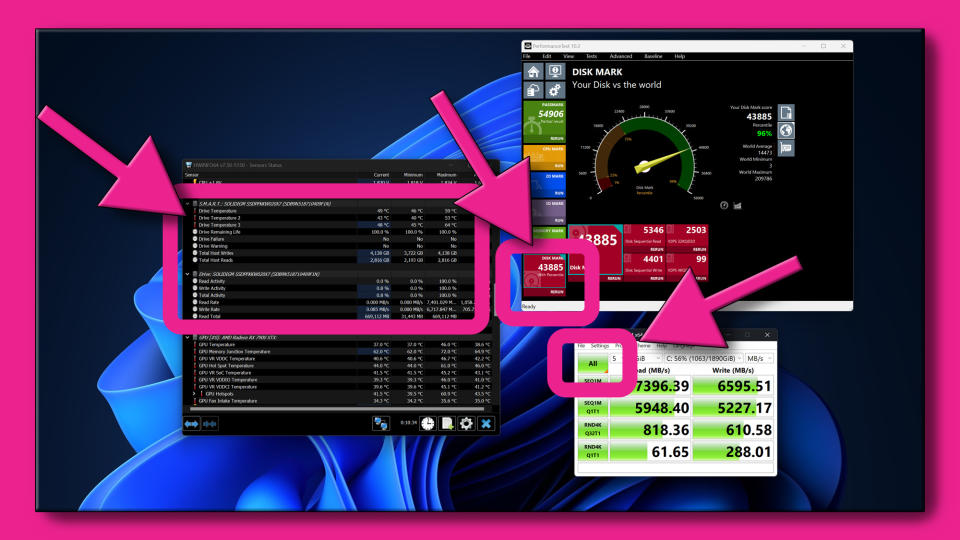
(Image: © Martin Malík, REALiX, s.r.o. / Crystal Dew World / PassMark Software / Future)
Now that you're ready to benchmark your SSD, open up the two benchmarking tools if you haven't already.
For PassMark's Performance Test, you'll want to click the 'Run' label on the bottom of the Red Panel in the testing interface. This will run the Disk Benchmark. You can run other benchmarks or all of them in one go if you'd like, but we're only interested in the Disk test. Once the test is finished, run it two more times and average the three scores to get your final score.
There might be wildly varying scores at first, and if so, you can run the test a few more times until the test results start becoming more consistent, then take the three scores and average them.
For CrystalDiskMark, click the top-left button that says 'All' to run the read and write tests. The top row is the Sequential Read and Sequential Write scores, given in MB/s, and it's these scores we're most interested in.
The other results are important, but the only one I would make a note of is the third row labeled 'RND4K,' which gives the SSD's Random Read and Random Write performance. Note these scores and run the test two more times and average the results.
5. Compare your results with the manufacturer's listed speeds
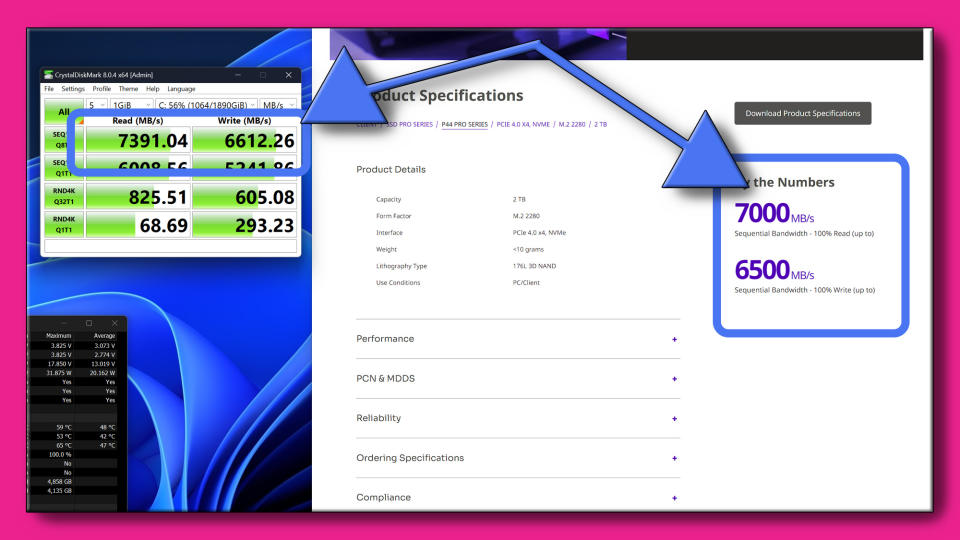
(Image: © Future)
The manufacturer of your SSD will have a speed rating for your SSD, given in MB/s for Sequential Read and Sequential Write. Compare the average speeds you got from CrystalDiskMark and see if your results are at least near where the manufacturer says it should be.
It's okay to be off by a several hundred MB/s (manufacturers tend to cherry-pick the absolute best scores possible to market, so you might not get that level of performance based on your system), but if you're off by more than 1,000 MB/s, then something is definitely hurting performance.
If your results aren't even close to what the manufacturer says it should be, double check that your SSD is in the right motherboard slot and that its peak temperature hasn't spiked too close to the maximum temperature, which could lead to performance throttling.
6. Compare your PassMark score to PassMark's average for your SSD
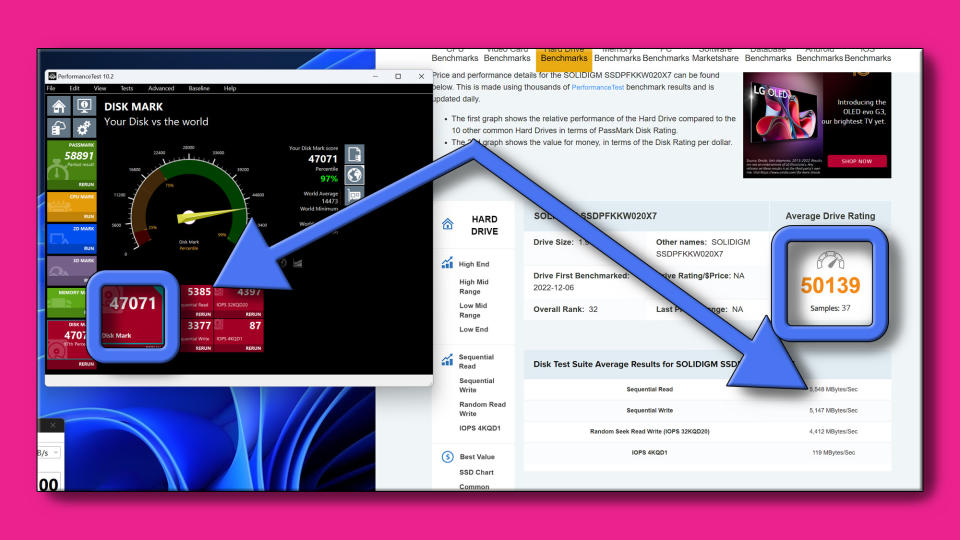
(Image: © Future)
Assuming that your sequential read and write performance is what you expected, navigate to PassMark's database of Disk Benchmark scores.
CTRL+F your SSD's model name to find it on the list (making sure to also find the same drive capacity, as different capacities can perform very differently). Once you've found it, compare your PassMark Disk score to the average score for that SSD. Are they in line with each other? If not, it could be an issue with compatibility, heat throttling, or a cluttered SSD, but if your score is considerably lower, then check to make sure that you've installed the SSD in the right slot and that there weren't any severe temperature spikes during testing.
Final thoughts
If your benchmark results don't line up with what the manufacturer said you should be getting, or your performance is way off from what the average reported PassMark performance for the SSD is listed as, then try reseating the SSD. Double check that you have it in the right slot (consult your motherboard documentation if necessary), and ensure that you have proper thermal dissipation on the SSD if you're using an M.2 slot.
Often times it takes a couple of tries before an SSD is properly installed, so if your SSD is working and should be getting better performance, a little bit of tickering can go a long way – and now that you know how to benchmark an SSD, you can use what you've learned to confirm that you have everything installed correctly.

