A Beginner's Guide to Meal Prep
If you're interested in less-hectic mealtimes, saving time in the kitchen or making healthier food choices, you need to try meal prepping. Meal prep can range from simply preparing freezer smoothie packs for breakfast to cooking complete dinners for the upcoming week. There is no one right way or method to meal prep—it's about what works best for you. And you don't need to spend your entire Sunday in the kitchen to get it done. Even spending as little as 30 minutes planning and prepping meals will make it easier to eat well during the week.
In this guide to meal prep for beginners, we break it down into a few simple steps to help make meal planning and prepping easy.
Read More: How to Meal Prep on Sunday for a Week of Healthy Dinners
How to Get Started with Meal Prep
Read through these simple steps to figure out how to get started with meal prep.
Step 1: Determine the Best Prep Method for You
Depending on your schedule, the meals you prefer to prep ahead, and your cooking style, one (or a combination) of these meal-prep methods may work best for you:
Make-ahead meals: For those with little time to prepare meals during the week, cooking complete meals in advance to be reheated at mealtimes (like a pot of soup or a casserole) makes for super fast weeknight dinners.
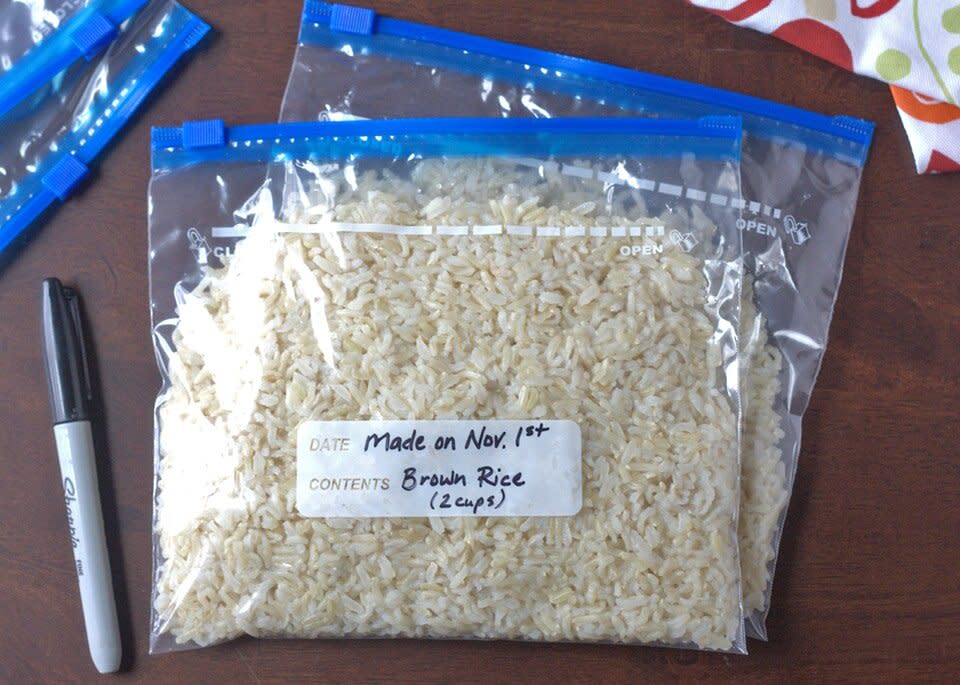
Batch cooking/freezing: Batch cooking is preparing multiple batches of a recipe to be portioned out and frozen for meals in the weeks to come. For example, doubling a chili recipe or steaming extra rice to freeze and use in the next three to six months.
Individually portioned meals: Those with specific health goals or looking for the convenience of grab-and-go meals may choose to prepare foods and portion them into individual servings. Think overnight oats portioned into single-serving containers, and mason jar salads.
Ready-to-cook ingredients: If you prefer to cook meals right before serving, prepping ingredients (e.g., chopping onion and peppers in advance for chili) cuts down on kitchen time, which can be especially helpful on a busy weeknight.
Step 2: Make a Plan
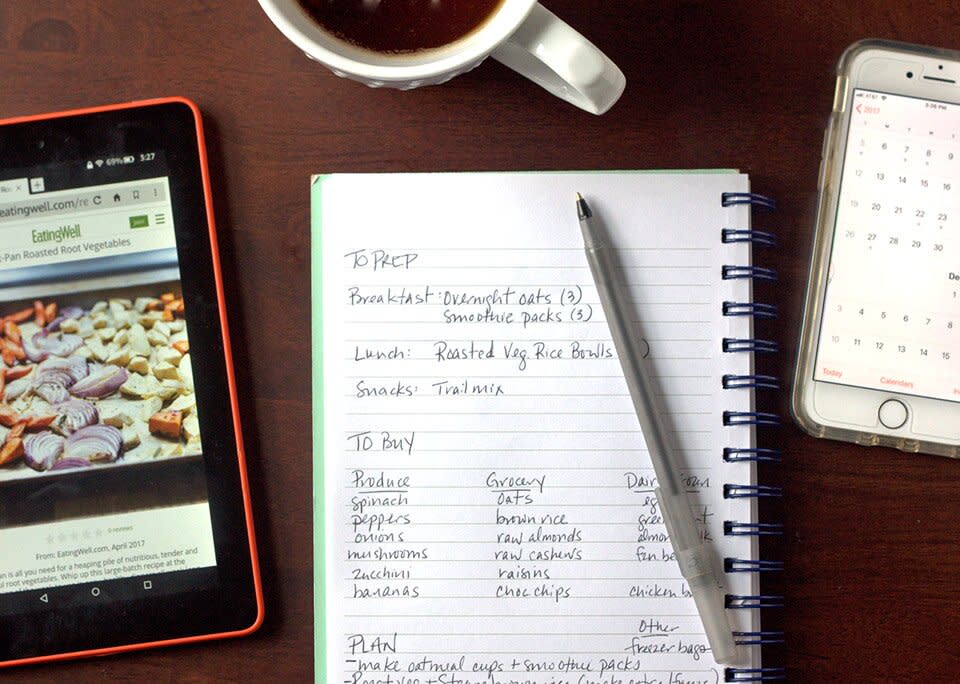
Once you've decided on the type(s) of meal prep you'd benefit most from, spend a few minutes creating a simple game plan to keep you organized. Consider the following as you write a menu and prep plan:
Choose meal(s) to prep: Are you looking to streamline your morning routine? Prepping smoothie packs cuts down on time spent on breakfast. If busy evenings limit time to cook during the week, consider make-ahead dinners that can be easily reheated.
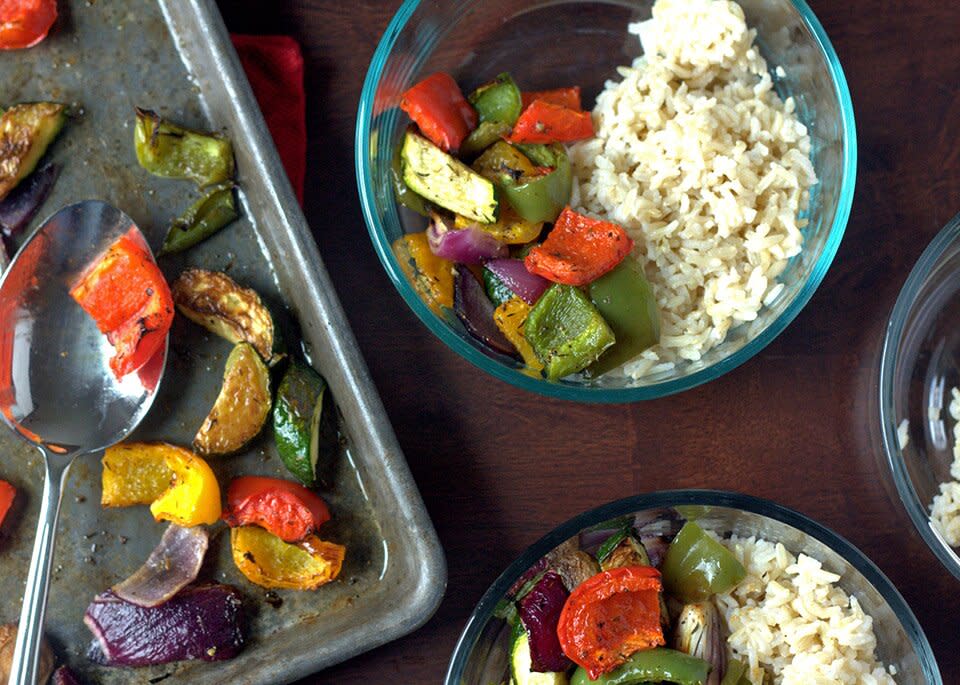
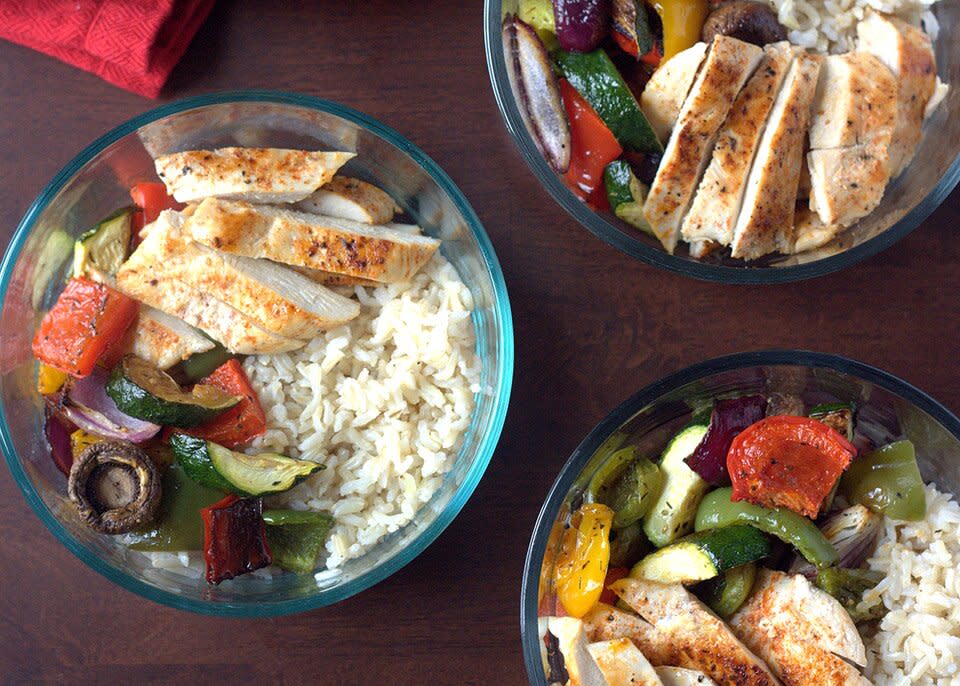
Write your menu: When planning your menu and prep, rely on some tried and true recipes that you've cooked before, with one or two new recipes thrown in. Keeping things simple will help save you time. Build meals around seasonal produce for best flavor and value-think butternut squash in the fall and ripe summer tomatoes. If you're not sure where to start, a batch of brown rice, a few chicken breasts and a tray of roasted vegetables are easily assembled into everything from rice bowls to fried rice to salads.
Schedule your prep: Setting aside some time for actually prepping is important! Consider meal prepping on the same day you shop and write a realistic prep plan. It may not be reasonable to cook five meals in an hour, but you may have time to prep certain ingredients for the recipes. And if you like a challenge, set a timer to keep you on task!
Step 3: Take Stock and Shop
With your menu planned, it's time to build a shopping list. But before rushing to the grocery store, take inventory of your kitchen.
Stock up on staples: Stocking your pantry with a variety of reliable goods-like dried herbs and spice blends and shelf-stable whole grains like brown rice and quinoa-simplifies meal prepping. Low-sodium canned beans and broth, fridge staples like eggs and precooked chicken sausage, and a few freezer-friendly foods can transform prepped ingredients into meals in minutes. You can even base your entire meal plan on pantry staples, like in this 7-Day Pantry Staples Dinner Plan.
Build a better shopping list: Navigate the grocery store quickly with a list organized by department. Keep a running inventory of foods you frequently use during weekly prep, like olive oil, onions or brown rice, and add these to your list when necessary.
Check your supply of containers: Depending on your plan for the week, you will need an assortment of storage containers, including glass and plastic containers with lids and zip-top storage and freezer bags. Consider these container recommendations for packing work lunches.
Related: Your Guide to a Well-Stocked Pantry
Step 4: Prep and Store
We've made it to the fun part-start prepping your meals! Here are some helpful tips to keep in mind before you start chopping:
Make the most of your time: Begin with foods that require the longest cooking times. Preheat the oven and prepare ingredients that will be cooked first. Bring water to a boil for longer-cooking grains like farro or brown rice. If two recipes call for the same ingredient, like chopped onions, prep the onions for both recipes at once, then divide to use as needed. To save the step of needing to wash your cutting board between tasks, cut produce that will be eaten raw first, followed by produce to be cooked. Always remember to use a clean cutting board and utensils after preparing raw proteins, like meat or poultry.
Be mindful of storage life: If stored in airtight containers, cut vegetables like onions and peppers will keep for two to three days in the refrigerator. Heartier vegetables, like chopped carrots and winter squash, will keep for at least four days. Lettuce and greens that have been washed, dried and kept in the refrigerator can stay fresh for up to a week. Cooked vegetables, grains and dishes containing meat, poultry, seafood or eggs should be consumed within three to four days, and be sure to reheat these to 165℉.
Freeze properly for best quality: Foods like soups, chilis, casseroles and cooked grains are easily frozen for future meals. During those crazy busy weeks, there is nothing more gratifying than pulling a ready-to-reheat meal from the freezer!
For soups and cooked grains, cool to room temperature (within 2 hours) and store in quart-size plastic containers or zip-top freezer bags. Leave an inch at the top of containers for food to expand as it freezes. Top casseroles with wax paper and cover tightly in foil. Label and date containers, and set reminders to consume frozen foods within three to six months. Be sure to reheat to a cooking temperature of 165℉ when ready to serve.
Step 5: Enjoy the Fruits (and Vegetables) of Your Labor
With a bit of practice, you will discover a style of meal prep that works best for you. Whether you prep ingredients for one meal, prepare work lunches for the week, or cook a double batch of chili to freeze for next month, any amount of time spent meal prepping yields big returns. If you're in need of menu inspiration, check out our library of meal plans and find one that works best for you.
Related: How to Meal Prep a Week of Healthy Lunches in under an Hour

