If you ask me, shooting video is easy – it's the audio that makes vlogging complicated!
On YouTube, people complain about poor audio quality far more often than poor video. If there's one thing guaranteed to stamp your video content as 'amateur', it's bad sound. Good audio can make average video look professional, while bad audio will wreck even the best video footage.
So what is 'good' and 'bad' audio? Well, it's the difference between what you hear from your camera's inbuilt mic when your subject is metres from the camera – faint, tinny and often overwhelmed by ambient noise or wind buffeting – and what you hear in a professional news broadcast or interview, with clear speech, rich sound depth and little or no background noise.
But getting the audio right is every bit as complicated as getting video right, with a complex choice of mic types, connection options, booms, blimps and whole range of other audio paraphernalia. Even the best YouTube cameras or best cameras for vlogging need the help of a good mic.
Get your (audio) priorities right
We devote endless attention to stabilization, bitrates and codecs. We fret endlessly over focus breathing, subject tracking and log profiles. As photographers, we're pre-occupied with the visual, when the audio is every bit as important and needs just as much work.
For photographers, the world of audio and microphones is uncharted territory. Do you need an on-camera microphone or a wireless lav? Should you get a condenser mic or a dynamic mic for your podcast? Why are some mics analog and some digital, and why do the best XLR mics not plug straight into your camera?
It's not just about getting the best microphones, it's about getting the right mics. So here's a brief and no doubt highly oversimplified guide to mics for photographers struggling not with video, but the audio that goes with it:
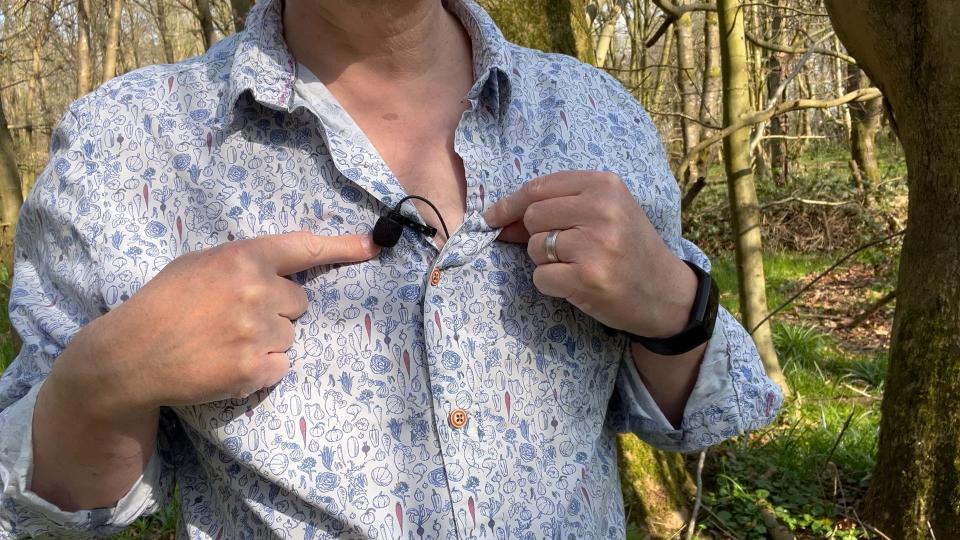
1. The mic should be near the thing it's recording. If you're filming a person, a little lavalier or lapel mic that clips to their clothing will do the job admirably. If they are a little way from the camera or you don't want the clutter of cables, use a wireless mic setup. If you can't put a mic on your subject, put one nearby whether it's a wireless transmitter with in-built mic or a directional mic of the sort that can be used either off- or on-camera. Check out our guide to the best wireless mics.
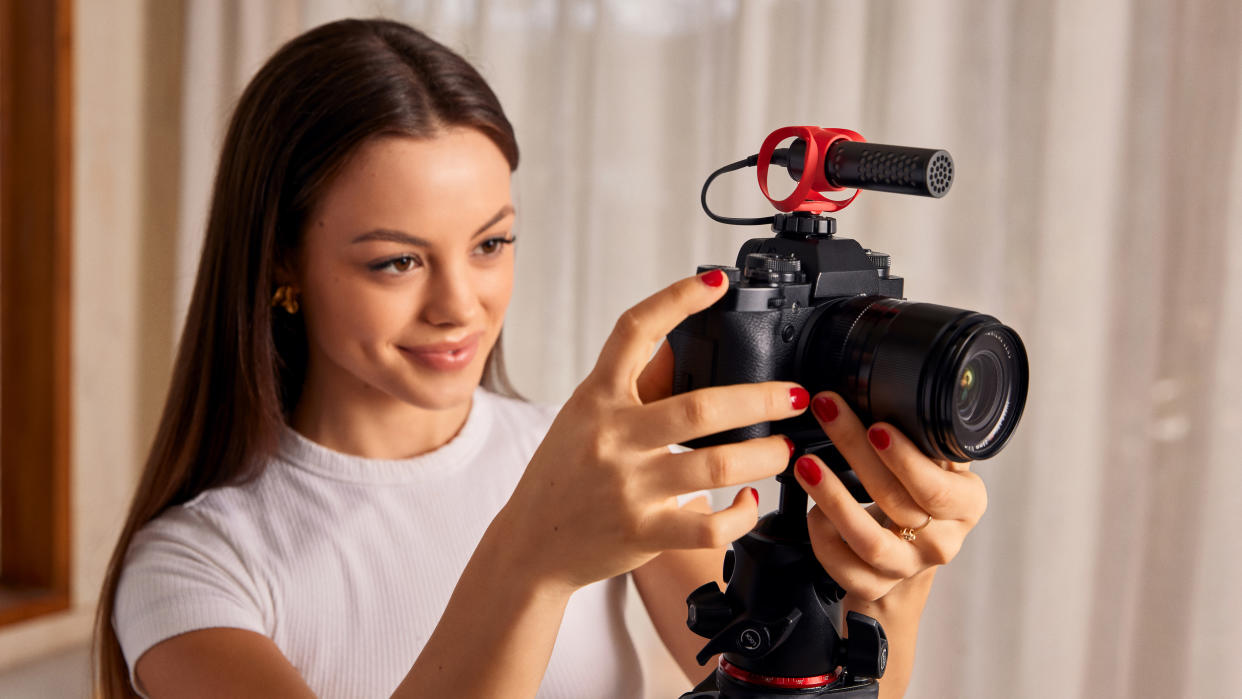
2. If you can't get a mic on or near your subject, a shotgun mic may work. These are highly directional, like a telephoto superzoom but for audio not images. You might see them on boom arms over studio sets or being pointed handheld by wildlife photographers. Really, these are specialist professional mics.
3. On camera mics are the most common sort and definitely better than nothing, but not a complete answer. They might look like 'shotgun' mics but they are not the same thing. They are more directional than the camera's built-in mics, but their range is limited and they are not immune to background noise. The best on-camera mics can record good audio if your subject is not too far away, and can also be detached from the camera and moved closer, though you'll need a cable extension.
4. Wind is your enemy [insert your own joke here]. It creates loud buffeting sounds that can completely swamp your audio. Anyone who's shot with a smartphone or camera will know that. The foam windshields supplied with on-camera mics will help, a bit, but furry wind mufflers are more effective. These may look like comedy items but they are an essential accessory for much outdoor sound recording.
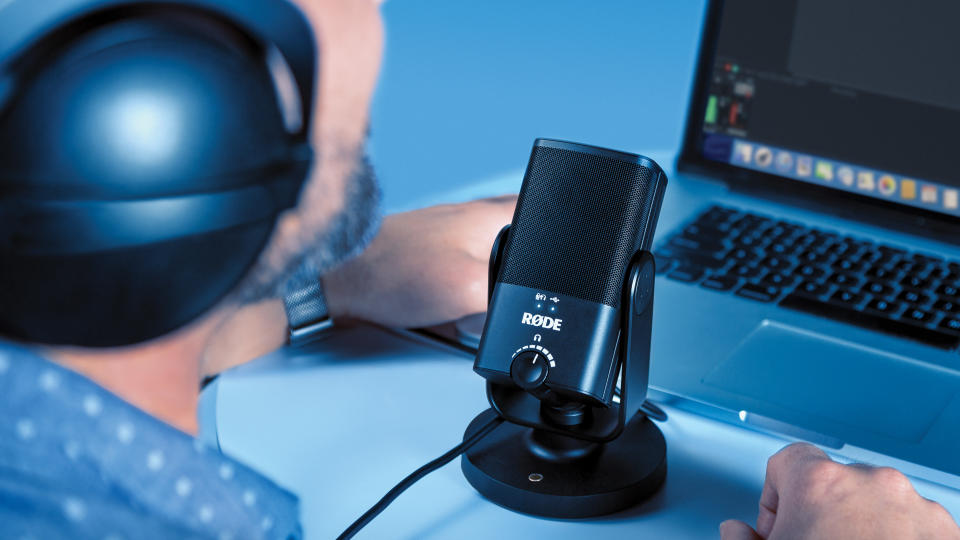
5. It's unlikely you will find a single mic for everything. Typically you might have a wireless mic/lav kit for when there's time to get your subjects mic'd up and an on-camera directional mic for when there isn't – plus a desktop USB mic for podcasting or studio-based YouTube videos.
6. External audio recorders can be useful. You can put these on a desk or next to your subject to record audio separately, then combine the audio with the video when you do your editing.
7. Voiceovers added later are a great fallback for when you can't get the audio right in situ. It's easy to add a voiceover in the editing phase, using a good-quality mic indoors to 'talk over' your video and replace the existing audio, maybe even adding in some music.
There will be plenty of audiophiles who prefer the sound of one mic over another, and it's no doubt true that some will give richer, nicer sounds than others. But this is all detail and finessing. The key thing is to get the right kind of microphone in the right place when you do your filming.
So in between comparing camera specs and video capabilities, do spare a thought for audio. It can take just as much work and there's a lot to learn, but it's as important as the video footage itself.

