Around the Clock Photos of Yosemite Sunrise, Sunset and Stars
This article originally appeared on My Yosemite Park
As a photographer, you'll be hard pressed to find time to sleep when you visit Yosemite. This park offers spectacular opportunities for photography all day long from when the first rays of light crest the horizon, to when the sun melts into the mountains and paints the sky pink, to when the stars come out. Each time of day comes with unique conditions for photographers, so we've compiled our favorite locations and tips from Tamron on how to get the best photos of this park.
Sunrise at Valley View
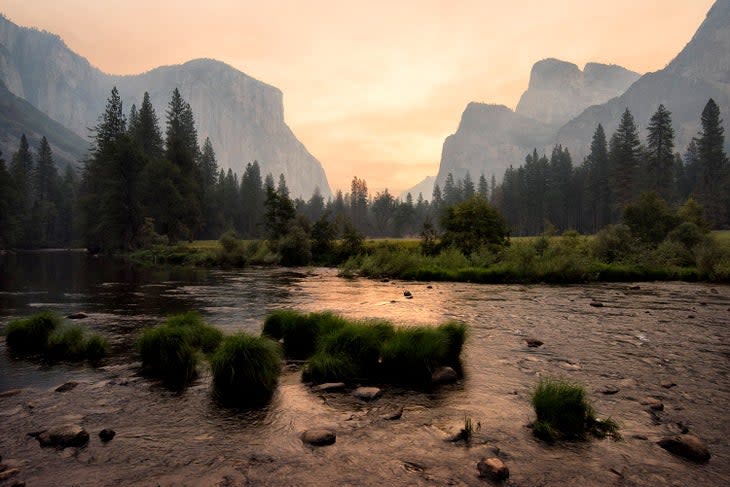
While there's no shortage of stunning viewpoints in Yosemite, Valley View makes for one of the best to capture sunrise from. Located on the western end of Yosemite Valley, this viewpoint overlooks the Merced River with views of El Capitan, Sentinel Rock, Cathedral Rocks and Bridalveil Fall in the background. It's located along Northside Drive, the one-way road leading out of Yosemite Valley. Use caution around the river, especially in the spring when it's running swiftly.
Arrive 45 minutes before sunrise to give yourself time to set up and capture all the stages of dawn before the sun finally appears. Be sure to bring a headlamp.
Tamron Tips: Clean the front element of your lens when shooting into the rising sun. If there's dirt or dust on your front element, you might end up with lens flares in your image. Sunrise is usually a high contrast situation, so be sure to expose for the highlights to maintain detail. To create a starburst effect with the rising sun, stop down your aperture to f/16 or f/122 and wait until the sun just crests the horizon. A wide-angle zoom lens like the Tamron 17-28mm F/2.8 Di III RXD or the 28-200mm F/2.8-5.6 Di III RXD is a great choice for both sunrise and sunset.
Sunset at Glacier Point
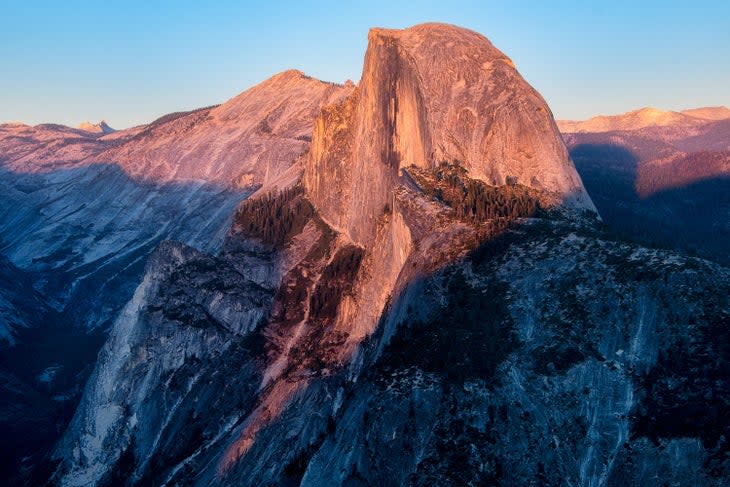
Capture sunset from one of the most iconic spots in the park. Glacier Point is set up high, offering sweeping views of Half Dome, Yosemite Valley, Yosemite Falls and the Sierra Nevada as far as the eye can see. A large, paved overlook provides plenty of places to set up your tripod and easy access back to the car after dark. Repairs are being completed on Glacier Point Road in 2023, so delays of 30 minutes should be expected. Factor this into the normal one-hour drive time from Yosemite Valley when planning your sunset mission. Aim to be at Glacier Point 30-45 minutes before sunset to give yourself time to set up.
Be sure to stick around after the sun sets and the colors begin to fade for blue hour. This time of day is the hour just before sunrise or just after sunset when a beautiful blue tint envelopes the landscape. It's a great time to take photos.
Tamron Tips: When shooting sunset, set your aperture to f/16 or f/22 to maximize your depth of field. If you're using a tripod, use the lowest ISO to maximize quality. If you're hand-holding, set your ISO to the lowest value that allows a fast enough shutter speed to get a clear image.
Night at El Capitan Meadows
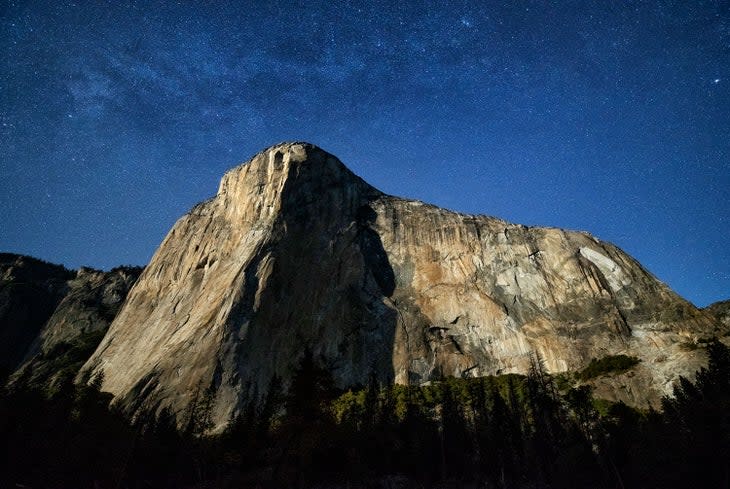
Thanks to its commanding rock formations providing a sense of place, Yosemite is an excellent park to try your hand at night sky photography. Valley View or Glacier Point would also be great spots to capture the stars, but for a unique shot, head to El Capitan Meadow between sunset and midnight or so on a night close to a new moon for the darkest skies. In addition to capturing stars over the imposing face of El Capitan, spring through fall you'll likely also catch a strange-looking scene. While it might appear that stars have fallen onto the rock, it's actually the headlamps of climbers camped out on routes on the formation's granite faces. A headlamp with a red light will be helpful for setting up your gear in the dark while still preserving your night vision.
Tamron Tips: A fast aperture, wide angle lens like a Tamron 17-28mm F/2.8 for full-frame or 11-20mm F/2.8 for crop-sensor is best for night photography. Settings will vary based on conditions, but you'll likely want to shoot at f/2.8 at an ISO between 1600-6400 and a shutter speed between 10 and 30 seconds. Be sure to have a stable tripod and shutter release or remote timer so you don't shake your camera while taking a long exposure, and turn off your lens' image stabilization.
You'll likely need to manually focus as your auto-focus won't be effective in the dark. Use the magnifier on your camera's LCD screen to enlarge a bright star or planet, then move your focus ring back and forth until the point of light is sharp. Zoom in on your first few images to make sure the stars are sharp. You can use a piece of tape to secure the focus ring, so you don't accidentally bump it out of focus.
These tips were sponsored by Tamron. Learn more and find your perfect camera lens at tamron-americas.com.
For exclusive access to all of our fitness, gear, adventure, and travel stories, plus discounts on trips, events, and gear, sign up for Outside+ today.

