How to Can Apples for Pies, Applesauce, and More
Preserve apples for pie filling, applesauce, apple butter, and all your favorite apple recipes by following this simple canning guide.
Going to the apple orchard to pick fresh apples is a must for anyone's fall bucket list. But, once you get home and enjoy those crisp apples raw or in the form of a delicious sweet or savory recipe, you might find a few too many apples left in the fruit basket. No need to let those apples go to waste. It's time to can apples.
You'll use a boiling-water canner and follow the usual canning procedures, whether canning apple slices, applesauce, or apple pie filling. Follow our easy steps below to learn exactly how to can apples to stock your pantry. That way, you can enjoy a fresh apple dessert even in the middle of summer.
Related: The 21 Best and Safest Canning Recipes for Newbies and Experts
How to Can Apples
The best varieties for canning apples are crisp, not mealy, types. Some of the best apples for canning include Fuji, Braeburn, Jonagold, Granny Smith, Golden Delicious, Pink Lady, Jazz, Honeycrisp, and Cortland. Once you're ready to can apples, follow these basic instructions to can apple wedges, then keep reading to learn how to can applesauce and apple pie filling. You may never need the canned aisles of the grocery store again.
Download Our Apple Canning Chart
Step 1: Prep the Apples
As with canning any fruit, start with ripe, unblemished well-washed apples. Then peel (if desired or specified in the recipe), core, and cut apples as directed in your canning recipe.
Test Kitchen Tip
Once peeled and cut, apples begin to discolor. Treat them with ascorbic acid produce keeper according to the package directions or with lemon water to keep them from discoloring. To make lemon water, combine 1 gallon water with ¾ cup lemon juice, place apples in solution, and drain before continuing.
Step 2: Make the Apple Canning Syrup
Most canning recipes will include syrup already, but if you want to make basic syrup or don't have a recipe, here's how to make it. First, choose the sugar level you want and place the following ingredients in a large saucepan. Heat until sugar is dissolved. Skim off foam, if necessary, for a clearer syrup.
Very Thin or Very Light Syrup: Dissolve 1 cup sugar with 4 cups water to yield 4 cups syrup. Use this for already sweet fruits or to cut down on sugar.
Thin or Light Syrup: Dissolve 1⅔ cups sugar with 4 cups water to yield 4¼ cups syrup.
Medium Syrup: Use 2⅔ cups sugar and 4 cups water to yield 4⅔ cups syrup.
Heavy Syrup: Use 4 cups sugar and 4 cups water to yield 5¾ cups syrup.
Related: How Do You Measure Sugar Correctly? Here's How and Why It Matters
Step 3: Make the Hot Pack
Hot pack is the preferred way to can apples in a boiling-water canner. Once you've made your syrup, add your prepared apple pieces to the syrup in the saucepan. Simmer apple pieces in the syrup for about 5 minutes (or as directed by the recipe), stirring occasionally.
Test Kitchen Tip
Why hot pack? Precooking apples breaks them down to eliminate air, making them less likely to spoil, and so they won't float in the can. Also, more apples can fit in fewer jars, and there's reduced processing time because the food is already hot.
Related: 6 Rules for Canning You Should Never, Ever Break
Step 4: Add Apples to Jars
Pack hot apples and syrup into sterilized jars, leaving a ½-inch headspace. Wipe jar rims and threads with a clean, damp cloth to remove residue. Set lids on the jars and screw on the bands.
Step 5: Process Canned Apples
Process pint and quart jars of filled apples in a boiling-water canner for 20 minutes (start timing when water returns to a boil).
Water Bath Canning Basics to Preserve Your Produce for up to a Year
Step 6: Cool and Store Canned Apples
When the processing time is up, turn off heat. Use pot holders to lift the canning rack and rest the handles on the side of the canner. Allow jars to cool in place for a few minutes. Remove jars from canner and set on a wire rack or towel on the counter. Do not tighten bands. Let cool 12 to 24 hours, then test lids for seal. If a seal fails, store that jar in the fridge and eat it within a few days. Store everything appropriately sealed in a cool, dry place for one year.
Related: Canning and Freezing Fruits
How to Can Applesauce

Canning applesauce is similar to how you can apples. Follow the above directions for prepping and processing apples, but you'll first boil apple quarters until very tender, then press boiled apples through a food mill or sieve to make a pulp. You'll make your hot pack with the apple pulp to ladle into jars (leaving the same ½-inch headspace) to process.
Get the Canned Applesauce Recipe
How to Can Apple Butter
Apple butter is similar to applesauce, only cooked for longer to develop a more robust apple flavor and deeper color. Use this guide to make apple butter with our apple butter canning tips.
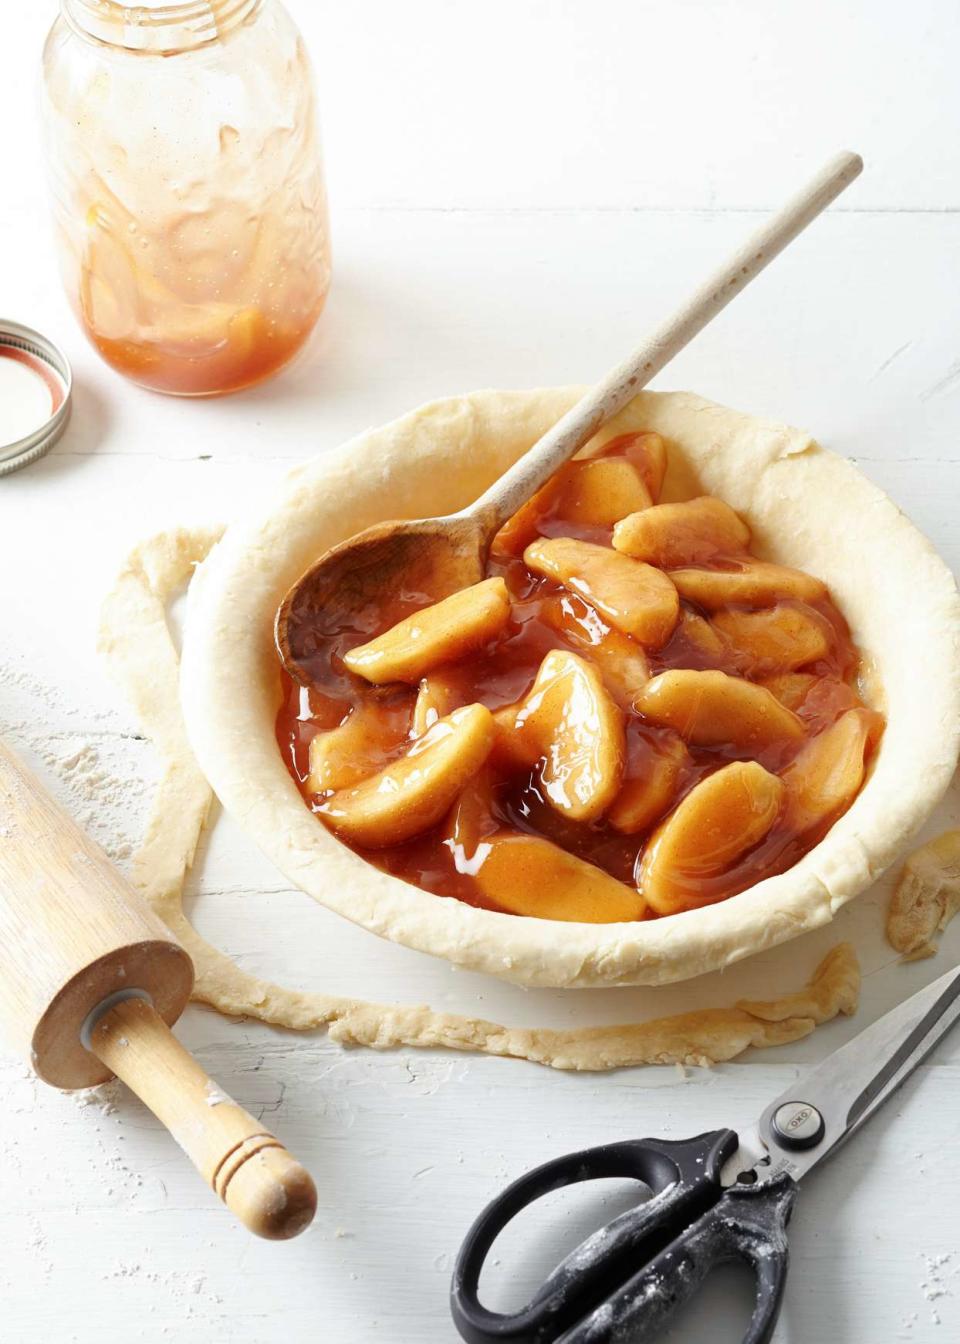
How to Can Apples for Pies (aka Apple Pie Filling)

To can apples for pie, you'll pre-cook the apples ever so briefly before making your hot pack of sugar, cinnamon, salt, canning starch, apple juice, and desired flavorings. Fill jars as usual, leaving 1¼-inch headspace, and wipe jars. Canning apple pie filling requires slightly longer processing (25 minutes). Then remove and cool as directed above.
Try Our Canned Apple Pie Filling Recipe
Test Kitchen Tip
When canning homemade pie filling, you need a thickener that won't break down under high heat and in high-acid conditions. We recommend regular (not instant) Clear Jel starch.
Use your canned apples all year to make your favorite recipes. Try our best apple pies and tarts, or enjoy the warm spice flavors in these pie-inspired desserts.
For more Better Homes & Gardens news, make sure to sign up for our newsletter!
Read the original article on Better Homes & Gardens.

