Get the Ansel Adams look in Photoshop
- Oops!Something went wrong.Please try again later.
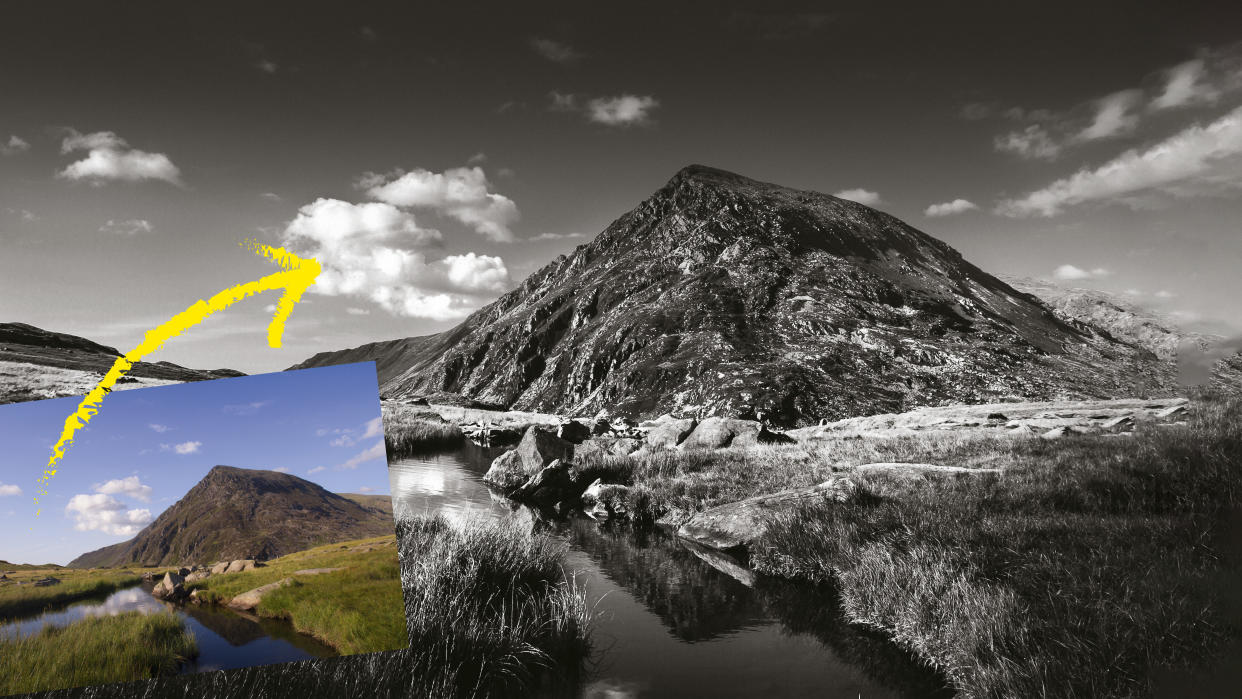
When we talk about great landscape photographers, Ansel Adams has to be the first name on the list. His starkly beautiful images of the American wilderness displayed flawless technique and a uniquely crafted vision. Most of his work made use of monochrome film; lens-mounted filters (usually yellow or red) to emphasize skies; and darkroom techniques that added contrast and controlled detail.
All of these great effects are simple to recreate. The first step is to convert our image to mono. Some methods for this are better than others. The best tools give you control over the brightness of individual color ranges in the image during the mono conversion. One such tool is the HSL panel in Camera Raw, within Photoshop. Just as Adams used filters, we can use HSL to control color brightness for a dramatic sky. Our technique differs slightly from the normal approach to Camera Raw mono, in that we’ll use HSL’s saturation sliders for greater control.
Adams’ prints were painstakingly crafted using his Zone System to ensure the best gradation of tones. Similarly, we can use Photoshop tonal tools to ensure we have rich shadows and delicately detailed highlights. Adams wasn’t averse to a little dodging and burning, despite his emphasis on ‘pure’ photography, so we’ll follow suit.
You can follow along using our start image (click to download the image to your computer as a Zip file), or use your own image. NB the exact values in this step-by-step guide will need to be adjusted if using your own image.
Step 1: Fix the fringing
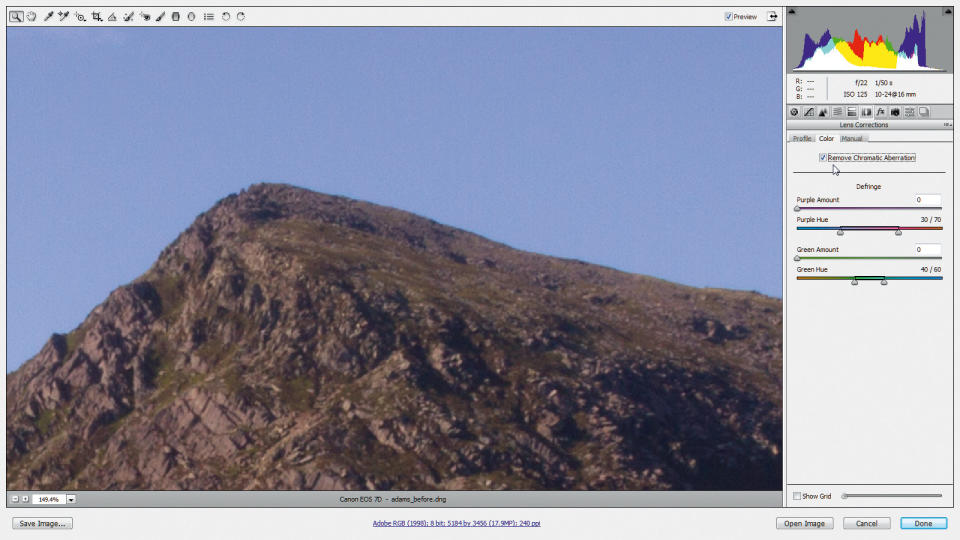
Navigate to our tutorial image in Bridge, right-click and choose Open in Camera Raw. We’ll start by quickly fixing the fringing you find in areas of high contrast, such as where the mountain meets the sky. Click the Lens Correction panel on the right, then go to the Color tab and tick Remove Chromatic Aberration.
Step 2: Remove the color

Click on the HSL Panel, then go to the Saturation tab. Drag all eight sliders back to -100. The reason we’re removing color like this rather than ticking Convert to Grayscale is that this way we can use the Temp, Tint, Saturation, and Vibrance sliders to fine-tune the look of the black and white later.
Step 3: Darken the blues

Click the Luminance tab, then use the sliders to change the brightness. We want to darken the sky and lighten the foliage, so set Oranges to +84, Yellows to +65, Greens to +54, Aquas to -65, Blues to -58 and Purples to -58. Use the Targeted Adjustment tool to drag over the image to change colors.
Step 4: Add a grad
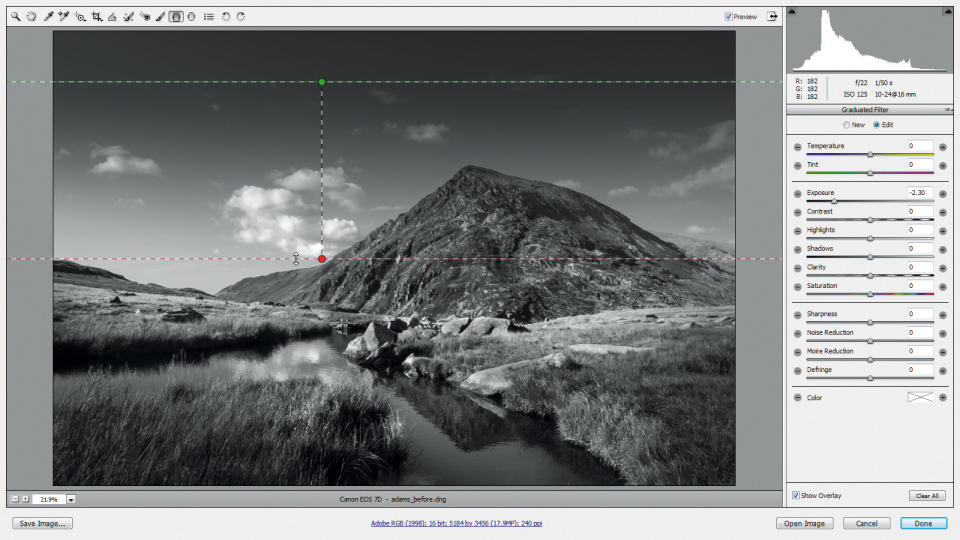
Grab the Graduated Filter tool from the Toolbar, then click and drag down from near the top of the image towards the middle. Hold Shift as you drag to keep the line vertical. Next, go to the Graduated Filter sliders on the right and set Exposure to -2.30. Make sure all the other sliders are set to their default values.
Step 5: Set white and black

Click the Basic panel. Set Contrast to +18, Shadows to +24 and Clarity to +18. Hold Alt and drag the Whites slider right until you see areas appear in the image. Set the Whites to a point just before the areas appear, at about +17. Do the same for the Black slider by dragging until the areas disappear at about +10.
Step 6: Play with temperature
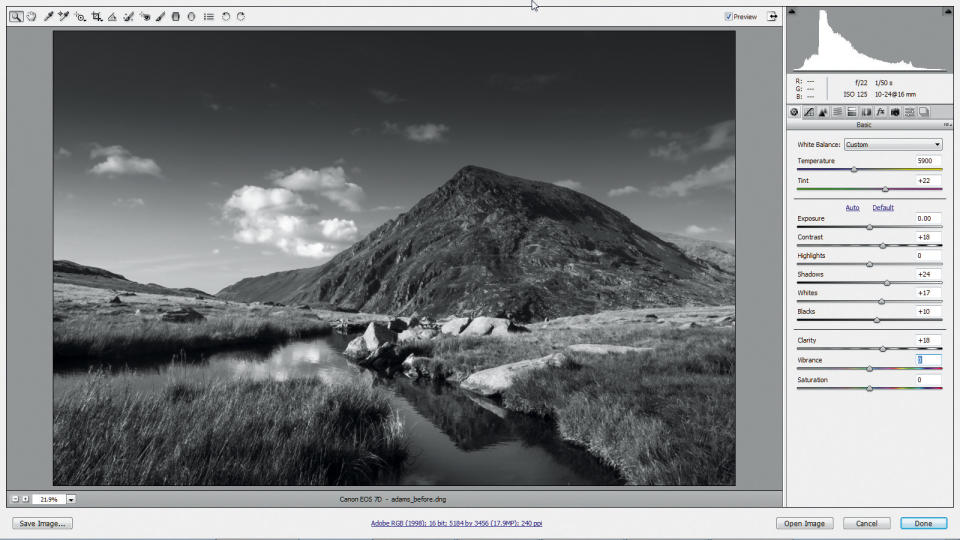
Now we can use the Temperature and Tint
sliders to fine-tune the black and white conversion. By dragging the Temperature slider to the left, we can shift the colours, which results in a different black-and-white look. Next, set Temperature to 5900 and Tint to +22.
Step 7: Increase the saturation

We can also use the Saturation and Vibrance sliders to vary the contrast and intensity of the mono effect. Set Vibrance to +18 and Saturation to +58. The changes are quite subtle, but add to the control you have over the look and punch of the black-and-white effect.
Step 8: Add more punch
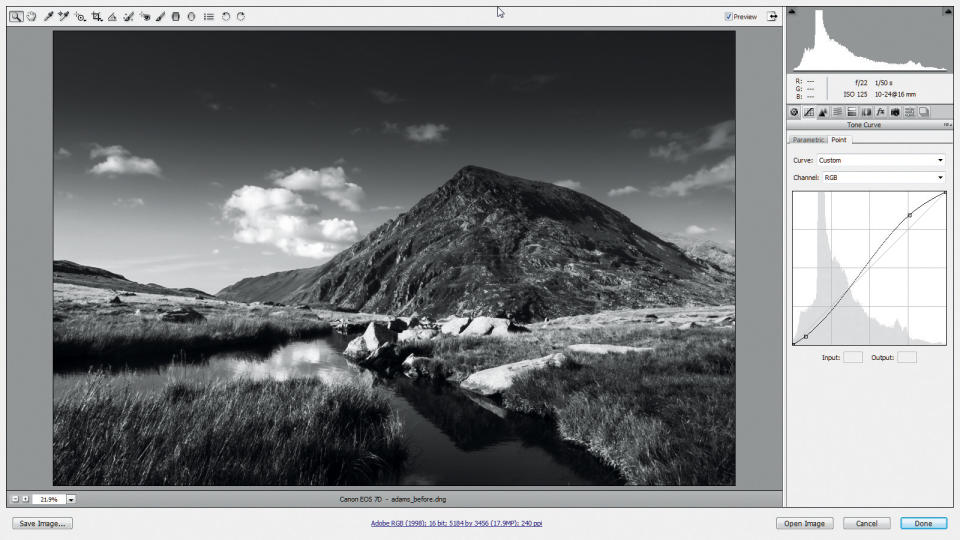
Click the Tone Curve panel and go to the Point tab. Click to add one point near the top right of the diagonal curve line, and drag up to lighten the image. Add a second point near the bottom left of the line and drag it down to darken the shadow tones, increasing contrast.
Step 9: Paint an adjustment
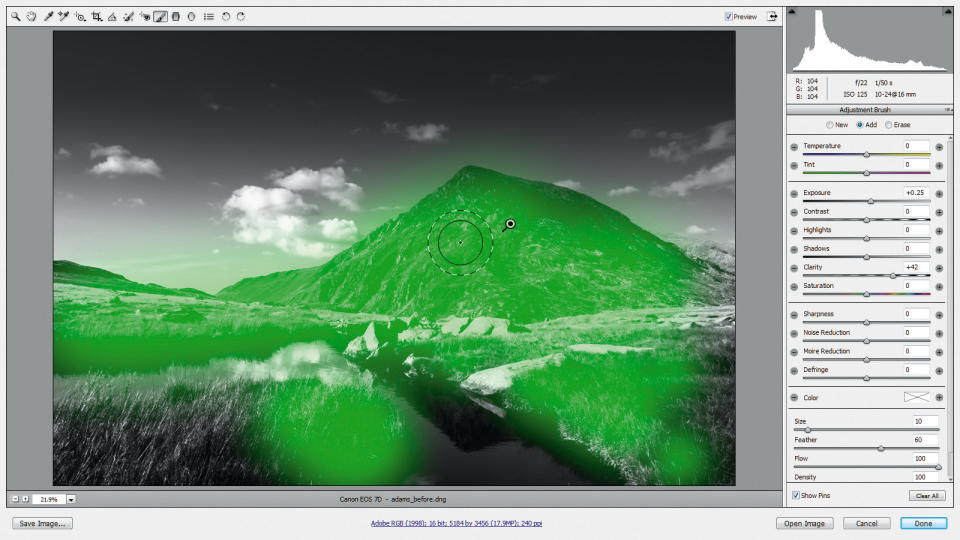
Grab the Adjustment brush from the Toolbar. Paint roughly over the mountains and the foreground. Use ] and [ to resize your brush as you paint and press Y to toggle the mask overlay on and off. Set Exposure to +25 and Clarity to +42 to change the area covered by the mask.
Step 10: Lighten the water
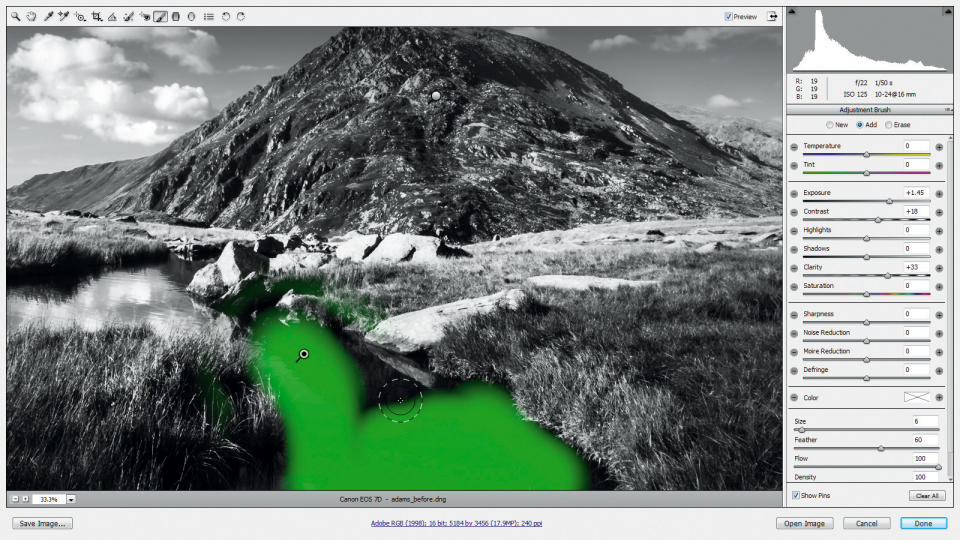
Click New in the Adjustment Brush settings to the top-right, then click to set a second pin in the patch of water at the front. We can use another adjustment to lighten the reflection. Paint over the water, reset the previous settings, then set Exposure to +1.45, Contrast to +18 and Clarity to +33.
Step 11: Burn the rocks
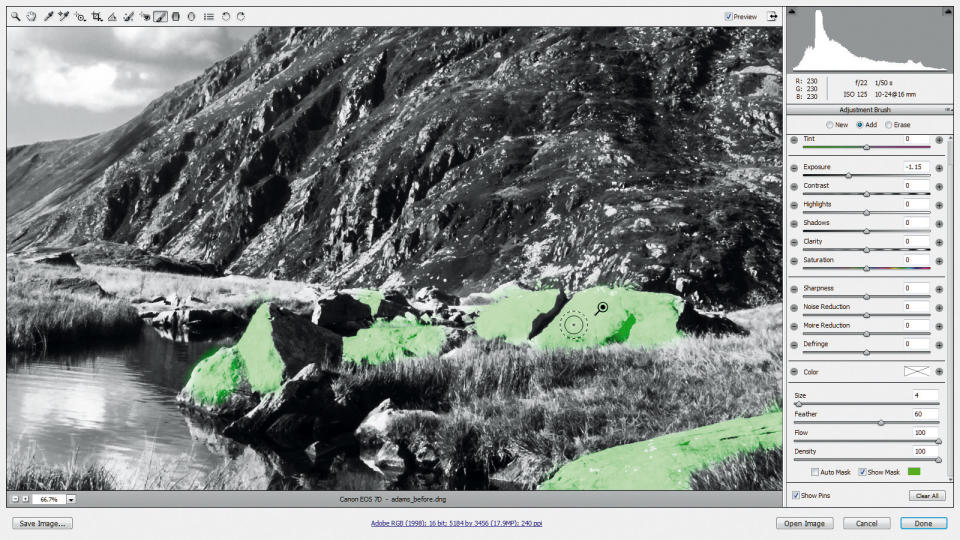
The rocks look a little too bright. Set a new pin on them then paint over the area. Try ticking Auto-Mask to snap onto the edges of the rocks as you paint. Set Exposure to -1.25. Next, set a fourth pin and paint over the right side of the mountain, then set Exposure to +0.80 and Contrast to +25.
Step 12: Add a vignette
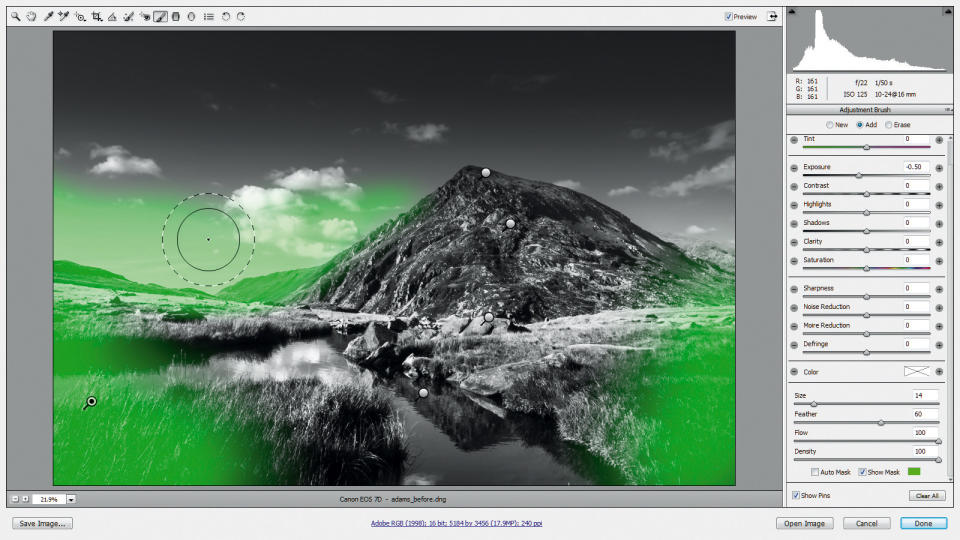
Press N for one more pin and set it in the bottom-left corner. Paint over the lower left and right sides left then set Exposure to -0.50 to darken down the areas. This kind of subtle vignette helps to draw the eye into the image. Paint over the clouds on the left too.
Step 13: Fix the noise
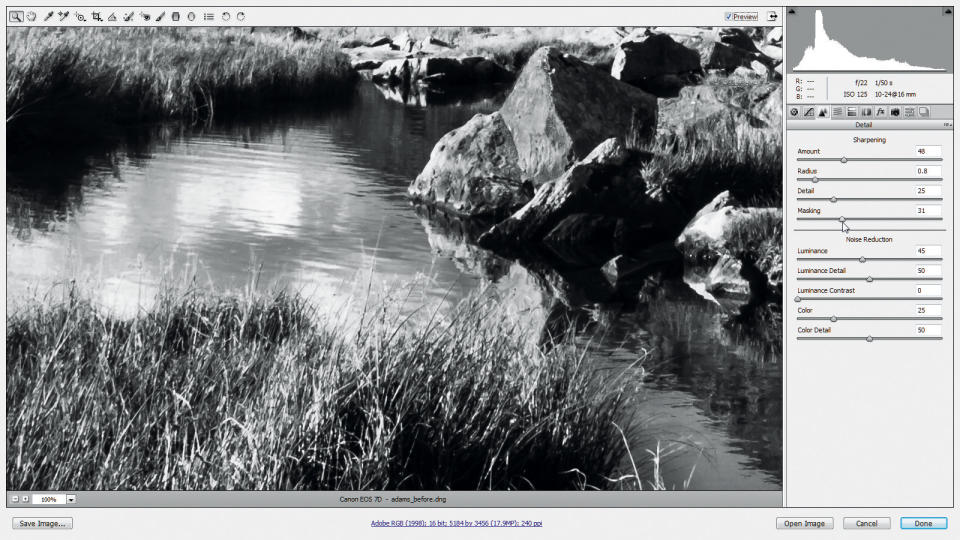
Go to the Detail panel and double-click the Zoom tool for 100% view. Tackle grainy noise by setting the Luminance slider to 45. Next, apply sharpening. Set Amount to 48 and Radius to 0.8. Double-click the Hand tool to zoom out, then hold Alt and drag the Masking slider to 31 to mask the sharpening.
Step 14: Open in Photoshop
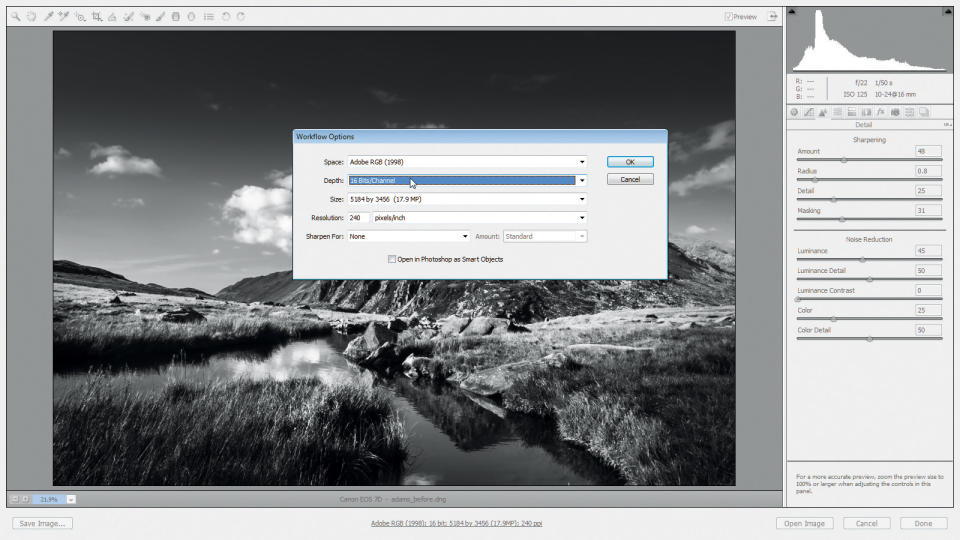
Click the blue text below the image window to access the workflow options. Set Depth to 16 Bits/Channel for the highest possible quality, then click OK. Next, click the Open Image button to the bottom-right to render the changes made in Camera Raw and open the image into Photoshop.
Step 15: Make a ‘dodge-burn’ layer
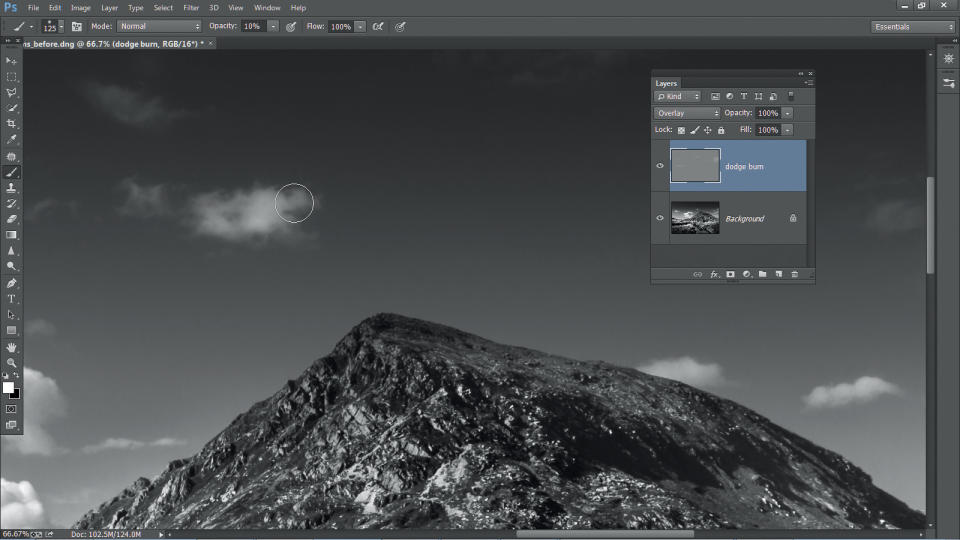
Hold Alt and click the New Layer icon to access the New Layer box. Name it ‘Dodge Burn’. Set the blending mode to Overlay, tick ‘Fill with Overlay-neutral color’ and click OK. Grab the Brush tool, press D then X to set to white. Press 1 for 10% Opacity, then paint over the smaller clouds to lighten them slightly.
Most landscapes will benefit from selective lightening and darkening to balance land and sky, and draw the eye towards the subject. This becomes even more important with black-and-white images, as the absence of color emphasizes the play of light across a scene. A layer filled with neutral grey and the blending mode set to Overlay lets you dodge and burn non-destructively by painting with black or white.
Step 16: Merge a copy
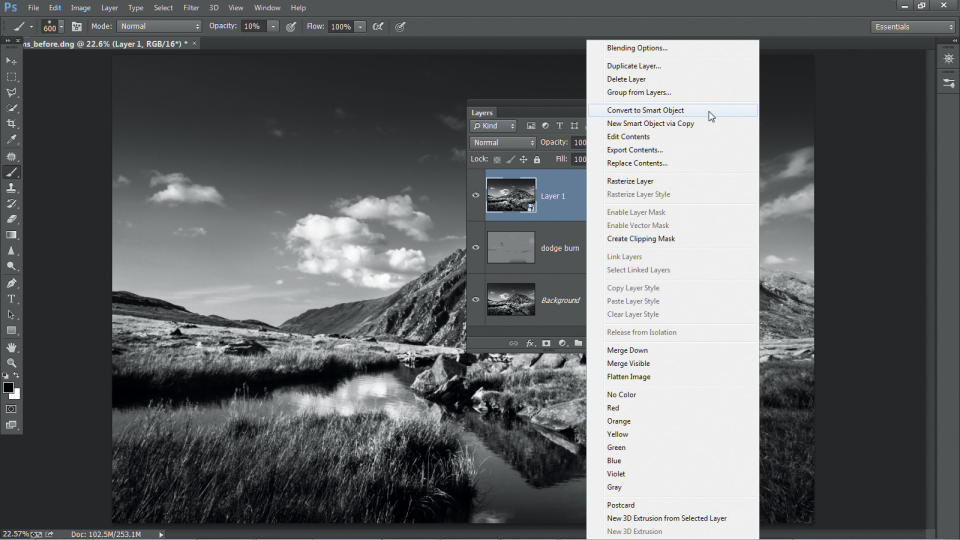
Press X to flip the color to black, then paint to burn in any areas that look a little too bright, such as the small patch of grass at center bottom. When you’re happy, press Ctrl/Cmd+Shift+Alt+E to merge a copy of both layers, then right-click the layer and choose Convert to Smart Object.
Step 17: Apply High Pass sharpening
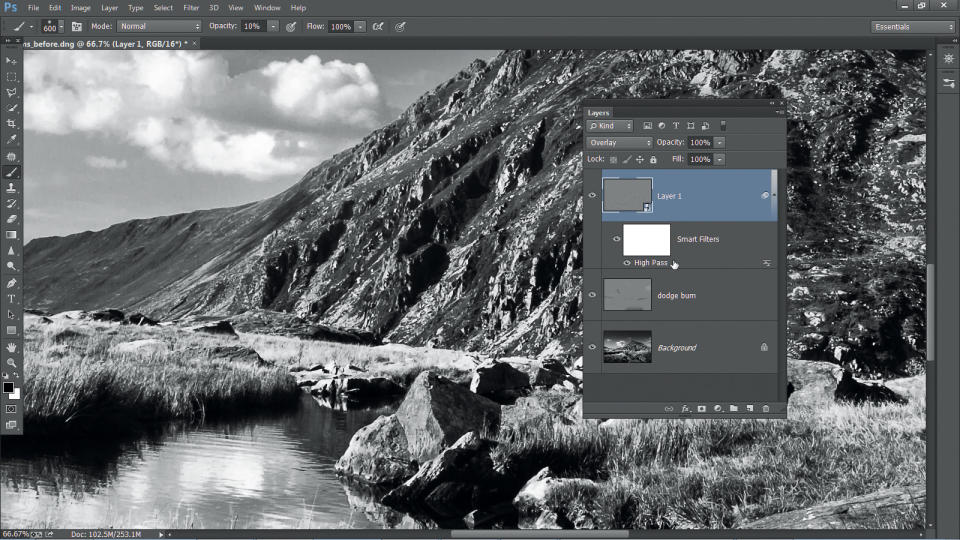
Go to Filter>Other>High Pass. Set Radius to 2.3 and click OK, then go to the blending mode drop-down at the top of the Layers panel and choose Overlay. This creates a nice sharpening effect. If you think the sharpening is too strong or weak, double-click the smart filter and tweak.
18: Correct the banding
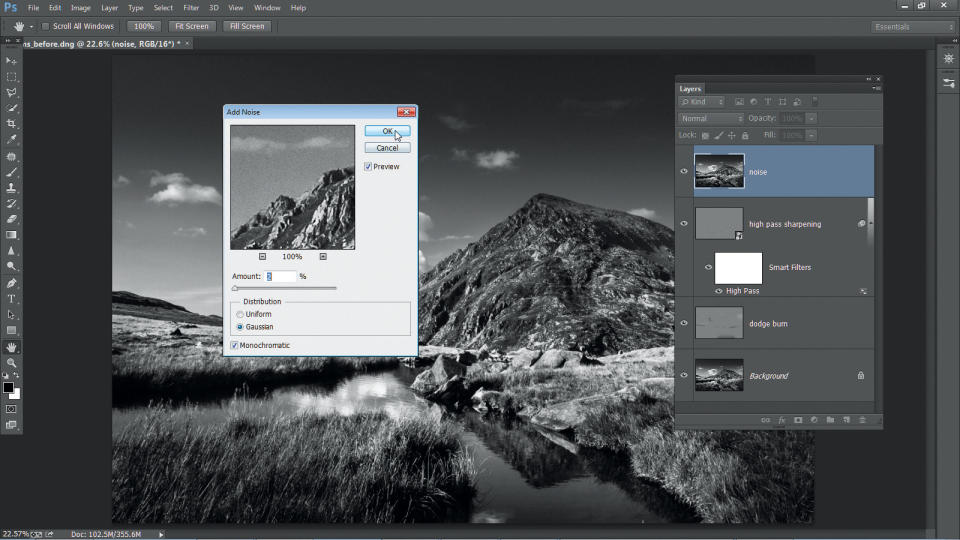
The gradient applied to the sky has led to some noticeable banding. To fix this, press Ctrl/Cmd+Shift+Alt+E again, then go to Filter>Noise>Add Noise. Set Amount to 2 and Distribution to Gaussian, and tick Monochromatic. Don’t worry if the grain looks strong: it’s less so when printed.

