Angel Wing Eyeliner Is the Dreamiest Viral Makeup—Here's How to Get the Look
Ashley Rebecca
From the heavily darkened lids of silent screen stars to the sharp cat eyes that reigned supreme in the 2010s, graphic eyeliner has been a makeup staple for over a century.
And since we love nothing more than finding new ways to spice up our old favorites, we've invited angel wing liner to enter the chat. The eye makeup trend that's gone viral, angel wing eyeliner differs subtly from its traditional counterpart in subtle but significant ways. Eager to learn more—and to get the look? Read on for our easy step-by-step tutorial for creating the perfect angel wing liner.
Meet Our Expert
Eddie Duyos is a professional makeup artist and senior manager of professional education and makeup artistry for Make Up For Ever.
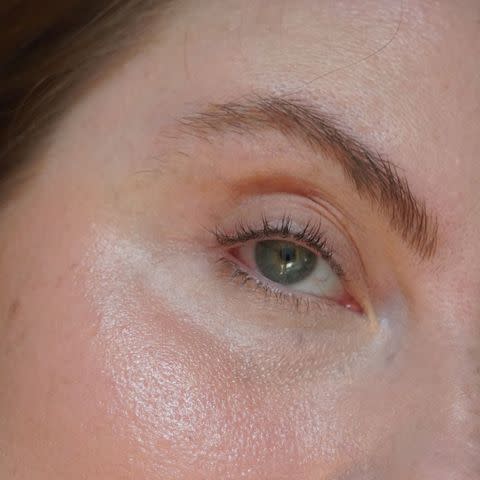
Prep Your Lids
Ashley Rebecca
After you've shaped and filled in your eyebrows, you'll want to prime your lids and apply any eyeshadow. I chose a very natural eyeshadow look here so that the liner could be the focus.
I shaped my brows with Ilia's In Frame Clear Eyebrow Gel ($24), then filled them in with the brand's Full Micro-Tip Eyebrow Pencil in Auburn Brown ($24). Then I primed with Nars' Pro-Prime Smudge Proof Eyeshadow Base ($26) and applied a natural-toned eyeshadow. Applying primer to the lids before eyeliner can help the liner stay on all day without transfer or smudging.
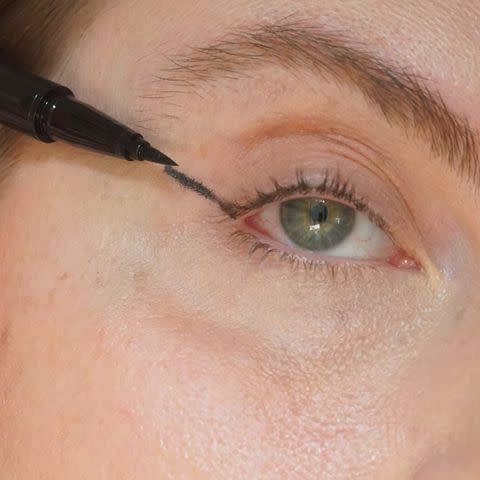
Set Your Base Line
Ashley Rebecca
After your lids have been prepped and your brows are done, it's time to map out the angel wing liner. I added the baseline in an outward motion extending from the corner of my eye, using Make Up For Ever's Aqua Resist Graphic Pen 24HR Waterproof Intense Eyeliner ($24). Duyos recommends using this pen on its side to create a perfect wing. "Also, try using the fine point to add graphic details to any look," he adds.
If you're hesitant to try this trend because your hand isn't as steady, we've got a pro tip: Angle something with an edge—like a piece of tape or a business card—at the corner of your eye. Use the edge and trace the liner on top for a clean wing.
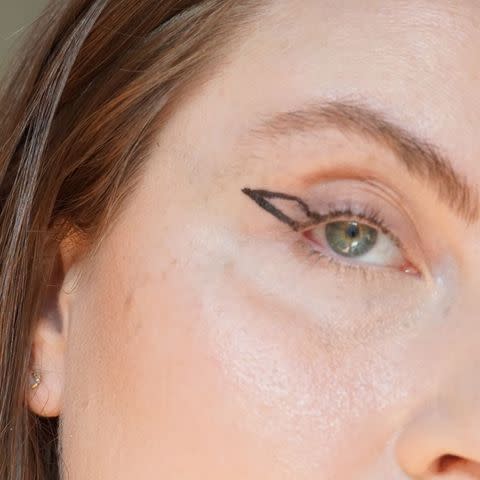
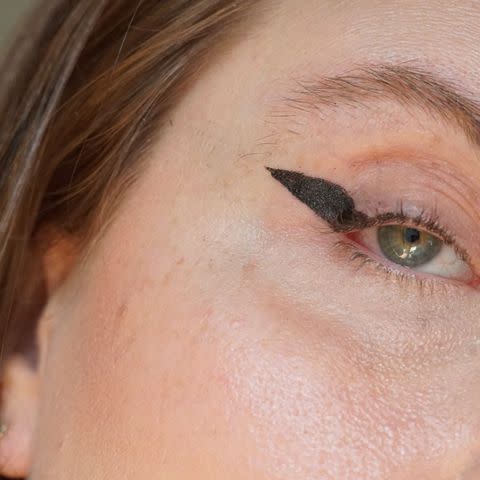
Trace Your Angel Wing
Ashley Rebecca
This is where the angel wing shape starts to come to life. The nice thing about angel wing liner is you can break the process down into steps. This gives you some time to create your shape without the pressure of achieving one-and-done perfection.
Use the point of the liner pen to draw your angel wing shape, connecting it to the bottom line you drew as a base—remember, keep it slow and steady. You can think of the overall shape as three separate lines: The base, the top, and the connecting line that brings it down to the lash line.
Fill in the Gap
Ashley Rebecca
After drawing your wing shape, the next step is to color in the white space with your liquid liner. You can use the tip or side of the liner for this, slowly coloring it in as you go. If you make any mistakes, use a thin cotton swab dipped in eye makeup remover or micellar water to eliminate any bumps. Take your time with this step, as this is where your angel wing liner will take the unique shape that sets it apart from traditional winged eyeliner.
Tips
Don't have a liquid liner? No problem. Use a waterproof gel liner that is soft enough to transfer on the skin without too much tugging or pulling and an angled liner brush to help maintain the shape.
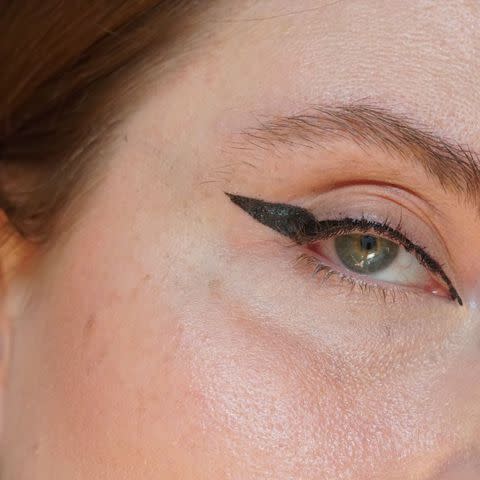
Connect Your Lines
Ashley Rebecca
After your wing shape is colored in, apply the liner to the lash line by placing it on its side and drawing to the inner corner of the eye. For a traditional winged liner look, one line would connect the wing to the inner corners; for the angel wing liner, notice that the line connects only at the bottom of the wing, enhancing the angel wing shape.
You'll want to leave that tiny gap open to master the form. This part might take some extra practice, but as we know, the more you practice something, the better you become at it. Don't worry if you can't perfect the shape on the first try.
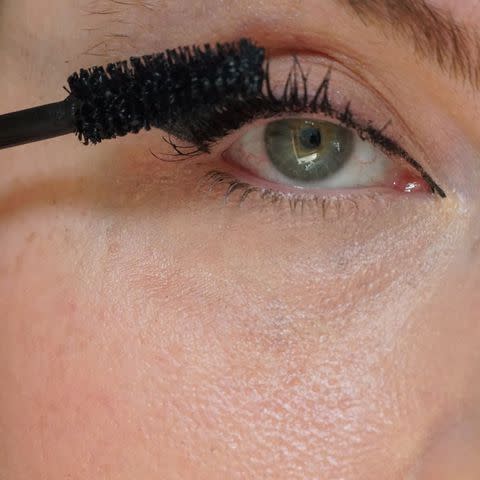
Add Lots of Mascara
Ashley Rebecca
Feel free to be generous with the application of your favorite volumizing mascara. I wanted my lashes to look extra long, so I used Thrive Causemetics' Liquid Lash Extensions Mascara ($25).
For the fullest, thickest lashes possible, apply your first two coats of mascara after you've curled your lashes and let the mascara fully dry. Once dry, return for a third coat to bump it up. This gives you the look of thick and full eyelashes while minimizing the look of clumps.
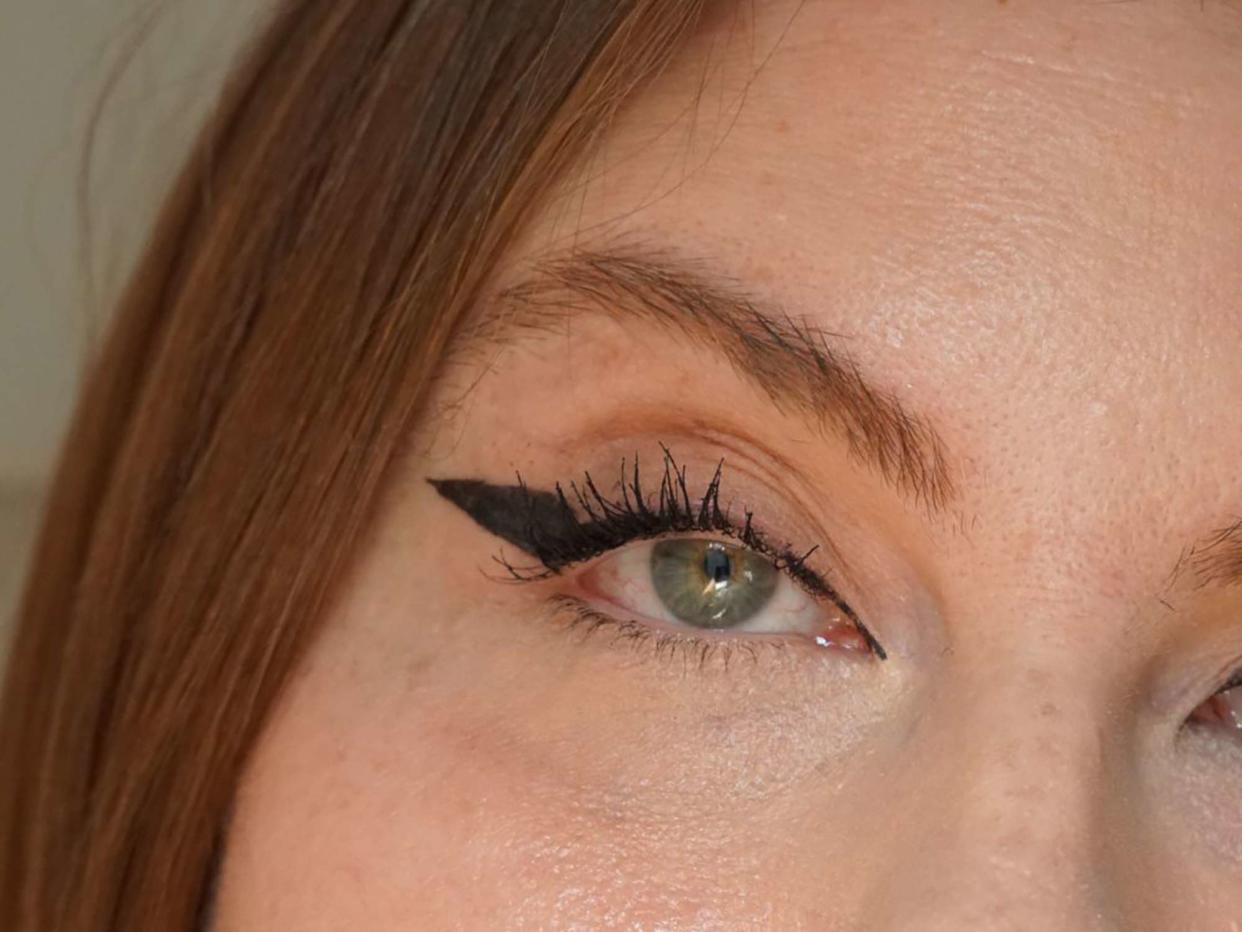
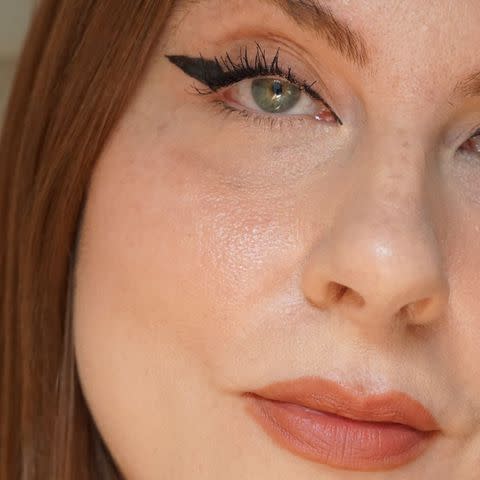
The Final Check
Ashley Rebecca
Once you've applied your mascara, take another look at your liner to ensure it's exactly how you like it. If you want a smokier look, use an angled eyeshadow liner brush to apply black eyeshadow on top of your eyeliner, then diffuse. This will give you some drama. If you're happy with the precise look, you can leave it as is and admire your handiwork.

