Aerospace meets artisan: Inside the Sturdy Cycles workshop
Titanium bikes, for many of us, represent the ‘forever bike’. The nature of the material, in that it is impervious to the rust and corrosion that plagues steel and eventually aluminium too, means that, as long as you don’t do anything daft like cross thread a bottom bracket installation, the frame will almost certainly outlive you. Titanium bikes however tend to follow the same basic blueprint as steel bikes, with round (or round-ish) tubes, mitred to fit, and welded together into a frame. Forks, bars, and everything else you need to make the frame into a bicycle comes from aftermarket sources.
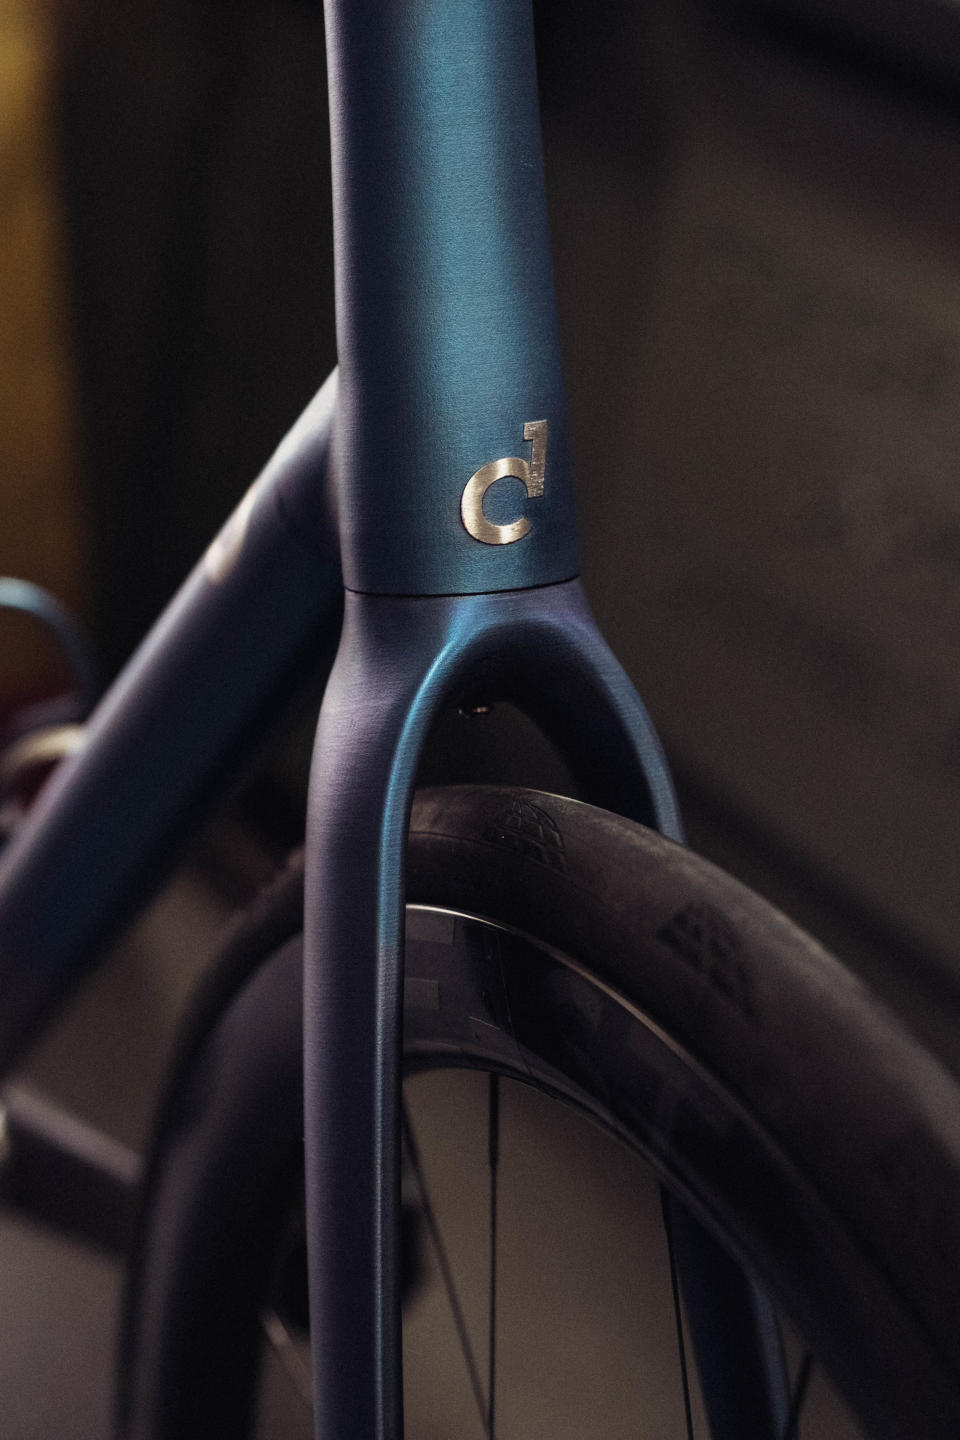
Sturdy cycles is a little different, not only because a great deal of the frame itself is 3D printed from titanium, but also because so many of the constituent parts are made in-house too. I’d go so far as to say a Sturdy is the most complete custom bike you can get your hands on today as almost every part that can be made in-house is made in-house. If you've seen my peek behind the scenes at the Colnago factory you'll have seen some 3D printed parts and a look at the factory where they are created, but this is orders of magnitude greater in terms of the utilisation of titanium.
It’d be worth distinguishing now between ‘custom’ and ‘bespoke’ when it comes to a bike. Bespoke is the full monty, often a frame builder who will build you whatever you want. Custom is a little different, in that there are still models that represent the intended purpose, but within these tweaks are available. Think of it like getting an off-the-peg suit tailored to fit, versus wandering into anywhere on Savile Row with a full wallet and asking specifically for even deeper pockets.
Recently I took a short train ride from Bristol, past my office in Bath, southeast to Frome to see the Sturdy workshop and give you a snapshot of how some of the most space-age bikes you can buy are made in an old forge in Somerset.
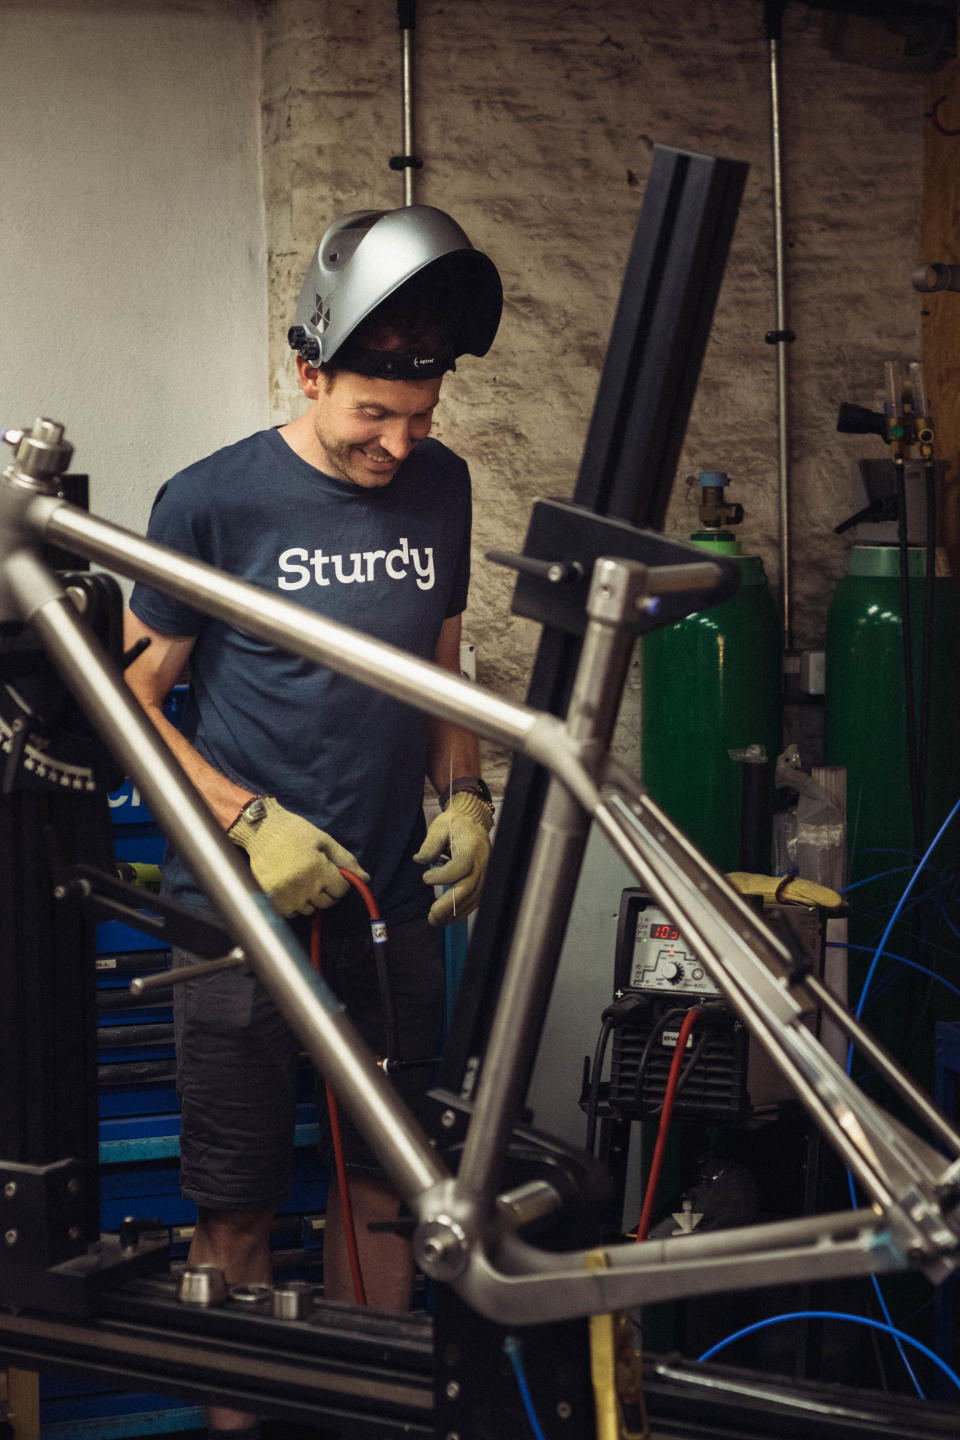
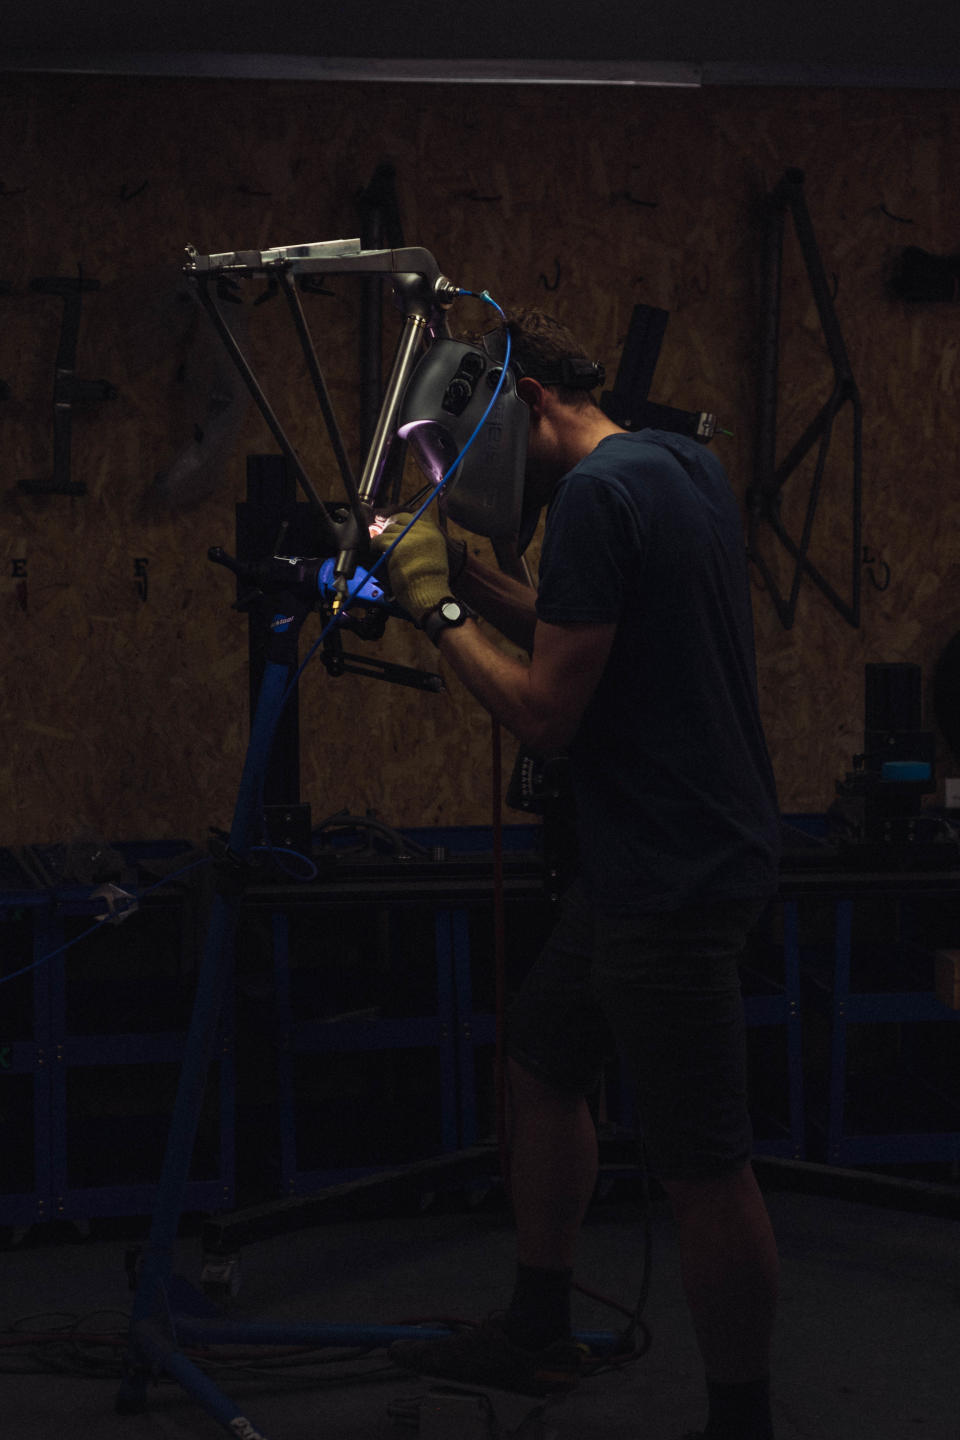
This is Tom Sturdy. He's got an easy smile that comes out frequently when prepping to weld a frame up.
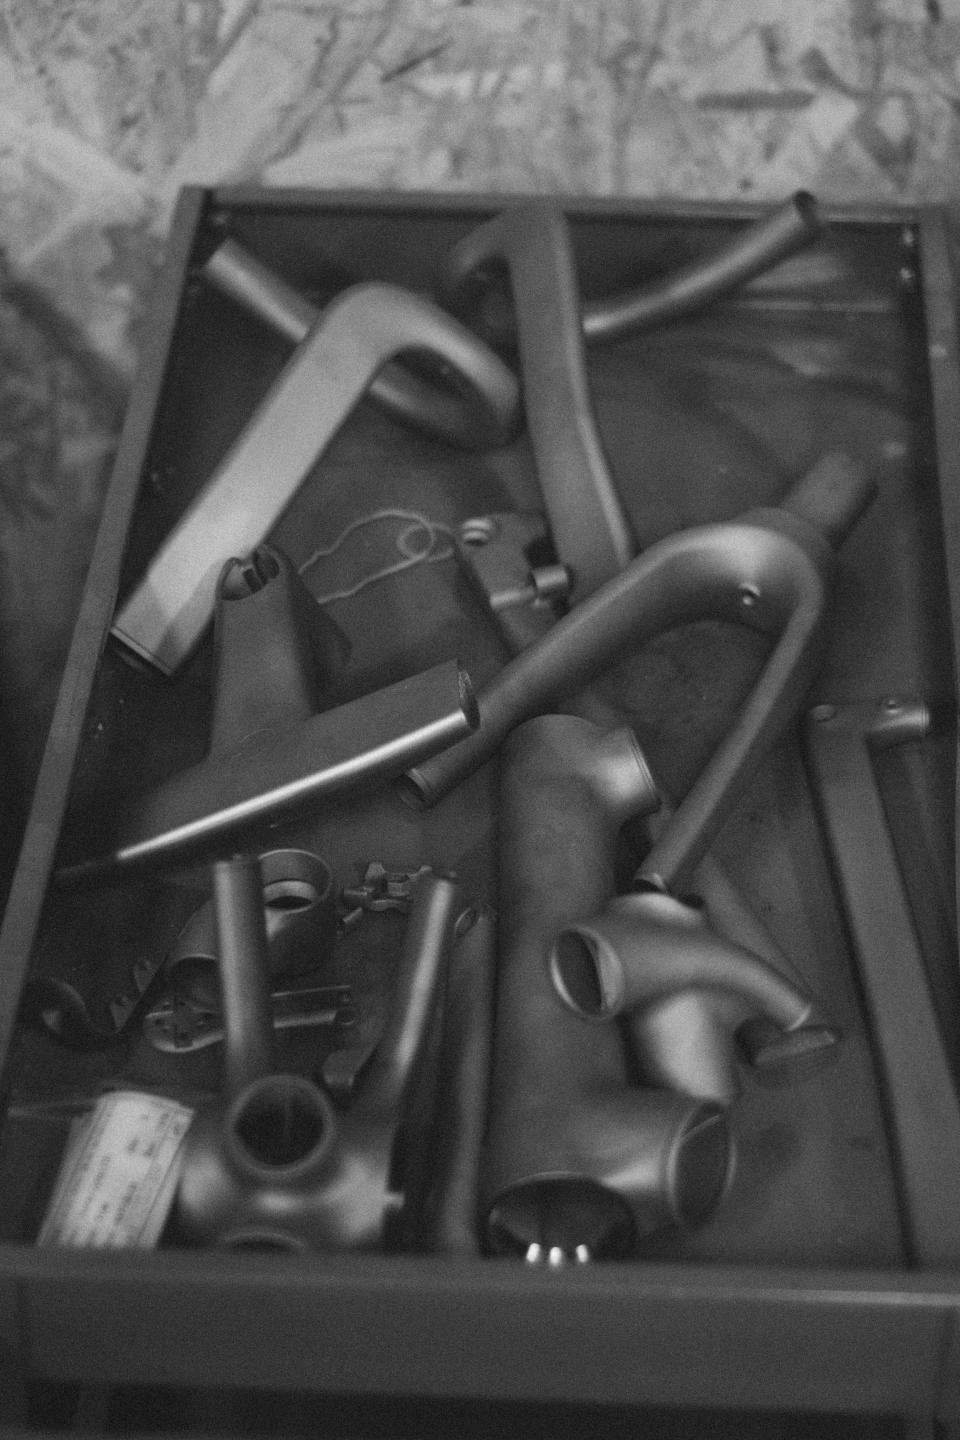
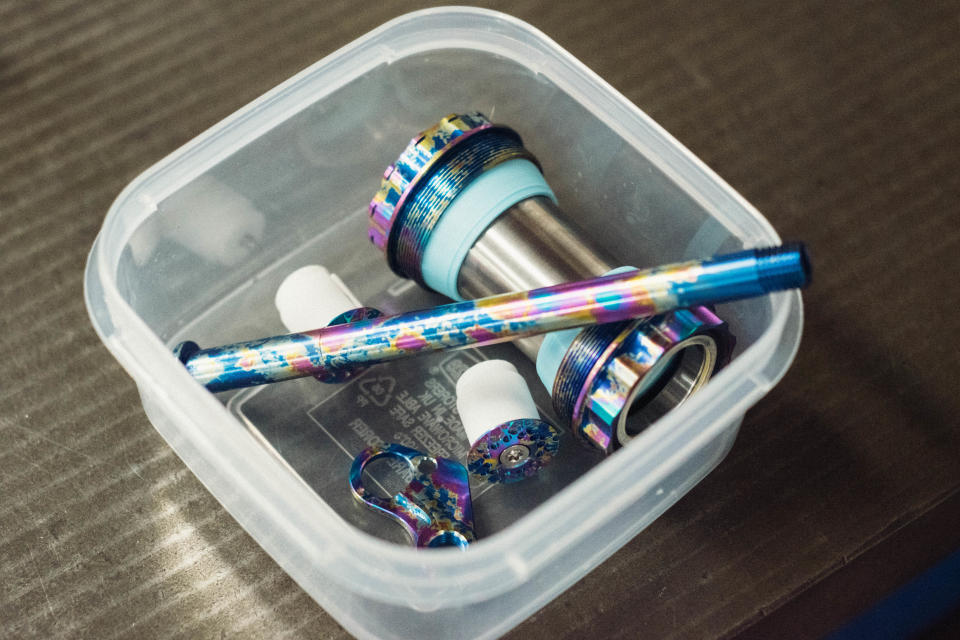
Each customer's bike gets a tray to hold the constituent parts of their future bike, like the reverse of an anatomists tray following a dissection; neat incisions separating key constituents of a greater whole
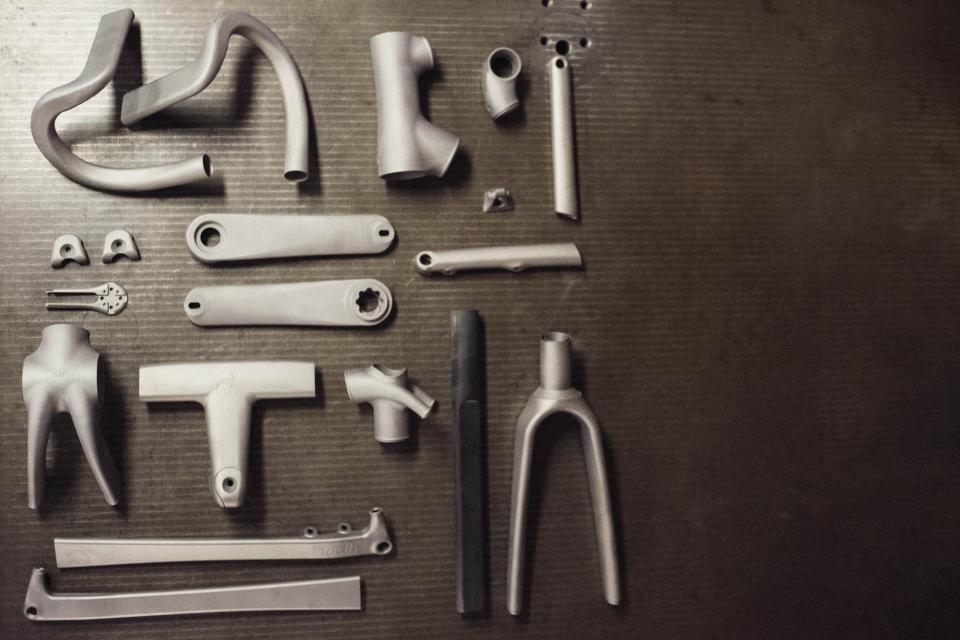
Arranged on the alignment table, a perfectly flat steel plate, again the constituent parts take on a vaguely medical feel. Some parts recall instruments, others implants
Elsewhere in the workshop Jack builds up a complete bike, 90% of which can be done with a single T25 torx key. Interestingly this customer has eschewed any of the trademark anodised finishing.
Tom prepares a frame, already tacked together, for welding. The 6ft cylinders of the welding gasses stand in the corner beside him, and I presume at this point he's running a final check on pressures and voltages.
Considering the cleanliness and space age nature of the finished bikes, the workshop features a wonderful amount of chipboard.
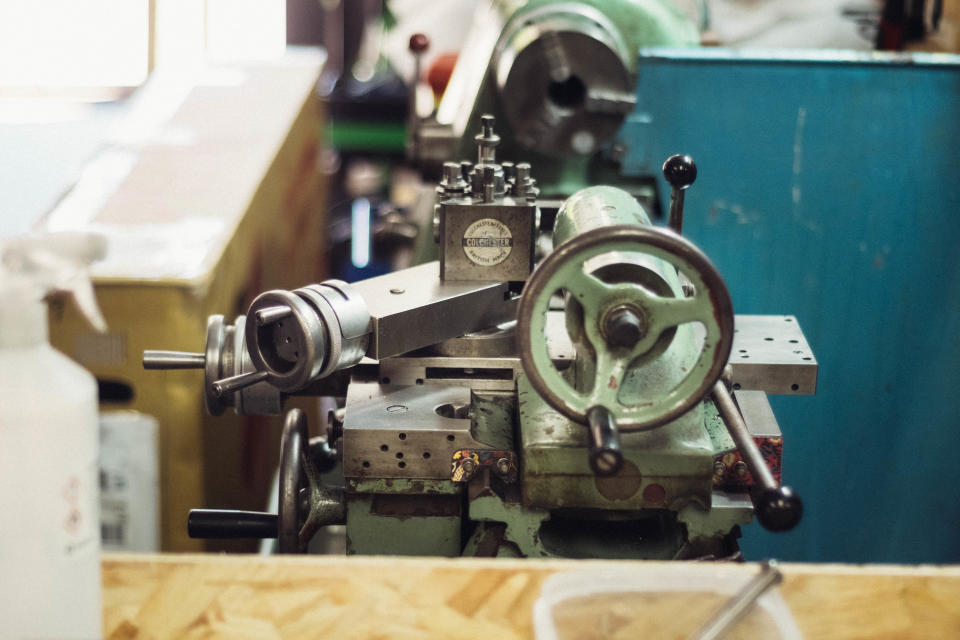
A beautiful old lathe, painted in the same green as the 50th anniversary edition of the Land Rover Defender, still runs like a dream, with the contact points polished by countless hands.
On the wall, hung from hooks are part built bikes awaiting final finishing
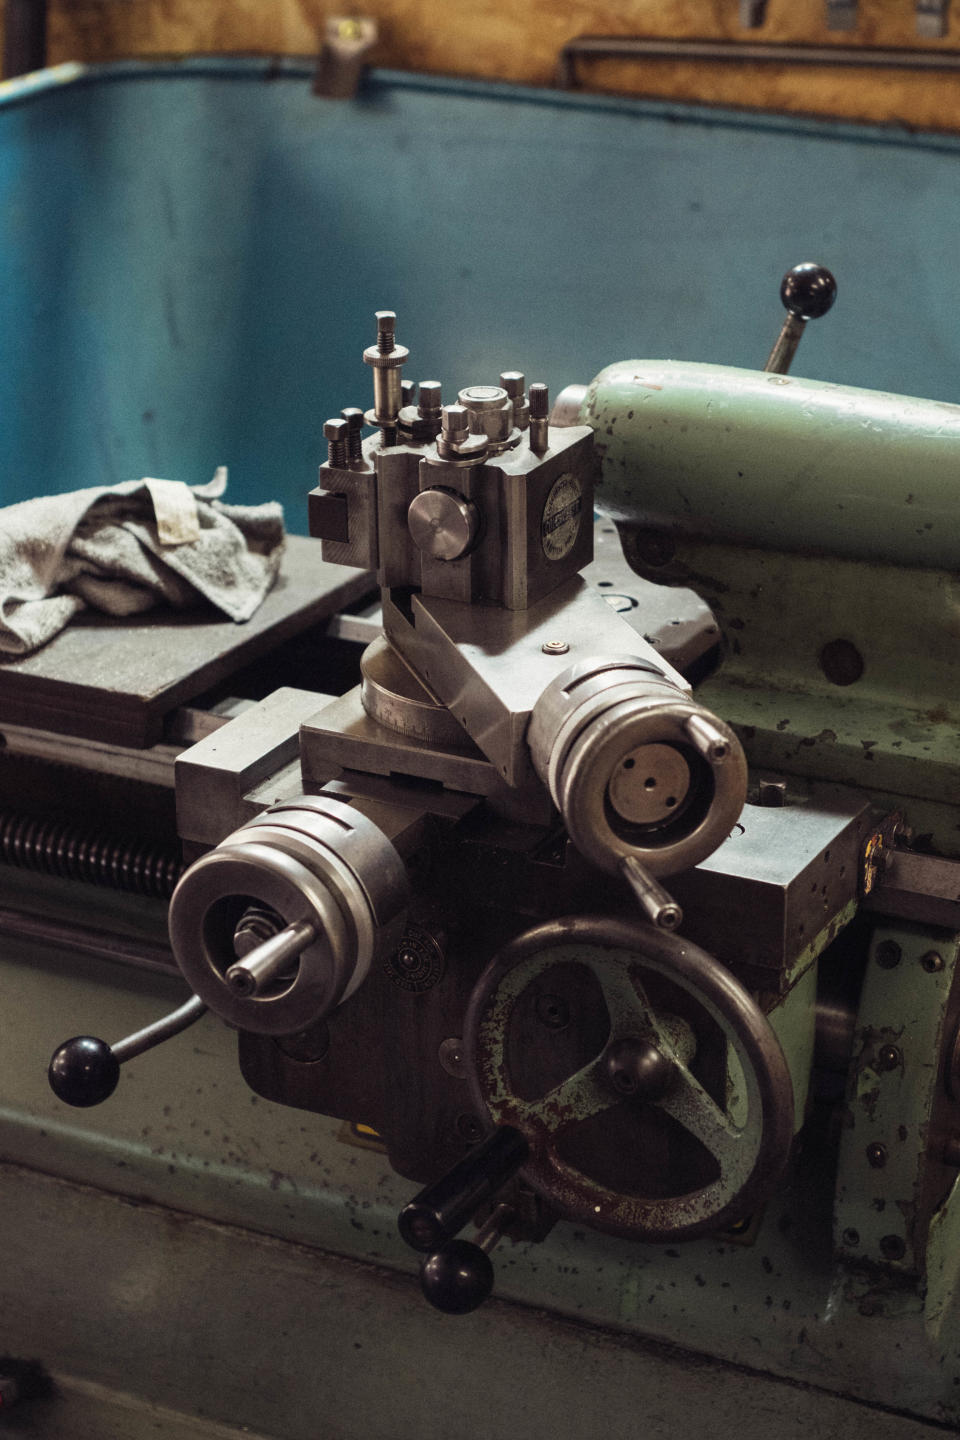
Given the modernity of the operation, seeing classic machining tools is, if not unexpected, definitely an interesting juxtaposition
Test anodisations of bottle cages hang like futuristing bunting next to the chemical baths in the corner

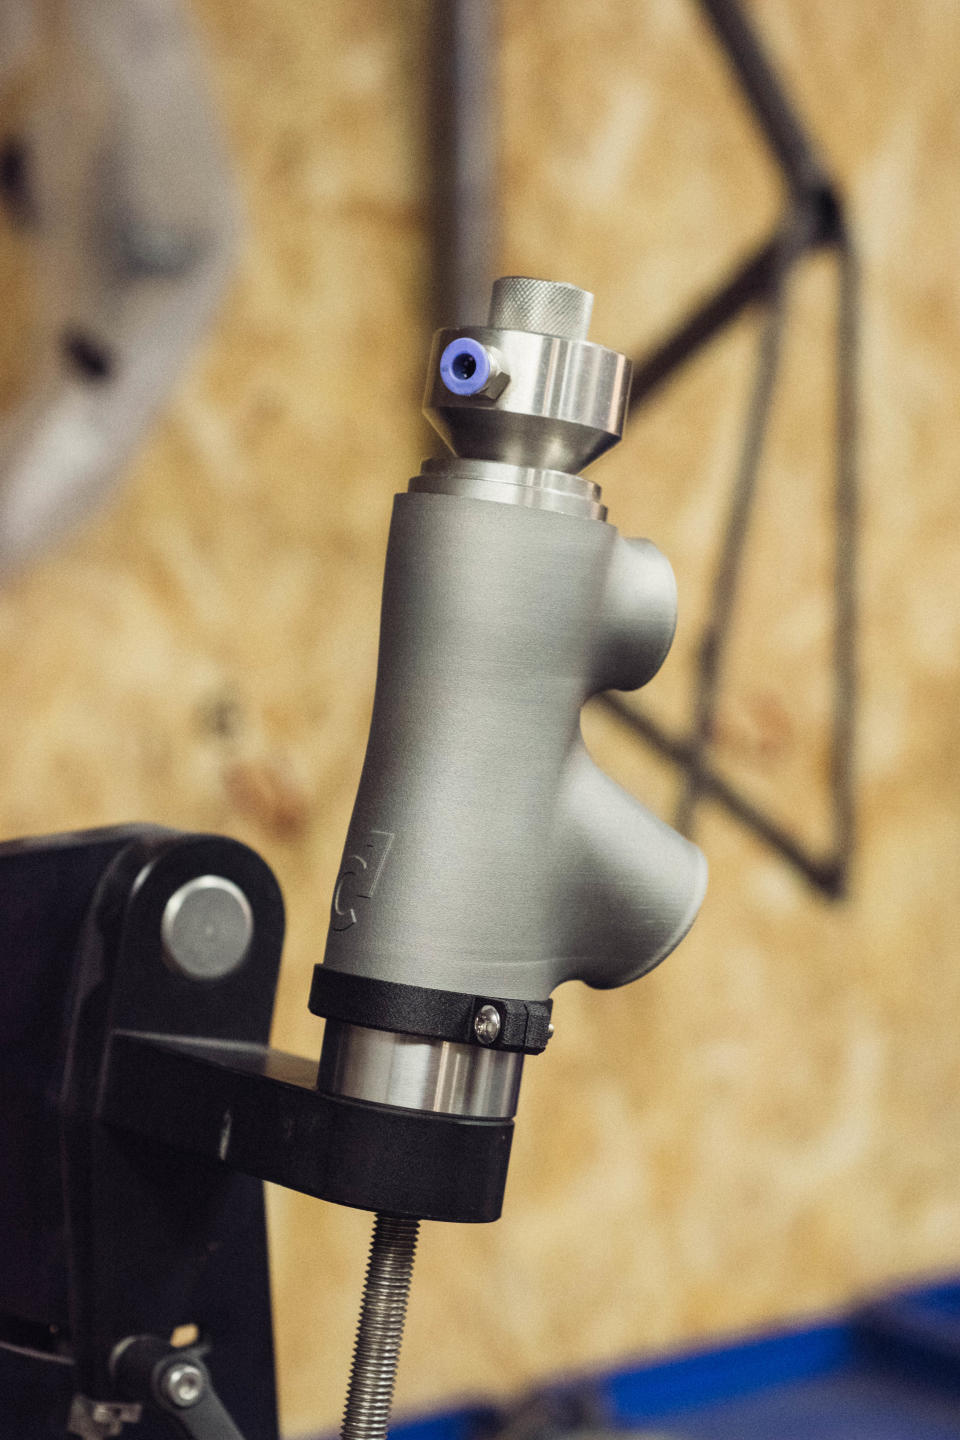
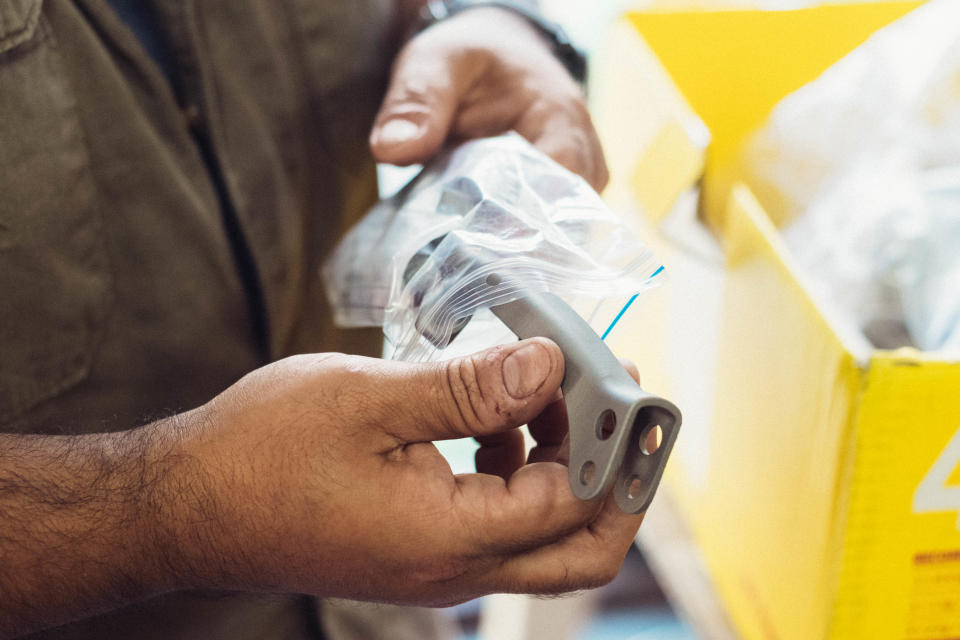
It's not just the macro parts that are 3D printed. The small parts like the computer mount are also created in the same way.
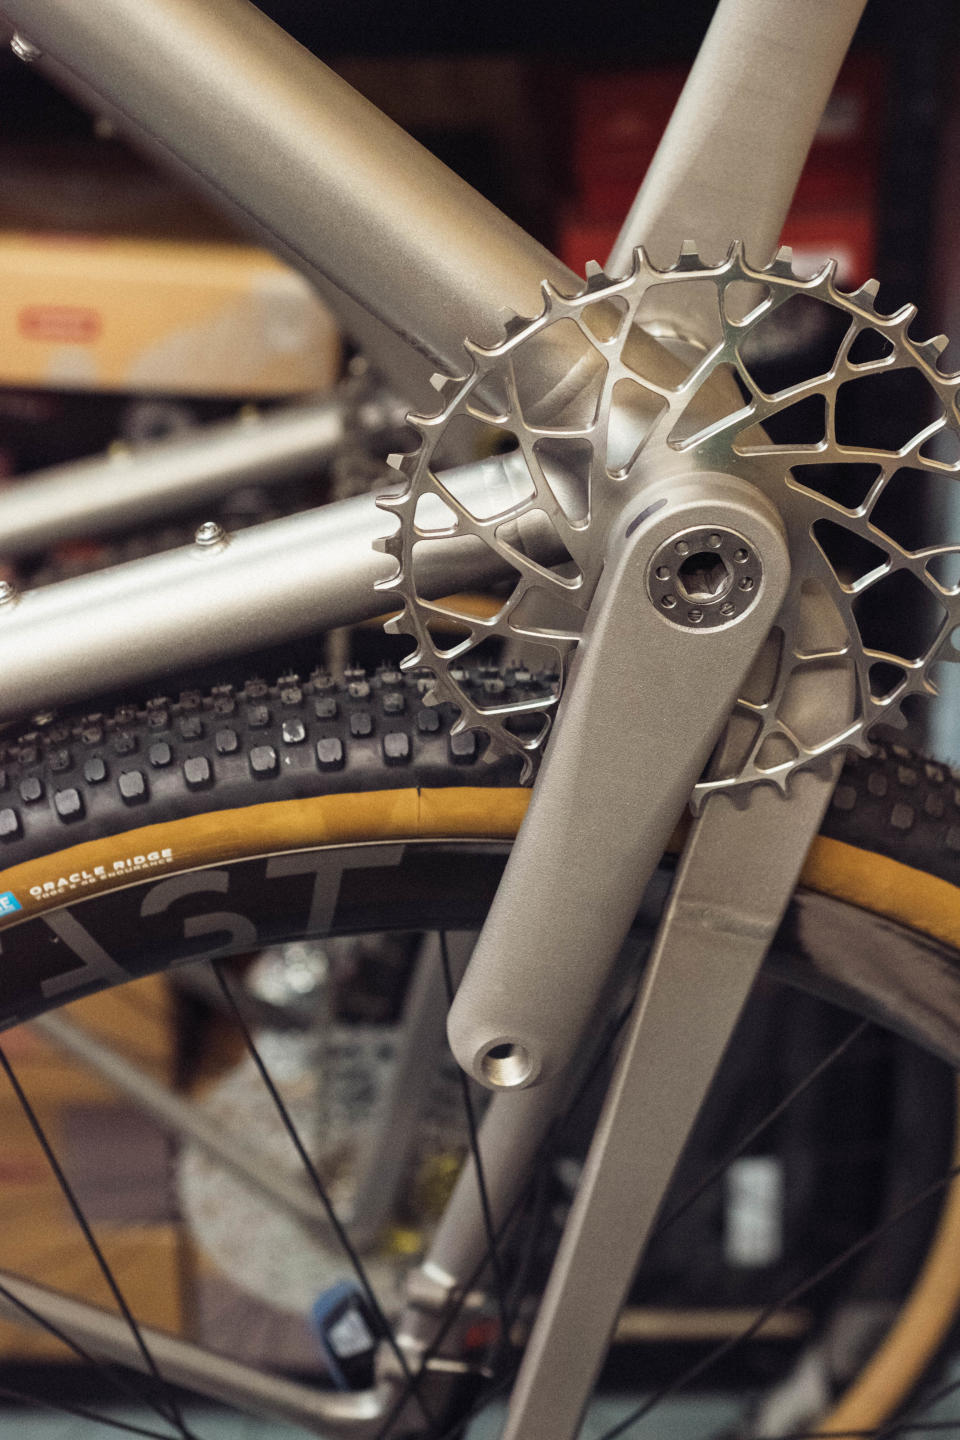
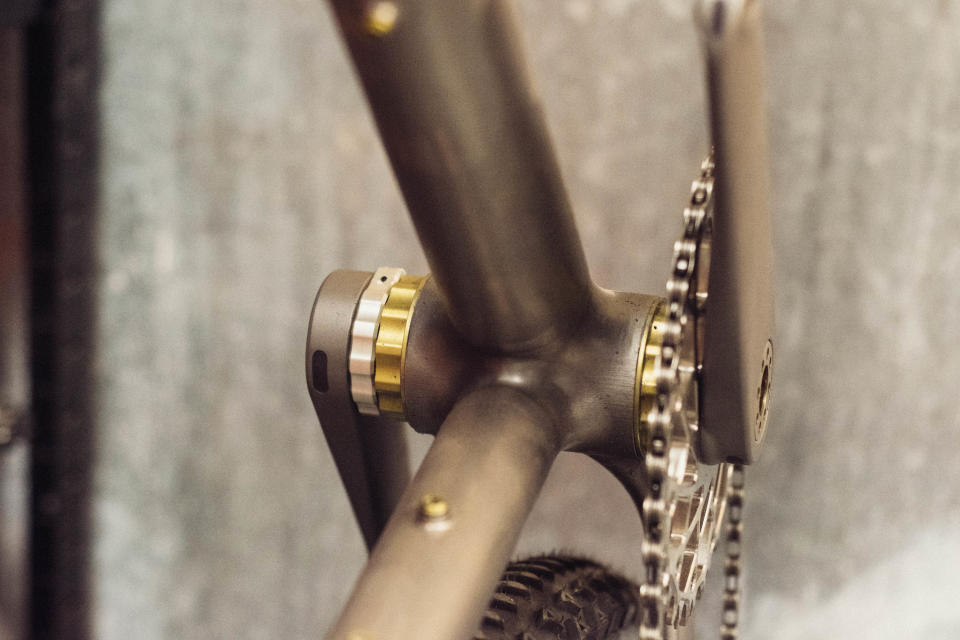
The derailleur mount uses the derailleur bolt itself to provide the clamping force, meaning one less unsightly bolt on show.
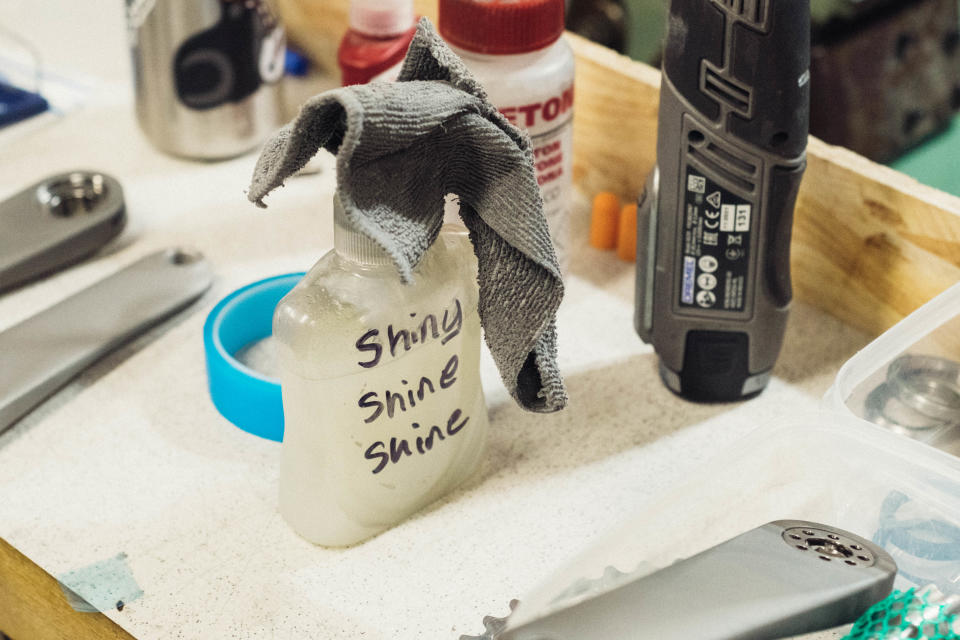
I never got to the bottom of what 'Shiny Shine Shine' was, but it was used to clean each part and complete parts down, and created something that's not quite matte, not quite shine, but somewhere between the two.
Gold custom bolts and a custom gold bottom bracket on a bike on the wall hint at the level of matchy match that's possible.
The backstory
As with any bike brand that takes the name of its founder it’s useful to get the background on the person behind the name to contextualise things. Sturdy Cycles is Tom Sturdy, though now with help from Jack and Omar in the workshop. Tom has been in the bike industry in some capacity since he was a Saturday boy in a workshop. He studied aerospace engineering while also racing as a pro triathlete, before (in his own words) sticking around at Loughborough to do sports biomechanics so as to continue being a student.
As with most framebuilders, Study began with steel, but his focus was more on using biomechanics and frame geometry to make himself faster rather than trying to create a product. Steel is, in framebuilding terms, at any rate, easy to work with and relatively forgiving. Bodging and tinkering, in Sturdy’s own words, transitioned to a more serious endeavour following a collision with a car that effectively ended his racing career. Unable to compete, he moved to creating a framebuilding business, and ran through a drawn-out process of making a series of frames back to back, each time isolating and changing an aspect of geometry in order to hone in on what makes the difference and what is the ideal combination of angles, drops, heights, and rakes.
The move to titanium was one that seems many-faceted. Naturally, the link back to aerospace is an easy one, with the metal being utilised a lot in that field. The mechanical properties translate well to a bicycle, but more than that it is a more premium option. Small-scale framebuilders, regardless of their skill, cannot compete commercially with low to mid-range mass-produced products. Custom titanium, on the other hand, isn’t catered for to nearly the same extent, and while it allows for a much more unique product it also makes the whole operation more commercially viable.
What struck me as a takeaway from my visit to the workshop is that, on the face of it, much of the manufacturing and finishing decisions of the bikes that Tom Sturdy creates appear to be hyper-boutique, but as you’ll see underlying all of it is a drive for efficiency. If the business isn’t viable in the long run then, no matter how good the product is, it cannot continue to be produced.
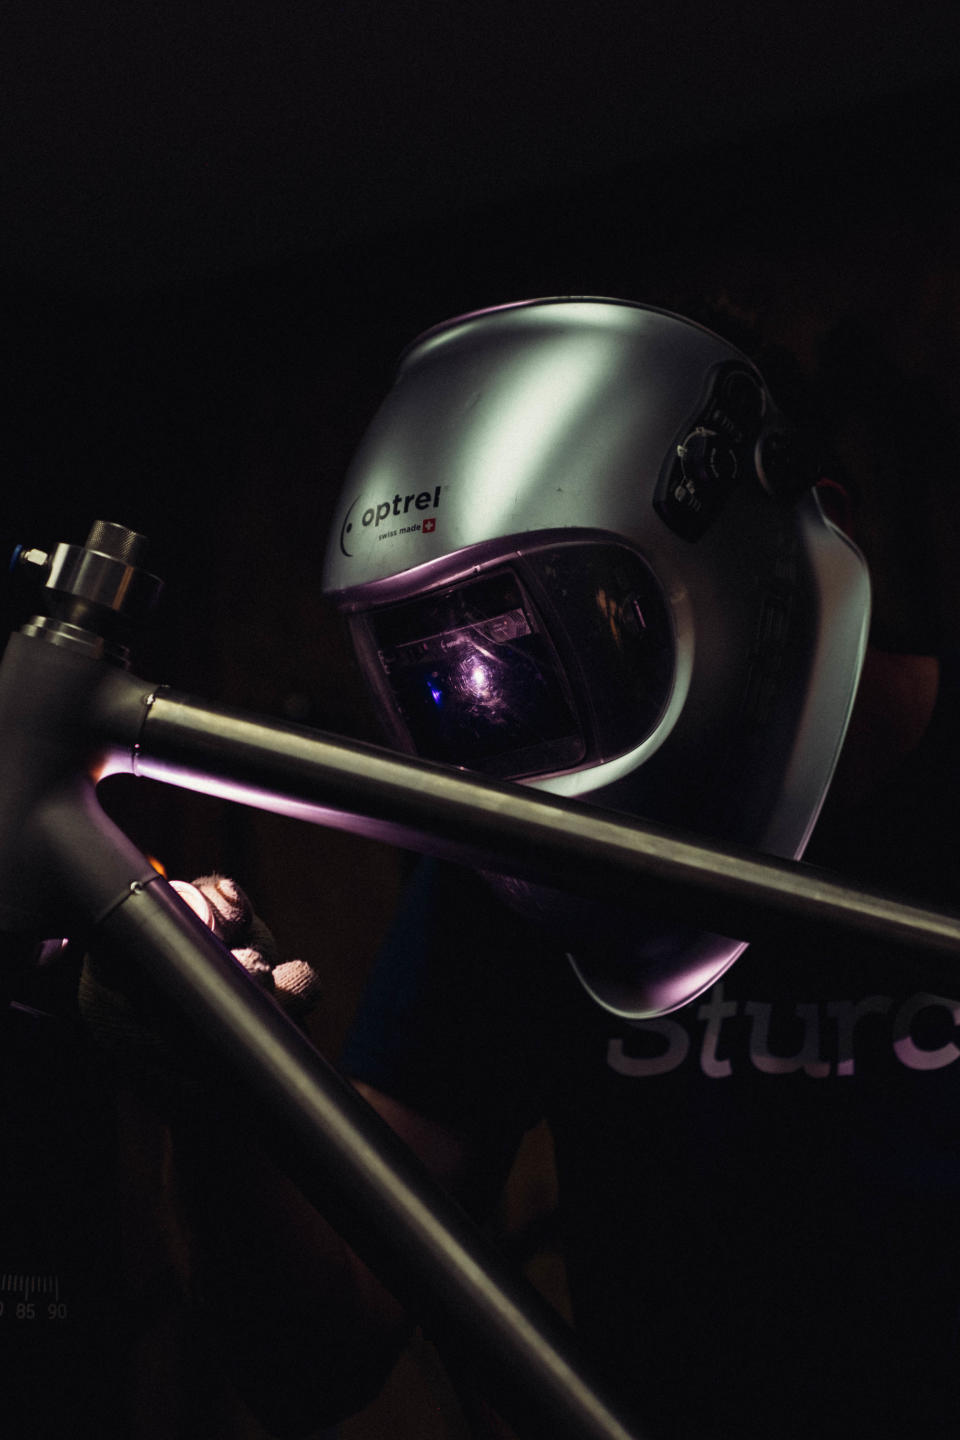
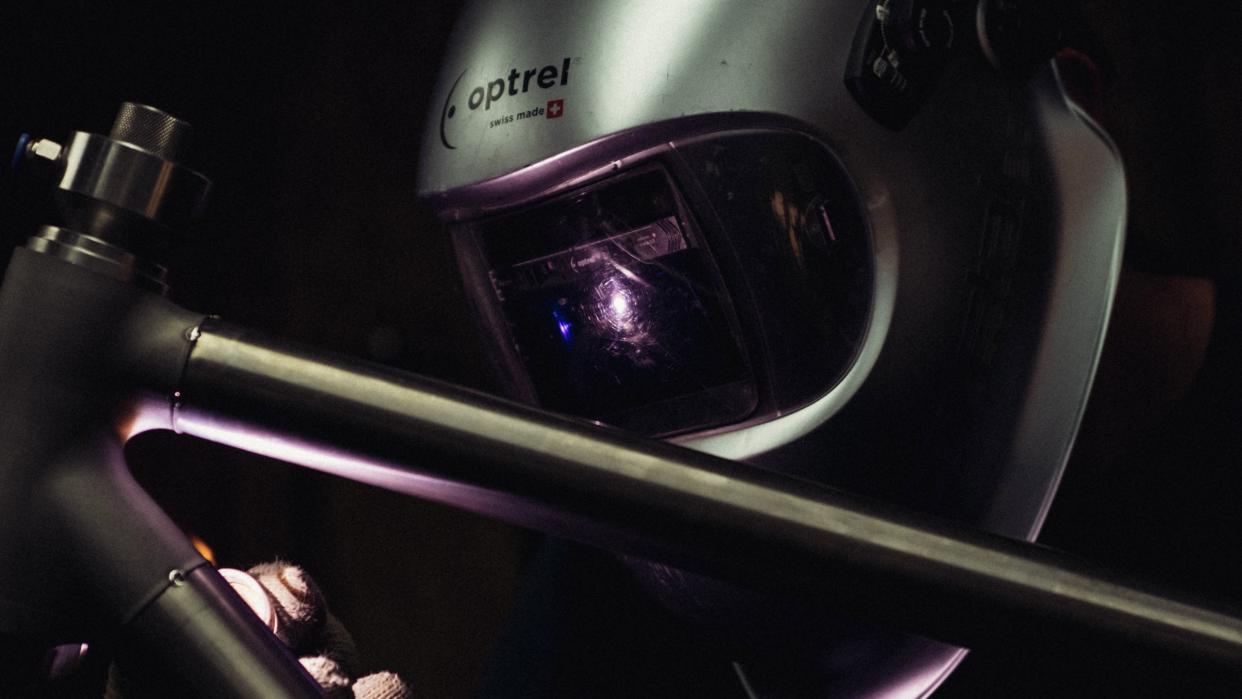
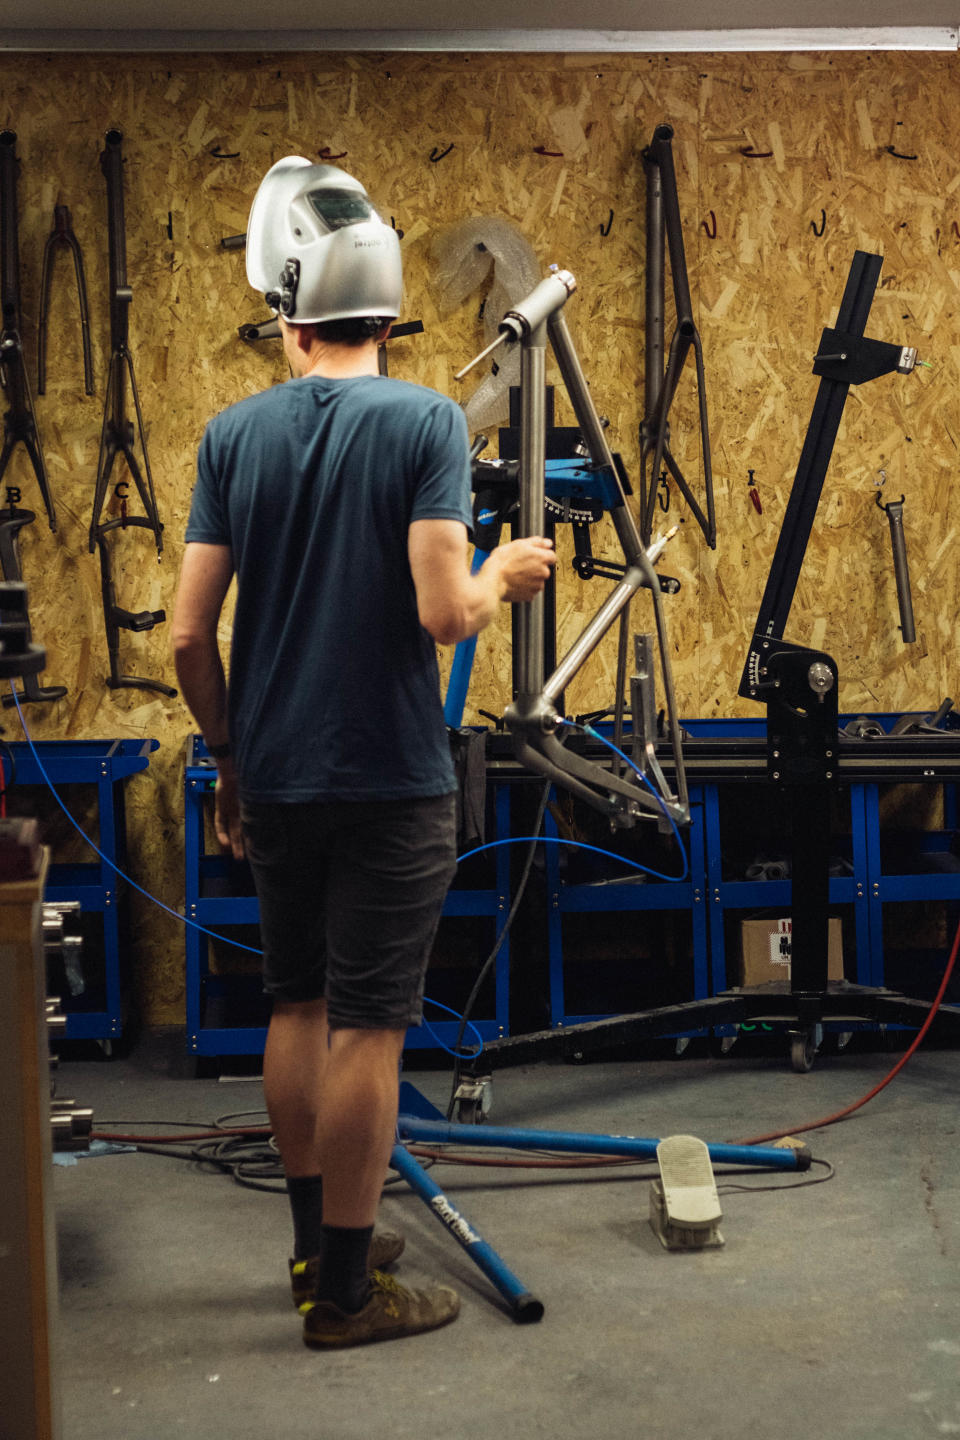
Welding mask on, Sturdy becomes a picture of concentration, mostly because you can't see his face. He may well have his tongue stuck out, but I'd never know.
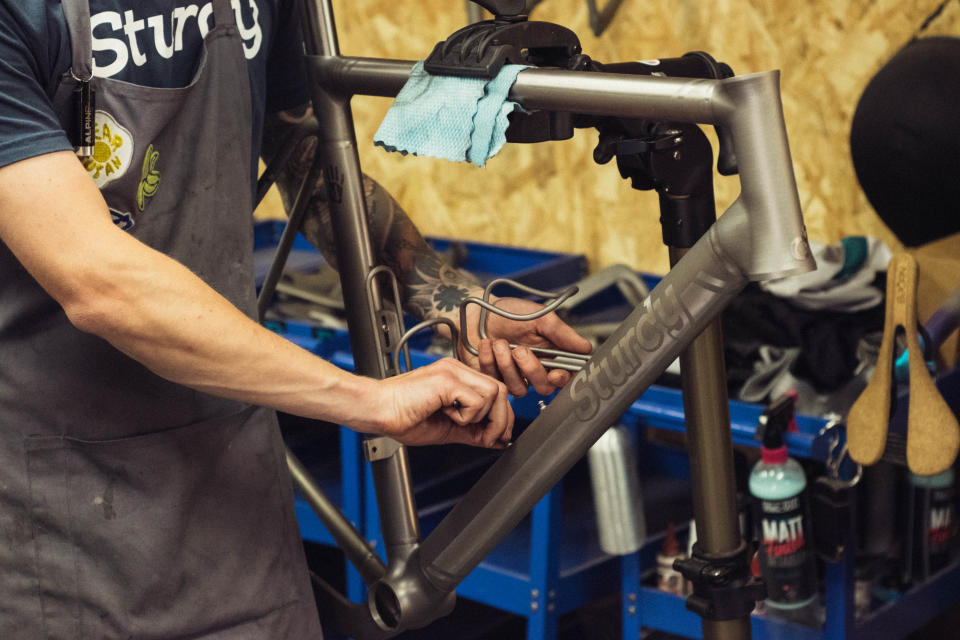
The join areas are mounted up in the frame jig, and freshly cut titanium tubes are slotted into the gaps to be tacked together.
The whole process from tacking the frame together to completely welded up takes less than an hour; the design of the parts is clearly a premium process, but efficiency is at the heart of it all
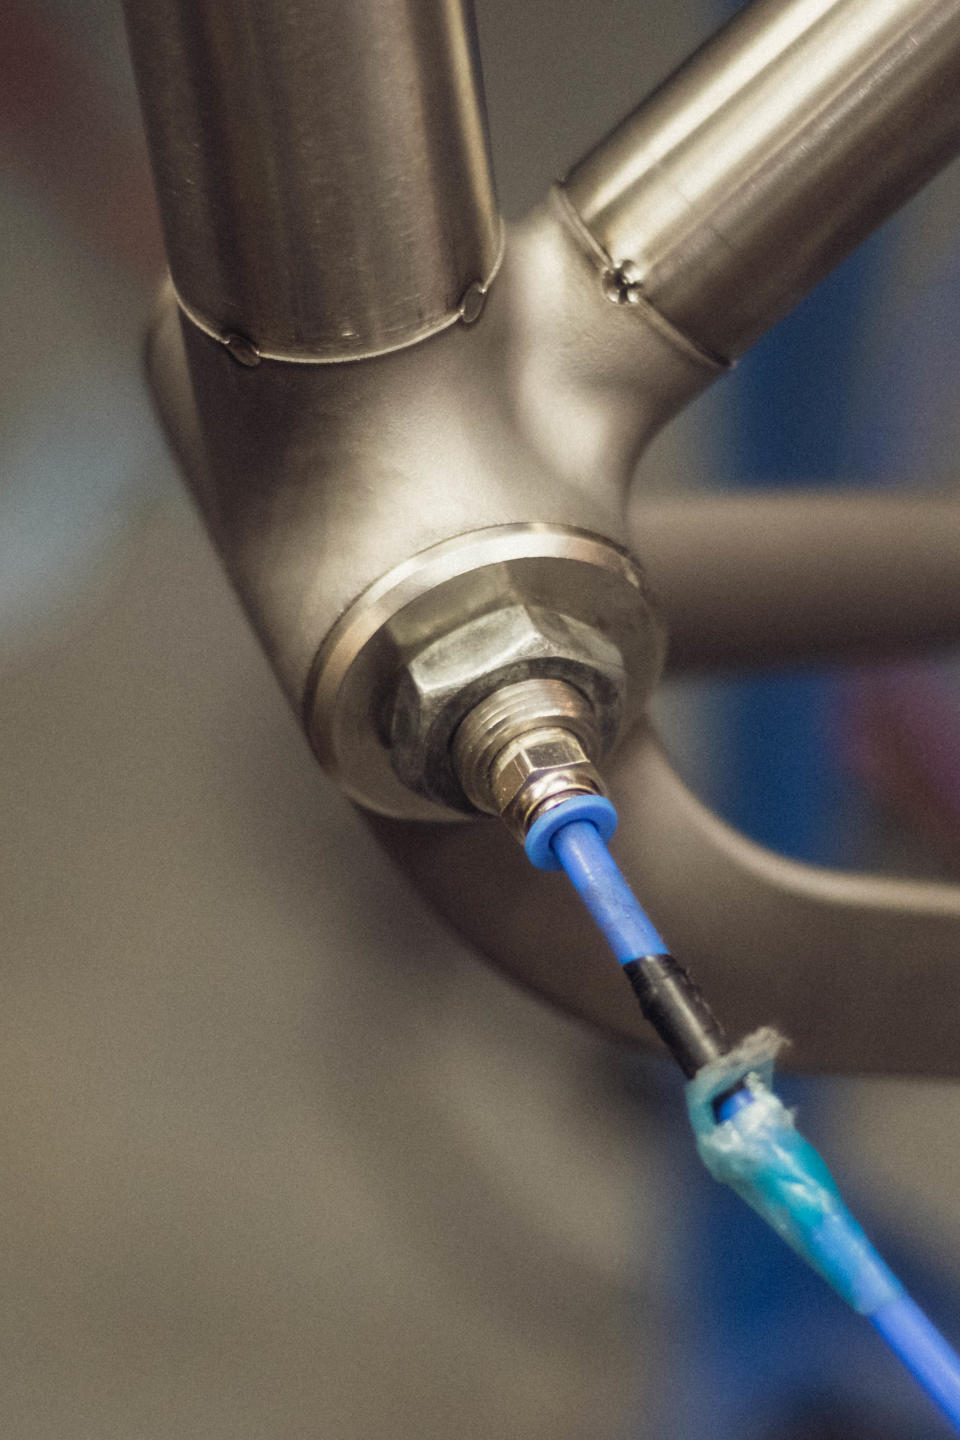
Here you can see the small frame tacks that are created while the frame is still in the jig, along with the inert gas purge pumped in through the bottom bracket.
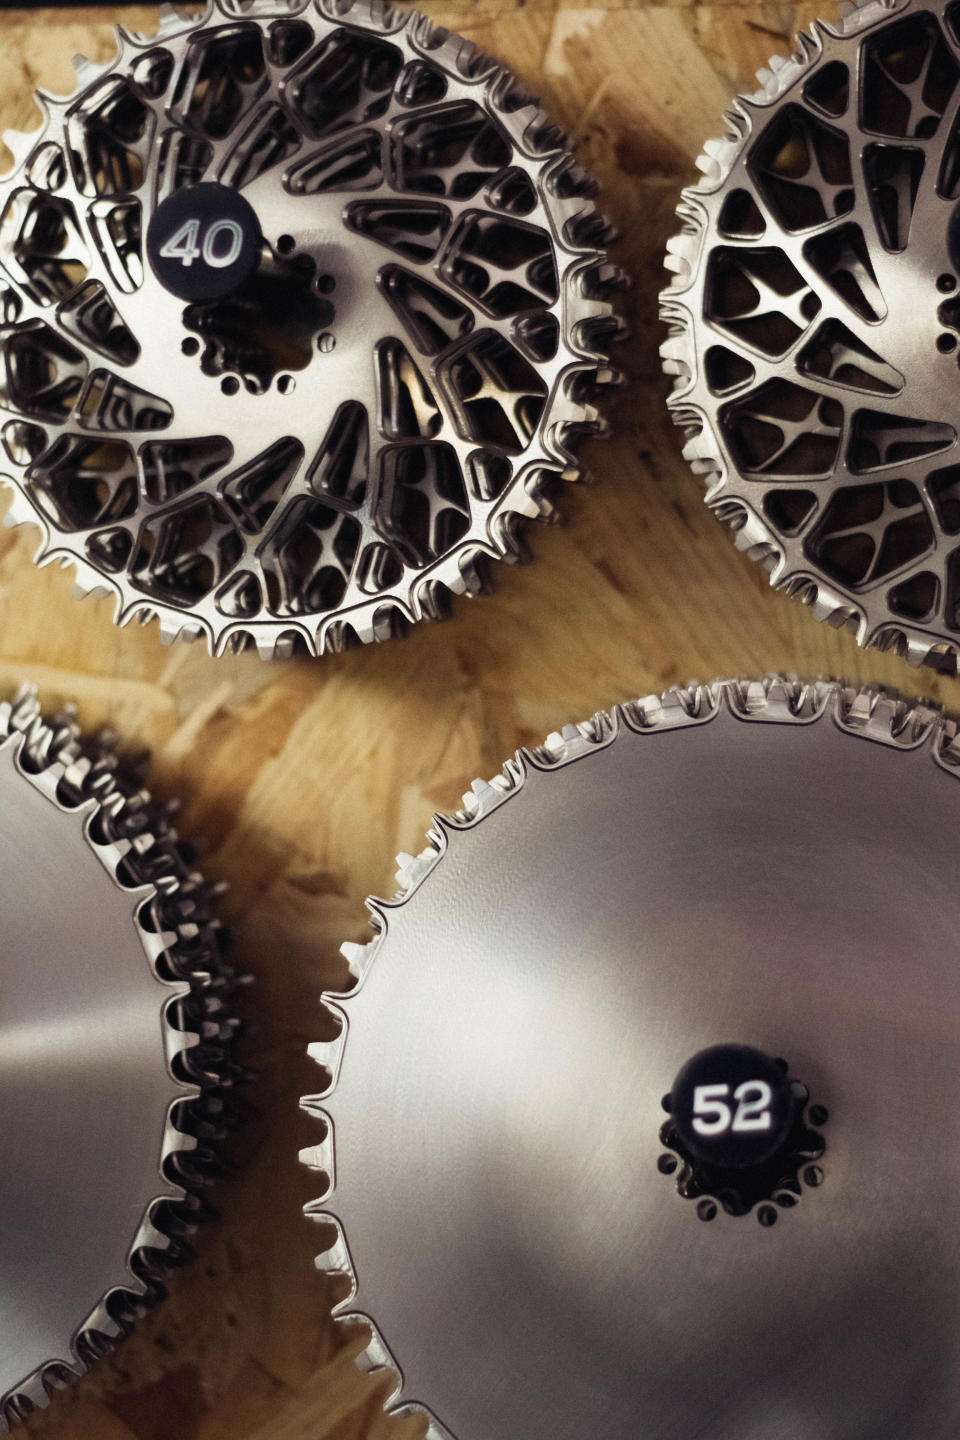
Lightweight and aero chainrings hang on the wall in size order. They are 1x specific, and CNC'd off site by a third party to Sturdy's specifications.
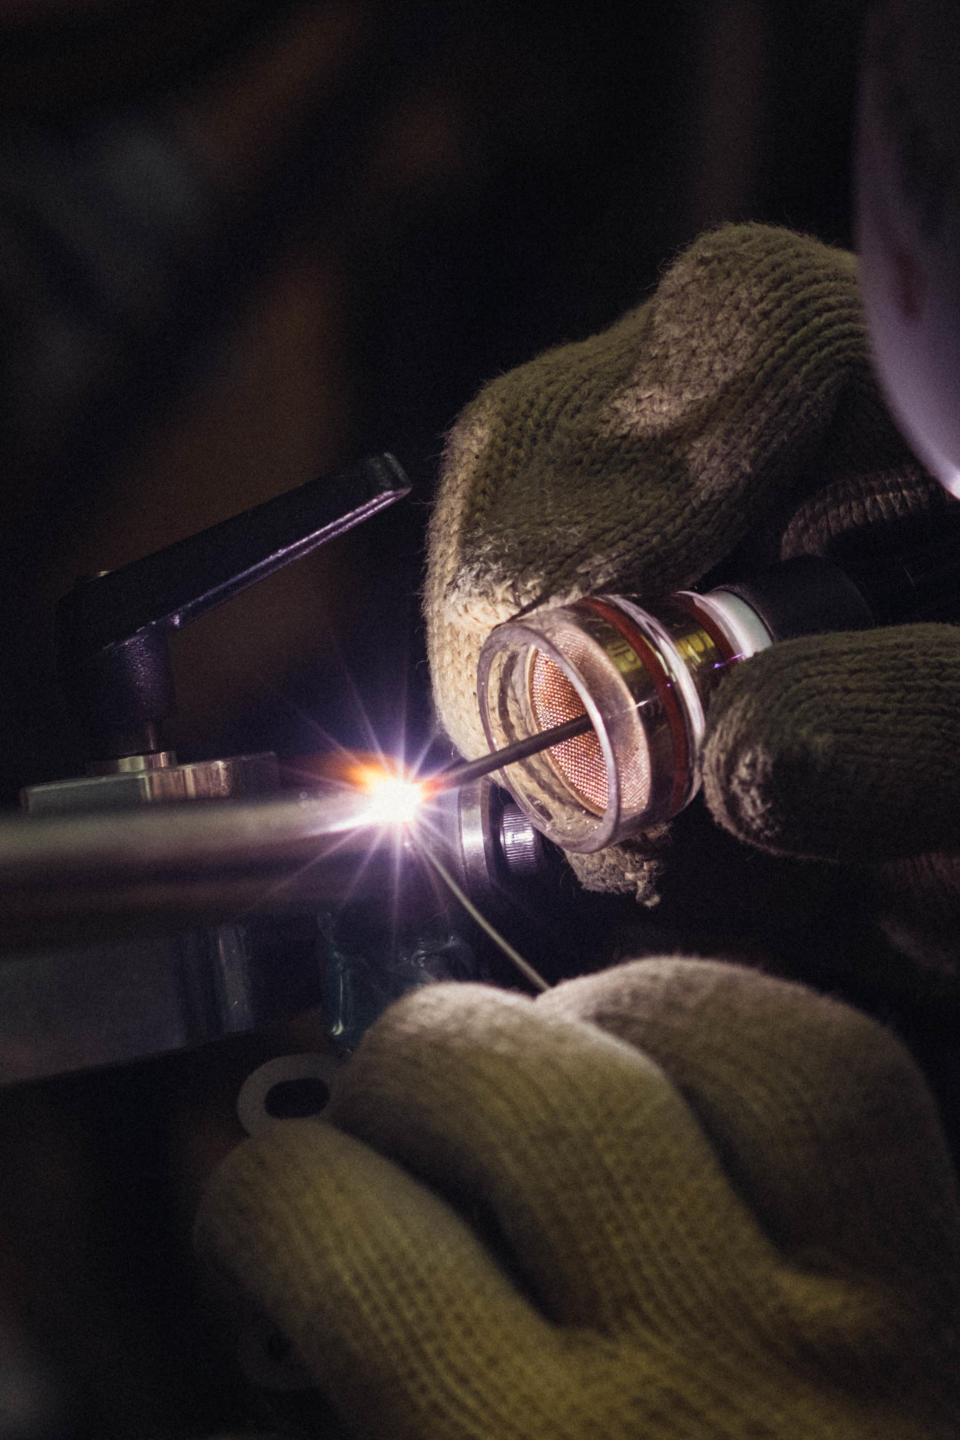
The end of the welding torch pumps inert gas out through a fine mesh behind the electrode, shrouding the weld area and preventing any oxidation that would impact the weld strength.
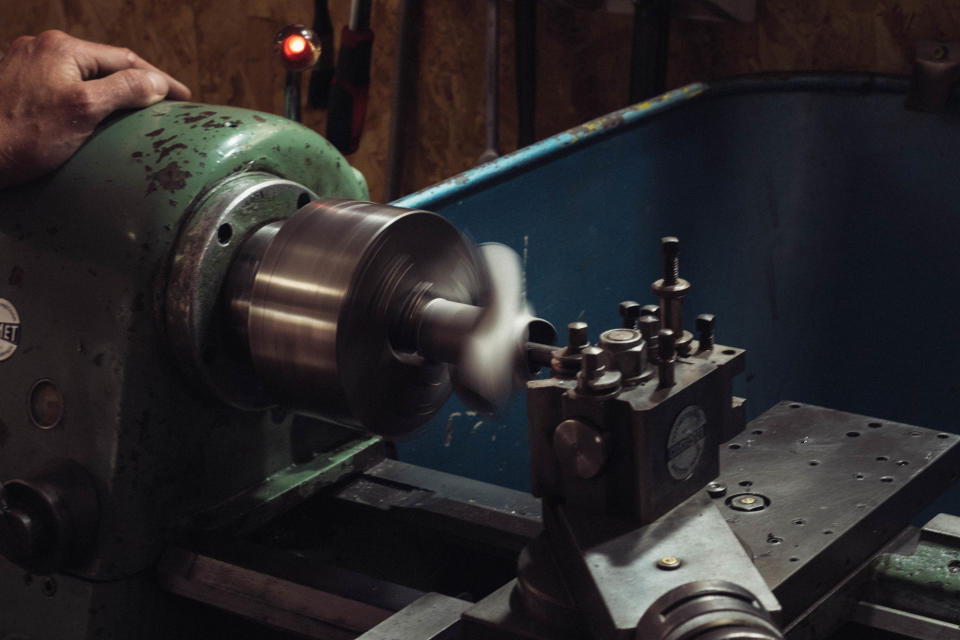
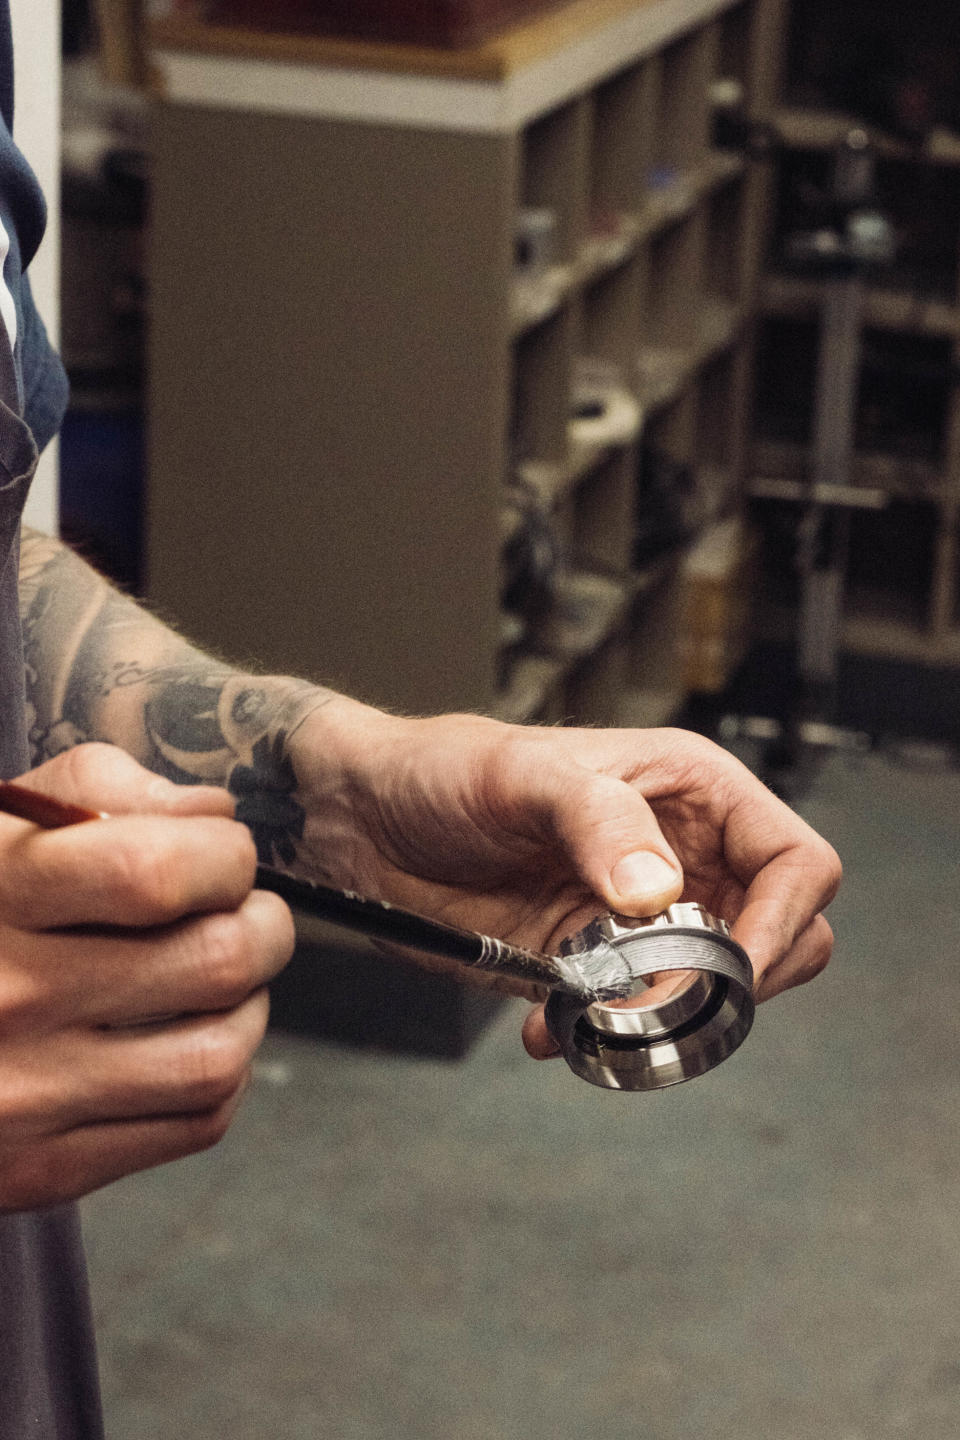
While Tom welds, Omar machines the inside of the seat cluster so the seat post will fit perfectly upon assembly.
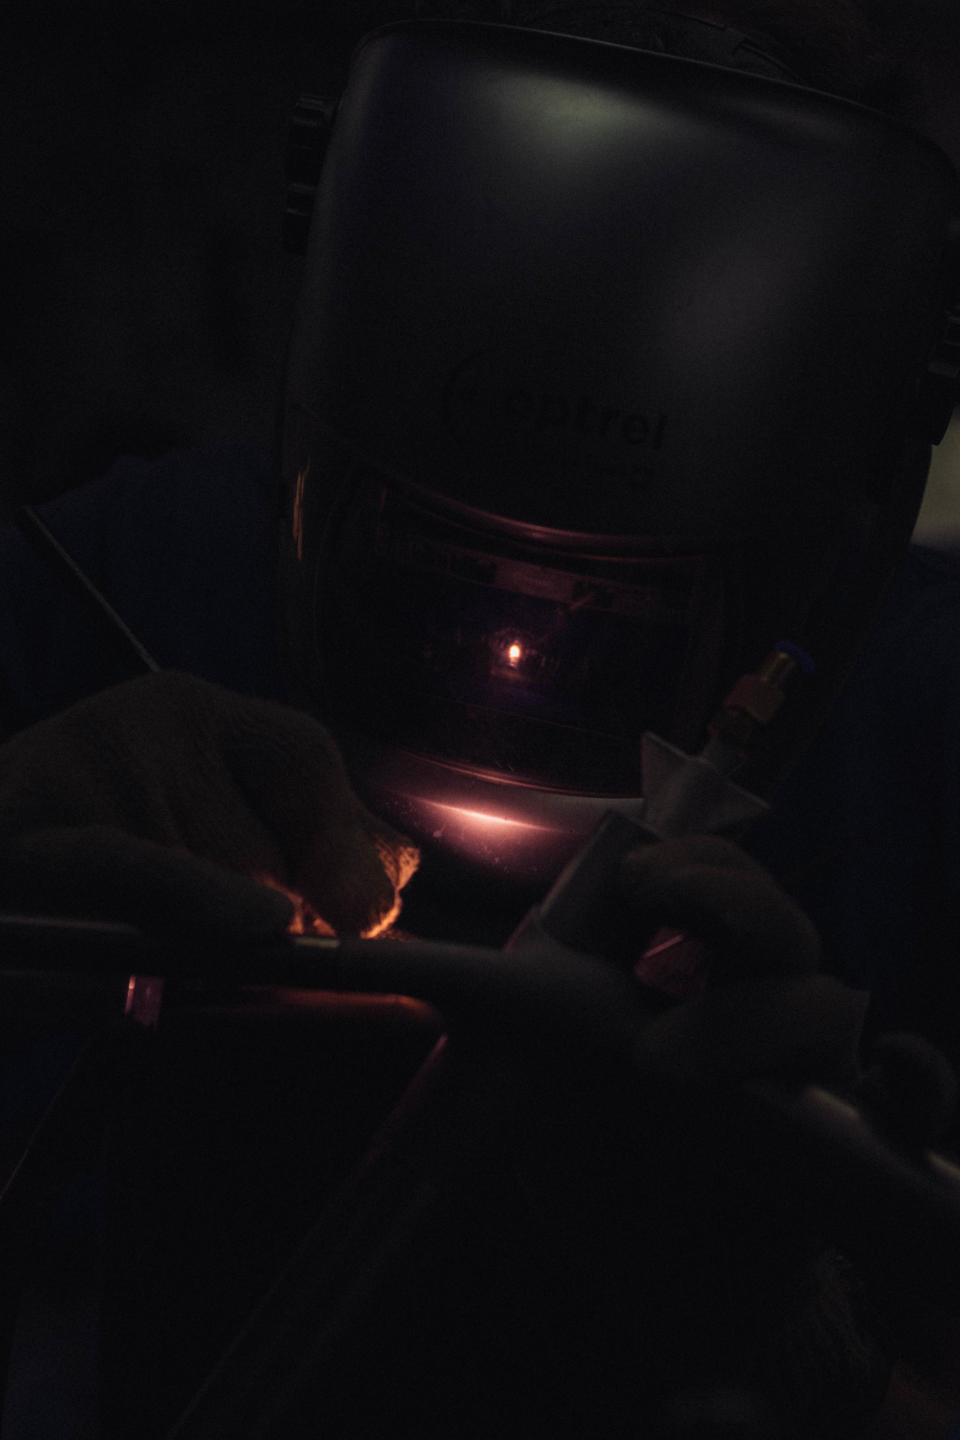
Through a camera's viewfinder, the welding process becomes something otherworldly, mostly thanks to the resemblance of a welding mask to an astronaut's helmet.
The shop floor
Traditionally, and even for the most modern of framebuilders and for industrial-level production to a great degree, building a bike frame involves taking tubes, mitring them (i.e. making notches in the tube ends) so they all fit together, then tacking the frame together and finally brazing or welding the frame together. In order to change the frame geometry one adjusts the notches in the tubes, but things are different at Casa del Sturdy.
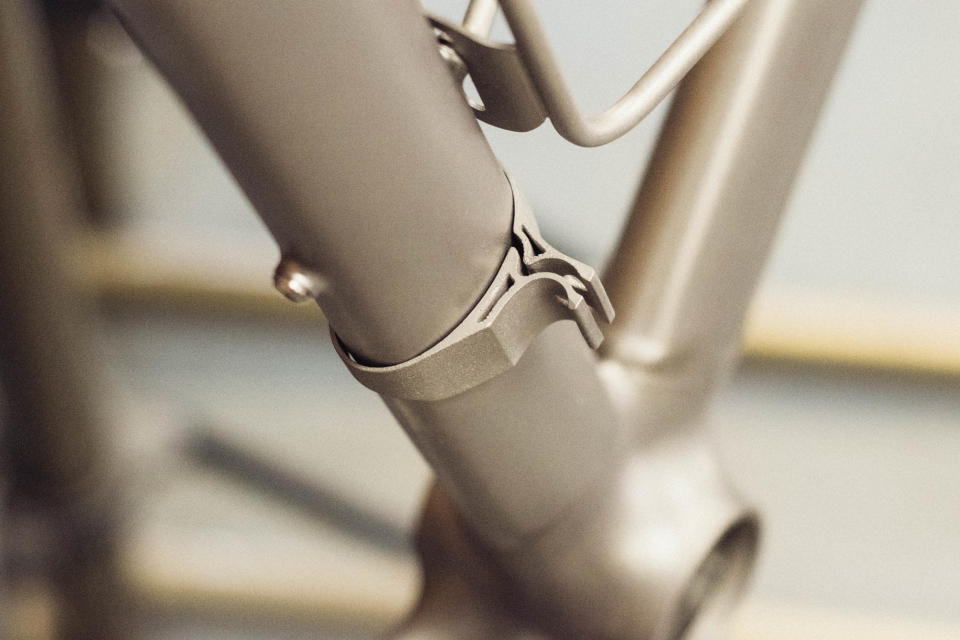
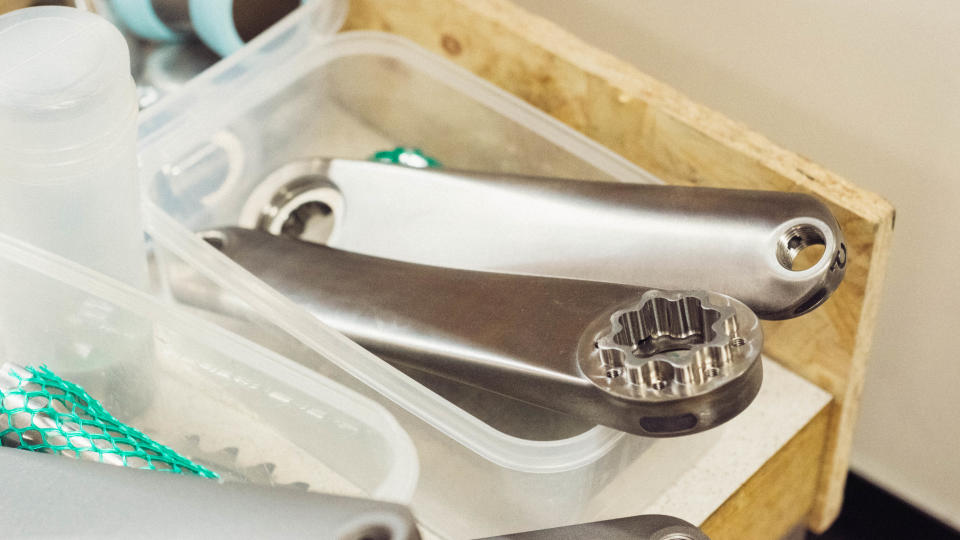
A great portion of a Sturdy frame arrives in a DHL box, shipped from a 3D printing facility in New Zealand. The head tube, forks, cranks, handlebars, bottom bracket, seat cluster, and the entire chainstay assembly come ready printed. Each piece is designed so that the main tubes of the frame can simply be cut to length and the printed parts slotted into them, a far faster process than mitring. Again, efficiency savings, and each customer can tweak their geometry to suit their needs and their own biomechanics.
This method of production means that Tom Sturdy can take a box of printed parts and turn them into a frame in around 40 minutes, which is blink-and-you’ll-miss-it-fast for frame production. Slot together, tack, weld, and done. Well, nearly, as things don’t end there, from an engineering and finishing point of view.
Welding adds a lot of heat to a very localised area of a bike frame, and regardless of the skill of the welder, this adds stress to the frame. For the most part, it’s never really a major concern, but that doesn't stop each weld, and the whole bike in its entirety, getting shot peened with little glass beads. Shot peening differs from shot blasting in that, rather than being a deliberately abrasive process, the aim is to slightly compress the upper surface of the metal, compressing it and relieving tensile stresses beneath. It just happens to be abrasive as a by-product. This creates an even, deeply textured finish for the bike, and I’m told that following peening some parts of the frame move by over 1mm.
The fresh products from the printers, replacement Sram brake levers in this case, have a matte finish, but still need shot peening to make them uniform with the rest of the bike.
Polished components are possible, but rare. Titanium is hard, and resistant, but polished parts show up scratches far more readily than shot peened ones do.

In a bank of draws the facing tools for the bottom bracket resides; a tougher job than with a steel BB.
The blasting media in the shot peener is glass beads, which shatter on impact and spark, eventually turning to a fine powder that needs replacing when no longer effective.
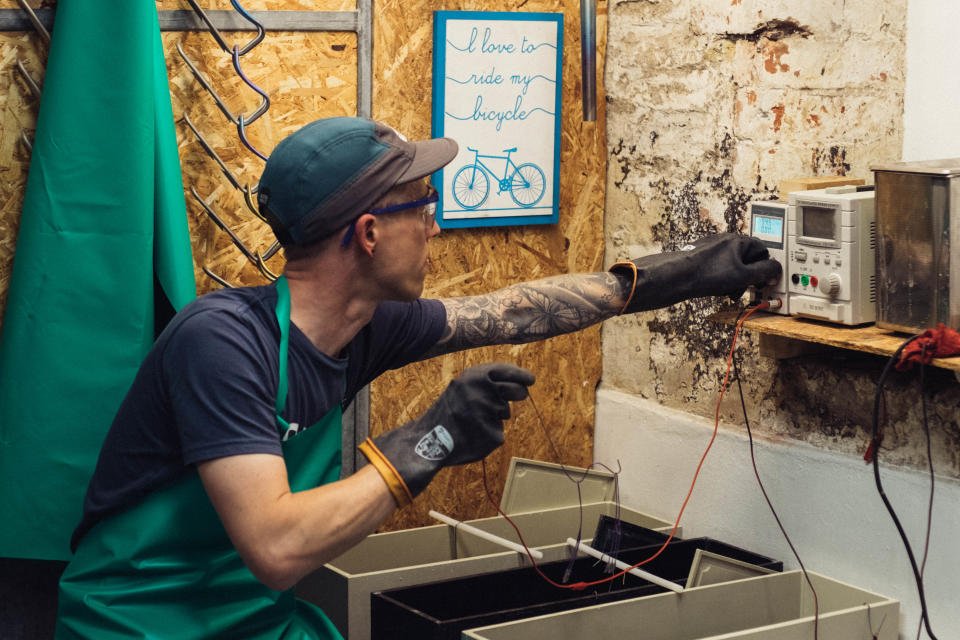
The anodisation station: A temperamental chemical process that creates the bright metallic finishes.
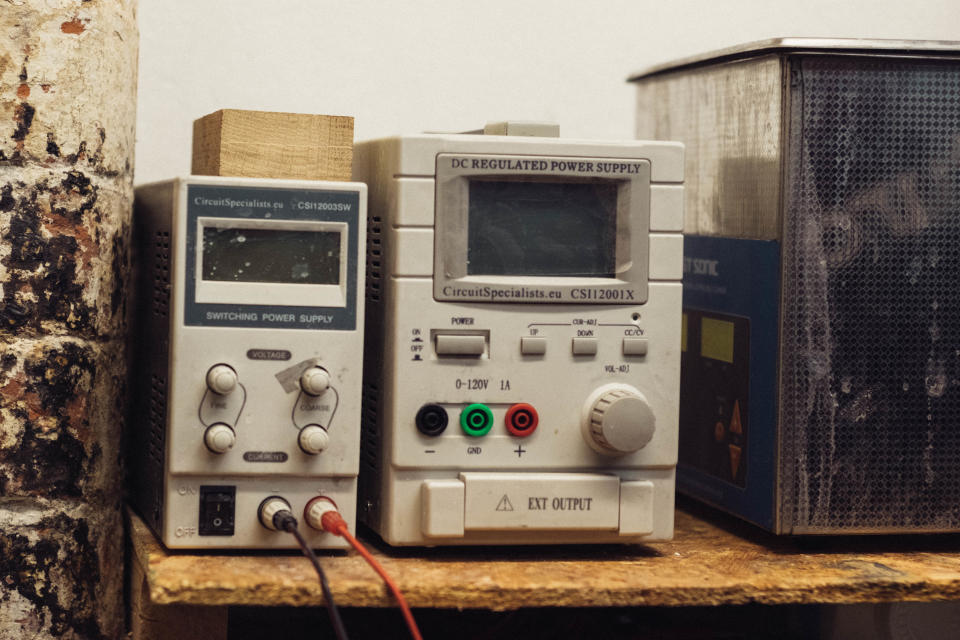
All the voltage and current controls are housed in this power supply, which put me in mind of a 90's stereo system.
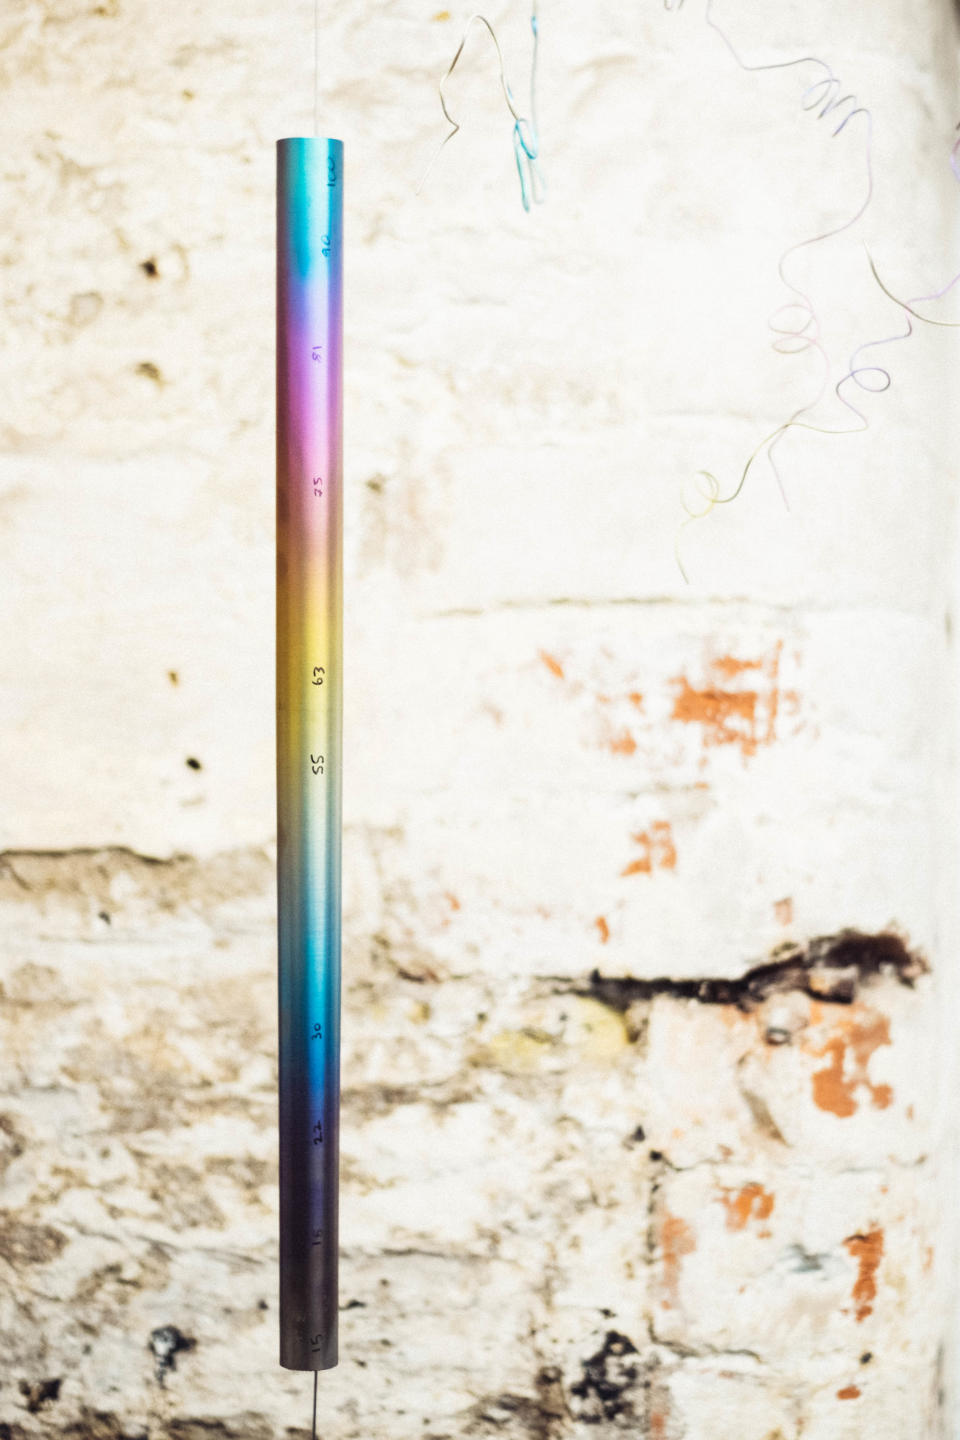
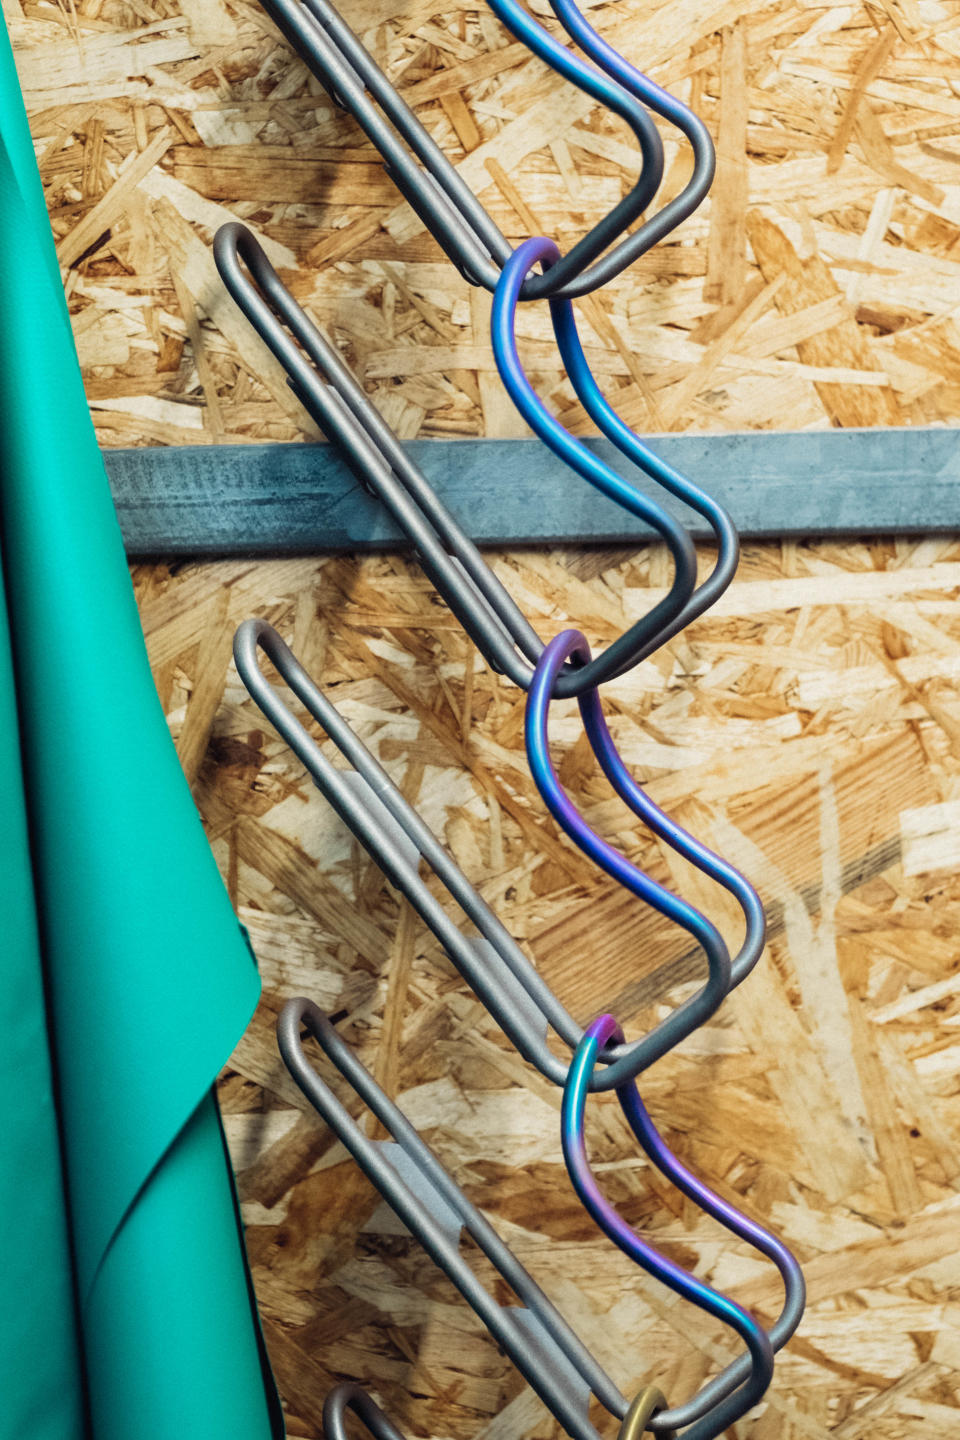
A reference tube, with annotated voltages, shows how only certain colours can be happy neighbours.

Parts ready for anodisation get a final soak in a rinse tank to remove any traces of acid.
With the application of voltage via a moistened cloth though, mottled patterns are possible.
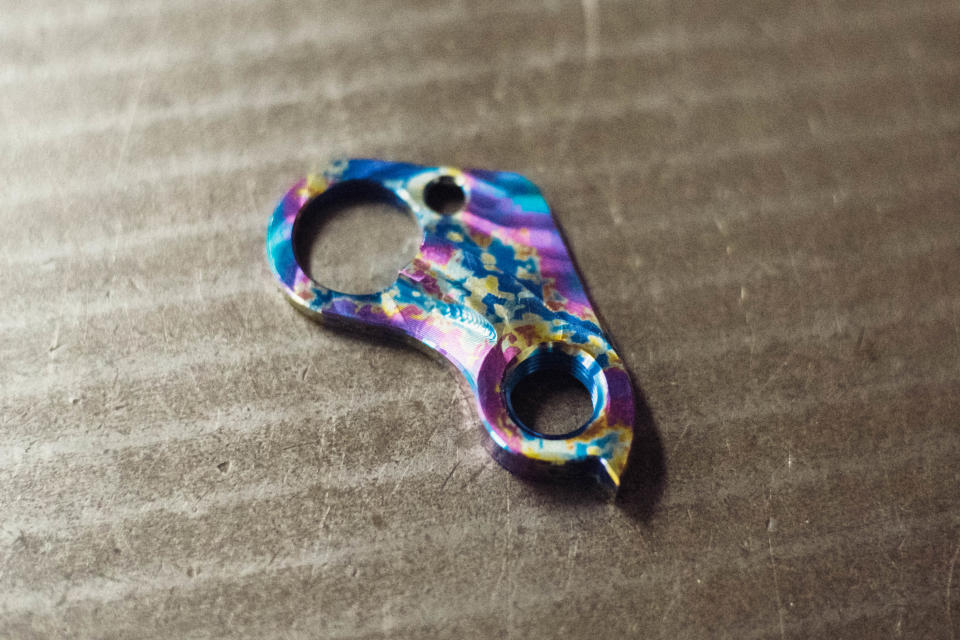
Quite possibly the most bling derailleur hanger I've ever laid eyes on.
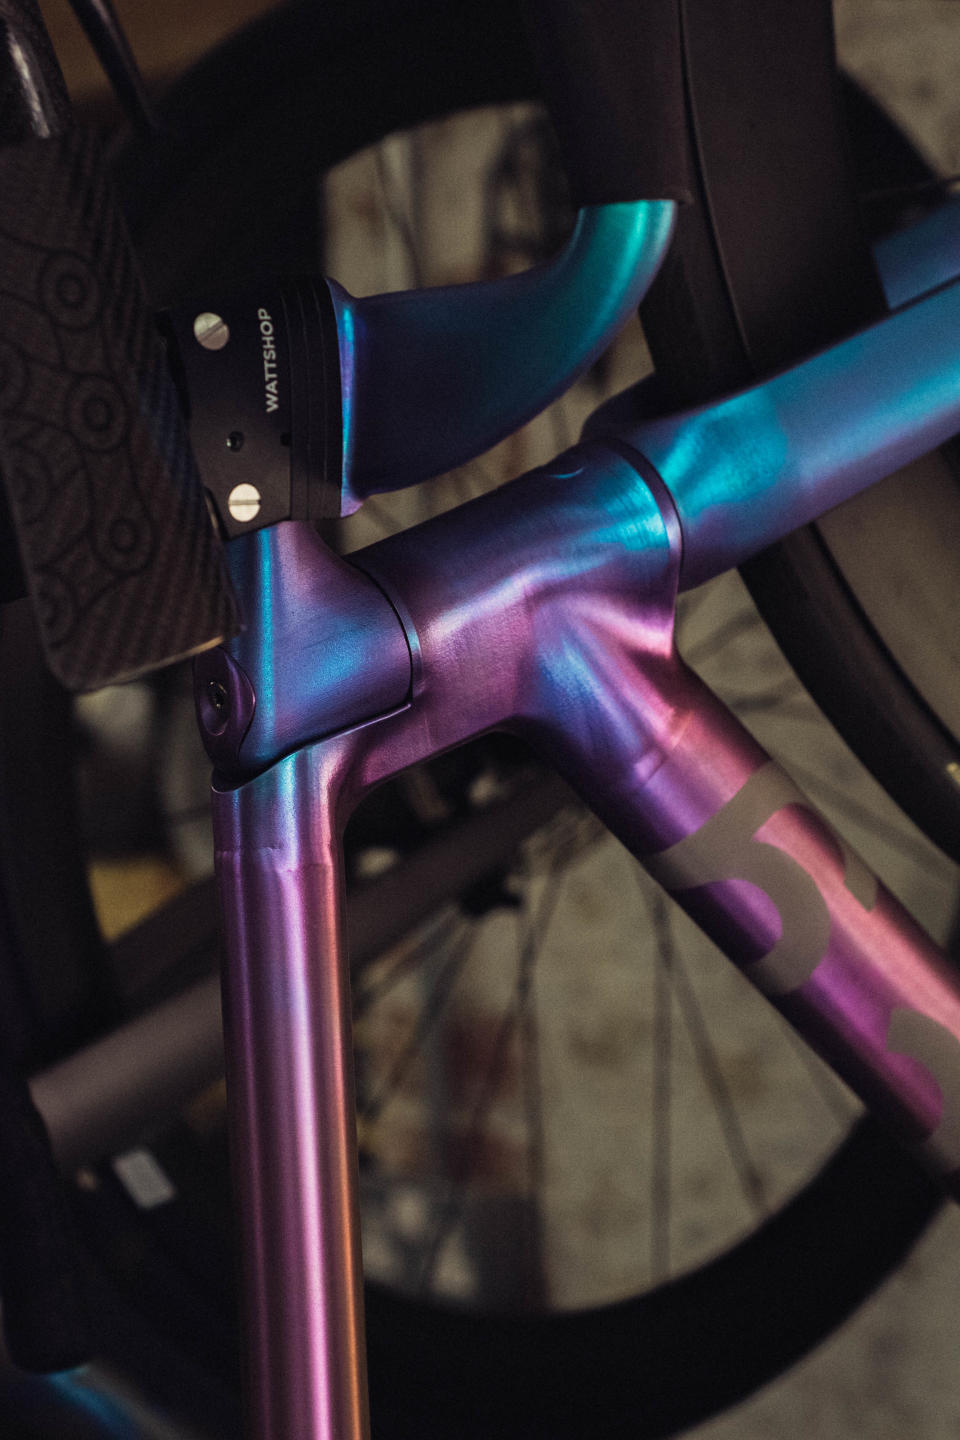
While some customers go overboard, and others reject anodisation altogether, the front end of Sturdy's own time trial bike is testament to what's possible in terms of finishing.
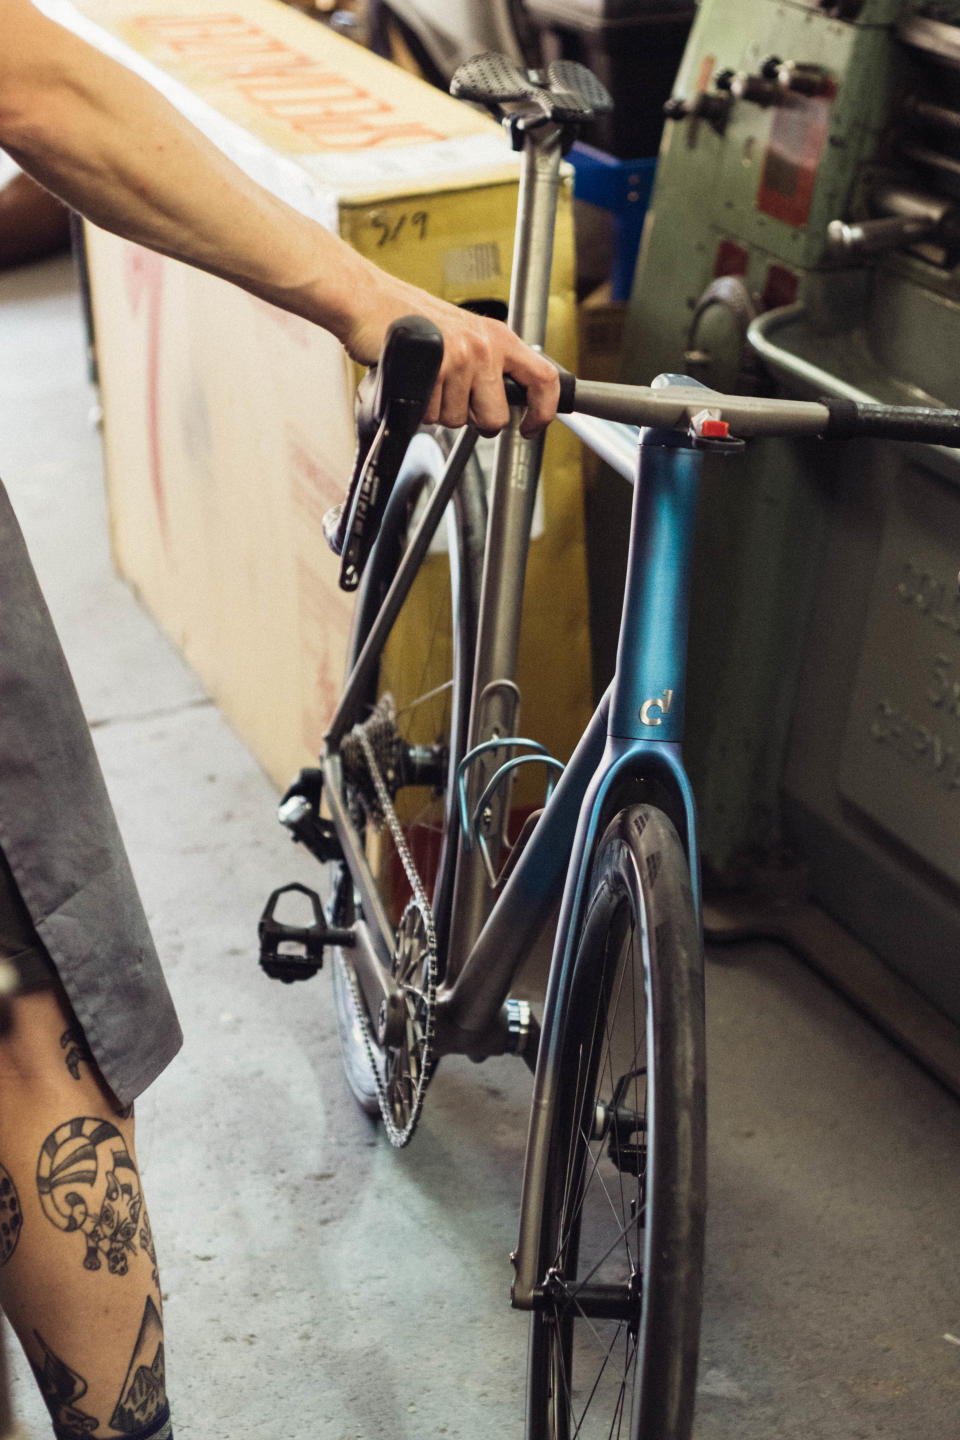
While I was at the workshop a customer came to collect his bike...
... the finish was similar to Sturdy's TT bike, but with a simple blue only scheme, rather than any fades.
The final bikes are pieced together, primarily from in-house components, with clear care.
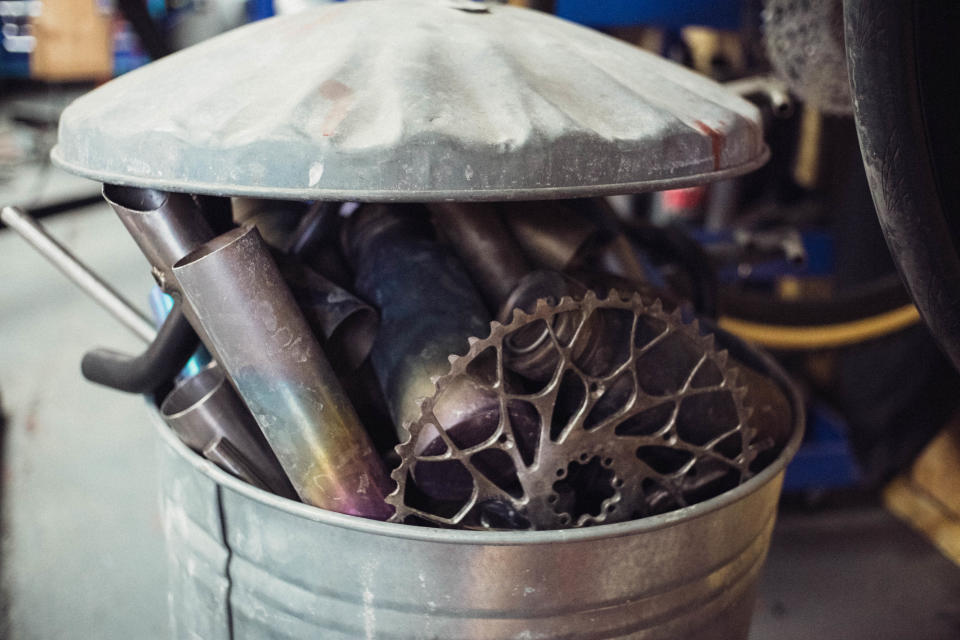
It takes a special workshop for the rejects bin to be worthy of a final photograph. Here resides offcuts, but also failed anodisations and out of spec chainrings.
There’s finishing, and there’s finishing
The shot-peened frames and parts take on a uniform texture, and designs can easily be blanked out with masking to create polished logos and designs. At this point the bike would be good to go, once assembled, but the most visually arresting thing about these bikes are the coloured, anodised sections. I’m reticent to use the old cliche that ‘the photos don’t do justice’ to the colour, but in person, there’s a depth to the colour that the camera lens struggles to pick up. The fades between the metallic shades are so subtle the presence of the next colour almost comes as a surprise.
The anodisation takes place in three consecutive tanks tucked away in the corner of the workshop. One tank full of acid receives the parts initially, to clean away any muck and remove any oxide that’s currently present on the metallic surface. A second tank contains deionised water and is a simple rinse, before the parts are connected to a crocodile clip and dunked into the final tank, acting as the anode (hence ‘anodisation’).
In short, the application of electrical current through the titanium creates an extremely small layer of transparent titanium dioxide, which itself modifies the wavelength of light that passes through it, reflects off the titanium metal beneath, and heads back out into the big wide world. The resulting reflected wavelength, and therefore the colour that we see, depends on the thickness of the layer, which itself is determined by the voltage. This means the colours are a continuum, rather than a series of distinct options. You can only fade between adjacent shades, so a bright yellow next to a deep blue is impossible, but purple into blue, or yellow into a grey-green is ideal. This is best illustrated by the anodised titanium tube hanging from the ceiling, handily annotated by the voltages required for creation.
Dunking is one thing, and gives uniform fades, but in order to create the more unusual textures, the titanium dioxide layer can effectively be painted on by attaching a crocodile clip to a moistened cloth or sponge and using that to pass the current over the bare metal. It results in mottled, vibrant textures that at once resemble extreme patina and something more biological.
The finished bikes are then assembled, mostly using only a T25 tool as the majority of the bolts on the bike are custom T25 units, and then are ready to ride. Given Jack and I are roughly the same size, and Jack had just taken ownership of his own Sturdy, I was afforded the opportunity to see what it’s like to ride totally custom titanium with a great day out in the hills of south Wales.

