Achieve super sharp scenes with focus stacking in Affinity Photo

Watch video (above): Focus stacking in Affinity Photo
Over the past few years focus stacking has gone from a niche, little-known trick used in macro photography to an everyday technique called upon by all kinds of photographers, from those shooting architectural scenes to landscapes, product photography, fine art and more.
There are two key benefits to focus stacking. The first is the obvious one. It lets us expand our depth of field beyond the capabilities of our camera and lens. By shooting a series of frames while incrementally adjusting the focus distance, we can record sharp details across the entire scene from front to back. Merging these photos is easy with Affinity Photo’s Focus Merge command. This automatically combines the sharp parts from each frame for us, and lets us manually perfect any mistakes in the blend.
The second benefit is perhaps less obvious, but could be just as important to landscape photographers. Lots of us tend to use narrow apertures like f/16 for landscapes as this leads to greater depth of field. But at these narrow apertures diffraction comes into play, and fine details render a little more softly. Every lens has an aperture at which it is sharpest, and by utilizing focus stacking, we have the luxury of choosing it. This ‘sweet spot’ is usually a couple of stops down from the max aperture of the lens, so if the max is f/4, the sweet spot is around f/8.
A wide aperture means less depth of field, but if we shoot for a focus-stack then we can simply shoot more frames to expand the depth of field and merge in Affinity. You’ll find eight focus stack start images that you can try out this technique on in your free download.
1. Start a focus merge
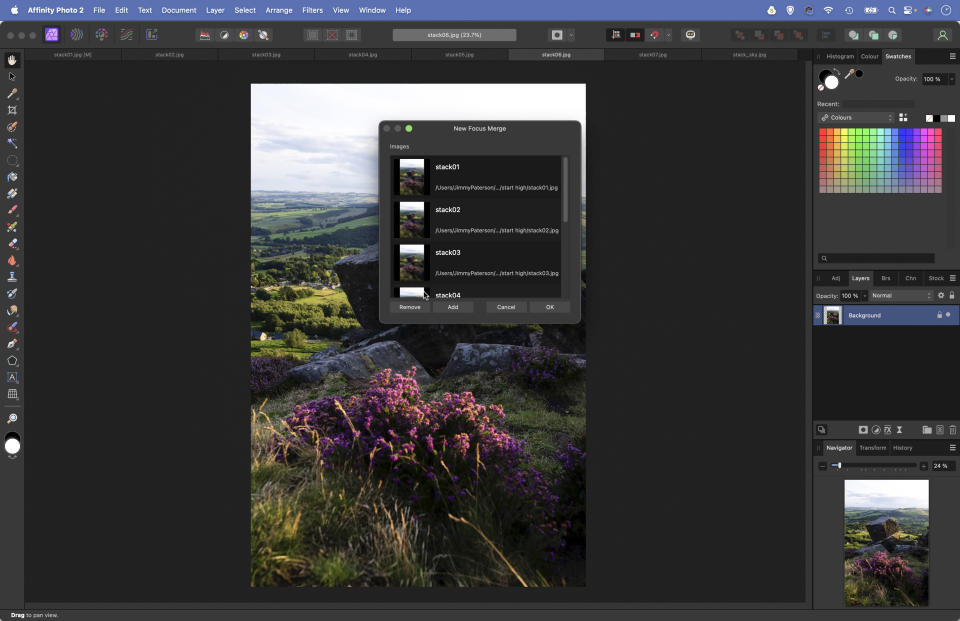
Open Affinity Photo 2 then go to File>New Focus Merge. Click Add, navigate to your folder of photos (or download our start files here) and drag to select them all and hit Open. Click the OK button and sit back while Affinity Photo seeks out and combines the sharp parts from each photo for you.
2. Inspect the results
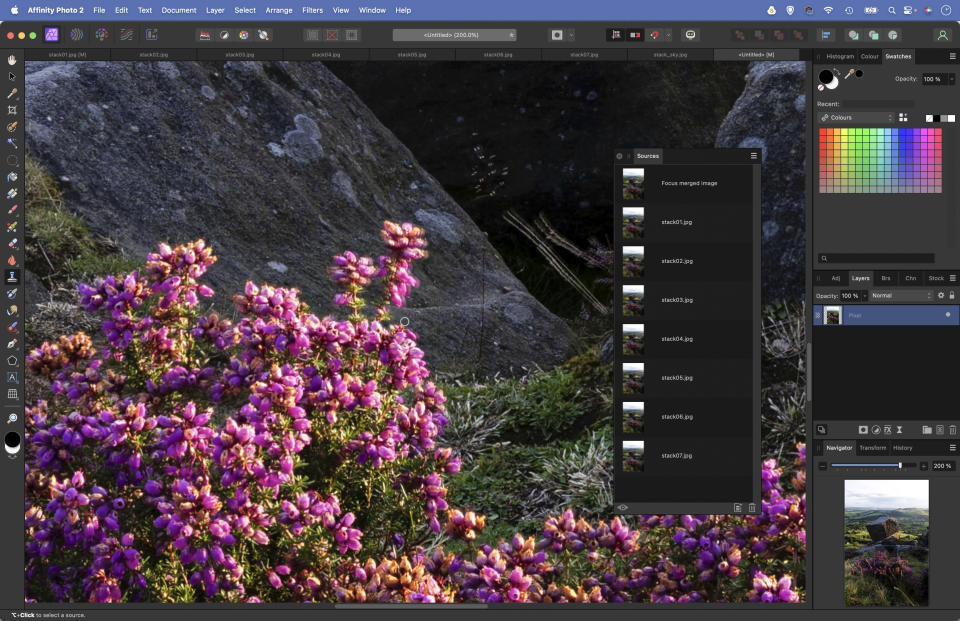
At this point you might find that you’re done. But sometimes the merge will not be perfect. Landscapes can often have issues, as patches of background detail between stems or branches may be blurry, or the wind may make plants to move like the flower here.
3. Find a sharper frame
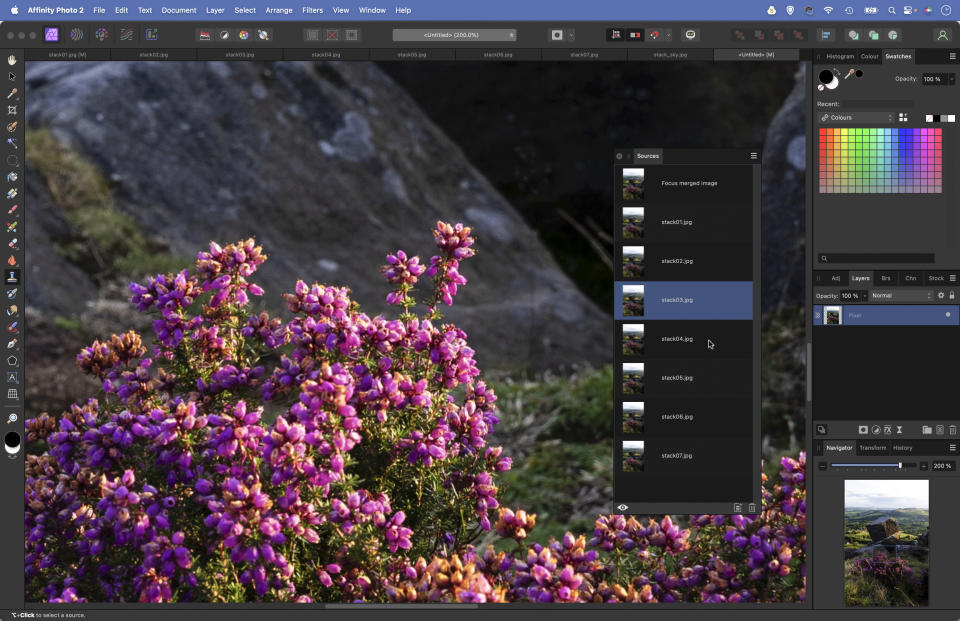
The Sources Panel lets us view each image in the blend, so we can click through the original frames to try and find a sharper match for our flower. Click the eye icon then click through each image in the list. Here image 3 has a sharper flower than the blend.
4. Clone to improve
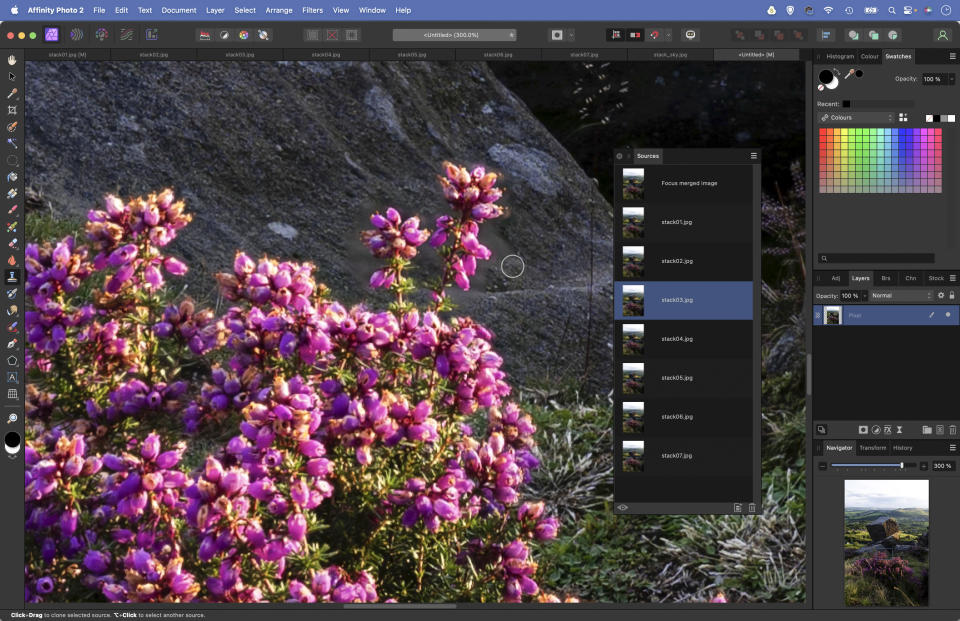
Highlight the image in the Sources Panel then click the eye icon again to go back to the merged view. Using the Clone tool (it should be selected) paint over the area to clone from the source into the blended image. Continue to paint in sharp parts from any other areas.
5. Fix messy areas
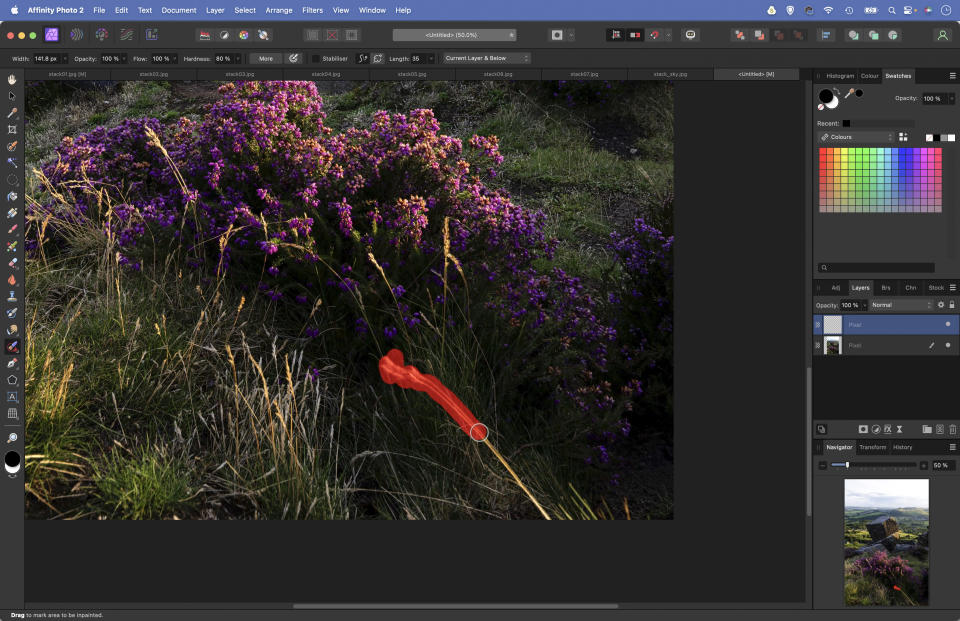
The grassy foreground has been moved between frames. Rather than attempt to fix the blend, we could simply remove it. Go to the Layers Panel and click the New Pixel Layer icon then grab the Inpainting tool. Set ‘Current and Below’ in the sample options and paint.
6. Blend in a new sky
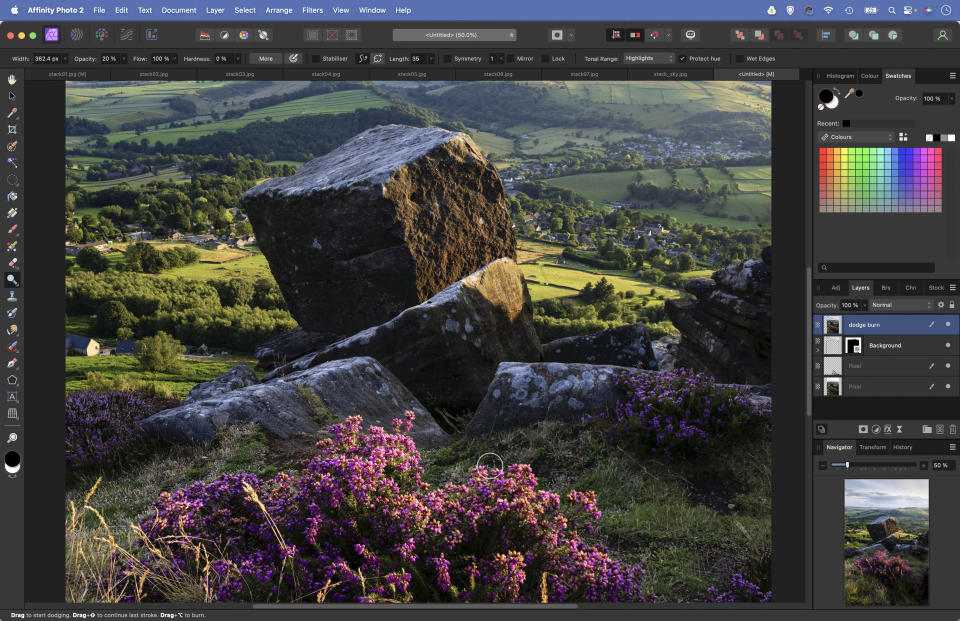
The sky is a bit blown out here but we have another frame with a darker sky. Open and copy this in (Cmd/Ctrl+C to copy, Cmd/Ctrl+V to paste), then add a layer mask and paint with black over the land so only the sky is visible. We finished off by dodging and burning.
If you enjoyed this tutorial but want a bit more power from your laptop, why not look at the best photo-editing laptops? If you're really keen to improve your skills further then online photography courses could be the way to go.

PhotoPlus: The Canon Magazine is the world's only monthly newsstand title that's 100% devoted to Canon, so you can be sure the magazine is completely relevant to your system. View Deal

