This ’80s Bathroom Got a Budget Reno and You Won’t Believe Your Eyes
The Spruce / Photo Illustration by Amy Sheehan / Margot Cavin
My partner and I had been fantasizing about buying a house to fix up for years. When we found a contemporary home built in 1980 that included three beds, two baths, and checked a lot of our boxes, we decided to take the plunge.
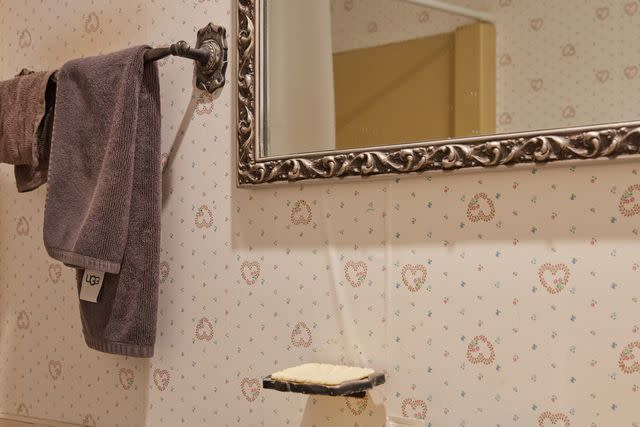
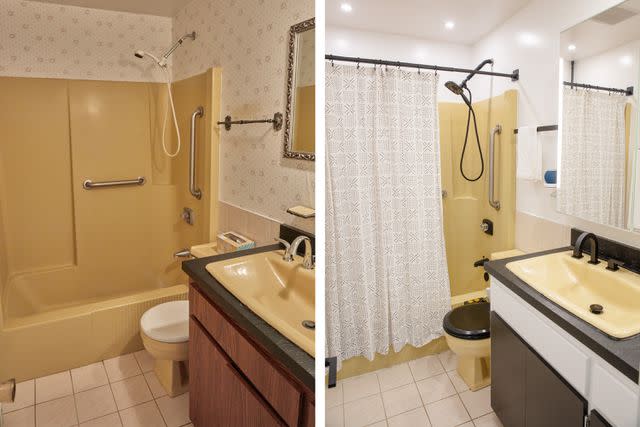
However, when we walked into the bathrooms, it was obvious they had not been updated since the house was built. The layout was completely outdated, and it seemed like they sat on top of each other. Colored in not-so-flattering hues and plastered with floral wallpaper, we knew the upstairs bathroom was going to need a lot of work.
We had many tasks waiting for us—as much as we wanted to get started, the upstairs needed to wait once we found out the downstairs toilet was flooding. Before we got started, we set a budget of $800, since our goal was to make inexpensive, DIY improvements that would transform our outdated bathrooms into stylish and modern spaces for less—and I'm happy to say we accomplished this goal better than I imagined. Here's how we completed the updates to inspire your own budget renovation.
Step #1: Goodbye, Wallpaper and Accessories
Right away, we knew the wallpaper had to go, so I started researching how to properly remove it. Everything I read implied that the process was going to be tedious and difficult, so I started preparing by buying my essential tools: a wallpaper scoring tool, a scraper, a spray bottle, a steamer (which I already owned), and a lot of vinegar.
Margot Cavin
Luckily, there was a corner along the floor that had started to peel up, so without any of my tools, I started to pull. Miraculously, it all came off in one nice full piece, so I never even opened the wallpaper scoring tool or used any vinegar.
After, I got my drill out and started taking everything off the walls, one by one including the towel rack, mirror, toilet paper holder, and hooks.
Step #2: Time to Prep
Once all the wallpaper was off, I started filling in small nail and screw holes with spackle. The wallpaper had taken some of the drywall top layers off, so I spread some drywall compound over those damaged areas to smooth out my wall surfaces.
Once everything had dried down, I sanded everything down. I used an electric orbital sander to quickly smooth down the spackle and drywall.
Step #3: Paint, Paint, Paint
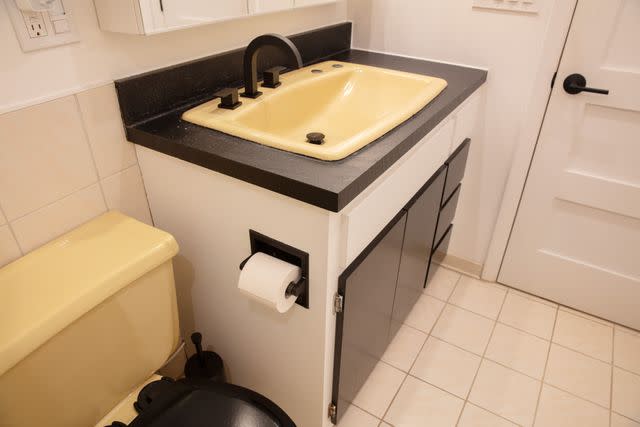
I primed the cabinet, walls, and ceiling. Since bathrooms had high moisture levels, we decided to use semi-gloss paint to withstand such conditions. We acknowledged that the mustard color wasn’t going anywhere, so we decided to paint everything white since we knew neutrals would complement the yellow hue.
In a last-minute decision, I painted the doors and the drawers of the cabinet black. Thanks to already having a can of semi-gloss black paint in storage, it didn’t affect my budget. The black and white color blocking leaned into a mod style making the mustard (almost) look purposeful. Finally, I added black caulk around the rim of the sink for a cleaner look.
Step #4: New Installations
As our bathroom was finally coming to life, we installed new accessories to complete the final look. We purchased and installed a new matte black toilet paper dispenser and towel racks to complement the aesthetic—getting these up was very exciting since it started to actually feel like we were close to the finish line.
Margot Cavin
To create more bathroom storage, we looked for a medicine cabinet and mirror combo to replace the dated mirror. We wanted LED lights built into the mirror since there was only an overhead fixture, which wasn't flattering at all. As a photographer and cinematographer couple, poor lighting was something neither of us could tolerate.
A lot of the options that fit our needs were over $600, but we soon came across an IKEA one which was $399. However, there were some caveats to this—my boyfriend (who is unquestionably very handy) messed up on an early step more than once and had to disassemble the unit three times. We used wood glue and our own screws to fix the mistakes.
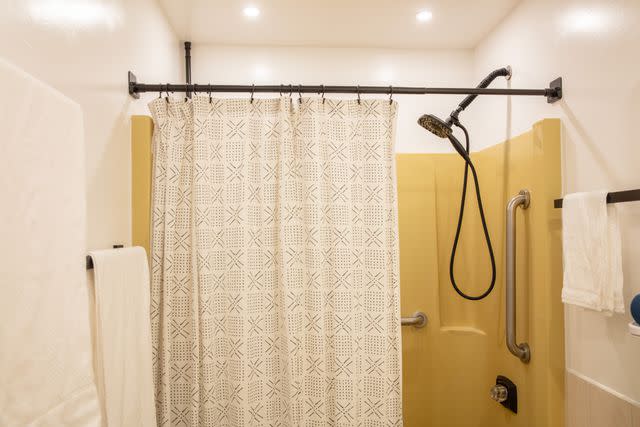
Finally, we swapped out the older shower head (which felt like the end of a garden hose) for a new quality one in matte black. The shower head cost us $168 and although it felt like an expensive purchase for a quick DIY project, we planned on keeping it even after the full renovation in the future.
The First Shower
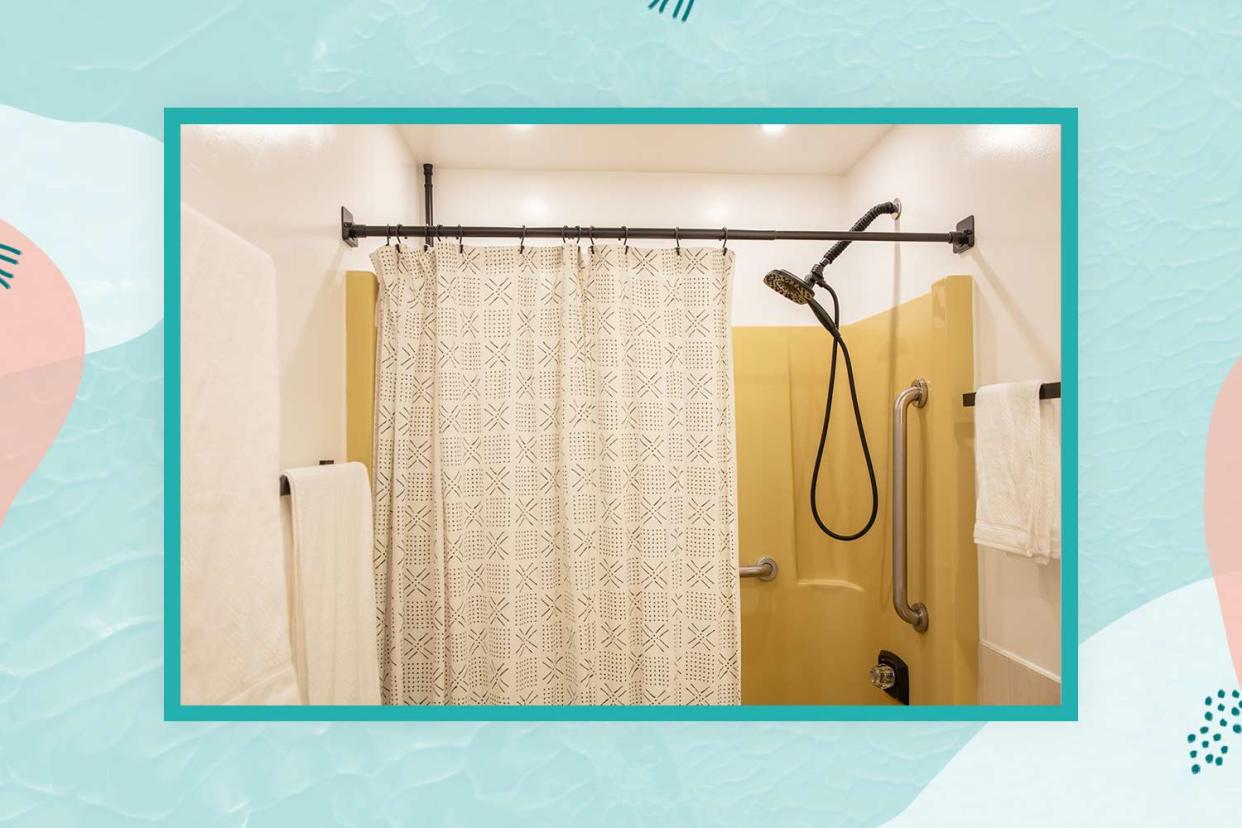
The least expensive, easiest, and most effective change was the new shower curtain. It cost us $29.99 and its fabric covered up two-thirds of the mustard color in the bathroom which was a bonus. I chose a white curtain with a dark gray pattern which helped to lighten up the space.
The bathroom was finally ready to be used and I had the best shower of my life.
Margot Cavin
More Updates
After a few months of our first DIY renovation, we went back and made some more changes.
Recessed the lights and added two lights above the shower to brighten up the space and added a better vent fan to keep the moisture levels lower.
Replaced the old chrome sink faucet with a modern matte black set to match the rest of our upgrades.
Replaced the old tub faucet and face plate. Since there weren't many options that fit the existing tub and its cutout, we ordered an inexpensive chrome one and painted it matte black.
Switched out the old toilet seat for a black one and added a bidet.
Final Thoughts
I couldn’t be happier with our budget bathroom renovation. The bathroom feels like a completely different space now. When I tour new guests around, there’s no stopping to laugh at the upstairs bathroom anymore. Instead, I take out my phone to show the before photos, so they can visually see the massive transformation.
Margot Cavin
Although we only made a few basic updates, it's a space that we are comfortable keeping for a couple of years. Even though the mustard yellow color is still there, we’ve made it work and have embraced its funkiness—for now.

