8 Essential Tips for Storing Holiday Decorations
Here's your foolproof plan to organize seasonal decor until next year.

Jay Wilde
Trimming the tree and hanging lights around the holidays is a favorite winter activity, and, more than likely, a fond memory to look back on. However, in the blink of an eye, the New Year rolls around and it’s time to take everything back down. And storing holiday decorations isn't nearly as fun. Fortunately, taking down the tree or boxing up beloved family ornaments becomes a more pleasant—and efficient—task once you have a plan. Follow these effective steps to decide how and where to store holiday decorations.
Adam Albright
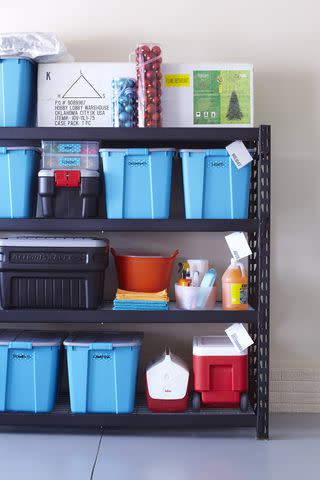
1. Carefully Choose a Destination
Having a dedicated area for holiday decorations is the first step to making this process less stressful. Depending on the size of your space, climate of your location, and extent of your stuff, a garage, basement, shed, or attic is ideal to house it all. This keeps items that you need access to just one month of the year out of your way for the rest of it.
If your home lacks these bonus spaces, or the temperature isn’t ideal, consider using a guest bedroom or storage closet, such as one under a staircase. Alternatively, you might have to separate indoor and outdoor decor if you don’t have room to store everything in one place. Once you've designated an area, it’s time to sort and store Christmas decorations.
2. Take Care of Your Artificial Tree
If you put up a faux tree each year, it's likely the largest thing you’ll have to store. Invest in a zippered cover. Once you've removed all the decor, fold the branches and placed the tree in the bag. Then keep it upright in a storage closet to maintain its condition. While you can also lay it horizontally, it can get crushed over time. Additionally, avoid using the original box, which can deteriorate, especially in humid conditions. For a DIY solution to storing a Christmas tree, stick an extra large trash bag over the tree and tie it at the bottom or use a roll of plastic to shrink-wrap it, then carefully cut it open the following year.
:
Jay Wilde
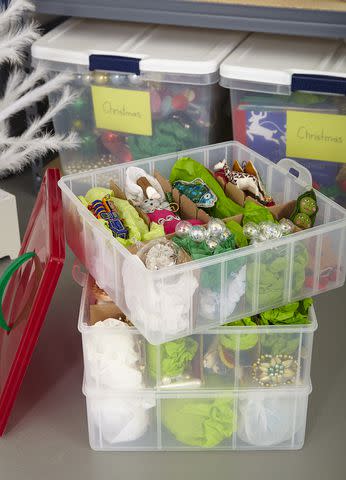
3. Organize Ornaments Safely
Ornaments are some of the most fragile and sentimental decor items, so it’s important to treat them as such. The original boxes that they come in will protect them, however, they’re not great at saving space. Consider using an ornament box with dividers or build your own using cardboard cutouts. A craft box with compartments can hold tiny ornaments. For exceptionally delicate ornaments, use its original box or roll it in tissue paper or bubble wrap before placing it into a divider.
:
4. Wrangle Wreaths
Safely tuck a wreath into a canvas bag or a plastic case with latches. This is a particularly good idea if it has fragile embellishments. For multiple wreaths, install sturdy hooks to create a wall display or use large S hooks to hang them from the rod in a closet. Similar to faux trees, artificial wreaths can be placed in garbage bags or plastic wrap for further protection prior to hanging them in storage.
:
5. Gather Garlands
Regardless of its material, garland can get tangled easily if not properly stored. A simple solution is to corral garland in a wreath organizer or a garland keeper, which usually comes with a hook. This is a good idea for bulky, heavy garland, such as artificial pine. You can also loop a garland around itself (like you would with a hose), use a piece of hook-and-loop tape to hold it together, and store it in a tote. Thinner garland strands, like those made of beads or fabric, are a bit easier to tackle. Fold up the fabric and loop the beads, then seal the garland in a clear, large plastic bag before placing it in a bin.
Jay Wilde
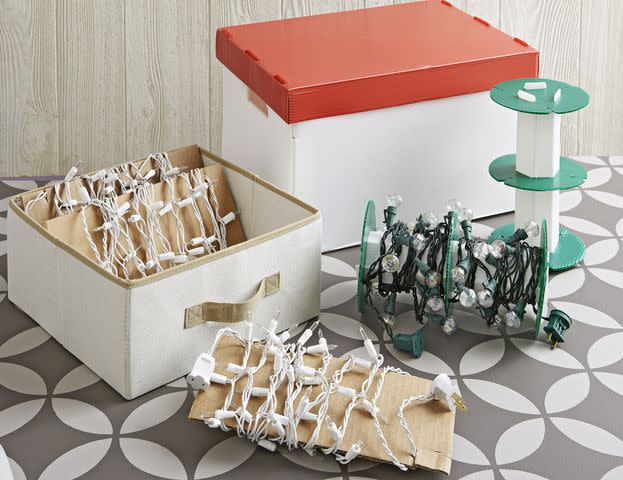
6. Sort String Lights
Similar to garland, strings of Christmas lights can quickly become a cluttered mess without a suitable storage solution. Consider a plastic wind-up wheel or holder, especially for extra-long or jumbo sets of lights. For shorter or smaller sets, try these two inexpensive DIY methods. One requires a rectangular piece of cardboard and the other a thick hanger. Starting at one end of the strand, begin wrapping the lights around either the cardboard or the hanger until it’s fully coiled. The cardboard can fit upright in a storage bin and the hanger can sit on a rod in the closet or on a garment rack.
7. Give Gift Wrap a Proper Home
While you might use gift wrap year-round for birthdays or showers, holiday supplies don’t necessarily need to be accessible at all times. Sort out your seasonal wrapping paper, gift bags, boxes, bows, and tags to stay with the rest of your holiday decor. An all-in-one organizer bag, in a festive color if you prefer, is likely all you need to contain gift-wrapping materials. Another option is a back-of-the-door rack with customizable compartments, which can maximize space in a small storage closet. A mobile cart, with a side attachment for rolls of wrapping paper, is another option, especially if you like to take your supplies out to a table or the living room floor to wrap.
8. Protect Holiday Dishware
Whether you host during the holidays and have settings for thirty or more, or only own a cookie plate and milk glass for Santa Claus, breakable items should be stored separately. It's also better to tuck them out of the way rather than clutter up your kitchen all year round. Use quilted boxes to store holiday plates alongside salad and soup bowls. Use boxes with dividers for wine glasses and mugs. Large serving platters should be carefully wrapped and placed on a shelf or in a bin to stay dust-free and prevent damage. If you own Christmas cookie cutters, cookbooks, candles, or napkins, keep these together in a storage tote with a label so you can find them quickly when next year’s first holiday party sneaks up.

