8 Easy Pumpkin Centerpieces to Complete Your Fall Table
Use the season's best pumpkins to decorate your table and wow your dinner guests.
Are you someone who jumps right to Christmas decorations after October 31st? Slow down and celebrate the fall season in its entirety by decorating your Thanksgiving table with a pumpkin centerpiece (because no one likes to see a decked-out Christmas tree before they even celebrate Friendsgiving).
Transform your leftover pumpkins into whimsical mushrooms, a luxurious candelabra, or a cute collection of owls. A festive centerpiece with pumpkins is an easy and inexpensive way to repurpose your Halloween decorations for Thanksgiving. Just make sure you preserve your pumpkins so they can last that long.
Terrarium With Mini Pumpkins
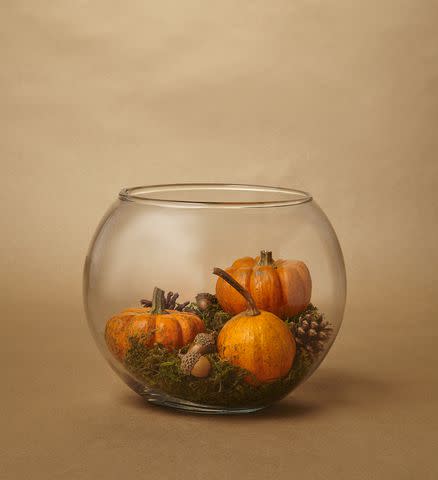
Supplies
Mini pumpkins
Moss
Pinecones
Acorns
Fishbowl
Steps
Place the moss at the bottom of the fishbowl.
Arrange the mini pumpkins, acorns, and pinecones on top of the greenery.
Mushroom Pumpkins
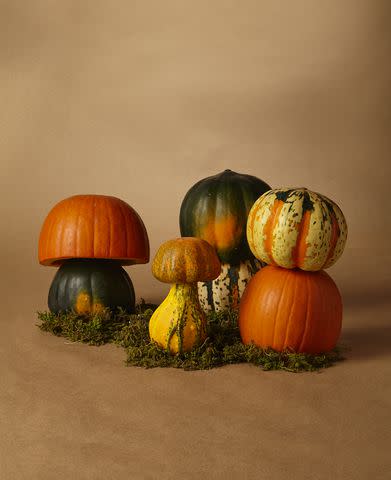
Supplies
Assortment of pumpkins and gourds (make sure to have the same amount of narrow and wide varieties)
Wooden skewers
Pumpkin carving knife or keyhole saw
Large loop tool (optional)
Moss (optional)
Steps
Cut off the stem portion of the wider pumpkins. Hollow or clean up the opening—you can also use a large loop tool for a cleaner look.
Attach the wider pumpkins—stem portion facing down—to the top of the narrow pumpkins with skewers.
Group the pumpkins together and add moss to complete the look.
Pumpkin Candelabra
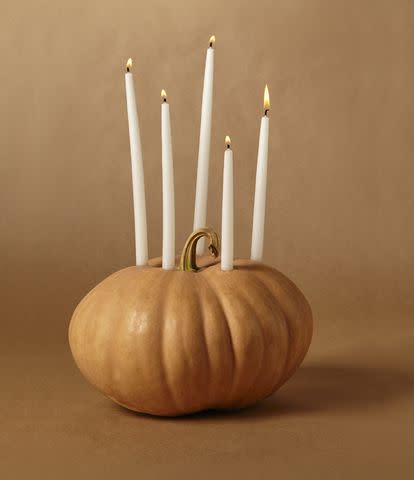
Supplies
Pumpkin
5 taper candles
Craft knife
Sculpting loop tool (optional)
Steps
Carve five small holes that are wide enough to fit the candles with a craft knife. The holes should be about ½- to 1-inch deep.
Stick the candles into the holes.
Optional: A sculpting loop tool can make the sides of the holes neater.
Cute Owl Pumpkins
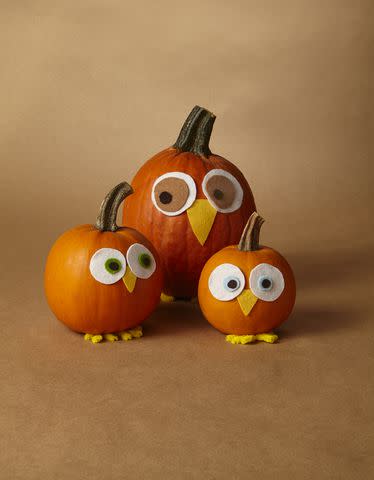
Supplies
3 pumpkins (or however many you want on the table)
White, brown, black, and yellow felt (plus any other colors you want to use for the eyes)
Yellow pipe cleaners
Tacky glue
Scissors
Tape
Steps
Cut out various-sized circles of white, black, and brown felt pieces to create the “eyes.”
Cut out a triangle shape from the yellow felt for the beak.
Glue all of the felt pieces onto the pumpkin to create the face.
Glue and tape yellow pipe cleaners to the bottom front of the pumpkin to create “feet.”
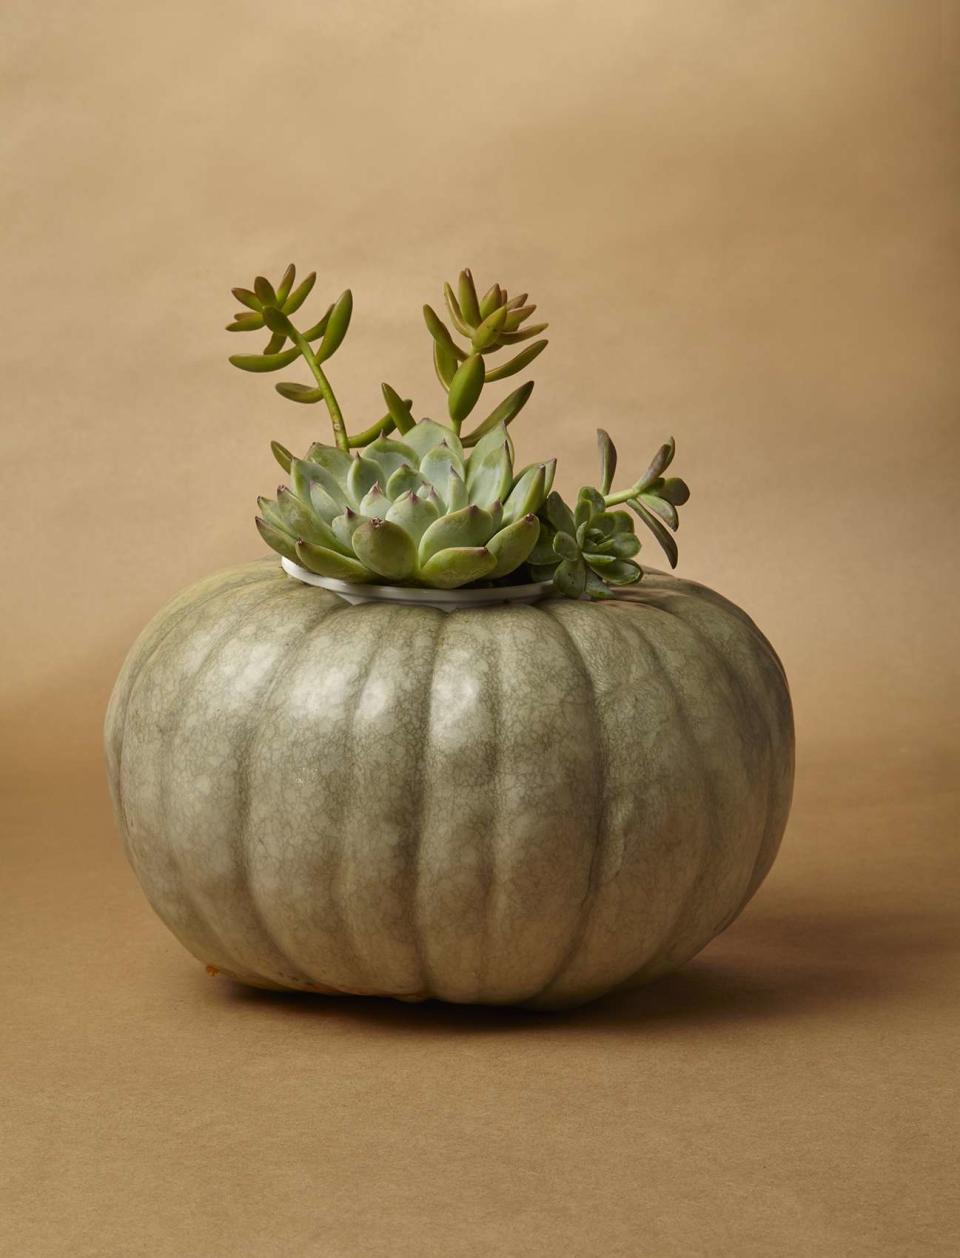
Pumpkin Vase With Succulents

Supplies
Pumpkin
Small potted succulent plant
Pumpkin carving knife or keyhole saw
Steps
Carve a hole at the top of the pumpkin that is big enough to fit the plant container. Scoop out the inside of the pumpkin so it's hollow.
Place the succulent planter in the pumpkin.
Pumpkin With Leaf Decoupage
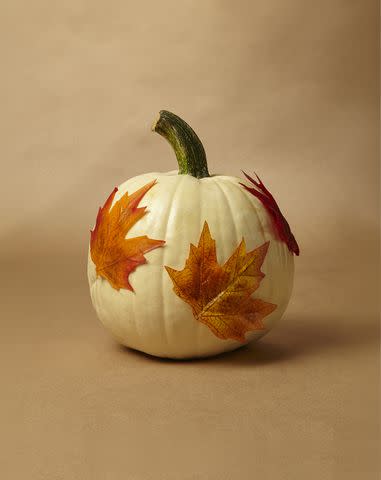
Supplies
White pumpkin
Artificial fall leaves
Mod Podge
Steps
Cover the pumpkin in Mod Podge, place the leaves on it, and let it dry.
Apply another coat of Mod Podge over the leaves.
Copper-Leaf Pumpkins
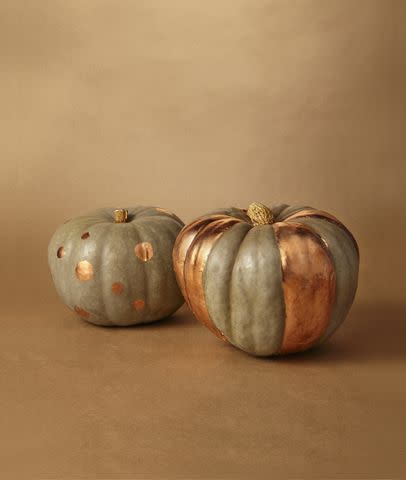
Supplies
Pumpkins
Painter’s tape
Contact paper
Paintbrush
Copper leaf sheets
Steps
For a stripe pattern, add vertical strips of painter's tape to the pumpkin, spacing them out to the desired width.
For a dot pattern, create a stencil by cutting out circles from contact paper.
Cover the parts of the pumpkin you want to copper-leaf with the gilding adhesive, making sure you put it on smoothly.
Let the pumpkin dry, so the surface is not completely wet, but still sticky.
Apply the copper leaf to the pumpkin. Smooth out any bumps with your fingers.
Modern Painted Pumpkins
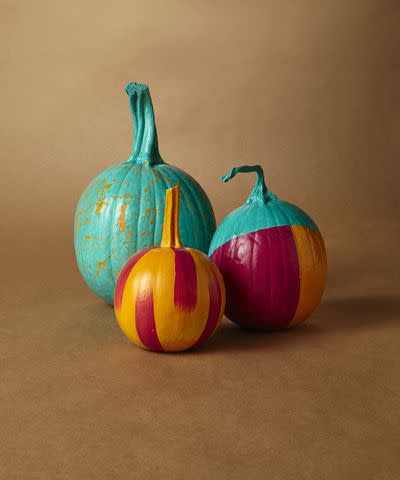
Supplies
Pumpkins
Primer spray paint
Paintbrushes
High gloss paint (in various colors)
Steps
Spray the pumpkin with primer and let dry—the primer will help absorb the paint.
Paint any geometric or modern-inspired patterns and motifs on the pumpkin.
For more Real Simple news, make sure to sign up for our newsletter!
Read the original article on Real Simple.

