8 Common Wallpaper Mistakes (and How to Fix Them)
Make sure your wallpaper project is done right the first time with these expert tips.
:max_bytes(150000):strip_icc():format(jpeg)/DSC_9352-Editx-Edit_preview-95367d589f5f49cdadaab000d56a97ba.jpg)
Katie Charlotte
Do-it-yourself projects give you the freedom to customize your space on your schedule and budget, reducing the labor costs that come with outsourcing any job. But a poor DIY job can also double your stress and time—and strain your wallet. While we're loving the resurgence of wallpaper right now, it can be a challenging project to tackle on your own.
Of course, you can hire a professional installer to do the job for you. But if you're taking on the project yourself, there are a few common wallpapering mistakes to be aware of. Tim Toot, technical manager for York Wallcoverings, takes us step-by-step through what a DIY wallpaper job really looks like.
Next time you embark on a wallpapering project, keep these tips in mind to avoid leaping into a big mess (or, worse, hiring someone to fix your DIY blunders).
Related: The 9 Best Wallpapers of 2024 to Add Visual Flair to Any Room, According to Our Testing
1. Papering Over Old Wallpaper
You might be tempted to slash your prep time in half by papering over your existing wallpaper, but this approach can lead to disastrous consequences. You must remove your old wallpaper before applying anything new. "The wet backing of the new wallpaper could reactivate the paste of the original and cause bubbling that would ruin both the new and old installations," Toot says.
How to avoid this mistake: Rent a chemical or power steamer to remove the existing wallpaper. You can usually find these gadgets at your local hardware, paint, and big box home improvement centers. If you're unsure which machine is best, consult an expert first and read the manufacturer's instructions on the wallpaper you're attempting to remove.
Related: How to Remove Wallpaper Like a Pro
2. Not Researching Your Wallpaper Type
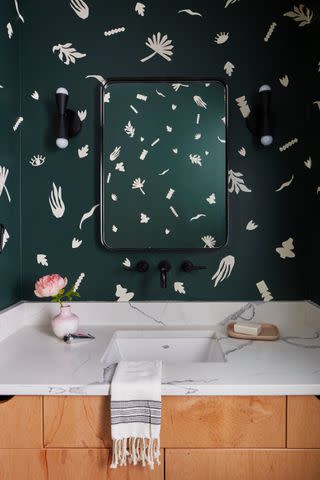
Not every wallpaper can be installed in any location. For example, natural wallpapers like grasscloth, "are not water-repellant, so their colors may run in areas with high humidity or fade in direct sunlight," Toot says. That means they're not a practical choice for moisture hotspots like bathrooms. High-heat areas need special attention, too. "Wallpaper is paper, so it must be protected and distanced from the heat source when using it behind a range such as a backsplash or near a fireplace," Toot says. Before getting started, research which wallcovering will perform best in your interior environments.
How to avoid this mistake: Use natural wallpaper in powder rooms and dry areas only. Toot recommends always reading instructions, looking for international codes on your wallcovering labels, and asking for assistance with selection and technical questions.
Related: We Put 29 of the Best Removable Wallpapers to the Test, and These 9 Won't Damage Your Walls
Annie Schlechter
3. Assuming All Wallpaper Backing Works the Same
With so many variations on the market (peel and stick, decals, unpasted, and standard), your wallpaper backing will dictate your installation process. For example, peel-and-stick wallcoverings feature adhesive backings for easy removal. But, "Standard wallpaper can be unpasted or prepasted, while commercial-grade wallcoverings may need heavier paste to keep it on the wall because of its weight, and naturals, almost without exception, have unpasted backing," Toot says.
How to avoid this mistake: Educate yourself on the type of adhesive your wallcovering calls for. Always be sure to apply your adhesive evenly (a non-negotiable step that will ensure your wallpaper doesn't peel off weeks later). And at all costs, avoid getting any adhesive on the front of the wallpaper, as this can damage the finish of the final product.
Related: How to Apply Peel-and-Stick Wallpaper for Long-Lasting Results
4. Doubting the Math
To avoid a hodgepodge situation, you'll also have to match each of your wallpaper strips at their seams—which means you can't cut random scraps to fill in even the tiniest of gaps above doors and windows. Because of this process, Toot warns that every wallpaper strip will have some usage loss due to its pattern match.
How to avoid this mistake: Use an online wallpaper calculator like this one from York to calculate how many rolls you'll need. Whenever possible, round up and order more than you need. You can sometimes return any unopened rolls for a refund, just double-check your store's return policy in advance.
Dye Lots Matter
When in doubt, always order more rolls than you need (a better solution than running out of paper while you're on the job). Keep in mind that wallpaper has a dye lot or "run number." This is printed on each roll and serves as an identifier of the design and color printed in that batch. This means, if you order the same wallpaper at different times, you may receive a color shift or variance of your original.
5. Not Prepping Your Walls
Before you begin, verify if your wallpaper covering requires a specific prep. "Some wallpaper has a pre-pasted backing that can be moistened and applied directly without a wallpaper primer. Other wallpapers require priming, allowing the paper’s paste to both adhere and remove easily," says Toot. This is critical because "the primary function of wallpaper primer seals is to create a uniform and absorbent surface for the wallpaper adhesive to adhere to," he explains. Added bonus: this handy solution helps prevent wrinkles, air bubbles, and various imperfections from popping up during installation and can even block stains, water damage, and marks from seeping through your wallpaper (and affecting the underlying wall), explains Toot.
How to avoid this mistake: Follow your wallpaper manufacturer's directions and prep your walls accordingly. Still confused? Always ask your sales associate or company rep for assistance.
Tips
Remember that any freshly-painted walls must be dry and cured for three weeks before applying wallpaper over the top. Otherwise, it could lift the drywall surface when removed.
Nathan Schroder
6. Not Organizing the Right Tools for the Job
Set out your tools before you begin for a smooth, efficient process. Each wallpapering tool is critical to ensuring an end result that lasts for years, from the smoothing tool (useful for removing air bubbles) to the seam roller (which prevents pasted edges from curling). For this reason, it's best not to use household stand-ins and stick to the recommended tools for a seamless result.
How to avoid this mistake: You'll find the most necessary tools available in your home improvement stores. Have each one prepped and ready to use before you start installing wallpaper.
7. Matching Wallpaper Strips as You Install Them
One of the most difficult parts about installing wallpaper is making sure the patterns match up perfectly. You might be tempted to do this as you place them on the wall, but this isn't the smartest way to go. "Do not match the wallpaper strips on the wall as you go. It’s slow going, and you could overstretch the paper, making it difficult to match," Toot says.
How to avoid this mistake: Lay your pattern out several strips ahead of installation on a flat surface or table side-by-side. Then, match your wallpaper and cut strips for installation in advance. Toot recommends leaving a few inches on both top and bottom that can be cleanly trimmed once installed.
Related: The 11 Most Iconic Wallpaper Prints (and the History Behind Them)
8. Forgetting to Wash Down Your Newly Installed Wallpaper
When you're done placing the wallpaper on the wall, Toot recommends you inspect and clean any areas that may have excess paste residue on them. He says it's easy to see if you've missed a spot, as long as you do this step as soon as you're done. "Wallpaper paste will leave shiny spots if not removed before it can dry," he says.
How to avoid this mistake: "Use a clean bucket with fresh water and a new sponge to wipe down the wallpaper as soon as you finish the project. The sponge should be damp, not wet," Toot says. "You will find instructions on smoothing and cleaning on the wallpaper label within each roll. There may be some exceptions for specialty finishes and naturals."
Related: Living Room Wallpaper Ideas That Make a Design Statement
For more Better Homes & Gardens news, make sure to sign up for our newsletter!
Read the original article on Better Homes & Gardens.

