7 Holiday Nail Art Designs You Can Actually Do Yourself
When you're out buying all your loved ones gifts this holiday season, grab yourself some nail polish while you're at it because you're gonna want to try at least one of these looks for your next holiday party. Nail art genius Madeline Poole, Sally Hansen's global color ambassador, breaks down these seven festive designs into a few simple steps, so turn on some Mariah Carey and follow along.
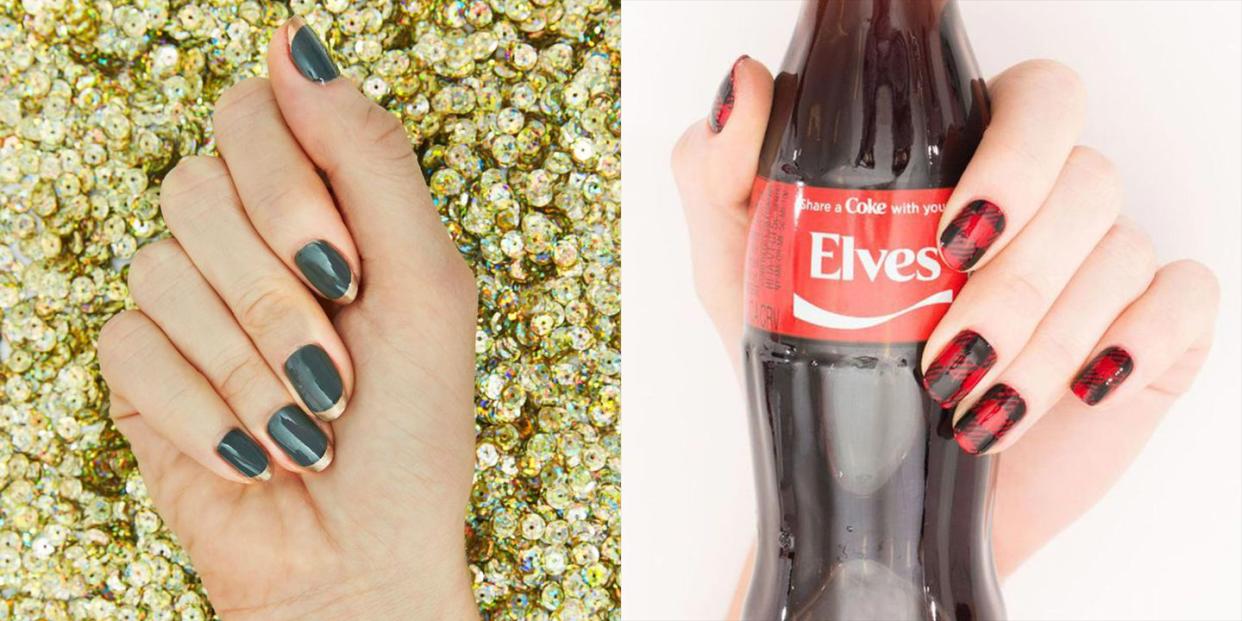
1. Green and Gold French Tips

Supplies:
How-to:
Paint on two coats of a deep blue-green polish.
Using a thin striper brush dipped in gold metallic polish, start from one side of your nail and paint a small line along the free edge, stopping halfway across your nail.
Using the same brush and polish, finish the line by starting from the other side of your nail. Connect the two lines in the middle.
Finish with a clear, glossy topcoat to seal the edges of the two polishes together.

2. Twinkling Stars

Supplies:
How-to:
Paint on two coats of a dark red polish.
Use a thin striper brush dipped in white polish and draw a thin, vertical line down your nail.
Using the same striper brush, draw a horizontal line perpendicular to the vertical line. This line should be about a third of the length of the first line.
Draw a short diagonal line over the intersection of the first two lines. Continue using the same brush and white polish.
Draw one more diagonal line the opposite direction to finish your star.
Use a pointy orange stick dipped in the same white polish to paint white dots around your big star. These will be the other, smaller "stars." Finish with topcoat.

3. Sweet Snowflakes

Supplies:
How-to:
Paint an iridescent polish as your base color.
Use a thin striper brush dipped in white polish to draw three lines on your nail. This will create the foundation of your snowflake.
Make tiny Vs at the end of each line to make the ends of the snowflake.
On a few fingers, create a larger snowflake to mix up your look. Draw a horizontal line on your nail and then an X over the center for a perfect six-prong snowflake. Then create the tiny Vs on the ends just like you did in step three.
Draw a hexagon connecting the intersecting lines of the snowflake.
Add tiny dots in between the six prongs of the snowflake. Wait until the white paint is dry and finish it off with a topcoat to make it super shiny.

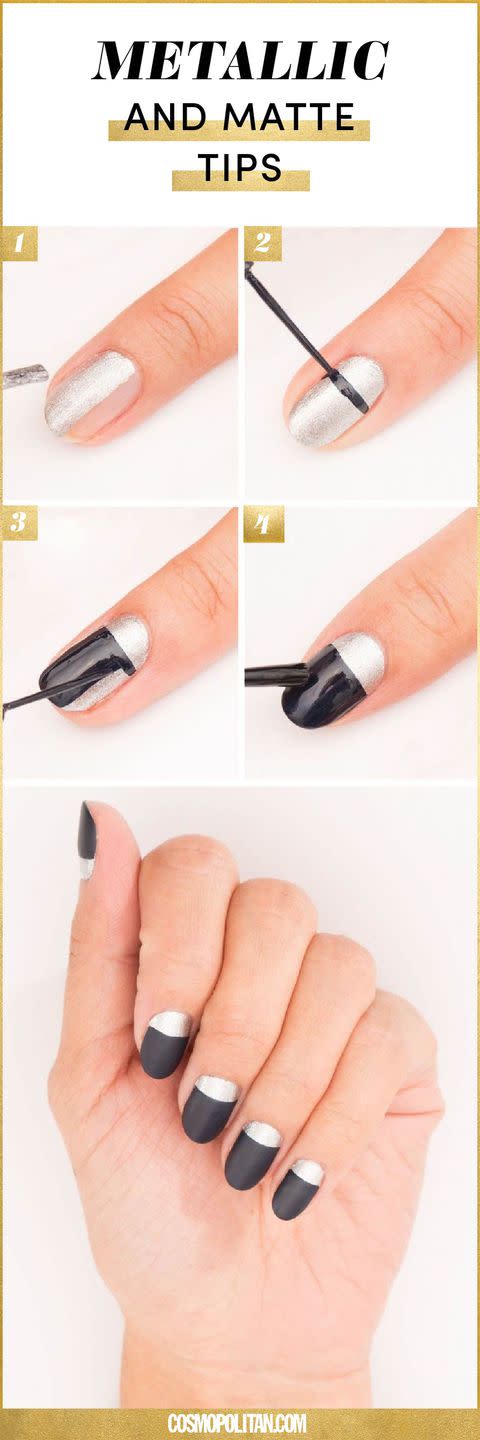
4. Metallic and Matte Tips

Supplies:
How-to:
Paint your nails a silver shade.
Create a horizontal line across your nail a quarter of an inch up from your cuticle. Use a striper brush dipped in navy polish to draw the line.
Fill in the top part of your nail with the navy hue.
Apply a matte topcoat over the navy part only. This will give you that matte-meets-shiny-silver combo.
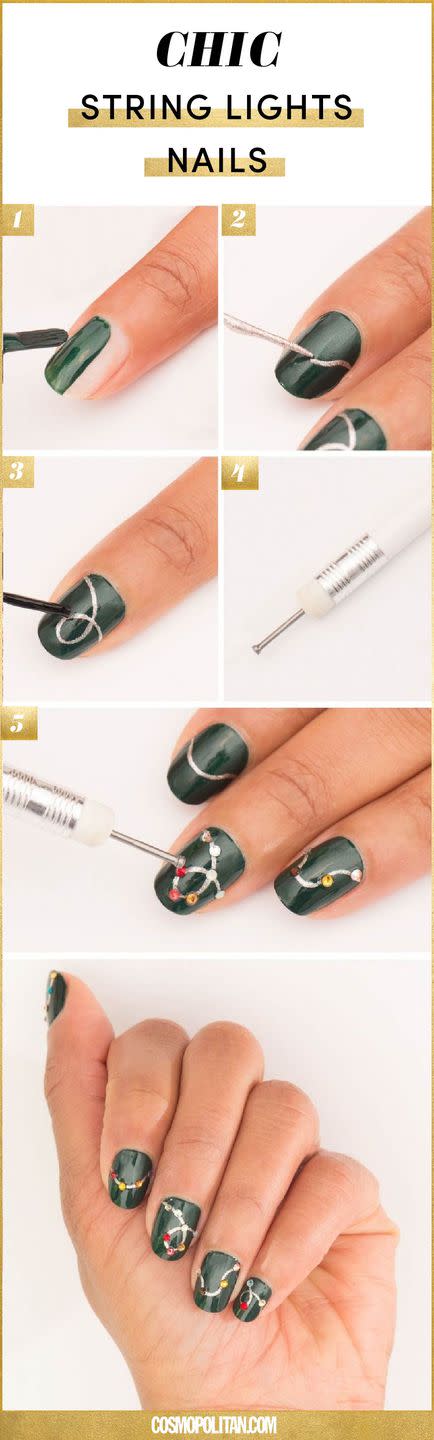
5. String Lights Mani

Supplies:
How-to:
Paint on two coats of a hunter green polish.
Using a striper brush, paint a thin line of silver polish to create your string for your lights. You can be creative with how you want the string to look, whether it's looped or just has a slight bend to it.
Dab nail glue where you want the crystals to stick.
Push a tiny nail into the eraser of a pencil to create a tool that will help you pick up the crystals more easily.
Place multicolored flat-back crystals that will serve as the lights. To place them on your nail with ease, put a dot of nail glue where you want to adhere the crystal to along the polish string, and then quickly dip the nail head into a little glue to pick up the crystal and immediately press it onto your nail.
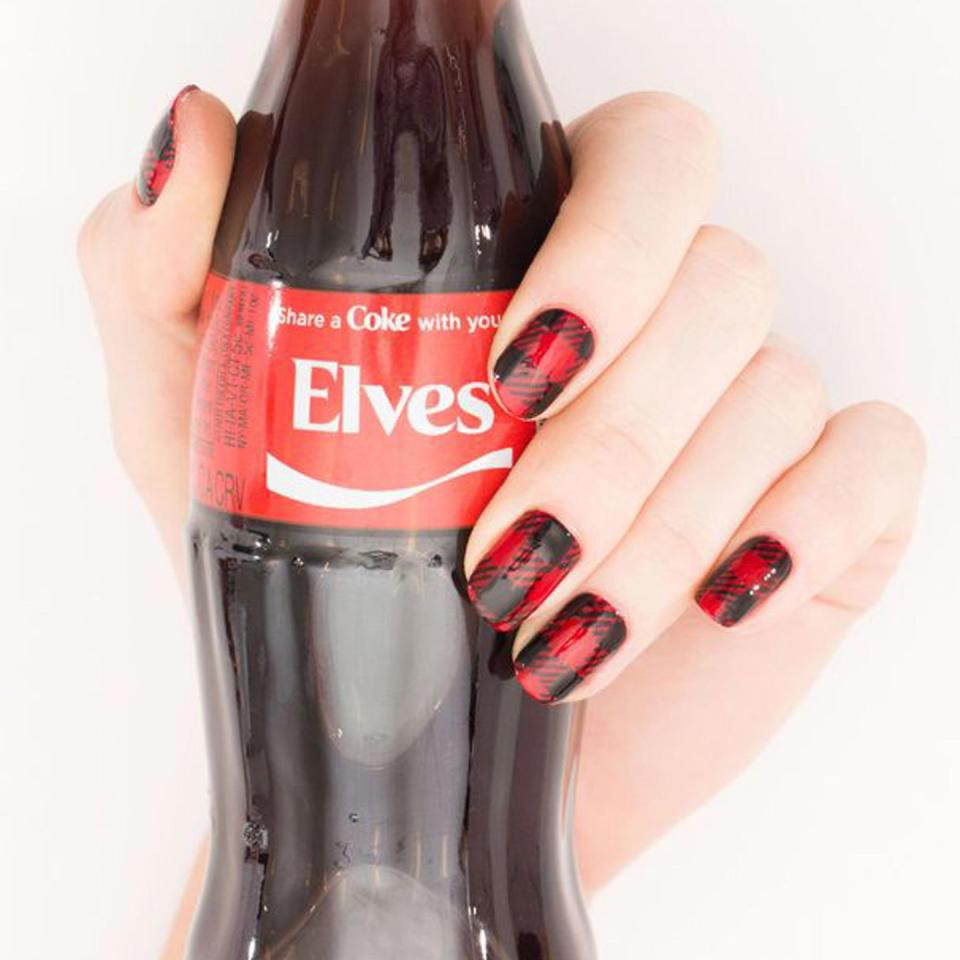
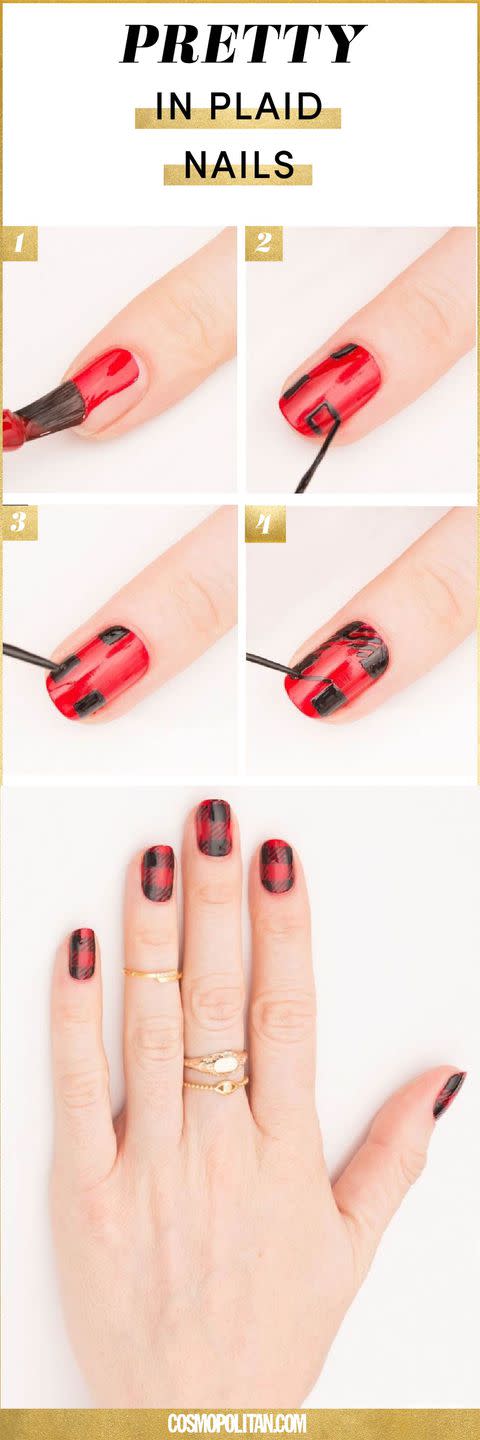
6. Pretty in Plaid
Supplies:
How-to:
Paint your nails a rich red shade.
Using a striper brush and black polish, draw four boxes on each nail.
Fill in each of the boxes with the black paint.
Create diagonal lines with the striper brush dipped in black polish to connect the black boxes to create the plaid pattern. Finish with topcoat.
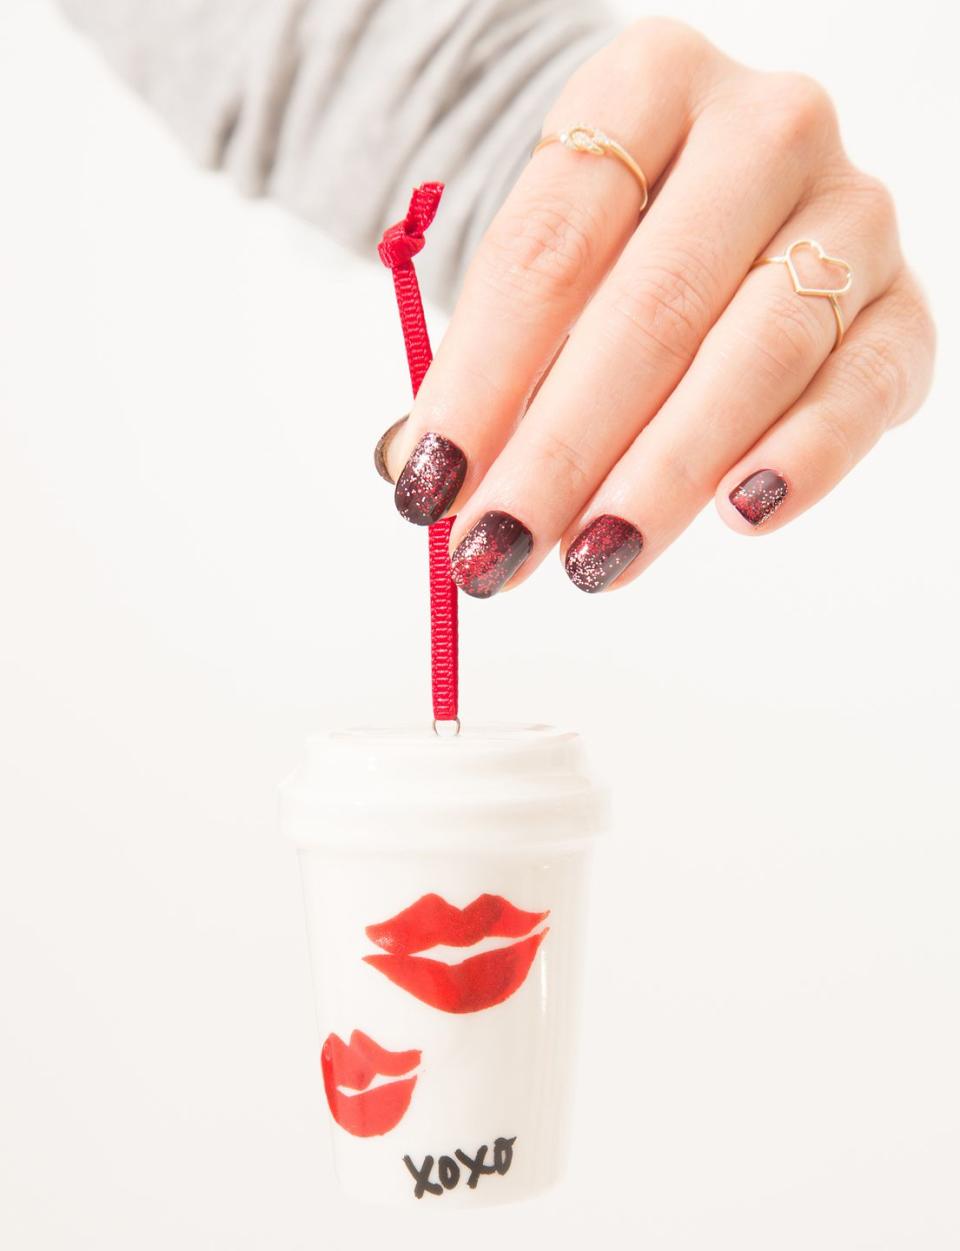
7. Festive Two-Tone Glitter
Supplies:
How-to:
Paint on two coats of a dark burgundy polish.
Paint on a layer of topcoat, so the glitter has something to stick to, and immediately sprinkle on some red glitter.
Promptly sprinkle on some pale pink glitter before the topcoat dries. Switch up where the glitter falls to create a unique design.
Use a tiny fan brush to dust off the glitter. Don't worry, the majority will be settled in the topcoat. Add another layer of clear polish to give your look a super-shiny finish.

('You Might Also Like',)

