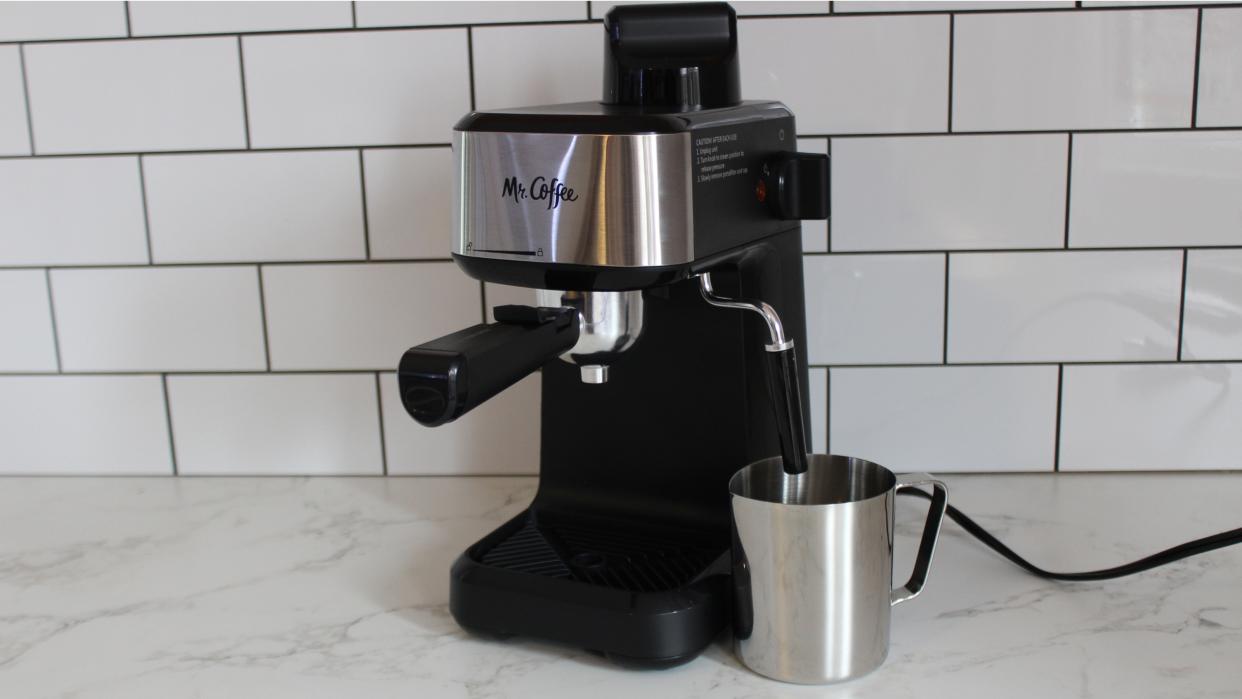
This $60 Mr. Coffee Steam Espresso Maker is a perfect low-budget starter appliance for small kitchens
A shot of Joe is one of my favorite treats, and with the Mr. Coffee Steam Espresso Maker, I can easily make them right in the comfort of my own home — and save a little cash in the process. To see if this budget-friendly espresso maker is worth bringing home, I tested it out for a week (I'm a product reviewer specializing in home and kitchen products), making lots of lattes to replace my morning cup.
While the appliance does have a few quirks, I thought its overall performance was impressive considering its compact size and wallet-friendly price point, and I’ll be keeping it around for those times I need an extra jolt of caffeine.
This compact espresso maker is a new release from Mr. Coffee, which is known for its budget-friendly kitchen appliances, and it’s surprisingly affordable at just $60. In addition to brewing fresh shots of espresso, it’s equipped with an easy-to-use milk frother so you can whip up lattes and cappuccinos that will rival your favorite barista’s. That’s not to say it's perfect. The tamp isn’t very effective, and you have to wrestle the portafilter into place. Not to mention, all the pieces are hand-wash only. However, none of these factors are deal breakers.
Model number: BVMCECM-STMMN-BL
Dimensions (in.): H12.28 x W6.46 x L8.62
Weight: 4 lbs
Water tank capacity: 8 fl oz (US)
Cord length (in): 24
Wattage: 900W
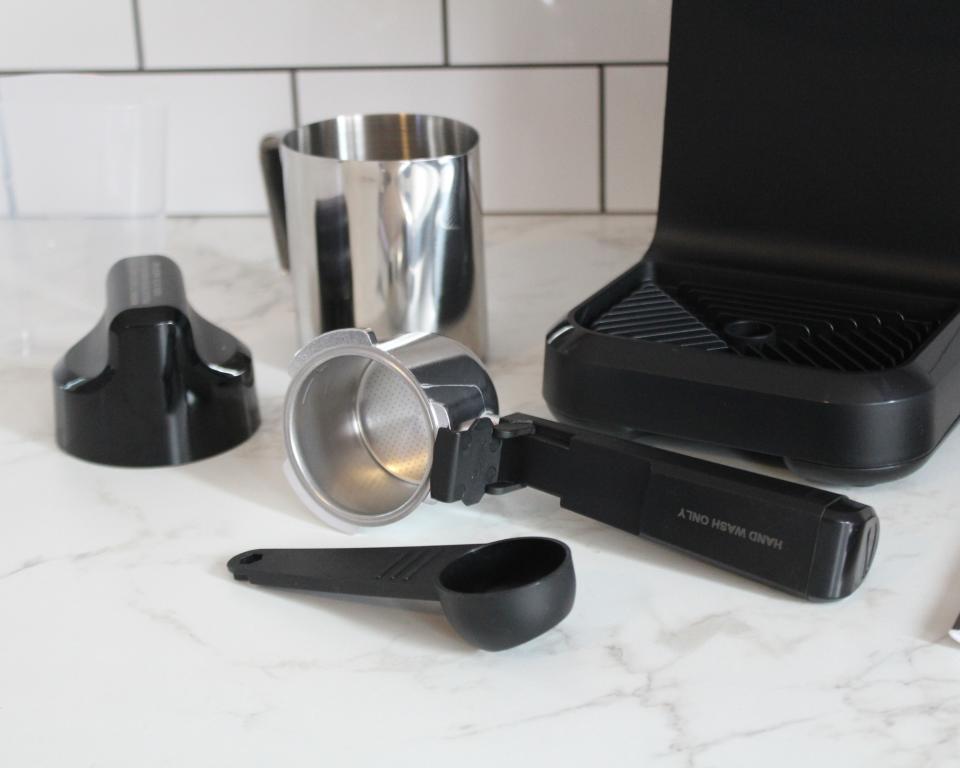
Accessories included: Plastic water pitcher, plastic espresso measuring scoop, and stainless steel milk-frothing pitcher.
Mr. Coffee Steam Espresso Maker: Quick list
1. Setup
2. Using the espresso maker
3. Cleaning
4. Comparisons
5. How we test
Mr. Coffee Steam Espresso Maker review
Setting up the espresso maker
When this small coffee maker arrived, I was surprised at how light the box was. The appliance was packaged in a thick layer of foam and wrapped in an additional plastic bag — not the most sustainable — but it was fully assembled right out of the box. All I had to do was remove a few pieces of tape holding the drip tray in place and insert the portafilter. Before using the coffee maker for the first time, the manual says to run water through it to rinse it out.
Using the espresso maker
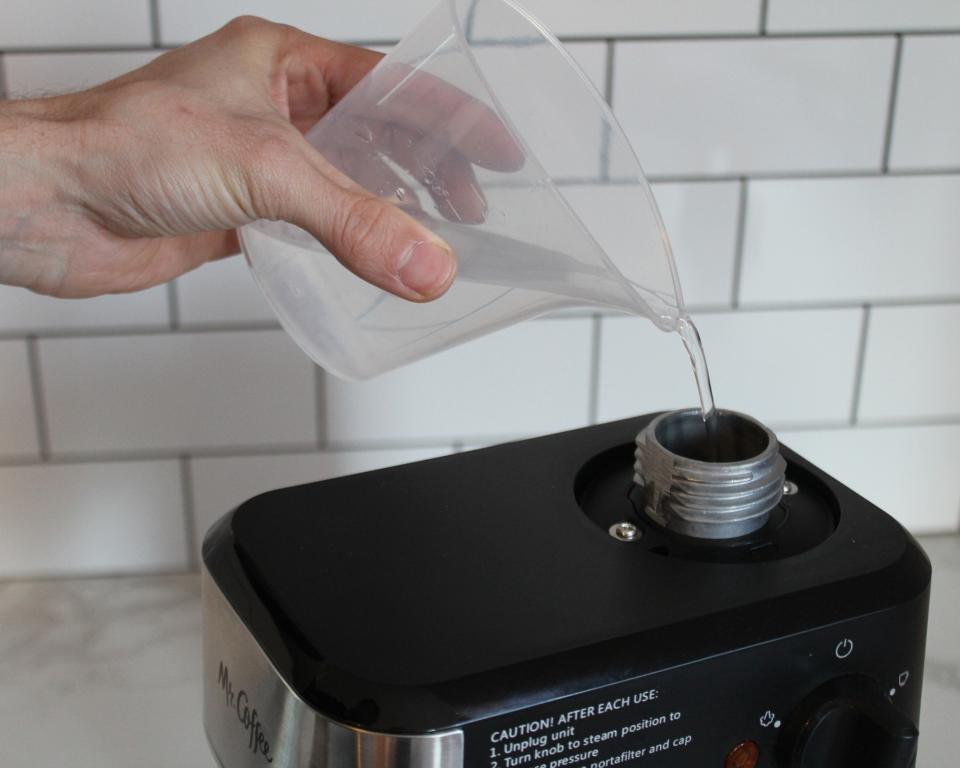
To make an espresso, start by filling up the water tank using the measuring cup that comes in the box, using its lines to pour the right amount of water for either two or four shots of espresso. There’s no option for a single shot, but I found you can stop the brew cycle when you have as much espresso as you want.
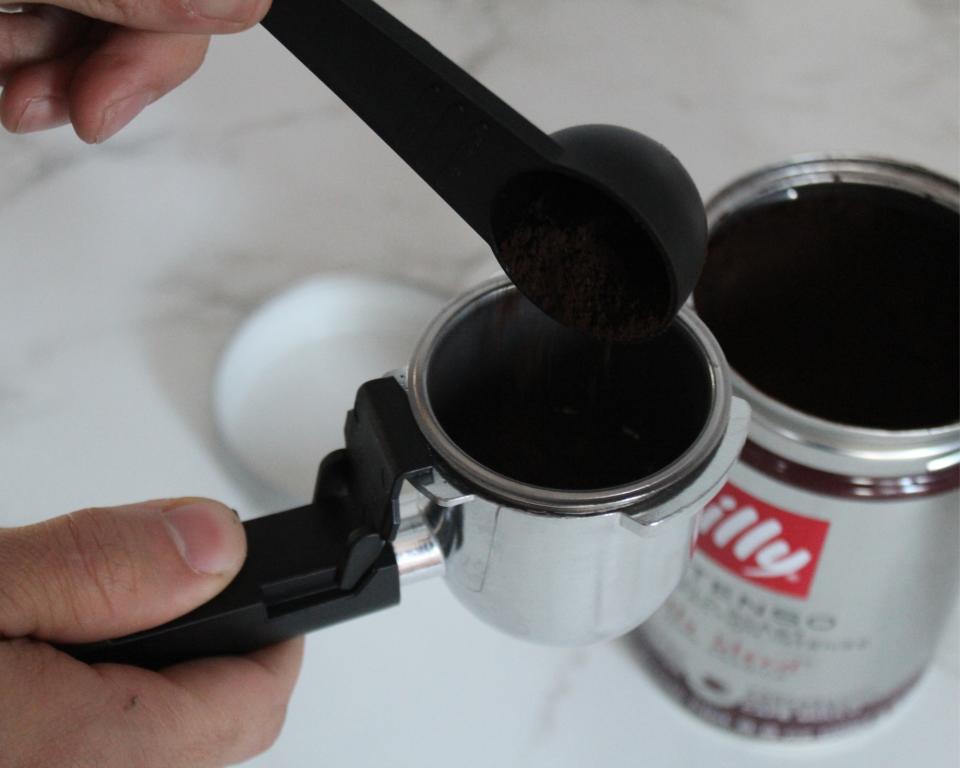
Next, I used the included scoop to put ground espresso into the portafilter — the handle-like piece that has a little basket on the end for your coffee grounds. Again, there are lines to let you choose between 2-4 shots, but they’re on the outside of the filter basket, making it tricky to fill precisely.
The back of the scoop is flat, allowing you to tamp down the espresso, but honestly, it’s pretty ineffective. If you buy this machine, I’d recommend picking up a cheap tamper (a small tool to push down coffee grounds) more effectively. This 51mm stainless steel coffee tamper on Amazon is cheap and highly-rated by shoppers.
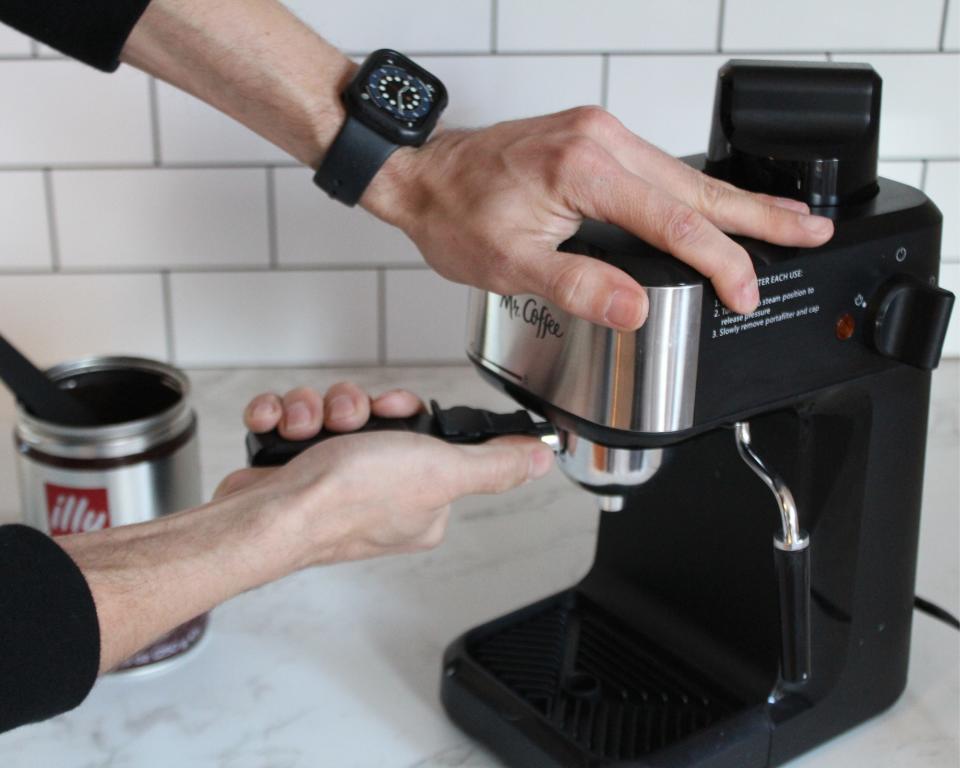
Putting the portafilter into the machine is a task that’s easier said than done. The manual says it’s a tight fit — and they weren’t kidding! Because the machine is so lightweight, it tends to slide around as you twist the portafilter into place, so you have to use some muscle to hold it down and twist the handle.
Hopefully, it will loosen up over time, otherwise, you’re in for an arm workout every time you want to make a drink! This is worth keeping in mind if you have any trouble with your grip strength.
Test 1: Making espresso
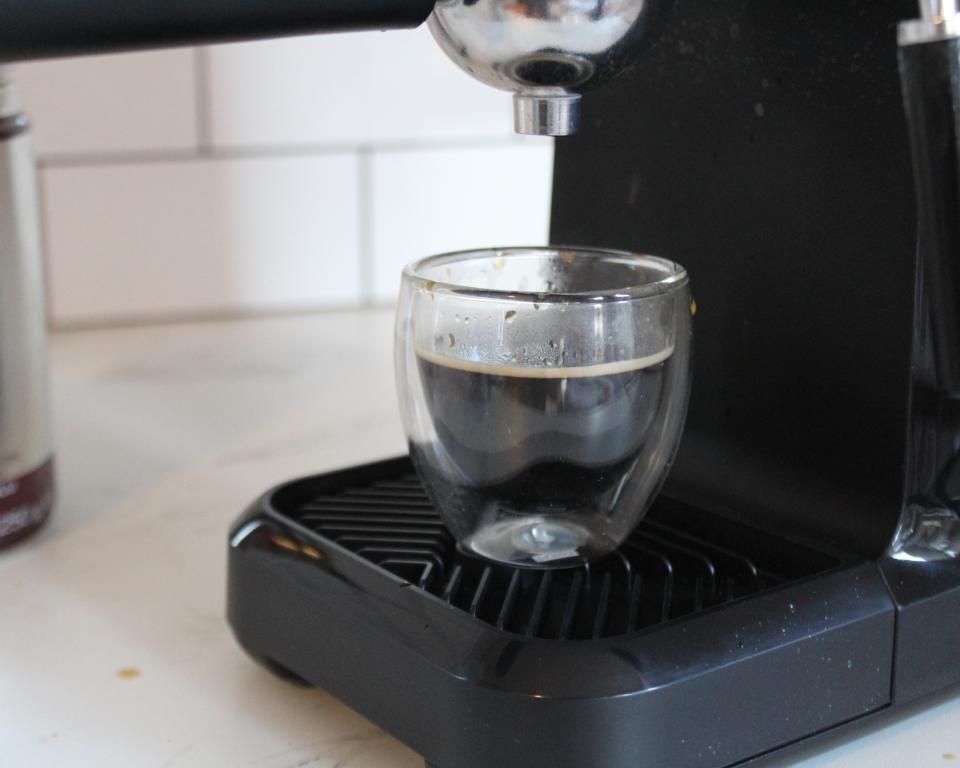
To use this coffee maker, you simply turn the dial on the side of the machine to start brewing. It takes around two minutes for the water to heat up, before it presses hot steam through the espresso grounds to extract all that delicious caffeine. I have a special espresso glass that’s perfect for one shot, but I found it’s easier to brew into a mug — it splatters a lot less.
I don’t consider myself an espresso connoisseur, but I thought the drink was pretty good! There wasn’t a thick layer of crema (the reddish foam on espressos) like other fancier machines create, but it was still flavorful and the foundation for a great latte.
Test 2: Frothing milk
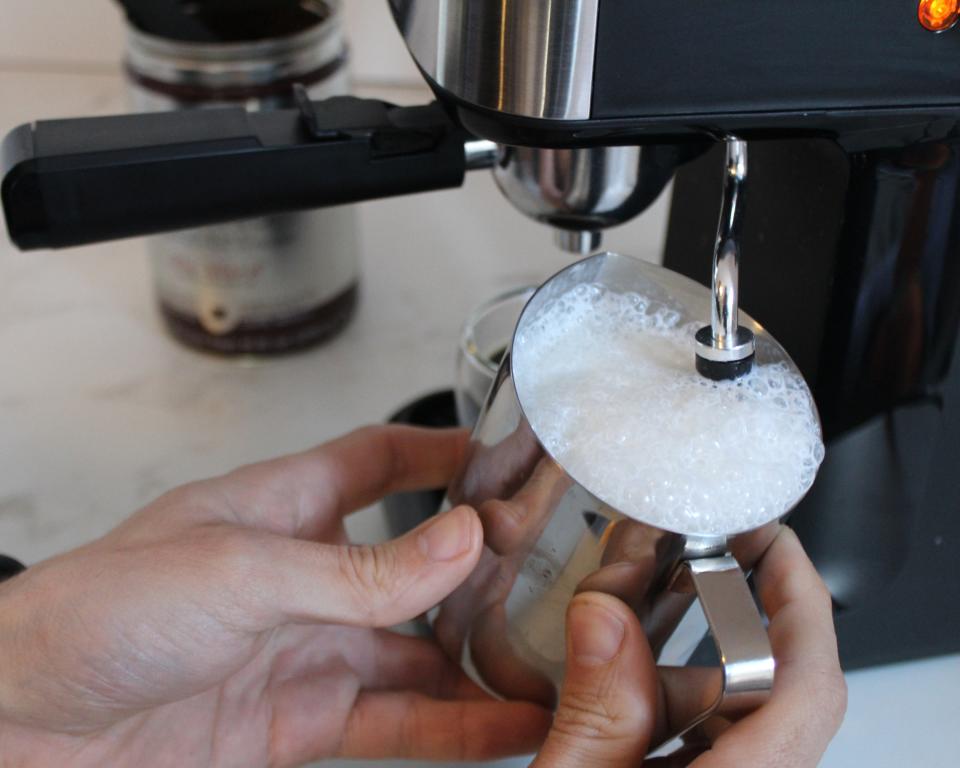
The Mr. Coffee Steam Espresso Maker has a built-in milk frother on the right side that allows you to froth milk for your drinks, and the small kitchen appliance also comes with a handy metal pitcher for the task.
If you’re making an espresso drink, the instructions say you should pause the machine mid-brew to froth your drink. However, I also successfully did it after the brewing was complete, so I don’t think it matters when you do it, as long as there’s hot steam left.
I filled the pitcher roughly halfway full with milk, then inserted the spigot (the little faucet where the espresso comes out) under the surface of the liquid. I turned the dial to the froth setting, and it started jetting out hot steam and making the milk bubble.
The milk steadily increased in volume (which is why you don’t want to fill the pitcher up too high) and temperature, and I turned it off when the outside of the pitcher was hot to the touch.
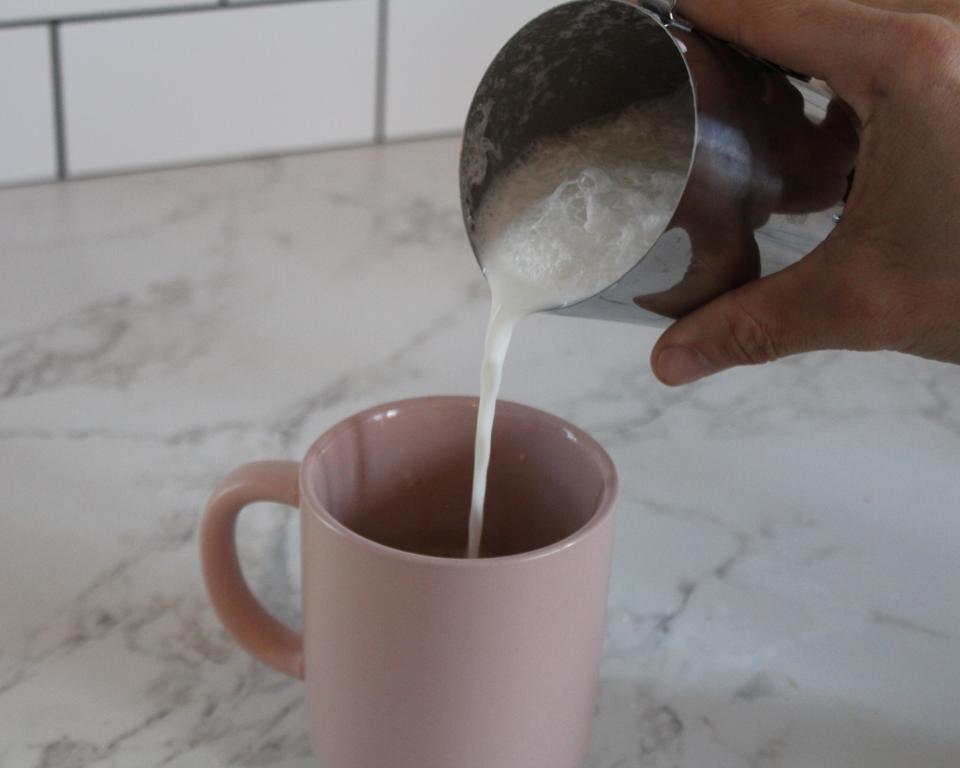
Once my milk was ready, it was just a matter of pouring the espresso and milk into a mug. I also added a pump of delicious DaVinci caramel syrup (from Amazon), a scoop of sugar, and voila! A delicious latte. It tasted every bit as good as the ones I buy, and even my partner gave the drinks two thumbs up.
Cleaning the espresso maker
Cleaning this coffee maker is fiddly, but only takes a few minutes. The first, and most important, step is to release any extra steam in the machine. To do this, you unplug it, then turn the dial to the steam setting. It will sputter out any leftover steam, and only then is it safe to take off the water tank lid.
Beyond that, you just need to wash the portafilter and frothing spigot. I dumped my used espresso into the trash, then rinsed out the filter and portafilter. Occasionally, there was a bit of residue left inside them, but it wiped off easily with a sponge.
A reminder that these pieces are hand-wash only — it says it on the handle — so don’t risk ruining them by putting them in the dishwasher. As for the spigot, the black rubber cap slips off for easy rinsing, and you can wipe down any lingering milk foam with a sponge or paper towel.
How does it compare?
The Mr. Coffee Steam Espresso Maker is one of the cheapest espresso makers we've tested, but there are better-looking designs out there, with larger water tanks so you don't have to fill it as often. All of the alternate options I've listed have longer cable lengths too; one of the things I wish I knew before buying a small coffee maker for
my power outlet-poor kitchen.
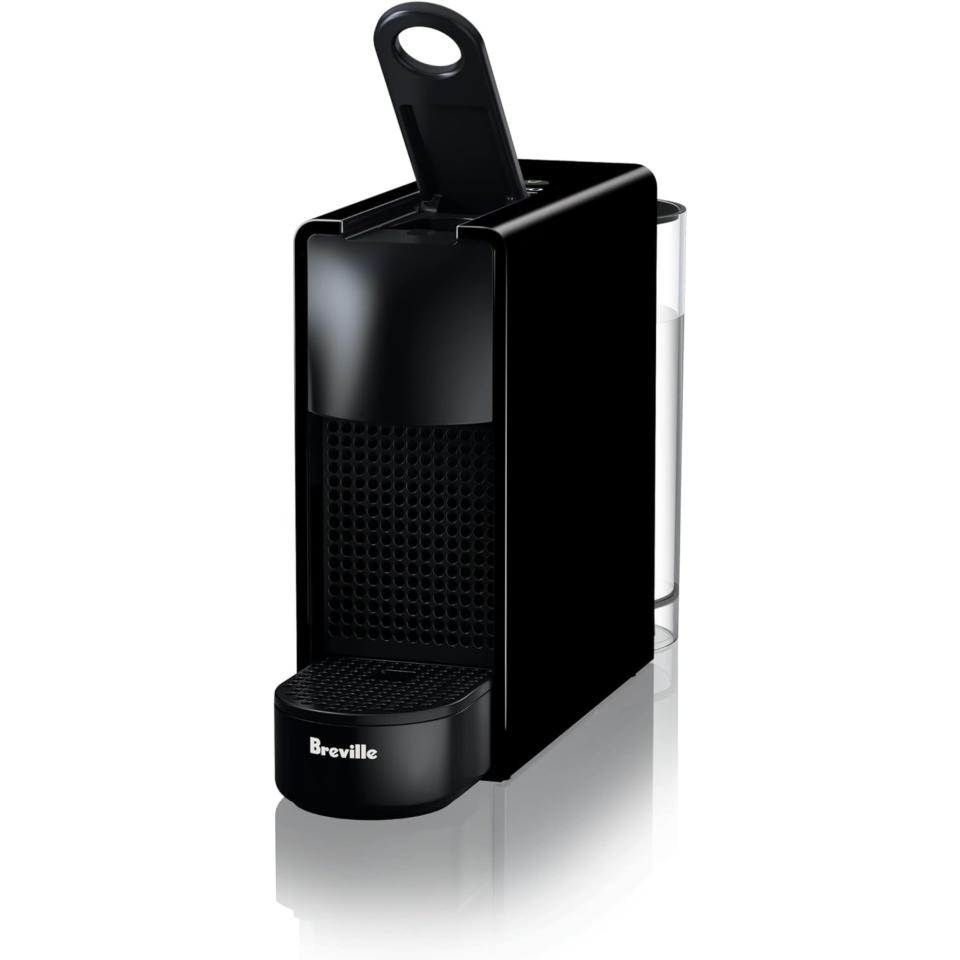
Smallest Nespresso
Nespresso/Breville Essenza Mini
Price: $179
Size (in): H12.8 x W8.1 x D4.3
Water tank capacity (fl oz): 20.3 fl oz
Weight (lbs): 5.1 lbs
Cord length (in): 32
Wattage: 1255 W
Accessories: 0
Rated 4.5 stars out of 5 in our Nespresso Essenza Mini coffee maker review
20-bar machine
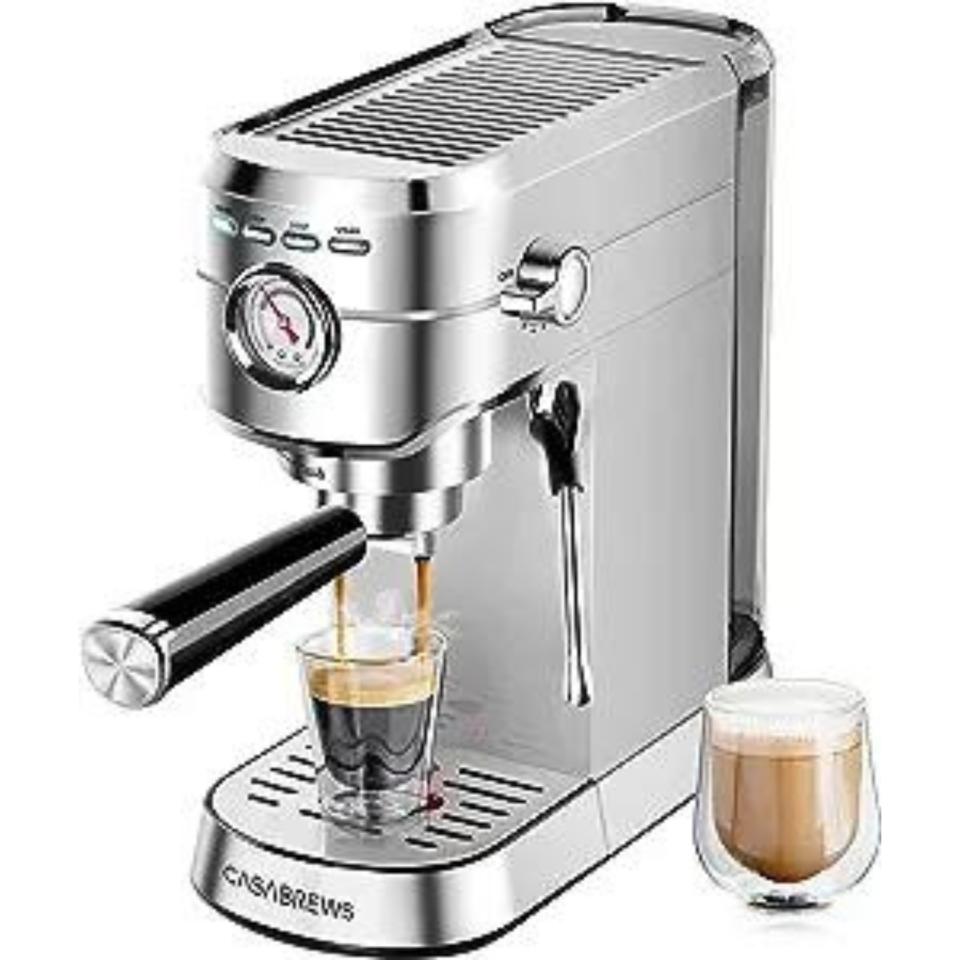
Casabrews espresso maker
Price: $139.99
Size (in.): H11.97 x W5.9 x L12.28
Water tank capacity (fl oz.): 34
Weight (lbs): 10.45
Cord length (in): 36
Wattage: 1350W
Accessories: 4
Rated 4 stars out of 5 in our Casabrews espresso maker review
Four colors available
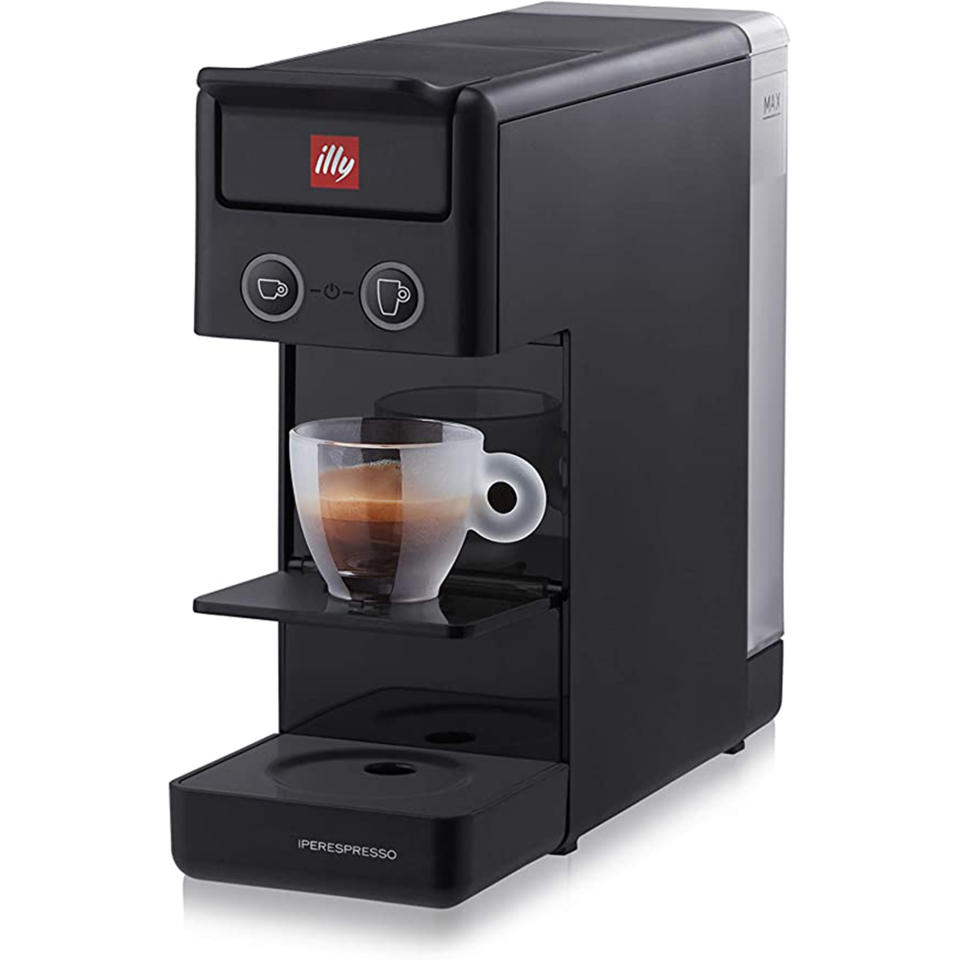
Illy Y3.3 Iperespresso coffee machine
Price: $149
Size (in.): H10 x W3.94 x L11.73
Capacity (fl oz.): 4
Weight (lbs): 7.5
Cord length (in): 39
Wattage: 1000W
Accessories: None
Rated 4 out of 5 stars in our Illy Y3.3 Iperespresso coffee machine review
How we test espresso makers
Here’s what I looked for while trying out the machine, in line with how the internal Real Homes team tests coffee makers:
Unboxing: I looked at how well the machine was packaged and if the materials were sustainable (such as using cardboard instead of Styrofoam).
Operation: After reading through the instruction manual, I made multiple drinks, and observed how long the machine took to warm up, how easy the controls were to operate, and how loud it was.
Drink quality: I made several drinks with the coffee maker, including espresso and lattes, and as I drank each one, I evaluated the brew strength and temperature. I also made drinks for friends and family to get their opinions on the flavor.
Ease of use: I considered whether the appliance was easy and intuitive to operate. I also looked at the machine’s instructions, noting whether they were clearly written and easy to follow.
Ease of cleaning: I cleaned the machine after each use, noting how long it took and if any special tools were required.

