6 Ways to Display Your Kid's Artwork

Instead of letting your child's drawings clutter your fridge door or countertops, hang a few artfully and don't feel guilty about tossing the others.
Matching Frames
This is a great idea for art that doesn’t typically fit in a normal frame—especially if your child’s drawings have 3D elements like cotton balls or pipe cleaners. Take some old frames or buy a few cheap ones at the craft store and cover them in spray paint for a uniform look. String monofilament across the frames and hang pictures from it with tiny clothespins. It makes it easy to switch out artwork as your child brings more home, too.
Photo and idea from The Caterpillar Years. See the how-to here.
Art Wall
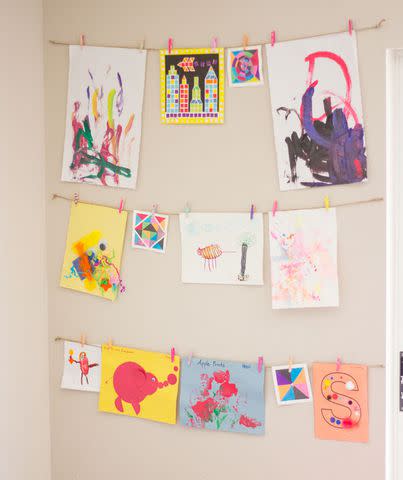
This is one of the easiest and least expensive ways to stylishly display your kid’s artwork. All you need is twine, clothespins, and some nails. You can also make it into another art project by having your kids decorate the clothespins with paint before you hang the drawings up.
Photo and idea from Design Improvised. See the how-to here.
Clipboard Art
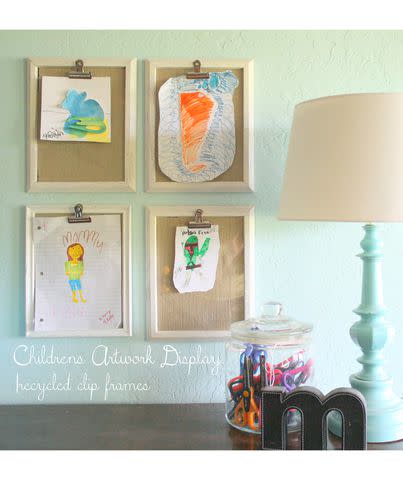
Create “clipboards” with recycled (or inexpensive) frames to showcase drawings. Wrap the frame’s glass in linen or other fabric for a cleaner look, and then glue metal clips to the frames.
Photo and idea from Lolly Jane. See the how-to here.
Collage
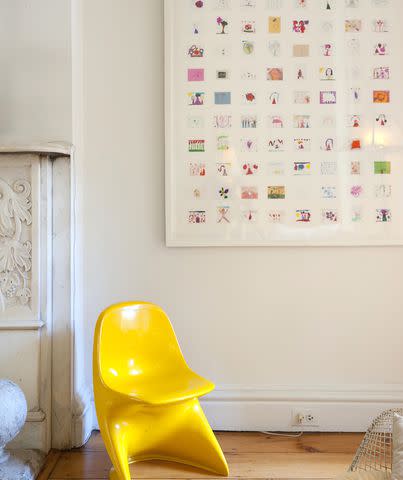
This one is a big investment, but think of it as a professional piece that you can have for years to come. Designer Jan Eleni Lemonedes will archive your child’s collection of artwork and create a collaged print with smaller images of your child’s artwork. You send her and her team the art, which will be returned to you once the print is made.
Photo and idea from Jan Eleni Interiors. Get more information here.
Wall Display
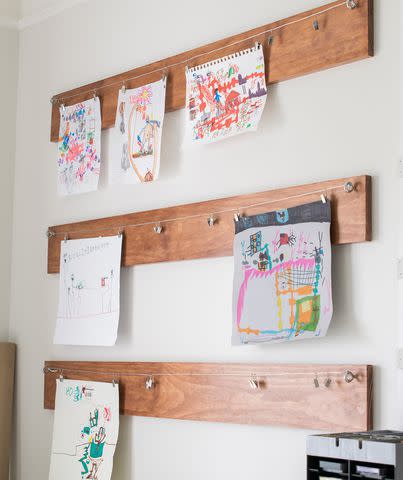
For a rustic look, take some stained wood boards and hang them horizontally on the walls. On each board, place eyelet screws on the ends and string wire from them. Attach clips to the wire to hang photos and other mementos.
Photo and idea from Craving Some Creativity. See the how-to here.
Decals
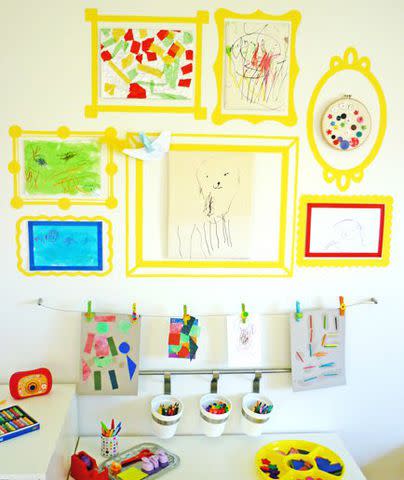
For a low-commitment gallery wall of your kid’s artwork, place some temporary decal frames on a blank wall—or create “frames” from washi tape. Hang the art with pins or tape.
Photo and idea from Childhood 101. See the how-to here.
For more Real Simple news, make sure to sign up for our newsletter!
Read the original article on Real Simple.