6 Lacing Hacks to Make Your Running Shoes Way More Comfortable
Chances are, when you take a fresh pair of running shoes out of the box, you don't give the laces much thought besides maybe admiring their bright, perfectly un-dirtied hue. And hey, that's fair—regularly laced shoes do a pretty good job of keeping your feet where they need to be. But for some runners, a creative lacing strategy can actually make their sneakers feel more comfortable.
"Oftentimes, a simple adjustment of the laces can reduce the chances of black toenails, pressure points, hot spots, and other foot irritations," Victor Ornelas, footwear specialist and director of brand management at Fleet Feet, Inc., tells SELF. Runners are no strangers to these foot woes, and for some, switching up the lacing pattern can provide sweet, sweet relief.
Here's what you need to know about running shoe-lacing hacks, including the problems they can solve, which ones come with an expert's stamp of approval, and how to try 'em for yourself.
Here's how to make sure your shoe actually fits.
First, it’s important to note that if you feel like you need lacing hacks, it might just mean that your shoes don’t fit quite right.
There are a few ways to tell if your shoe fits properly. Check and make sure that the widest part of your foot (where your toes flex) matches up with the widest part of the shoe you're wearing (where the shoe flexes), Eric Sach, shoe fit expert and former owner of the Balanced Athlete in Renton, Washington, tells SELF.
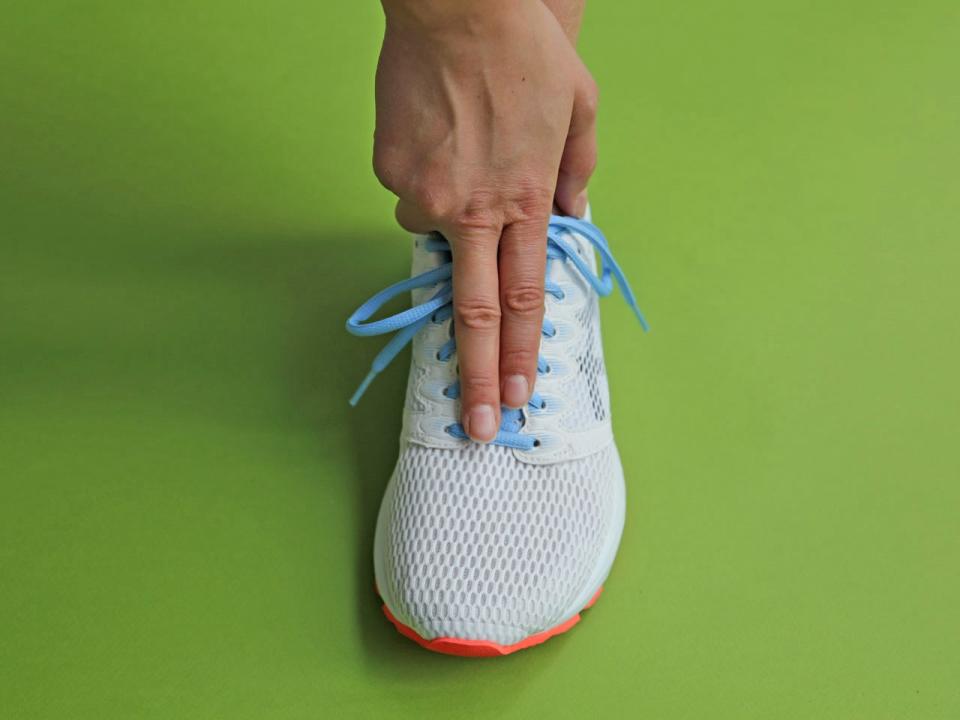
Once your foot is in the shoe, lace the shoe snugly. Point your index and middle fingers and hold them together. Now, place them along the tongue of your shoe, with your fingers facing toward your toes. The eyelets (holes) on the shoes should be just touching your fingers on either side. If your shoes feel comfortably laced and you can only fit one finger in between the rows of eyelets, the shoe is too big all around. If you've got three or more fingers of width, the shoe is stretched too much at the top, which means it’s too tight.
A too-small or too-big shoe can lead to endless (and sometimes unexpected) problems, depending on your foot and running form. For example, if you're prone to heel slipping, your shoe is probably too small—not necessarily too big. "When your foot is trying to flex where the shoe is not designed to flex, your heel is going to rise," says Sach. And with every step, this creates friction that can lead to blisters.
A shoe fit expert at a specialty running store can help identify these issues and find you a shoe that fits your foot shape and size. Going up a size can solve quite a few problems for many runners, says Sach. People often think their running shoe size is smaller than it actually should be, and there are numerous factors (including the foot swelling many of us experience when exercising) that may make sizing up a good idea.
If your shoe doesn't fit well, you might also need to try a different brand and style that matches up better with your anatomy.
While there’s no lacing technique that can correct for a shoe that really doesn't fit right, tweaks in the lacing can still make a major difference when your shoe is just a little off.
There are a few scenarios that warrant breaking out a shoe-lacing hack. First, "no one has the same size foot on both sides—there's always going to be one foot that's longer or [bigger], they're never going to be the same," podiatrist Mitchell Wachtel, D.P.M., author of The Runner’s Healthy Foot and Ankle Book, tells SELF. You may choose to use a lacing hack on one shoe and not the other if you're experiencing fit problems with only one.
Lacing techniques can also be handy for temporary problems, like a black toenail that came from a long weekend of wearing brutally high heels. In these cases, you can adjust the shoe lacing until you're healed, then go back to the OG lacing pattern when you feel better.
Of course, changing the lacing can't solve every common running problem (things like shin splints and heel pain are generally better treated with orthotics inside the shoe and other methods, says Wachtel). But there are some particular cases in which they can help.
Here are six expert-approved lacing hacks to try for different foot complaints.
First, an important note for all of them: To avoid creating sore spots, "it's very important to have even distribution of pressure across your shoe lacing," says Ornelas. "You don't want to make it too tight at the bottom or too tight at the ankle."
In the instructions, you'll see a few important shoe terms. Eyelets are the holes that the laces go through. In the descriptions below, the top of the shoe (or the first eyelets) refers to the area closest to your heel, while the bottom of the shoe (or the last eyelets) refers to the area closest to your toes.
1. For heel slipping and heel blisters (method one)
This is one of the most common shoe lacing hacks around. It's called the heel lock, and it helps prevent the heel from slipping, which can lead to painful recurring blisters.
The method tightens the circumference of the shoe around the heel, explains Sach, but it can also put too much pressure on the tendons on the top of your foot and inhibit ankle mobility, he warns. So while it works very well, avoid using it long-term or when you’re running long distances.
Shoe-laces
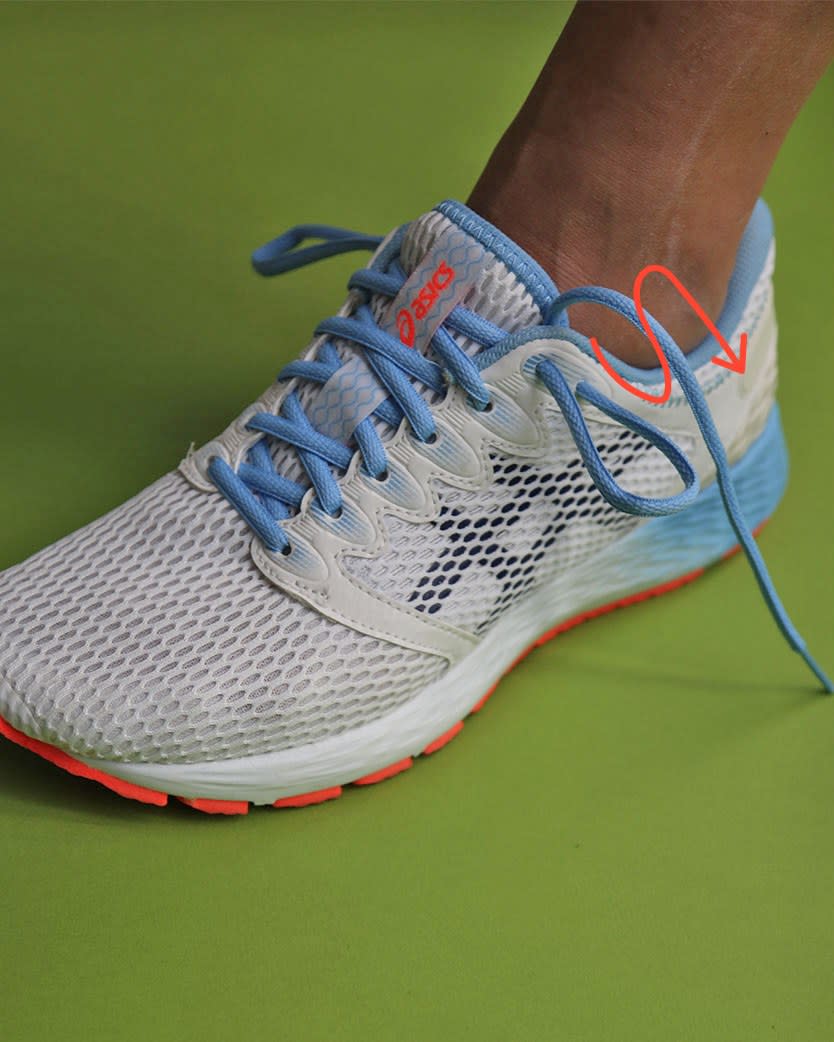
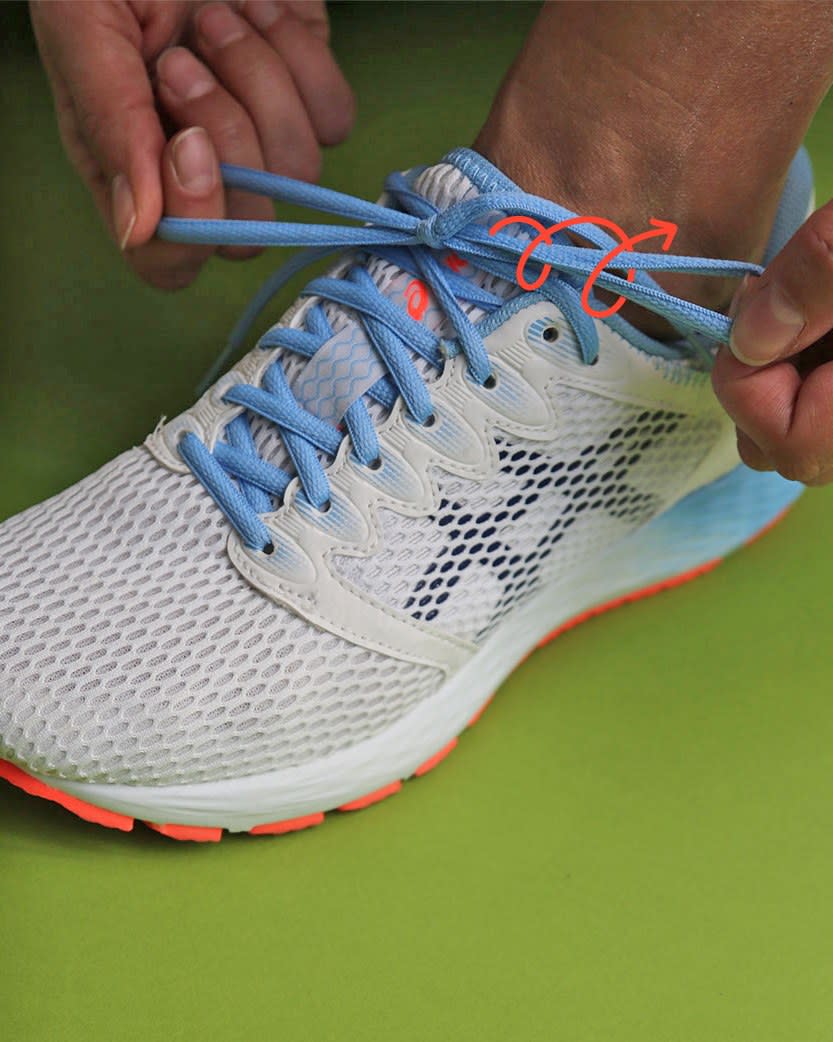
Locate the extra eyelets on your shoes (the ones closest to your heel). These don't come laced, so they should be open. Weave the end of your right shoelace through the extra eyelet on the right side, going toward the inside of the shoe. Stop about halfway, so you've got a loop on the outside of the shoe. Repeat on the left side.

Shoe-laces
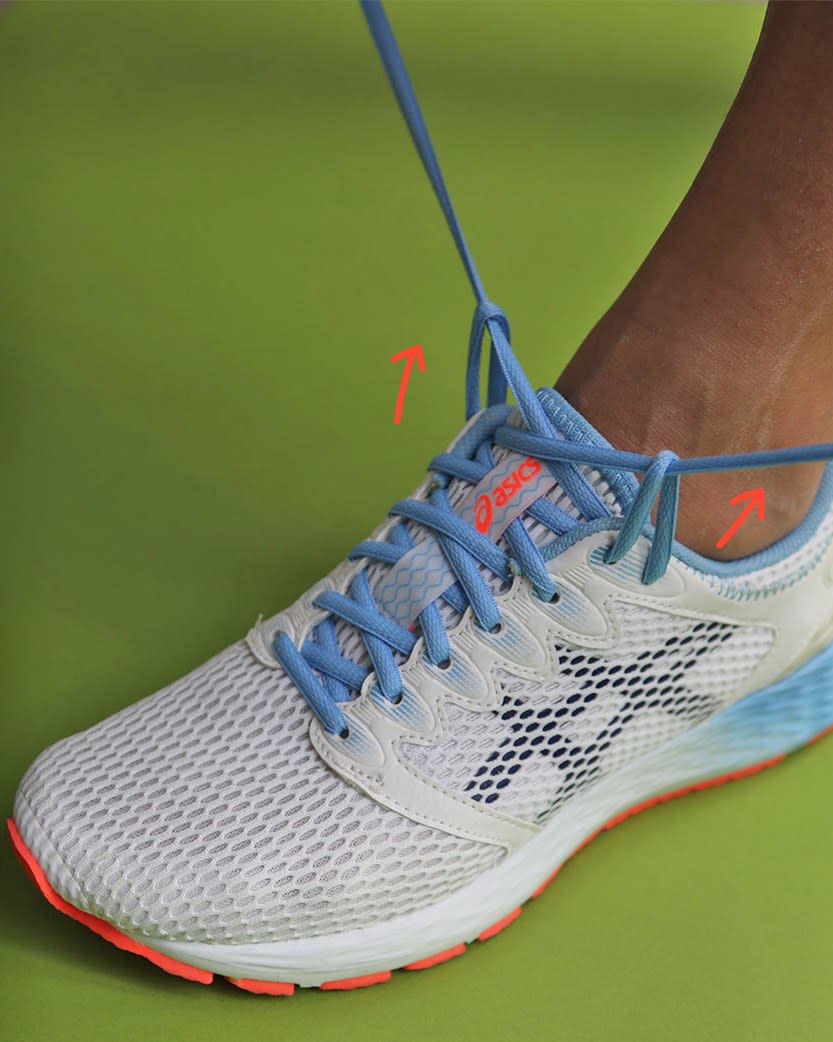
Cross the ends of your shoelaces, then weave the right end of the shoelace through the loop on the left side, and vice versa.
Shoe-laces
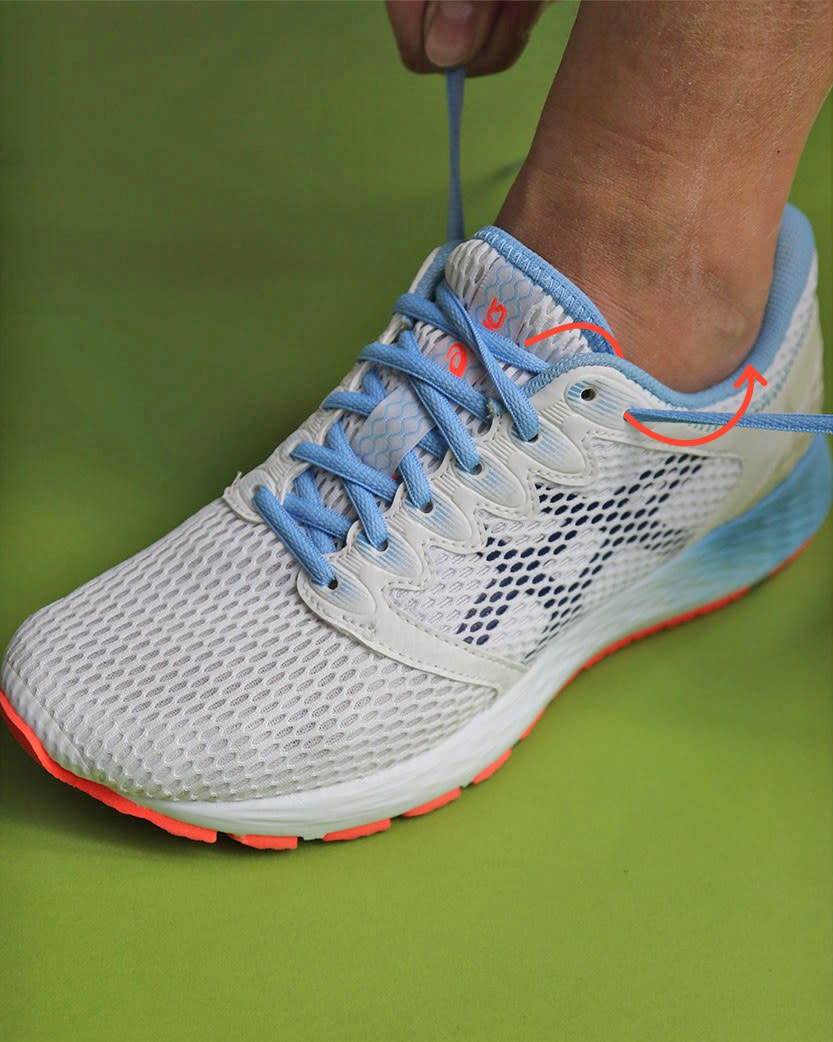
Pull the ends of your shoelaces taut to secure the loops and tie your shoelaces normally.
2. For heel slipping and heel blisters (method two)
This is Sach's preferred method of dealing with heel slipping—it's easier than a heel lock, and it still squeezes your heel in the back, he says.

Shoe-laces
Keep your shoes laced normally, then unlace the top two eyelets (this includes that extra eyelet on the top).
Shoe-laces
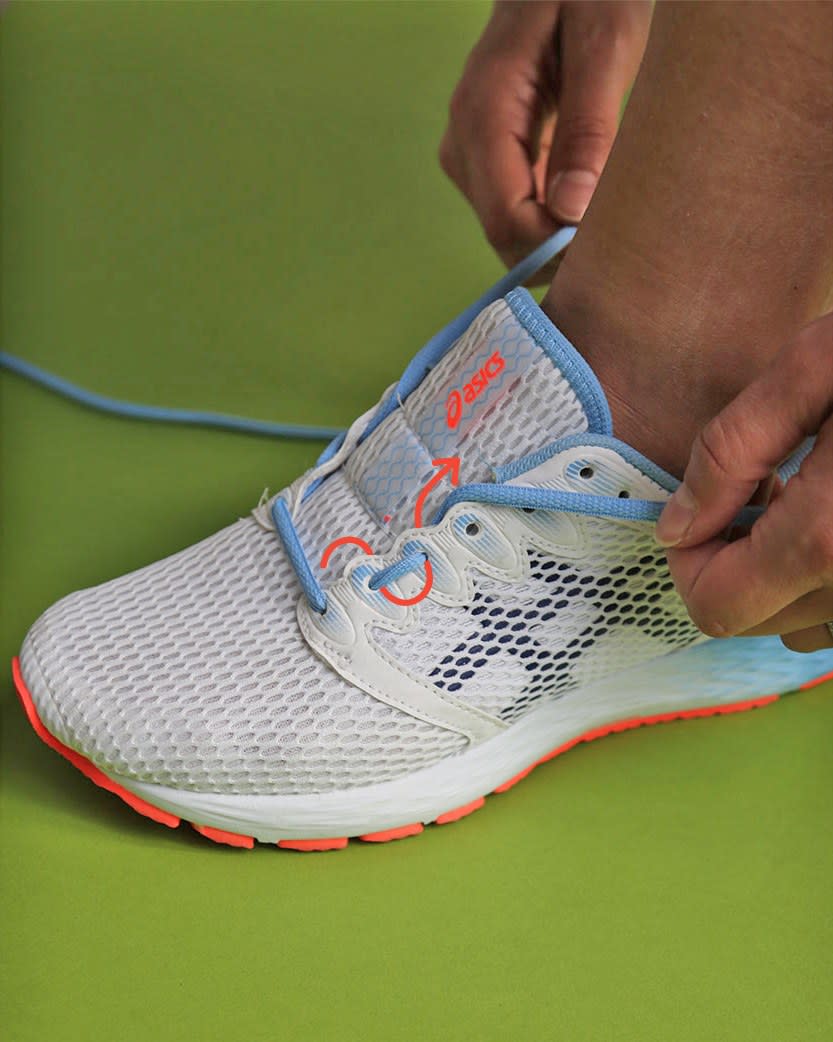
Now, skip the eyelet that's second to the top, then weave the laces normally through the very top eyelet (the extra one), going toward the outside of the shoe.
Shoe-laces
Tie your shoelaces.
3. For a high instep
A high instep means the top of your foot is raised a little bit higher in the middle and closer to the ankle (it's common in people who have high arches too). If you have a high instep, you might experience pressure or irritation on the tops of your feet while you’re wearing shoes.
"This method creates a window in the lacing pattern to accommodate a high instep—it adds volume in the mid-foot, which reduces pressure," says Ornelas.

Shoe-laces
Unlace your shoe from the top three to four eyelets (so your shoe is only laced through two to three of the eyelets at the bottom).
Shoe-laces
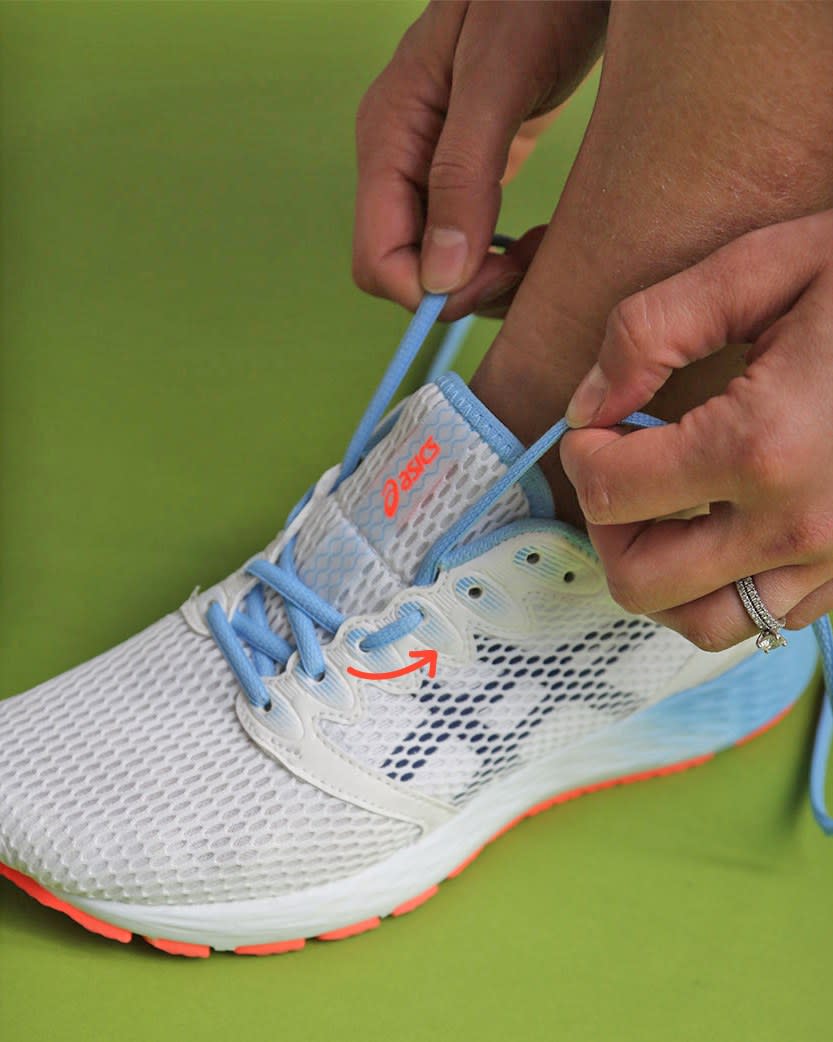
Weave the end of your right shoelace through the eyelet directly above it, going toward the inside of the shoe. Do the same on the left side.

Shoe-laces
Continue lacing up the rest of the shoe normally.
4. For a wide forefoot or bunions
This hack is helpful for relieving tightness when the front of your foot is especially wide compared to the rest of your foot. Making the front of the shoe a little wider can also accommodate for (and prevent) bunions, says Wachtel. "Any kind of lacing that will give you more width and room for the bunion [can help]," he says.

Shoe-laces
Unlace the shoe all the way to the bottom, so the lace is only in the bottom eyelet on the left and the right side.
Shoe-laces
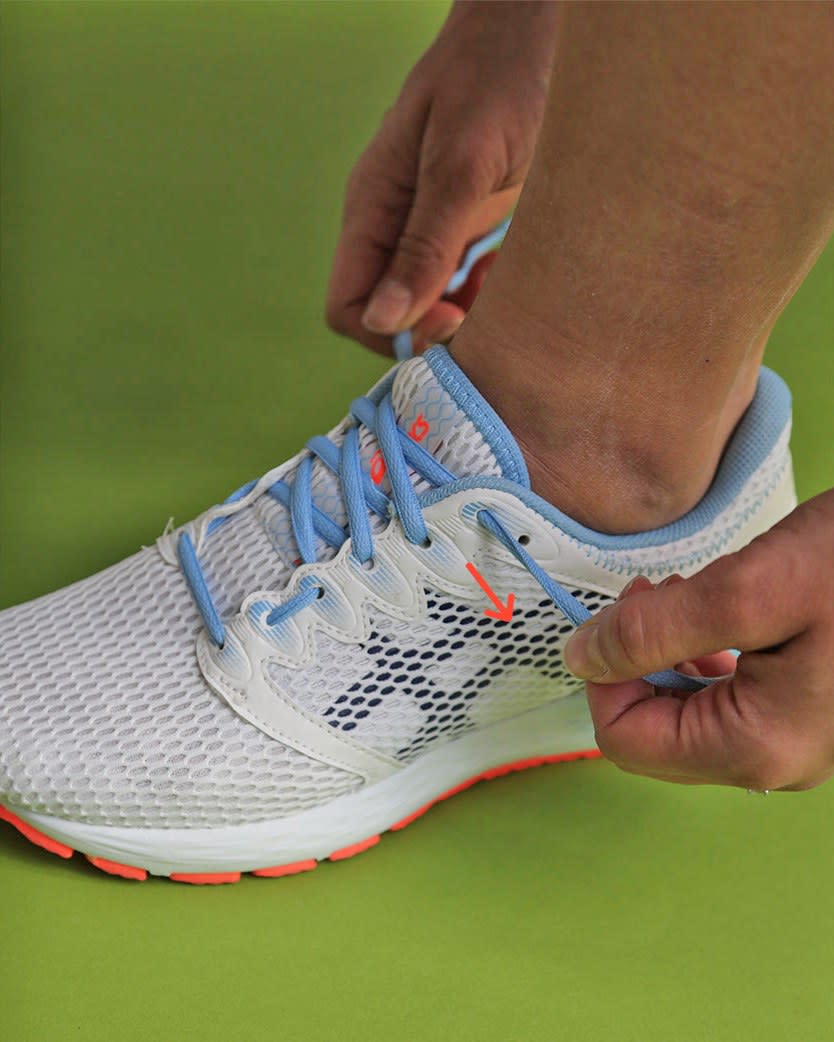
Weave the end of your right shoelace through the eyelet directly above it, going toward the outside of the shoe. Do the same on the left side. Weave the end of the right shoelace through the eyelet directly above it again, this time going toward the inside of the shoe. Do the same on the left side.
Shoe-laces
Lace your shoes normally from here.
5. For an overall wide foot
While the most obvious fix for a wide foot is to buy a wide shoe, this is a work-around if that's not an option. "You still have a clean finish [with this hack], but you're just giving a little more space," says Ornelas.

Shoe-laces
Unlace the shoe all the way to the bottom, so the lace is only in the bottom eyelet on the left and the right side.

Shoe-laces
Start lacing your shoe normally, but skip the eyelets that are directly above the bottom eyelets (on both sides).

Shoe-laces
Continue lacing the shoe, skipping every other set of eyelets.
6. For black toenails or toenail pressure
If your shoes are a tad too short or tight at the toe, this hack can help avoid black toenails (or allow already-bruised ones to heal). “This lacing pattern will help alleviate pressure on the toes and give shoes a little extra room," says Paul Lang, merchandising manager at Asics. "I’ve been able to make shoes that are a margin too short feel much more accommodating using this technique.”

Shoe-laces
Remove the lace completely from the shoe. Weave one end of the shoelace into the bottom eyelet closest to your big toe. Pull the shoelace diagonally and weave it through the top eyelet on the opposite side, going toward the outside of the shoe. (The length of the lace poking outside the shoe at the top is the length you'll be tying the shoe with, so adjust accordingly—you won't be messing with this end again.)

Shoe-laces
Move on to the other end of the shoelace. Weave it through the other bottom eyelet, going toward the inside of the shoe. Weave the shoelace diagonally through the next eyelet on the opposite side. Bring the shoelace straight over to the eyelet directly across and weave it through, going toward the inside of the shoe.

Shoe-laces
Again, cross the shoelace diagonally back over and weave it through the next open eyelet on the other side, going toward the outside of the shoe. Repeat this pattern until you get to the top.
Related:
Originally Appeared on Self

