The 5-ingredient Sugar Cookie I Bake Every Year — Plus 5 Easy Ways to Make Them Look Special
Baking is something I fell in love with as a child. The ingredients were a kind of magic, hidden in my parents’ cupboards, and resulted in a manifestation of love or celebration. I discovered an affinity for cookbooks at a young age, one that would become a lifelong obsession and eventually my career. But back then, it really was all about how disparate ingredients could be stirred together, shoved into an oven, and transformed into something thrilling (and often otherwise illicit in my parents’ health-conscious kitchen).
It was no coincidence that I found myself most often at my best friend’s house, where baking was encouraged as an after-school activity. Margie, the mother-in-residence and supervisor to our chaos, was also a master cookie-baker. She took me aside one day and distilled her lifetime of practical baking knowledge into a batch of dough we made together, offering details that remain an inner narrative in my mind when I bake today. It was that connection, though — being in the kitchen with someone I loved and creating a kind of joy together — that changed me most. More than the recipe or even the cookies themselves, I discovered that the real magic of baking was sharing the process.
When testing the five-ingredient sugar cookie recipe for my board book series, I invited my children into the kitchen to help make batch after batch of the simplest, sweetest cookie. In that moment, I found myself wanting to whisper all of Margie’s secrets to them, wanting to pass along the knowledge that had opened my world those years ago. As they stirred and rolled the dough and nibbled the scraps with enormous grins split across their faces, I saw that they already knew.
Here are five fun sugar cookie variations you can make with your kids, using my simple 5-ingredient sugar cookie recipe as a starter dough.
Get the recipe: 5-Ingredient Sugar Cookies
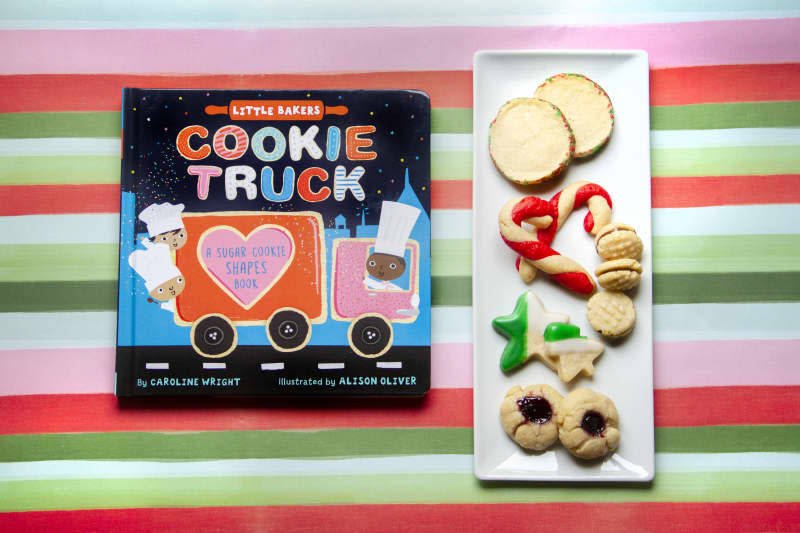
1. Classic Cut-Out Cookies
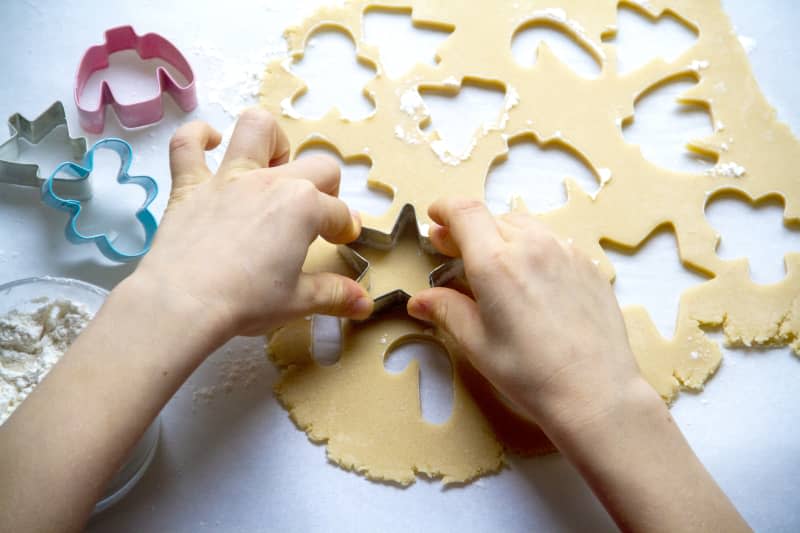
Follow the recipe as written, and use a variety of 2- to 3-inch cookie cutters of your choice.
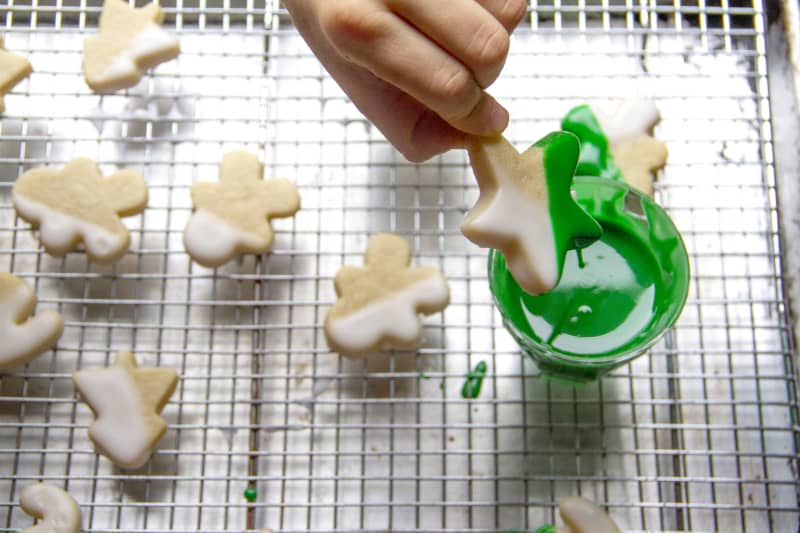
Try dipping the shapes in brightly colored icing, then setting it aside for a few hours to let it harden, and dipping again in a different color. The result is not only fresh-looking, but also easy for little hands to help! The possibilities are endless: Drizzle with the icing, then scatter with sprinkles or colored sugar. This option is the simplest and potentially most creative afternoon activity for littles.
Make-ahead tip: Roll out dough and cut out cookies; freeze cut-out cookie dough shapes flat on wax paper-lined trays. Bake cookies from frozen using the notes in the variations above. (Cook time does not change.)
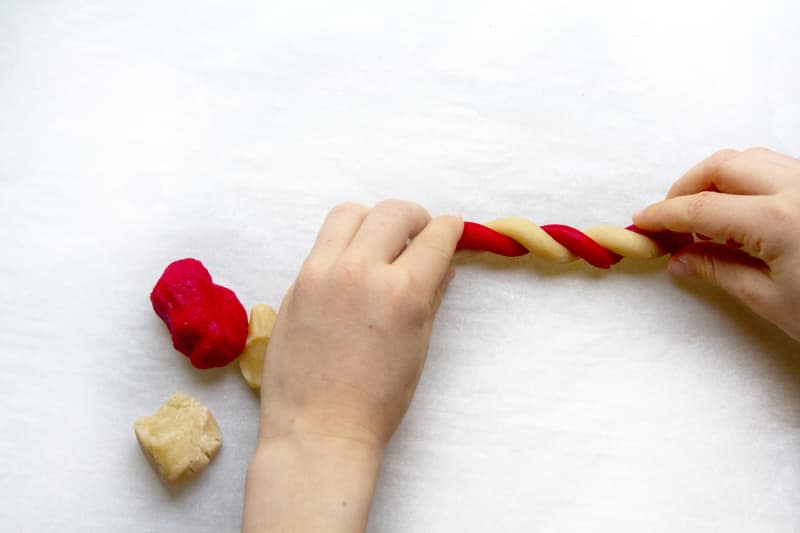
2. Candy Cane Twists
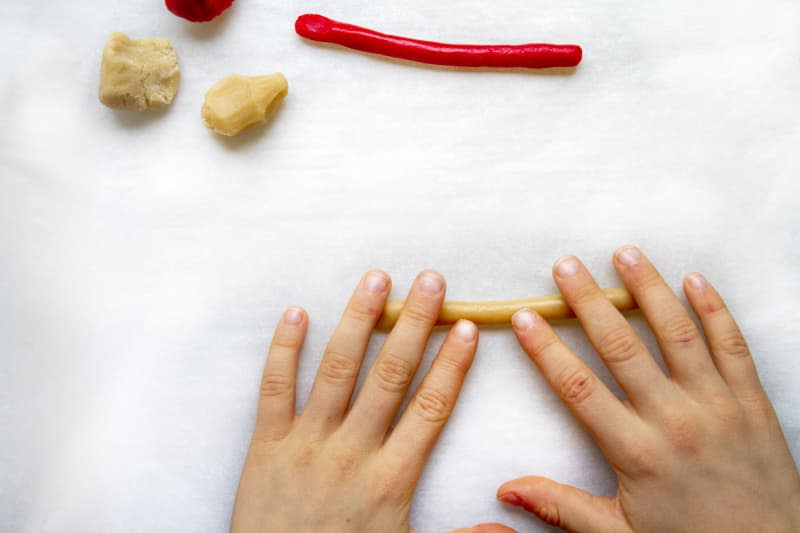
Divide a single recipe’s worth of dough into two portions and knead red food coloring into one portion. Working with level tablespoon dough portions, roll each piece of dough into eight- to 10-inch ropes about the thickness of a pencil. Twist ropes together, then form each twist into a hook shape. Increase baking time in the recipe by one to two minutes (or until canes are just beginning to brown around edges). Makes about 14 shaped cookies.
No need to stick to classic red-and-white candy canes: Swap red for blue, or dye each portion a different color. Or dye the whole lot green and shape into wreaths (and scatter with sprinkles before baking for some decorative flair). Don’t worry if your assistant’s hands get frustrated with the task and they no longer look like anything in particular: Embrace it and make holiday tie-dye cookies! It’s like creating with Play-Doh — only, it smells a lot better and you get an edible final product.
Make-ahead tip: Make and freeze dough. Dye thawed dough; form and bake. We don’t recommend freezing dyed, raw dough, so the color isn’t compromised.
3. Slice-and Bake Cookies
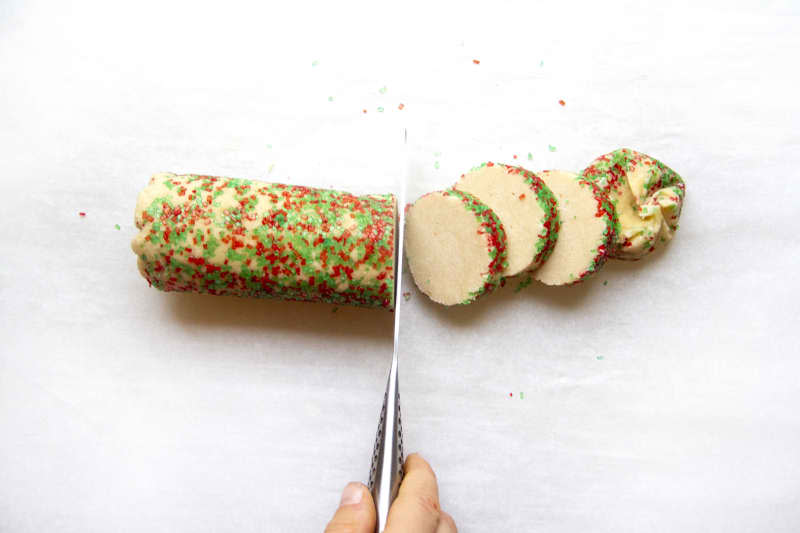
Divide a single recipe’s worth of dough into two equal portions. Roll each into a log about 2 inches thick and coat the outside of the log in 1/4 cup of your desired topping: Colored sanding sugar, turbinado sugar, shredded coconut, crushed peppermint, or sprinkles. Wrap the coated cookie dough in parchment, twisting ends to enclose dough like a party popper, then wrap the roll in plastic wrap. Freeze dough until solid (about 1 hour). Slice across logs to form 3/8-inch-thick discs; arrange on a cookie sheet a few inches apart (about 12 per sheet). Bake as from frozen as directed. Makes about 48 sliced cookies.

Pro tip: Rotate log after each slice, which will help to keep the log round, and slice your cookies while the log is still frozen solid for a clean cut.
Make-ahead tip: Make and shape dough into logs; wrap tightly in plastic and transfer to freezer. Slice and bake dough from frozen. Timing doesn’t change.
4. Thumbprint Cookies
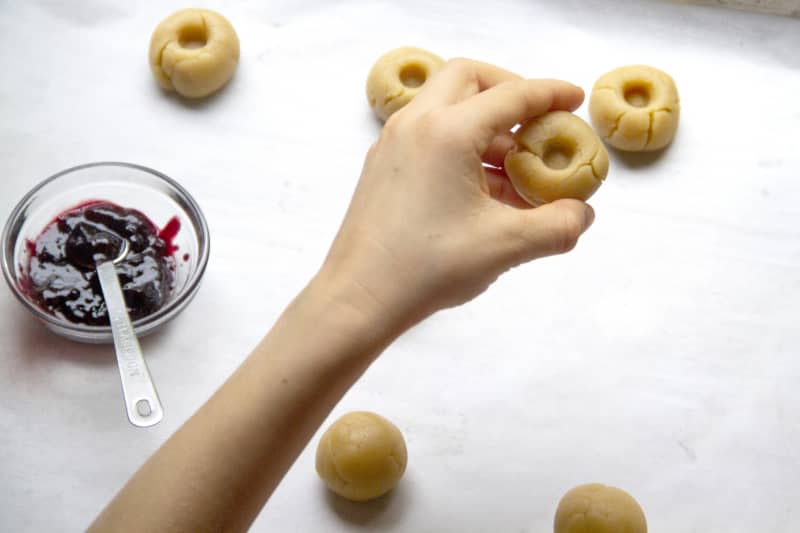
Portion level tablespoons of dough and roll each into 1 1/2-inch balls. Arrange on lined baking sheets, 12 per sheet. Use your thumb (or the handle end of a wooden spoon) to indent each ball in the center. Fill indentations with 1/4 teaspoon seedless jam of choice. Increase baking time by one to two minutes, or just until cookies are beginning to brown around the edges. Makes about 28 cookies.
Make-ahead tip: Make and shape cookies. Freeze unfilled cookies; fill indentations with jam before baking.

5. Tiny Cookie Sandwiches
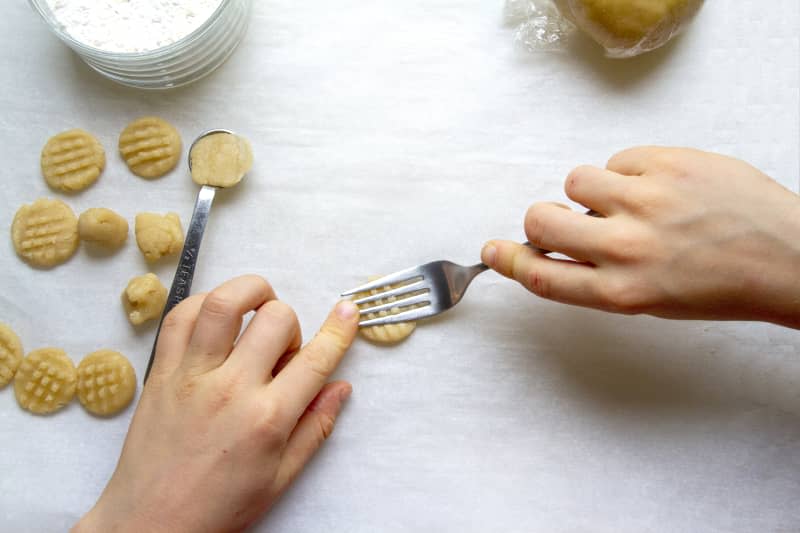
Roll dough into 1/2 teaspoon-sized balls and arrange on lined baking sheets 1/2 to 1 inch apart (about 24 per sheet). Press a fork into each dough ball to flatten them slightly. Reduce baking time by two minutes (or just until cookies are beginning to brown around the edges). When the baked cookies are cool, spread half of the cookies with about 1 teaspoon of chocolate-hazelnut spread, sweetened nut butter, or speculoos. Then sandwich with remaining cookies. Makes about 44 sandwich cookies.
Get creative! Use the bottom of a pressed drinking glass or even a cookie stamp in place of the fork to press the cookies before baking. It will offer a sweet design touch to the finished cookies.
Make-ahead tip: Make and bake cookies (before sandwich step) according to instructions above. Freeze baked cookies. Arrange on a baking sheet to thaw 20 minutes. Fill and sandwich thawed cookies.
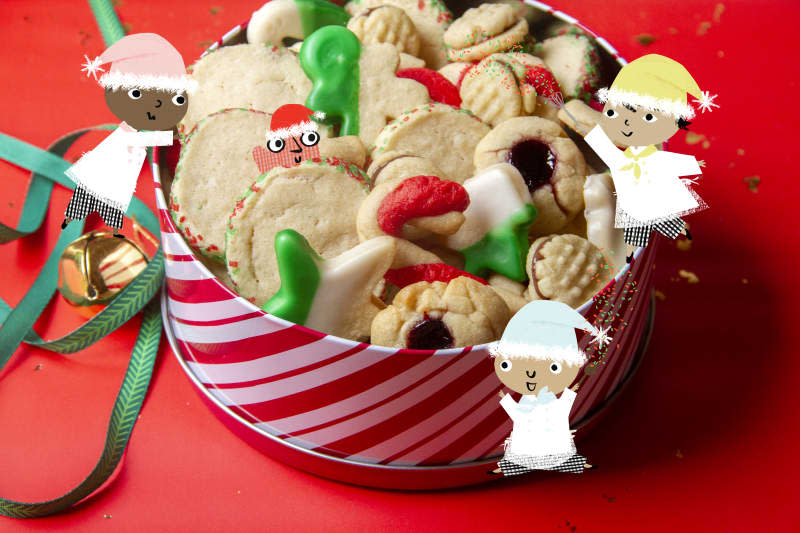
Tips for Gifting Cookies
Make a list of recipients and cookie types for each. Match them up with their preferred cookie type. Consider the make-ahead chart above as you plan your baking.
Double or triple your recipe for large-batch baking. Divide each batch before wrapping and chilling them separately. You can freeze the dough after it’s been formed into a patty or puck shape; wrap tightly in plastic. When you are ready to use, just thaw your dough in the fridge the day before.
Make or prepare packaging. Gather your packaging before baking to consider how many cookies you need to bake. Options include cellophane bags tied with a ribbon; cookie boxes; decorated paper lunch sacks (scribbled with crayon is a fun way to go!); and cookie tins.

Suggestions for Stress-Free Baking with Kids
Arrange all ingredients, equipment, and supplies out on the counter to maximize fun for (and supervision of!) your little baker.
Help your kiddo measure dry ingredients on a parchment-lined surface. Then you can funnel any ingredient spillover back into their containers to reduce waste.
Take breaks and separate tasks into blocks suited to your little baker’s age and attention span. Use the make-ahead tips to your advantage to spread out activities over a couple of weeks in short bursts rather than marathon baking sessions.
This article has been updated from its original publication in December 2021.

