17 Genius Baking Tips From Claire Saffitz
- Oops!Something went wrong.Please try again later.
Claire Saffitz is a pastry chef, video host, and cookbook author who has plenty of baking tricks up her sleeve. Although she now has a YouTube channel with a large audience, it wasn't always that way. She studied French cuisine and pastry, then later worked with Bon Appétit in the test kitchen and as senior food editor. Over time, she became more well-known as she crafted different copycat dessert and candy recipes Bon Appétit posted on YouTube.
With her expansive knowledge and experience in baking, it makes perfect sense why she inspires people with her work. After all, her website, Dessert Person, even mentions that her goal is to make baking more approachable and joyful for home bakers who feel hesitant or overwhelmed in the kitchen. So, whether you are trying to bake like the pros or just switch from boxed mix to homemade, some helpful guidelines from Saffitz can help your baking adventures run more smoothly.
Read more: 12 Martha Stewart Tips To Make You A Better Baker
Pre-Cook Fruit Cobbler Filling
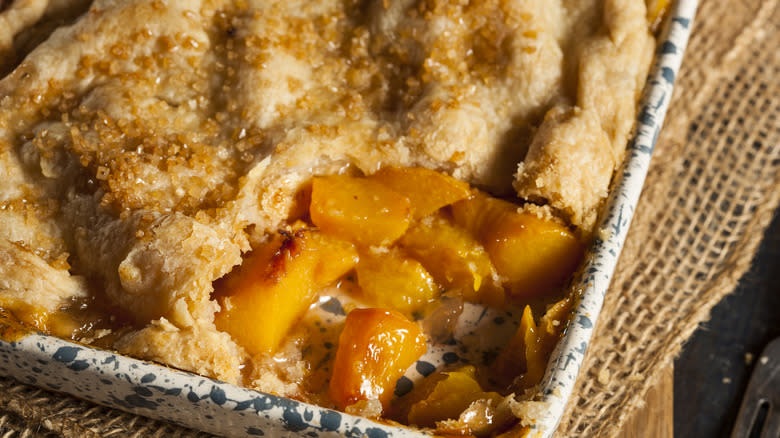
On YouTube, Claire Saffitz introduces the first recipe from her book "What's For Dessert," a recipe for homemade peach cobbler. She explains how cooking the peach filling in a skillet is a good idea before transferring it to a baking pan and putting the biscuit dough on top. There are a couple of reasons why she gives this tip. First, when you slowly cook the filling, the heat cooks down the juice, making it syrupy. So, when you place the dough on top, it doesn't turn mushy.
Secondly, starting with a hot filling helps the biscuit dough to bake from the underside. Sometimes, when making cobblers, people run into the problem of having a crispy surface layer while the dough touching the filling stays partially raw. You can completely prevent this issue with the help of Saffitz's advice. And, of course, this doesn't work with only peach filling. You can use it for any cobbler or dish that bakes with a filling underneath and dough on top, like a pot pie.
Add Herbs To Bread Dough When You Shape It
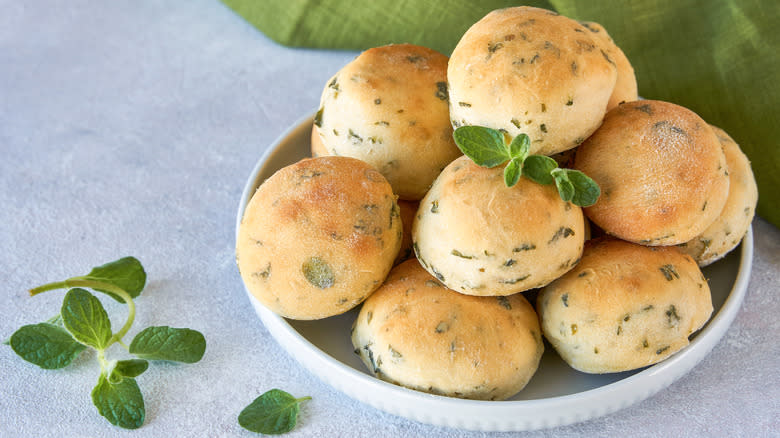
Whether you make whole loaves or fluffy dinner rolls like Claire Saffitz does in her YouTube demonstration, you need to try her genius trick. She says to wait until you shape bread dough to add delicate herbs because it's ideal to fold them in manually. This isn't always the standard; many recipes tell you to add these as the last addition when you have a hook mixing the dough, or maybe even earlier by including them in the wet ingredients. However, Saffitz notes how fresh herbs or ingredients like chives bruise easily and a mixer can destroy their vibrant color.
In her video, she rolls the dough as you would with cinnamon roll dough, forming it into a rectangular shape. She then sprinkles on the chopped chives and folds the dough into a cylinder. Once more, she rolls the dough flat with the rolling pin, which distributes the chives and creates layers. From there, she finishes the process of shaping them into rolls. Of course, this looks different depending on how you shape it, and it works well with baguettes, buns, braided doughs, and more.
Use Seeds In Cookie Dough
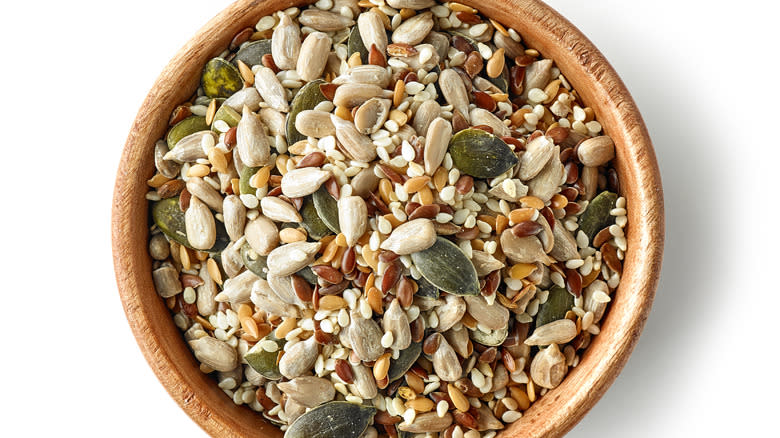
There are many ways to make an excellent chocolate chip cookie, but Claire Saffitz's go-to recipe (via Epicurious) includes an array of seeds, making them extra unique. For example, she suggests you use pumpkin, sesame, sunflower, and flaxseeds in your cookie dough. You can use poppy and chia seeds, too. The pastry chef believes this simple addition drastically improves the dessert's texture. Not only that, but she also recommends that you toast the seeds to give them a deeper flavor and golden-brown color.
When you make your cookie dough, you can use a combination of any seeds you like and simply fold them in before you scoop the cookie dough. Moreover, it doesn't just have to be chocolate chip cookies. Other types, like oatmeal or peanut butter cookies, also benefit from the texture and taste of seeds, so there are plenty of ways to get creative with this tip.
Avoid Silicone Mats When Making Cookies
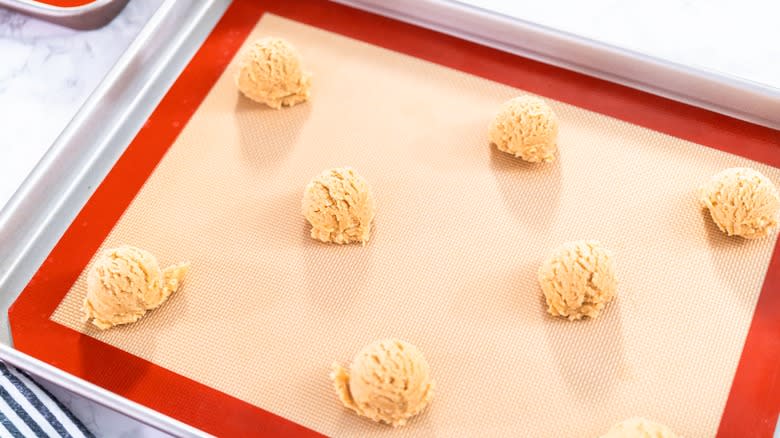
Although most of Claire Saffitz's videos are how-to baking demos, there are some cases where she posts other content. In one of her question-and-answer videos on YouTube, the pastry chef gives a word of advice to a home baker who has trouble with their cookies always spreading out. That issue happens for a few reasons, but Saffitz informs the audience that using silicone mats might be the contributing cause.
Companies design these mats for things like toffee or other candies, which are prone to sticking. Yet, they aren't always the best equipment to use with cookie dough. According to Saffitz, baking cookies on a silicone mat may ruin them. Since the material is so slick, the dough softens and slides, creating cookies that don't have any height. Therefore, the cookies end up with a not-so-impressive presentation. If you want perfectly thick cookies, Saffitz's approved method is to bake the cookies on a parchment-lined tray and always double-check your oven temperature before baking.
Make Bread With Freshly Milled Flour

Instead of baking with old flour that's been sitting in your pantry for a while, Claire Saffitz says using the highest quality flour is a good idea. Using organic or fresh flour isn't necessarily impactful in specific recipes, such as chocolate cakes where the sweet ingredient stands out, but Saffitz believes it makes all the difference when you make bread. This is because bread often has minimal ingredients, so if you can afford to buy the finer quality products, like freshly milled flour, it's worth it.
After all, many breads only have yeast, water, salt, and maybe sugar aside from the flour. And since flour takes up most of the bread's composition, its flavor is the most noticeable. If your local grocery store doesn't carry higher-quality flour, you can always check at specialty food stores. Also, some manufacturers allow you to purchase the flour online and ship it to your home.
Use Your Oven As A Proofer

If your kitchen is cold and you have trouble proofing bread, Claire Saffitz has an easy solution. As part of a video for her YouTube viewers, the pastry chef explains that you don't need any fancy equipment to help your dough rise. All you need is the oven that you plan to bake it in. The process is impressively simple, too: Just heat the oven on low for a short time and then turn it back off.
Ensure the chamber is warmer than room temperature before placing the dough inside. The good news is that you don't need an oven thermometer to know the precise temperature; just carefully hover your hand in the oven to get an estimate. Saffitz clarifies that you don't want it to be too hot, though. This is because too much heat can kill the yeast in the dough, which will prevent your bread from rising properly as it bakes.
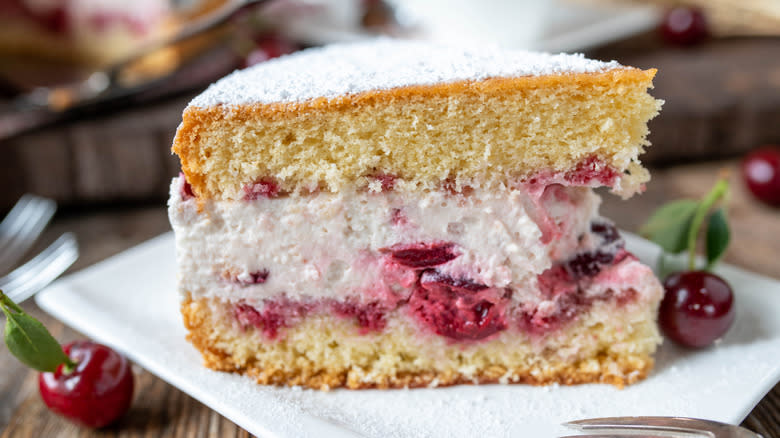
Cool Sponge Cakes Upside Down

Claire Saffitz's handy tip regarding sponge cakes has to do with the way you should cool them. These cakes are fragile and airy; they can lose their fluffiness if you're not careful handling them. When you remove these delicate bakes from the oven, the cake's crumb relies on the cooling process to fully set its structure. In a YouTube video, Saffitz says that to prevent chiffon, angel food cake, or similar cakes from turning dense after you bake them, invert the cake pan upside down while it cools.
Make sure to also have a wire rack ready for the cake to rest on so there is proper airflow around it. This method helps relieve the pressure from the bottom, meaning the rest of the cake isn't weighing down on the base. Allow it to fully come to room temperature without disturbing it, then flip it over and unmold the cake as usual.
Soak Tres Leches Cake For A Few Hours Minimum

If you've ever made a tres leches cake that turned out more dry than moist, this tip from Claire Saffitz is just for you. When you poke holes and pour the milk mixture over the cake, it needs time for its texture to reach its full potential. According to Saffitz, you must wait at least three hours for the liquid to balance evenly throughout the cake. You can also let it rest up to a whole day before you serve it to be fully confident it's ready.
Naturally, since the cake has dairy, you must put it in the refrigerator while allowing it to rest. Saffitz's reasoning for the suggested time is that the milk absorbs into the surface, but you can't see what the cake crumb looks like below. It can be harder for the milk to reach the sides and center sometimes. Luckily, with a little time and patience, any excess moisture can spread to dryer areas of the dessert.
Allow Pie Dough To Rest Overnight

One of the most essential steps to perfect pie crust is allowing it to rest before you work with it. When you go on a mission to make an excellent pie, Claire Saffitz says it's best to give the dough a full night's rest in the refrigerator. The professional baker emphasizes this importance in a YouTube video where she demonstrates how to make a blueberry pie. Depending on your recipe, it might require you to rest the dough for only a few hours, which she mentions is alright but not as ideal.
This is because planning ahead gives more time for the dry ingredients to hydrate. When the dough is more relaxed and thoroughly moistened, it's not as tough in consistency. As a result, rolling out the dough is much less of a strenuous task. This simple tip can make the recipe easier and help you to get the pie in the oven quicker.
Toast Nuts In The Oven Rather Than The Stovetop
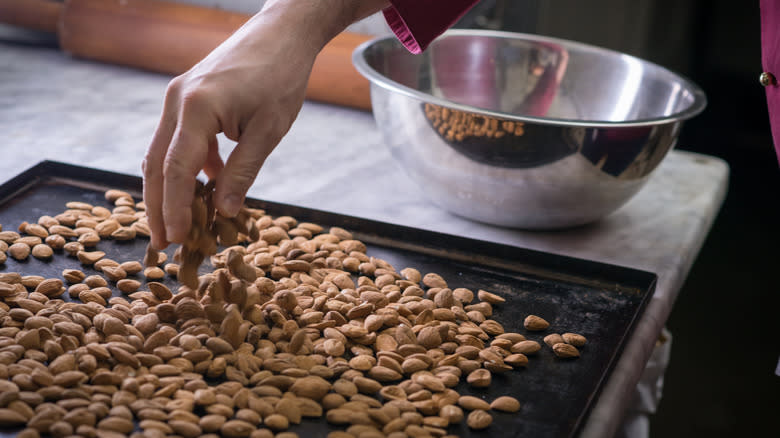
You might not think there's much difference between toasting nuts in the oven or stovetop, but Claire Saffitz makes an interesting point in her maple sticky bun YouTube video. She explains how the oven is better because you only get surface-level toasting when you use a skillet. On the other hand, when you spread out the nuts on a sheet tray and place them in the oven, it cooks them on the inside too.
If you want your walnuts, pecans, or other nuts to have a more complex flavor, there's only one way to go, according to the pastry chef. Also, Saffitz reminds her viewers that the cooking time of nuts can vary. One of the biggest mistakes people make when roasting nuts is thinking they're all the same. Yet, in reality, every type of nut is different. Pay attention to the indicators to know when you should remove them from the heat, which is if they have a distinct toasty smell and darker color.
Use The Tip Of The Knife To Slice Fruit
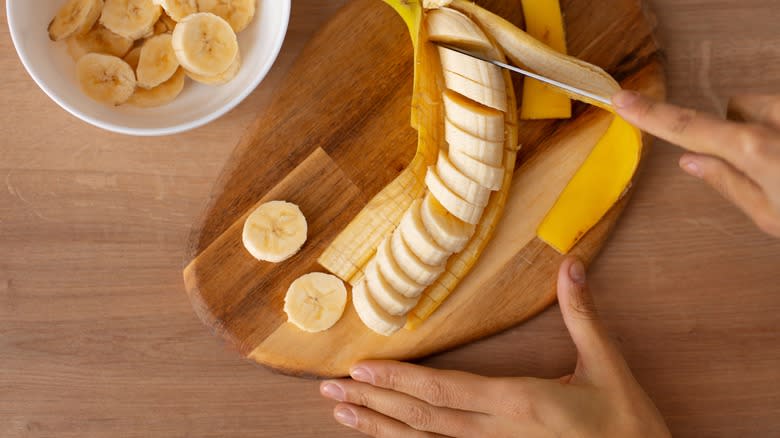
Slicing fruit can get frustrating sometimes when the pieces stick to the knife and fall onto the counter or floor, making a mess. This is especially true if you must cut a large amount of fruit and manually have to take each piece off the knife, which feels like a massive waste of time. Luckily, Claire Saffitz has a clever trick to prevent this kitchen issue from happening: Use the tip of the blade rather than the thicker part.
She gives this advice in a YouTube video when she slices apples for a gorgeous apple tart. The pastry chef explains why this bothersome problem happens to the best of us; it is caused by the friction between the knife and the fruit going back and forth constantly. Fortunately, you don't need to worry about purchasing a special tool because this trick works with any type of fruit, not just apples.
Create A Foil Sling For Pie Weights

If you use dried beans or rice as pie weights, Claire Saffitz says to first line the dough with a double layer of foil. Many people use parchment paper as the base for the weights to rest upon. Unfortunately, this isn't the best option if you're not careful since it breaks when you try to remove the weights. The beans are often too heavy, and you need to scoop them out of the crust to prevent a mess, which is time-consuming.
Foil is more heavy-duty, especially how Saffitz advises her viewers to assemble it in her YouTube demonstration video for making quiche. To try it yourself, make two foil rectangles larger than your pan. Layer them on top of the crust so their lengths are perpendicular, ensuring plenty of overhang on every part of the rim. From here, you can use your weights as usual. Then, when it is time to remove them, bunch the foil edges together to create a sack and carefully transfer it to a bowl.
Use An Immersion Blender When Making Custard Bases

The one tool Claire Saffitz relies on the most when she makes custards like quiche is a small immersion blender. According to her, using this tool makes the mixing process vastly easier than if you just use a regular whisk. This is because immersion blenders work very effectively; they are powerful and distribute the yolks and whites throughout the dairy.
Sometimes, even if you use a countertop mixer with a whisk attachment, there are stubborn clumps that don't fully break down, which forces you to strain the custard base to make it entirely smooth. But Saffitz says that you can skip the straining altogether with her method. She also advises fully immersing the device in the liquid rather than keeping it on the surface, to prevent it from working air into the mixture and changing the consistency. She also mentions, though, that if you don't have an immersion blender handy, you can also use the jar of a regular blender.
Add Gelatin To Make Extra Stable Pastry Cream
If you plan to make a molded cake with distinct layers, Claire Saffitz suggests adding gelatin to set your pastry cream. Although pastry cream has eggs and cornstarch in classic recipes, the gelatin provides added structure; powdered gelatin is a common ingredient in baking because it's colorless and odorless. When you add softened and melted gelatin into a mixture, the proteins it contains spread out. Then, once the food begins to cool, the molecules attach back to each other, which helps stiffen liquids into solids.
In her recipe, Saffitz only uses 1½ teaspoons of unflavored powdered gelatin, so you don't need much to benefit the pastry cream. You can also swap powdered gelatin for sheets if you adjust the ratio. As a bonus, Saffitz's trick works with other frostings or mousses if you want them to hold up better than usual, so you can use it on more than just pastry cream.
Use A Saucepan As A Makeshift Cake Mold

Impressively, Claire Saffitz successfully assembled a layer cake in a tall saucepan during a YouTube demonstration for making a wedding cake. She emphasizes that you should use a cake pan if you have one. However, if you are in a pinch, it undoubtedly works when you find a saucepan with the correct dimensions. The chef used an 8-inch pan with straight sides for assembling the cake and a salad plate of the same size to help her cut the layers.
If you find yourself in a similar situation, you can use this creative trick as long as you line the saucepan or other cookware with plastic wrap — otherwise, the cake might get stuck, preventing you from unmolding it. After assembling, fold over the excess plastic wrap to cover the cake while it sets in the refrigerator. To unmold it, Saffitz says to put a plate on top of the pan and flip it, which releases the layered cake effortlessly.
Bind Graham Cracker Crust With Egg Yolks
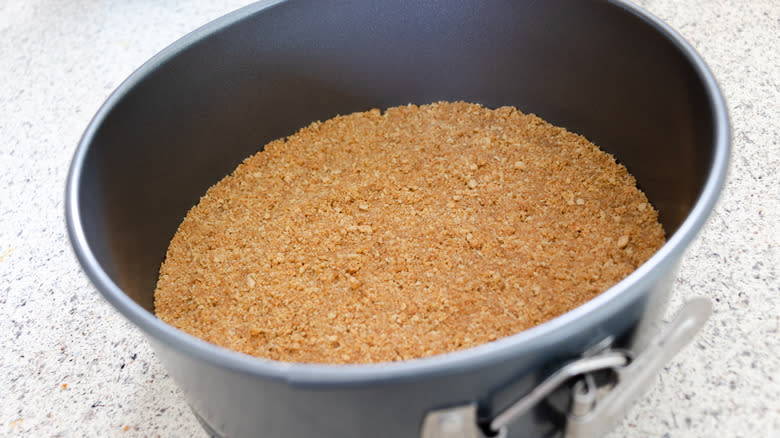
Most graham cracker crusts for desserts only require melted butter and crushed graham crackers (some also have sugar). But Claire Saffitz has a genius tip for your next crust: Add an egg yolk into the mixture. She discusses this inclusion when she makes a s'mores-inspired tart in a YouTube video. It's helpful to use yolks because they can hold everything together — an ingredient known in baking as a binding agent.
Whether you bake the crust alone for a no-bake tart or slow-bake it with a filling on top, the final product slices into uniform pieces much more easily because of her special ingredient. There's less of a chance that the mixture crumbles, especially when you take the time to carefully pack the crust before baking. And don't worry, when the crust turns into a deep golden color and has a buttery, honeyed smell, the egg has fully cooked too.
Use Your Finger To Determine If Macarons Are Ready To Bake

During a video on New York Times Cooking's YouTube channel, Claire Saffitz gives her advice on how to make the perfect macaron. While measuring and mixing correctly is crucial, there is a step that some people often miss — they don't realize they need to rest macarons when baking them. The pastry chef says that before you pop your piped macarons in the oven, you should do a simple test to determine if they are dry enough.
Otherwise, the cookies don't form a "foot" on the bottom as they should and end up with cracks. It's a good idea to pipe an extra cookie on the side to use as your sample. Gently touch the test macaron with your finger so you can physically feel the texture. You must wait longer if the cookie feels wet or your finger leaves a dent. Ideally, they need to feel somewhat firm and shouldn't budge when you touch them. Following Saffitz's advice on this is the best way to tell when your macarons are perfect for baking.
Read the original article on Daily Meal.

