16 Tips To Remember When Making Buttermilk Pie
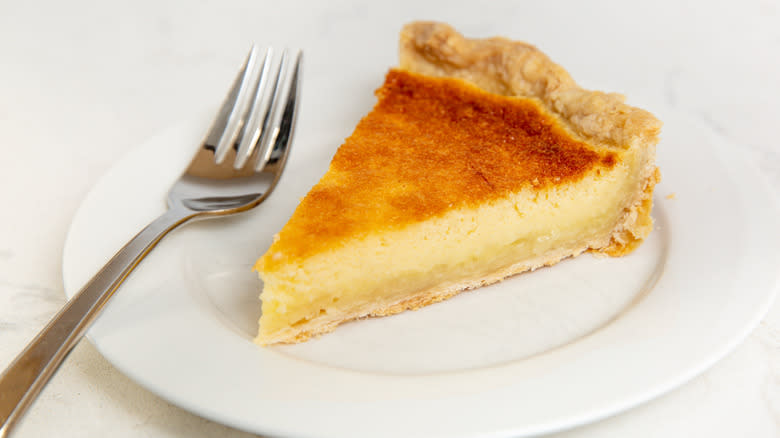
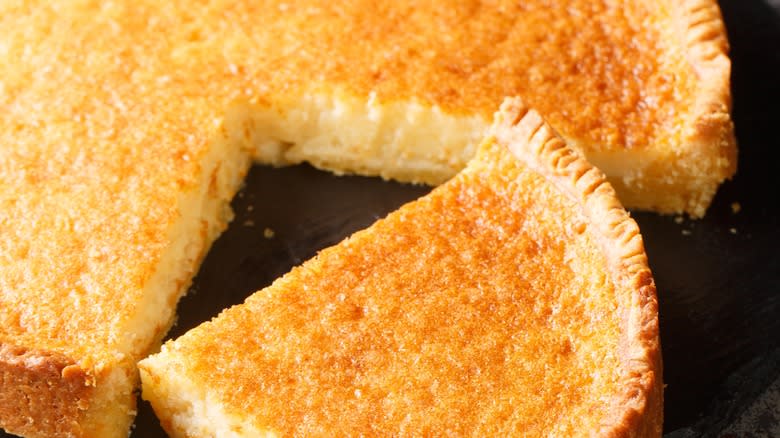
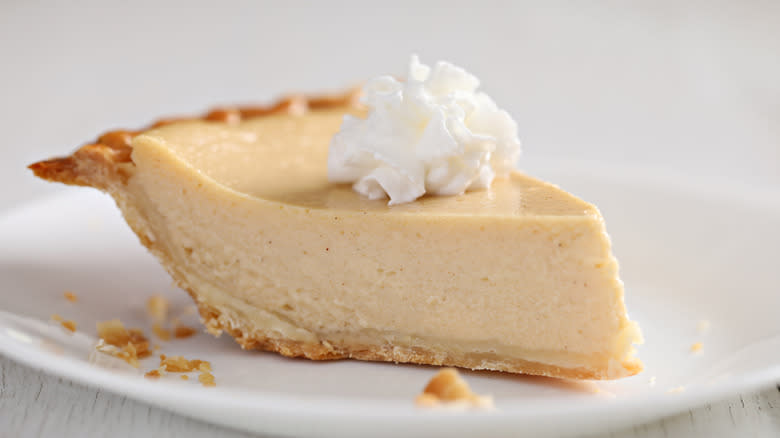
No Thanksgiving table would be complete without a litany of pie choices. Rather than going for the conventional pumpkin or pecan pie, we're taking some time to highlight the strange world of desperation pies. This class of pies are made with relatively inexpensive household ingredients and was especially popular during the mid-20th century. One of those pie varieties is a buttermilk pie, which remains a popular pie choice in the American South. The texture is similar to its distant cousin, the chess pie, but instead, it's made with a base of buttermilk and thickened with wheat flour rather than cornmeal. The pie is well-known for its tangy, dynamic flavor coupled with a bright burst of lemon. Combined with a flaky pie crust, this pie is bound to make a splash on your holiday table.
Although buttermilk pie is nothing short of delicious, it isn't the easiest to make at home. Like many other home bakers, we too have struggled with making the perfect custard pie and experienced the frustration of it not setting firsthand. It's led us in search of how to make a great buttermilk pie like it's straight out of a bakery. Here are some of our tips for perfecting this Southern classic and making a pie fit for a feast.
Read more: 25 Most Popular Snacks In America Ranked Worst To Best
Try Adding Cream Cheese To Your Crust
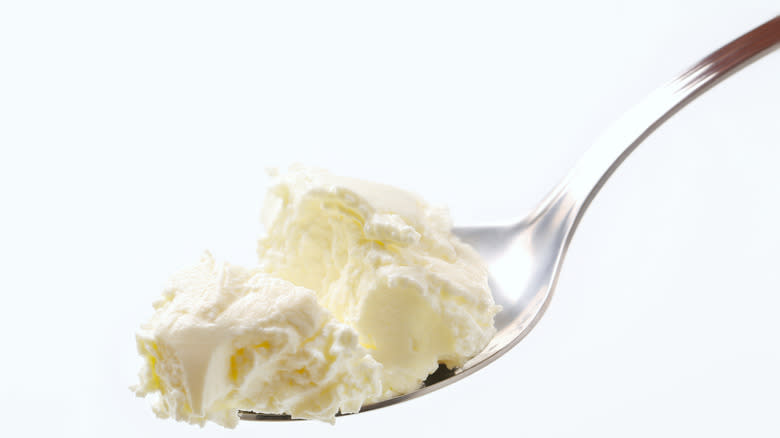
Most pie crusts are made of the same simple ingredients: flour, water, butter, and salt. But there are some other ingredients that you can add to your buttermilk pie crust to help it stay together and impart a sublime texture. Our chocolate buttermilk pie recipe includes an additional creamy ingredient to help keep the crust texture: cream cheese.
You'll want to add the cream cheese and the butter to the crust together to get the perfect flaky layers combined with a soft bite. A little help from the sugar will help you keep your crust sweet without overwhelming the flavors in the pie filling. The best (and least messy) way to bring together your crust is to make it together in a food processor. You can blitz in the cream cheese and the butter until it forms pea-sized pieces before adding in the cold water to bind the crust together.
Keep The Butter As Cold As Possible For Your Crust
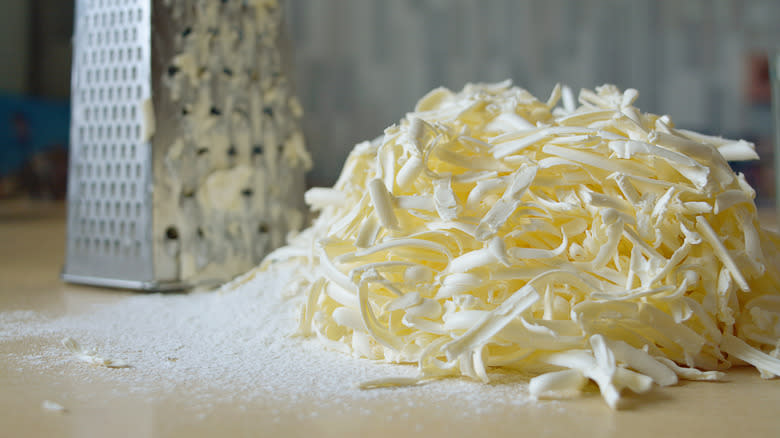
The key to making a great pie crust is to always mind the temperature of your butter. Butter contains parts of fat and water. As the pie bakes, the water in the butter will form from liquid into steam and give your pie its characteristic flaked crust. If you allow your butter to start warm or melt, then the butter will not produce any steam and develop those layers. It will just leave your crust stodgy, greasy, and melted.
Luckily, there are many ways to ensure that your pie crust stays together and you get the perfect texture -- and it's by keeping your butter as cold as possible. One method to keep butter as cold as possible when baking pie is to dice your butter into pieces and place it back in the fridge until you're ready to add it to the crust. You can also grate in frozen butter to keep your butter together.
User Proper Measuring Technique For Your Ingredients
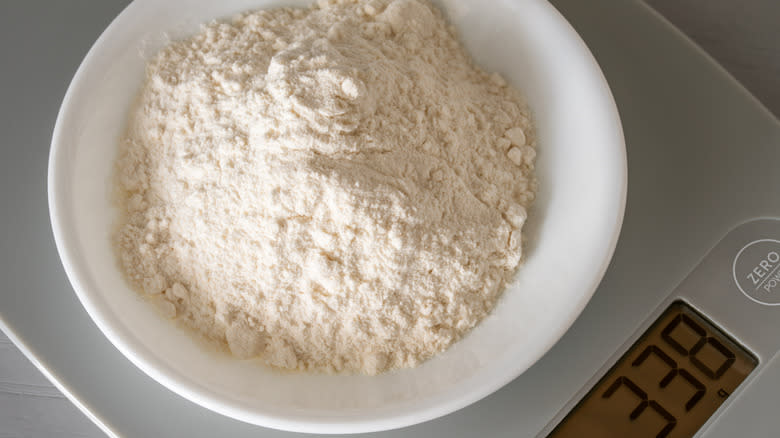
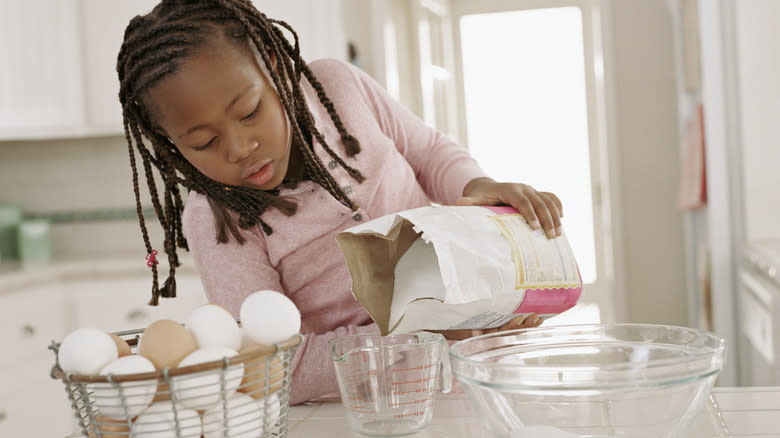
Baking is all based on precision. If your ingredients are even a bit off, it can alter the texture of your crust and filling. The exact measurement technique needed will depend on what type of ingredient you're measuring. You should bake with a scale to ensure you have the correct amount of every ingredient, especially the dry ones. For example, when you scoop out a cup of flour from the bag, you can inadvertently pack the flour and create an inconsistent amount compared to the recipe. This minor change will throw off your hydration ratio and alter the texture of the pie completely.
When it comes to liquid measurements, you're going to want to look at the side of the measuring glass and sink down to its level (not metaphorically) to ensure that your measurement of buttermilk is on par with the recipe. These simple measurement steps can mean the difference between a great buttermilk pie and merely a good one.
Bring Your Filling Ingredients To Room Temperature Before Baking
Sans butter in the crust, you're going to want to make sure all of your pie ingredients are brought to room temperature. This is because a buttermilk pie is dependent on the seamless integration of ingredients -- especially with its finicky filling. When you're adding the butter to your filling, you'll want to make sure it's softened so it can easily be whipped and mixed with the flour and the sugar.
In addition, the eggs should always be brought up to room temperature because cold eggs tend to cause the butter to firm up. You might also be more prone to overmixing the filling to ensure that the egg is mixed in. In comparison, room-temperature eggs will give a flawless, smooth consistency, and both the yolks and the whites will be more easily combined in the mixer. The best way to get eggs to room temperature is to put the eggs in a water bath or run them under warm water.
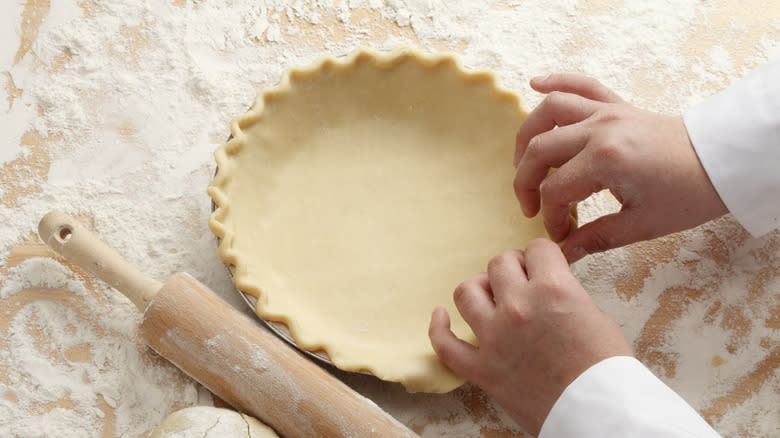
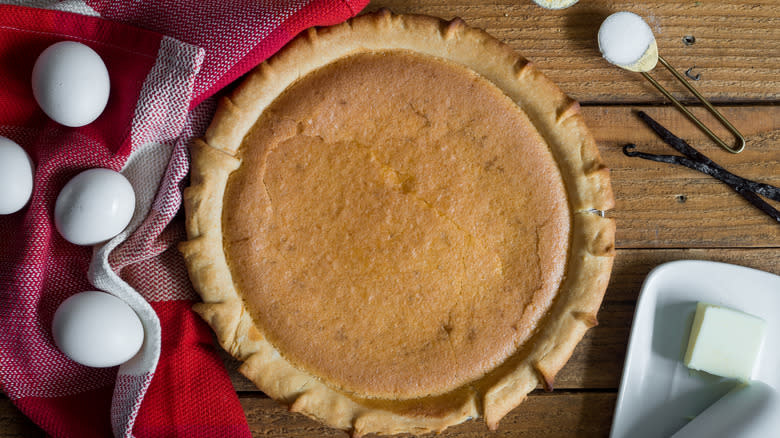
Never Add A Top Crust
There might be some variations in recipes and techniques but there is one consistency: buttermilk pies (and custard pies in general) do not utilize a top crust. This is because the crust layer on top would impact the moisture in the crust. Moreover, you don't need to use the top crust to hold in a juicy fruit filling, like you would for a berry or apple pie.
There are some ways to give a cream pie a top crust without actually sealing in the moisture. You can add crust cutouts to the top of your pie or pre-bake lattice strips and add them to the pie after it's adequately cooled. It might look a little untraditional, but it's worth it for the crust-lovers among us.
Moreover, it's important that when you're making a bottom-only crust you modify the recipe as needed. And if you forget, you can always find some creative ways to use up leftover pie crust.
Double-Chill Your Pie Dough
One of the most common issues that come up with making a pie crust is that it comes out dense or shrinks down when placed in the oven. This is likely because the crust has been overworked or the butter has melted down so much that the water in the butter has caused gluten formation. Gluten is the protein that gives the dough its structure. Too much gluten will make the crust stodgy and tough, but crust that has been underworked won't hold up well during baking.
To prevent your crust from getting overworked and the butter from melting, you should plan to double-chill your dough. The first time needs to occur right after you bring the dough together in a ball. Pop it in the freezer or fridge to allow the gluten to slack and the butter to solidify. Then, chill it again after you've rolled it out and fit it into your pie dish. You can bake the cold crust directly from the fridge to the oven.
Avoid Overwhipping Your Filling
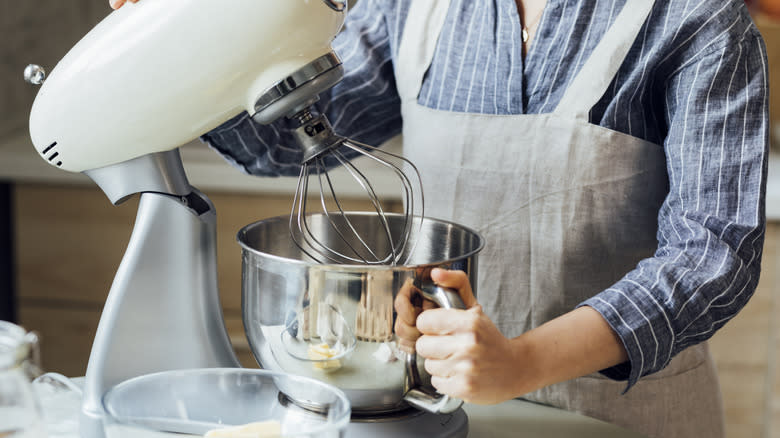
One of the biggest mistakes people make with custard pies, including buttermilk pie, is overwhipping the fillings. The mantra here is "gentle, yet assertive." This is because you're working with whole eggs, which can scramble and split if they become overwhipped. After all, you're not trying to make poofy meringues with your egg whites.
Besides making sure to not overwhip your ingredients, you'll also need to be sure that you pay attention to the order in which you're adding them to the pie. Most buttermilk pie recipes start with mixing together the butter, eggs, and flour before adding the buttermilk and lemon juice. This is because the acidic ingredients can curdle the eggs if added prematurely and agitated by the stirring. You'll only want to mix your acids in enough so that they are completely mixed into the filling, but not so much that chunks of egg start to surface.
Don't Omit The Flour
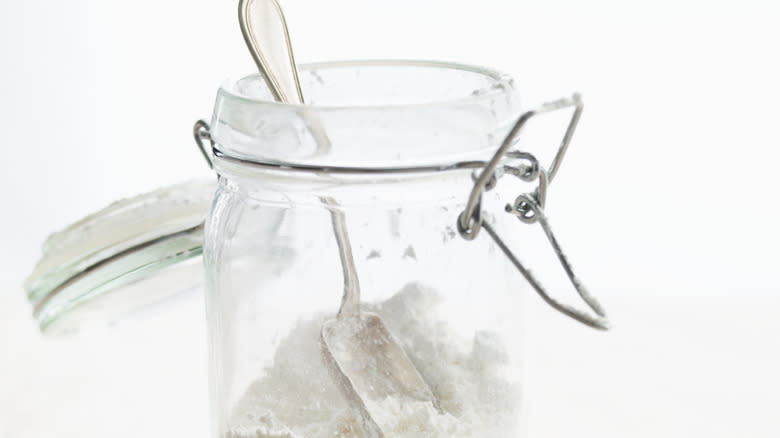
Flour is one of the key differing ingredients between buttermilk pie and it's chess pie cousin. The latter is made with cornmeal, which gives the pie a thick texture and subtly chewy texture. In comparison, buttermilk pie uses flour as a thickener. Without this ingredient, you wouldn't have the thick texture that buttermilk pie is known for; and your custard filling may not set as easily.
You'll likely only need a couple of tablespoons of flour in your filling to get the perfect texture. You should also be sure to mix the flour into your filling completely rather than letting it bead up. This will prevent you from biting into bits of flour, and it will ensure that the flour will be well-dispersed. Like all dry ingredients, we recommend measuring this one out on a scale to ensure that you're not making the filling too gunky.
Avoid Letting The Filling Sit For Too Long
Baking can be a matter of balancing many different tasks at once, especially if you're baking this pie for a special occasion like Thanksgiving. But buttermilk pie filling is not one to abandon on your countertop for too long. Since the base of the filling for the buttermilk pie contains both eggs and sugar, you may end up with a scrambled texture if you let it sit out. Sugar is hygroscopic, meaning that it pulls water from the surrounding ingredients, including the eggs. This will result in pieces of scrambled egg floating around in your otherwise silky-smooth custard.
This process takes upwards of 20 minutes, so a few minutes here and there won't make a difference. While your crust is par-baking, you can start on your custard filling. This will ensure your timelines line up and your scrambled egg conundrum is avoided.
Protect Your Pie From Rapid Changes In Temperature
Custard pies, as a whole, tend to be very finicky when it comes to temperature. Some folks will leave these pies in the oven with the door open to cool before pulling the pie out, while others will rip the Band-Aid off relatively quickly. There's no concrete answer to this question, but you'll have to do some extra legwork if you leave the pie in the oven. It is recommended that you take about ten minutes from your baking time to ensure that your pie won't overcook.
Another mistake many folks make with baking pies is to run the temperature in the oven too high. Our recipe for blackberry-buttermilk pie bakes at 350 F, which is comparatively low for a pie variety like apple or peach. Running the temperature too high may cause the eggs to split, so always opt for a low-and-slow method for cooking your buttermilk pie.
Use Fresh Buttermilk For The Filling Rather Than A Substitute
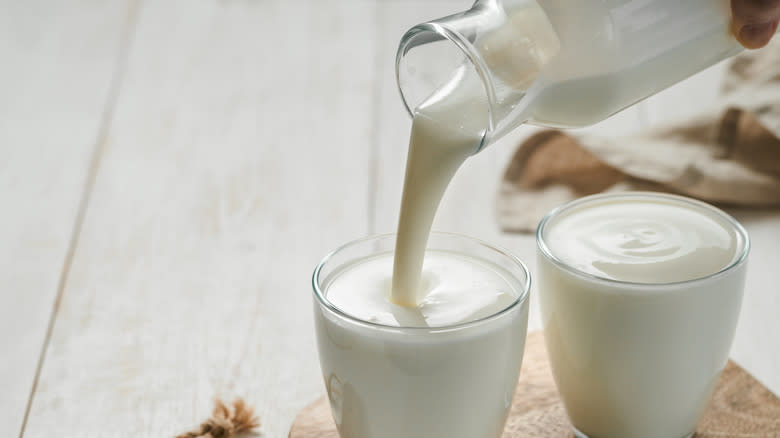
Buttermilk is the key ingredient in the aptly named buttermilk pie. This ingredient is made by combining milk with bacterial cultures before heating it and allowing it to ferment. Without it, you won't have the same tangy flavor and texture in your pie. You also, arguably, can't call it buttermilk pie. There is no ingredient that you can substitute in this recipe for the dairy product, including the common DIY buttermilk combination of milk (dairy-free or regular) and an acid (often lemon juice or vinegar). The texture of this mixture isn't ideal or conducive to add to your filling.
The ideal buttermilk to use for this recipe is a high-fat variety, often labeled as "whole buttermilk." You can also substitute in a low-fat buttermilk, but it won't create the same texture as its high-fat counterpart.
Try Spiking Your Pie With Liquor

Buttermilk pie doesn't have to retain the same slightly lemony profile to it. There are tons of ingredients and flavor enhancers you can add to your pie to add complexity and flavor, one of them being liquor. Bourbon is one of the best choices for spiking your pie because it has a smooth, oaky flavor that pairs well with the vanilla base of the filling. Or, you can add a few tablespoons of dark rum to the filling for a tropical flavor.
The other alternative to adding booze to the filling is to substitute equal amounts of vanilla extract, which is just vanilla-flavored vodka. You'll want to add the alcohol to the custard mixture with the buttermilk, lemon juice, and zest. To double down on the booze, consider making a boozy-infused whipped cream with your alcohol of choice, powdered sugar, and heavy cream. It will provide the perfect hint of sweetness and creaminess to your pie slice.
Par-Bake Your Crust To Prevent A Soggy Bottom
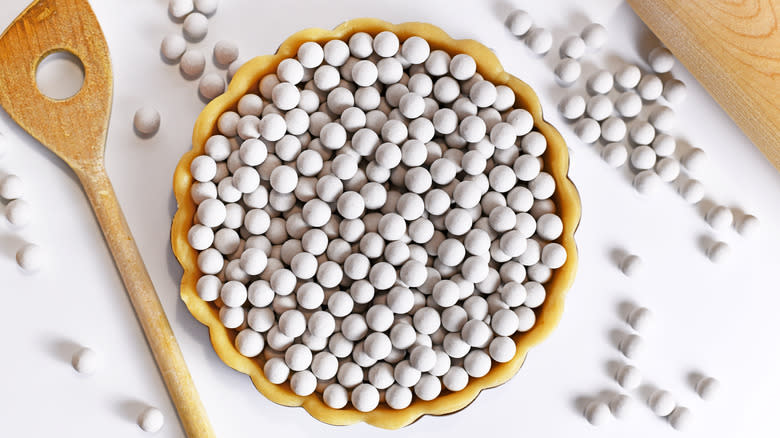
One of the important necessities for baking buttermilk pie is to always par-bake the crust before adding your filling. The idea is that pie custard tends to cook at a slower rate than the surrounding crust, so putting it in the oven to bake will give it enough of a head start to crisp up before being swamped with a wet filling. After all, no one wants the dreaded soggy bottom.
Blind-baking and par-baking are two terms that are often thrown around in the baking world. Blind-baking fully cooks the pie crust and is essential for a pie with an unbaked filling, like a peanut butter pie. In comparison, par-baking is used for custard pies where the fulling requires more cooking time. To ensure your crust gets perfectly crisped before adding in your filling, you'll want to add pie weights or beans to the crust to keep it weighed down. You should also reduce the risk of scrambling the crust by cooling the crust briefly rather than adding a cold filling to a hot crust -- which might scramble the eggs.
Use A Pie Shield If Your Crust Browns Too Fast
Giving your crust a head-start via par-baking is a blessing and a curse. It will give you the opportunity for the bottom crust to firm up before you add in your wet filling, but it will also create an issue when it comes to the later stages of baking. Mainly, your crust will brown faster than the filling sets, which may leave you with a dark (or potentially burnt) crust.
To prevent burnt pie crust, use aluminum foil to make a pie shield. Fold the square of foil into a smaller square and cut it into a circle shape. You'll need about three inches of space on the rim of the shield to ensure it adequately covers the pie. Once you notice your pie starts to get dark around the edges, crimp the shield over it. Alternatively, you can place the pie cover on when you pour in the filling to avoid having to crimp the foil around a hot pie plate.
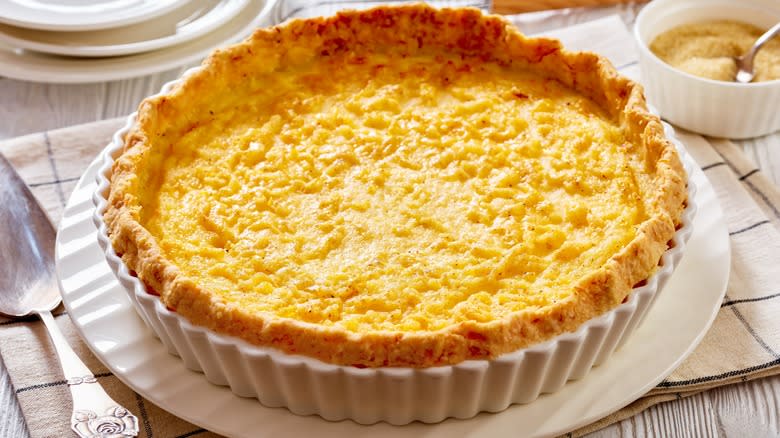
Do A Jiggle Test To Determine If Your Pie Is Sufficiently Baked
The hardest part about baking a pie is determining when to pull it from the oven. The buttermilk pie will develop a slightly darker skin on top of the filling as it bakes, similar to a crème brûlée, which can be deceptive in determining when to pull the pie from the oven.
Chemically, when the pie bakes, the proteins in the egg start to coagulate and set. Whole eggs set at around 165 F, which is the temperature at which it is perfect to pull your pie from the oven. Besides sticking a thermometer in the pie, you can stick it with a knife to see if it comes out mostly clean. However, this method will leave a noticeable gash in your pie. The best method to determine if your custard is set is to gently shake the side of your pie. The center should jiggle like Jell-O (not like a liquid) while the edges should be relatively firm.
Chill Your Pie After Baking To Allow It To Set
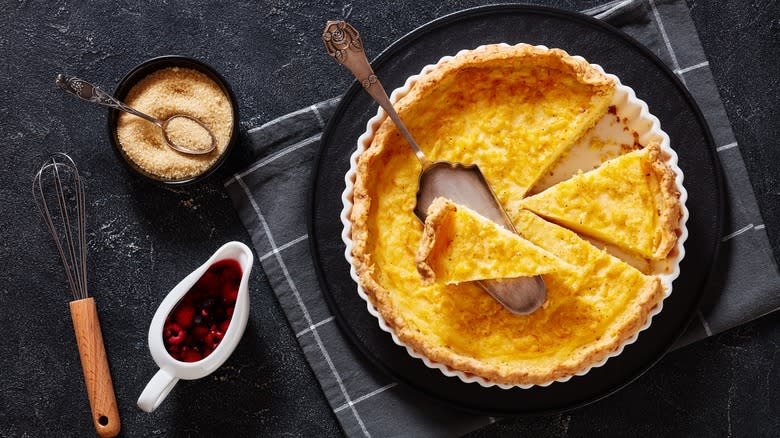
The critical step to baking a pie, regardless of the pie, is to allow it an adequate amount of time to sit and set. Remember that custard pies aren't completely set in the middle when it's time to remove it from the oven. The two hours on the countertop after the pie has finished baking will allow the proteins in your custard to finish firming up. If you slice into your pie prematurely, you risk the pie sloshing out and causing the crust to become soggy. It's nothing short of disappointing, especially when you put so much work into your pie.
If you plan to eat your pie on the same day, you don't need to refrigerate it while it's cooling. But if you plan to make your pie the day before, you'll need to pop it in the fridge after it's adequately cooled to ensure it's safe to eat. If you like eating your pie warm, pop it in the oven at a low temperature until warmed through.
Read the original article on Tasting Table.

