16 Cues for Pigeon Pose You Probably Haven’t Heard Before
This article originally appeared on Yoga Journal
"I never understood the excitement over Half Pigeon Pose," wrote teacher Erin Jorich in one of her blog posts. "For the longest time, it was a posture that just frustrated me. It never felt comfortable for my body and no matter how much the teacher asked me to surrender, I just couldn’t. It wasn’t exactly pain I was experiencing, there just never was a sense of ease in the posture."
Sound familiar?
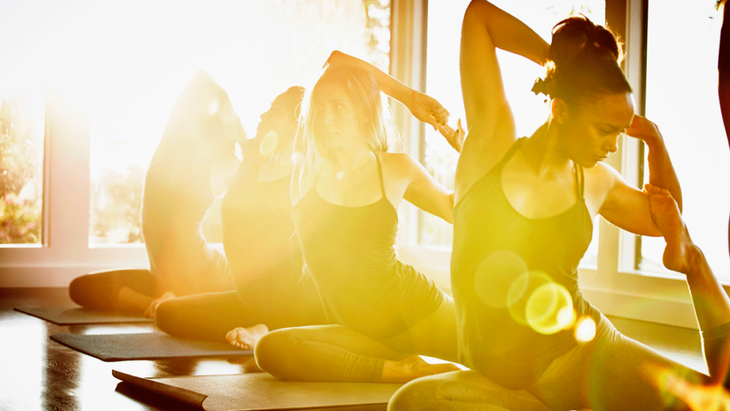
Pigeon Pose, or Eka Pada Rajakapotasana, is a "hip opener" that targets the psoas, piriformis, and gluteals, each of which has a tendency to hold considerable tension. The experience can be...intense.
Trying to maneuver your body into the traditional outward expression of the pose, even when it simply isn't working with your anatomy, can be part of the problem. There is tremendous variability among our bodies. When you repeatedly try to conform to what a pose supposedly looks like rather than what it feels like, you increase tension, frustration, even the likelihood of injury.
Think of physical or emotional tension as resistance. The more resistance you experience, the more challenging it is to release it. Rethinking and recalibrating how you approach the pose can elicit different physical and emotional sensations--ones that you can surrender to--which facilitates that release. But in order for that to happen, you need to find a way to sit with the tension.
That's what Jorich did. "I took the time to actually understand the various aspects of Pigeon," she says. "It took a lot of experimentation for Half Pigeon to feel decent in my body."
The following cues, collected from Jorich and other teachers, can help you redefine your approach to the posture so it becomes more than barely tolerable. When you're open to exploring, you're more likely to receive the full benefits of the posture.
16 Cues for Pigeon Pose You Probably Haven't Heard Before
Pigeon Pose has several iterations. As you settle your hips into place in Pigeon, you can hinge at your hips and bring your chest forward toward the mat in what's commonly known as Half Pigeon or Sleeping Pigeon. Or if you've been practicing backbends and have sufficient flexibility, you might bend your back knee, bring your hands overhead, and reach for your back foot as you arch your back. Whatever version you intend to practice, there are cues that can help you find an expression that works for you.
1. Make a seven with your leg
Yogi Bryan often tells students to "make a seven with your leg." It's succinct. It's straightforward. It's simple. It's also technically a little inaccurate since you don't need to bring the front shin parallel to the short side of the mat. But the metaphor introduces the general shape of the pose in an easily recognizable fashion. Teachers, there will be ample time to offer more specific cues as you observe students' bodies coming into the posture.
2. Draw a straight line toward the back of the mat with your toes
As you start to align yourself in Pigeon Pose, it can be easy to fixate on your front leg and completely forget about your back leg. Overlooked, that leg can easily veer off to the side and create tension in your hips and low back.
Adriene Mishler of Yoga With Adriene guides students into Pigeon from Tabletop or Downward-Facing Dog while keeping their awareness on the back leg in her YouTube teaching. Her simple reminder as she transitions into Pigeon Pose is to use your toes to "draw a straight line toward the back of the mat." It's just enough of a nudge to help you find safe alignment.
But your awareness doesn't end there. Even after your leg is positioned correctly, your back foot can easily veer off to the side and create wonky alignment. (A look over your shoulder often reveals the heel falling off toward the long side of the mat.) To remedy that, yoga instructor Rehnuma Tajbin, a yoga instructor in New York City, tells students to continue to pay attention even after the leg is in position and point the toes straight toward the back of the mat. The bottom of your foot should face the ceiling and your heel should be in line with your calf.
RELATED: 8 Lessons Adriene Mishler Has Learned From Being YouTube's Most Popular Yoga Teacher
3. Press your back leg and foot into the mat
To keep students' attention on their back leg, Mishler also cues pressing into the top of your back foot. "Really engage," she says. That muscular contraction of pressing into the mat provides additional stability in the pose.
Hiro Landazuri, founder of Body Smart Yoga, also cues pressing your back leg into the mat, although for a different reason. He explains that this action engages the muscles you're trying to stretch, creating an isometric stretch. As a result, he says, the work you do becomes "significantly more efficient."
4. Unclench your jaw
"Your temporomandibular joint and hip joint are related," says yoga instructor Gwen Lawrence, creator of Power Yoga for Sports. The connection is both fascial and neural. Fascia is a dense form of connective tissue throughout your body. The Deep Frontal Line of fascia runs from your foot through your pelvis and to your jaw. When it tightens and shortens, there is a consequent effect that can be felt elsewhere along that line. Emotions registered with the nervous system also affect this connection, although the extent of the relationship is not fully understood yet.
"If you have watched Olympic sprinters, their lower jaws hang open as they race in order to have full range of motion in their hips, therefore leading to a longer stronger stride," says Lawrence. The same thing applies when you’re trying to get your hips to open up for Pigeon. Because we tend to clamp down in yoga holds that are tight or difficult, she continues, try relaxing your jaw. See if it releases some tightness. Keep in mind, it might take consistent practice over time to notice significant tension release.
5. Take a blanket or bolster beneath BOTH hips
You've probably heard yoga teachers suggest tucking a folded blanket beneath your bent front leg if that side of your body remains lifted off the mat. It's a helpful suggestion that can decrease the pressure in your front knee, improve alignment in your pelvis, and allow the targeted muscles to release rather than remain engaged.
There's another way you can use a folded blanket to accomplish this. In her YouTube video "Why Can't I Do Pigeon Pose," yoga teacher Lizzie Brooks offers the option to adjust it horizontally across the mat so the supportive blanket is situated beneath the hamstring of your bent leg and the front thigh of your straight leg. This brings a little height and support to both hips in a manner that she finds beneficial. It can also minimize the tendency many of us have to cram too much of the blanket beneath the hip of the bent leg, which creates an imbalance in the pelvis.
6. Come into Thread the Needle
In addition to the folded blanket trick, yoga therapist Jenny Clise often incorporates a modified Thread the Needle into Pigeon to help correct an imbalance in the hips. This approach also intensifies the stretch in the lower body and offers a pretty decent stretch in your shoulders and upper back.
To come into Thread the Needle, start with the arm opposite your bent front leg. Flip your palm up and bring it across your body in front of your bent leg and under your other arm. So if your right leg is forward and bent, you would bring your left arm beneath your chest toward the right side of the mat.
"This helps encourage the left hip forward and down so that it's more level with the right," says Clise. You can rest your forehead on the mat or a folded blanket. Or you can turn your head in the direction of your bent leg to intensify the twist.
7. Draw your front hip back
Another way to bring some evenness to your hips and remain aware of your body during the pose is to draw the sit bone of your bent leg toward the wall behind you, says Jorich. "I like to work a lot in opposition," she says. "If you’re exploring the shape of a forward fold, the torso is moving forward, and then you have that opposite energy of the front hip moving backward."
8. Hug your thighs toward one another
You might have heard this cue in poses such as Low Lunge and Lizard to maintain alignment and engagementt. It serves a similar purpose here. "Sometimes I find that with students, the weight in the pelvis slides off to the side of the bent leg," says Jorich. "When you energetically and isometrically draw the thighs inward, sometimes that can help folks find more of that balanced pelvis."
9. Stay upright
There are days--and heck, perhaps lifetimes--when folding forward in Pigeon just doesn't feel comfortable. There's a role that being with discomfort can sometimes play in yoga, although that doesn't mean you should be in distress.
As you begin to find the shape of Pigeon in your legs and hips, pause with your chest lifted and your fingertips pressing into the mat. You might just stay there, says Mishler. In her video, she suggests keeping your chest open and continuing to press through your fingertips so you're not sinking in the hips and low back. Continue to breathe and release into the posture, says Mishler. She also suggests this might be the version of the pose that works best for you "for a long time."
Landazuri also offers this option to students. He cues students to hug the belly in and tilt the pelvis back (posteriorly) to intensify the stretch on the hip flexors along the front thigh of the back leg. (Although most of your--and your teacher's--attention tends to focus on the bent leg and the outer hip and glutes, you're also stretching the hip on the straight leg.)
10. Press your front shin down
Whether you choose to fold forward, remain upright, or take an intense backbend in Pigeon Pose, try pressing your front shin into the mat. That muscular engagement stabilizes the body in the upright expressions of the pose to help you keep your balance. It also helps you practice the same engagement you need if you progres the pose into Flying Pigeon, says Jorich, in which that shin has to push down. "It's kind of like laying the foundation," she says.
But engaging your shin can also benefit the forward bend version. "Sometimes we’re just going to hang out and rest in Pigeon Pose, and that's a great approach," says Jorich. "But often I want to give students something a little different, and that can just be an added sensation."
11. Take Figure 4 while sitting instead of reclining
Reclining Figure 4 is a standard alternative to Pigeon Pose that finds a similar--but less intense--external rotation in your hip. The variation, which takes your ankle to the opposite knee, works especially well for those of us with tight hip flexors, hamstrings, or low back muscles. It also allows you more control over the stretch in the hip by modulating the position of the heel that's resting on the ground--the closer it is to your sit bone, the more intense the stretch.
You can practice Figure 4 while sitting, which also engages your core. You can still modulate the degree of the stretch by varying the distance of your heel to your hip. To ratchet up the intensity, instead of pressing your ankle against your inner thigh, says Landazuri in a YouTube video, reach your ankle toward your knee without touching it.
12. Wear long socks
"One of my favorite teachers, Barbara Benagh, would tell us to wear long socks on the days we were working into King Pigeon pose," said Amy Leydon, a yoga instructor and founder of Soma Yoga Center in Boston. "The long sock acts like a strap but is so much less complicated than getting a strap around your foot!"
Here's how she cues it: If your right knee is bent in front of you, reach your left arm back with your palm facing up. Bend your left knee and lift your foot off the floor. "Grab the sock at your big toe with your palm still facing up. Then, draw your elbow in close to your rib cage, and then rotate your arm so your elbow is pointing toward the ceiling. The sock will pull off of your foot slightly to allow you more space in your shoulders until you have the mobility to get into the pose without a sock.
RELATED: How to Practice King Pigeon Pose
13. Imagine your breath along your back like rain flowing down a mountain
Joe Miller, a yoga anatomy and physiology teacher in New York City, considers Pigeon Pose an opportunity to be aware. More specifically, he thinks of it as a time "to pay attention to the movement of your breath along the back of your body." He explains this to students by cueing, "As you exhale, imagine your breath flowing down over your back like rain flowing down the sides of a mountain." That awareness and focus is something that you can take with you into any challenging moment.
14. Close your eyes
You probably already close your eyes when you're in Sleeping Pigeon, the forward bend version of the Pose. Try closing your eyes even when you keep your chest lifted, suggests Tajbin. He explains that shutting yourself off from your visual world--and the accompanying sensory input--can calm the nervous system. Chances are that you could use that when you're experiencing an intense hip opener.
15. Feel it to heal it
Ever heard a yoga teacher refer to the hips as the "emotional junk drawer of the body"? Research supports the yogic belief that emotional stress is held in the body, which can result in the physical manifestation of tightness. And when this tension settles in the hips, it can also lead to lower back pain.
The practice of yoga is built around the belief that you can unlock both physical tension and emotional release through the physical practice of postures. "I usually talk about how emo you can get in the pose," says yoga and meditation teacher Yogi Bryan. "[Pigeon Pose is] my favorite because I can process my feelings better in that pose. I usually joke around in class about how the 'hips don't lie,' like Shakira says. Feel it to heal it."
16. Take it nice and slow
Most of us have a tendency to rush into our yoga poses, says Mishler. Especially in vinyasa classes. "All the time in yoga--and in life--but especially here, I advise you to go nice and slow and be mindful," she says. "Let the pose unfold."
RELATED: Cues You Probably Haven’t Heard Before for Down Dog, Reverse Warrior, and Legs Up the Wall.
About Our Contributor
Crystal Fenton is an E-RYT200 YACEP Yoga Instructor and author of The Healing Power of the Pineal Gland: Exercises and Meditations to Detoxify, Decalcify, and Activate Your Third Eye Chakra.
For exclusive access to all of our fitness, gear, adventure, and travel stories, plus discounts on trips, events, and gear, sign up for Outside+ today.

