15 Incredible Resin Crafts You Won’t Believe Are Homemade
Create one-of-a-kind pieces of art using resin. You can make wall art, coasters for a coffee table, or even preserve precious photos.
Crafting is an excellent way to use your creative energy. With resin crafts, made with a mix of epoxy resin and hardener that creates a hard-as-nails finish over almost any material, you can make artwork for walls, objects for decorating shelves and tabletops, and even preserve family photos.
Related: These 27 Budget-Friendly DIY Projects Will Make Every Room Feel Custom
Prepping for Resin Crafts
Though resin crafts are easy to do, prep is key; have your supplies and workspace ready before the first mix.
Cover the floors and worktable of a dust-free room or garage (ideally 65°F–70°F) with heavy-duty plastic.
Wear old clothes and latex gloves, and use disposable cups and stir sticks for easy cleanup.
Have a level on hand for flat projects such as artwork, so the resin spreads evenly.
With your space prepared, it’s time to play, starting with simple projects like coasters and glossy artwork. Most packages of resin cover multiple projects, so you’ll have enough to perfect the technique.
Glossy Impact
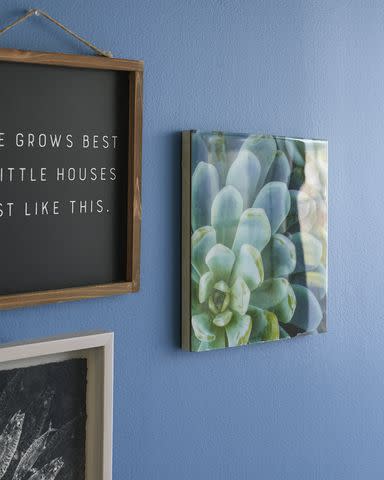
Art paper, a canvas, and resin craft mix make for easy art, like the supersized succulent featured on this gallery wall.
Working on a level, protected work surface, attach art paper to a canvas, such as this 10x10 Inch Wrapped Canvas ($17, Michaels) with decoupage medium like Mod Podge ($10, Michaels).
Cover the paper with more decoupage medium, smooth out the bubbles, then let it dry.
Pour the clear resin into the center of the art and let it run down the sides; smooth the edges with your finger. Let the art dry for 24 hours.
Editor's Tip
We recommend placing a large box or plastic tub upside down over the art to prevent dust from collecting on the surface.
Rocky Coast
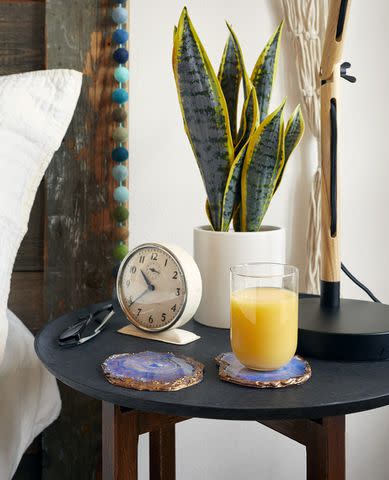
Similar to split geodes, these easy-to-make coasters are a perfect introduction to resin art.
To create a form for each coaster, on a silicone mat, pipe the outline of a rock shape using a glue gun and glue sticks. Apply several more layers to build up the edge, adding rocks and glitter if desired.
Once dry, mix clear resin (Clear Cast Resin, $25, Michaels) in individual small cups with a few drops of acrylic paint in purple, gold, blue, and white, stirring for even color.
To form the look of rings, pour a small amount of one color in the center, repeating with remaining hues; the colors will spread and blend. Sprinkle with glitter.
Finish with the white paint, swirling with a stir stick to create the look of movement, then apply a heat gun to blend colors and remove air bubbles.
Let dry 24 hours, then paint the edges with gold metallic paint and line the bottoms with felt to protect your furniture.
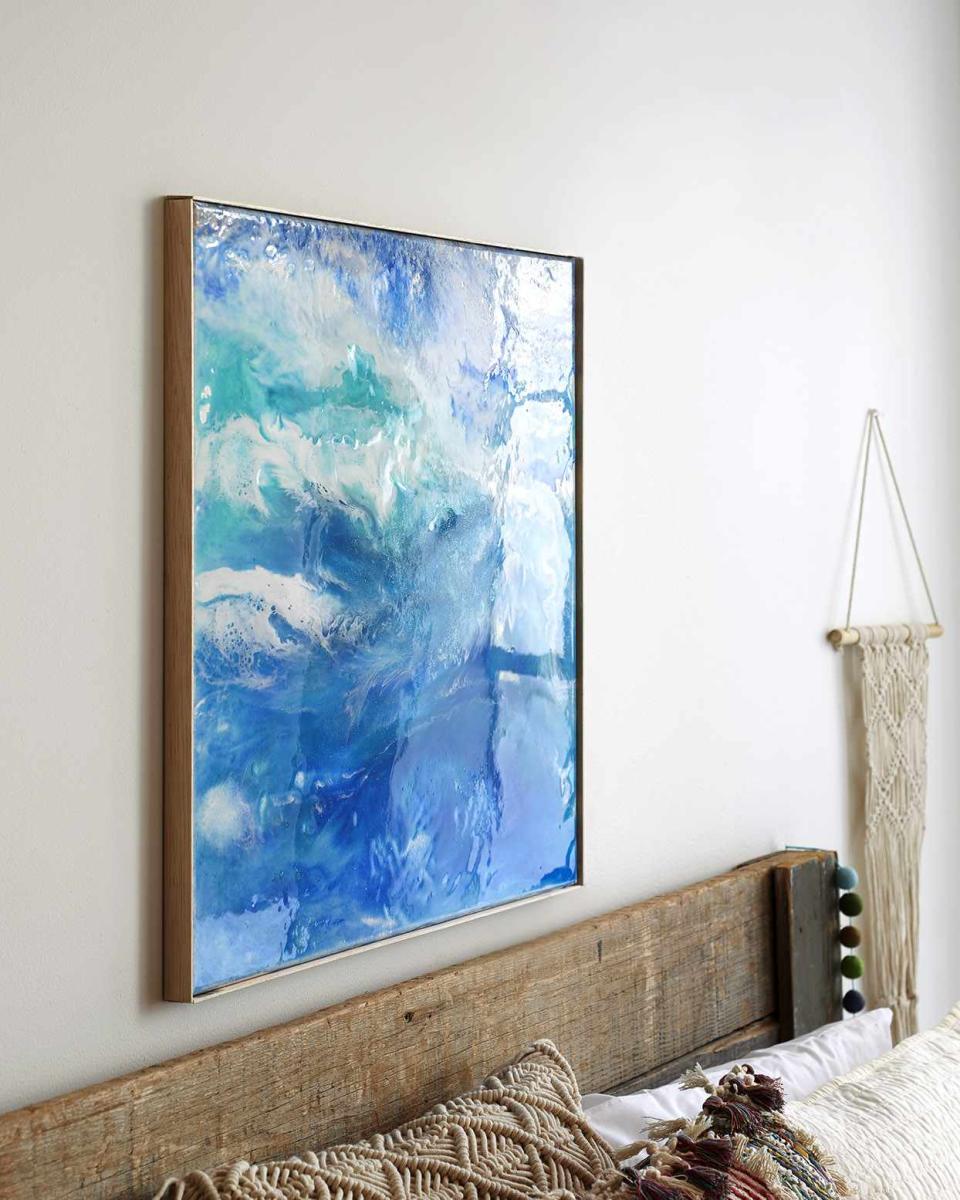
Making Waves
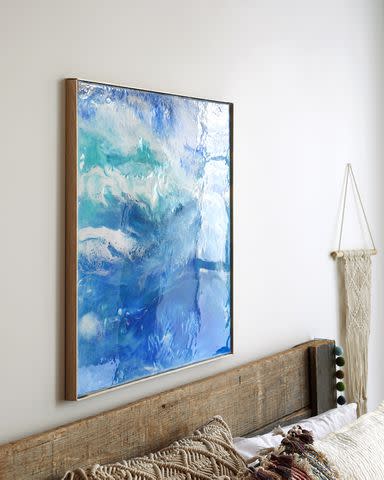
Resin mix, a clean artist canvas (24×24 Inch, $19.99, Michaels), and a few paints yield a resin craft piece so stunning you can almost hear the waves crashing.
Using a separate plastic cup for each color, combine resin with a few drops of paint in the following colors: Deep blue, teal, light blue, and white, reserving some clear resin. We used a total of about 32 ounces of mixed resin for our canvas.
Pour stripes or waves of clear resin on the canvas. Working in the same direction (but keeping the colors separate), pour the blues and teals onto the canvas, mixing with a gloved finger if desired.
Continue blending the colors with a heat gun.
For sparkle, dust the canvas with teal or blue glitter. To create the look of foam, spread thin stripes of white resin, again applying heat to blend the colors.
Cover with a large box or tub to protect the surface from dust while it dries flat for at least 24 hours.
Editor's Tip
Trim your DIY artwork with a thin frame to hide drips along the canvas edge and provide a finished look.
Resin Photo Art
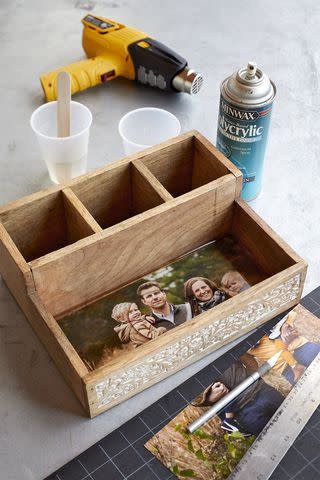
Resin crafts aren't just made from abstract designs; use resin to perfectly preserve photographs in a place where you'll see them every day. We used clear resin and a large family photo to customize this wood jewelry box. To make your own, trim your photo to fit inside the resin mold of your choice, then pour and spread the resin until the entire surface is covered. Use a heat gun to heat the resin and remove bubbles before letting it dry.
Related: How to Make a Shadow Box to Display Precious Possessions
River Still Life
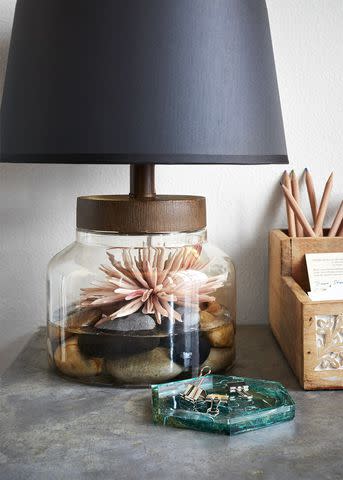
Capture the river rock table trend with this easy idea.
Clean river rocks with soapy water and let dry (or purchase a set from a crafts store).
Find a lamp with a glass base and removable top and arrange the rocks inside the lamp; pour resin crafts medium over the center of the rocks so the material fills in around the rocks.
Spray an artificial bloom with polyacrylic spray, then let dry and place over the rocks.
Allow the resin to dry 24 hours before using the lamp.
Cube Resin Craft
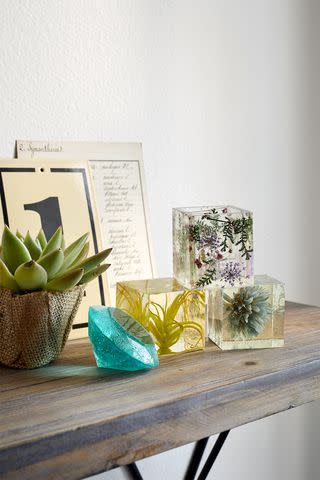
Artificial and dried foliage never fades when encased in resin crafts.
If you’re working with one large object (such as the artificial air plant and silk flower we used), center it in the bottom of a square resin mold. Before pouring mixed resin into the mold, warm the mixture with a heat gun to remove bubbles. Pour over the object and let sit for 24 hours before removing from mold. For smaller flowers, fill the mold with clear resin, then insert foliage and blooms into the resin with a pointed stick and let dry.
Related: How to Create Beautiful Dried Flowers to Enjoy Year-Round
Sweet Accents
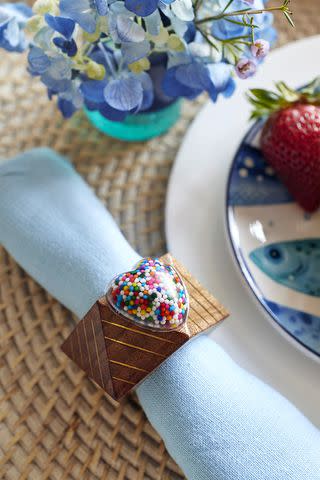
Turn up the fun of everyday objects. A candy mold filled with sugar sprinkles and topped with resin adds a sweet accent to a wooden napkin ring. Use these for Valentine's Day celebrations, anniversaries, and other holidays.
Doodle Resin Craft
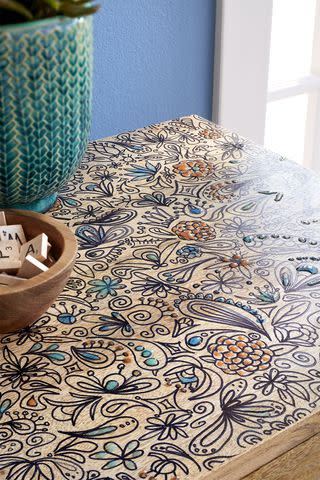
Embellish a tabletop with a marking pen and drops of colorful resin. Draw organic shapes such as leaves, berries, and flowers, filling the surface with designs. Opt for stencils or stamps if you’re not confident in your doodling skills. To create the three-dimensional effect, fill areas of the design by dipping the tip of an artist’s brush into tinted resin then gently tapping onto the desired spot.
Related: How to Make Stamped Canvas Artwork with a Drywall Masher
Resin Buttons

Make your own homemade buttons in just a few easy steps. Add the buttons to sweaters, throw pillows, or other creations to amp up the handmade style.
Start by buying a button-shape resin mold (Silicon Button Mold, $3, Etsy), epoxy resin, polyamine hardener, and acrylic paint in the colors you want for the buttons. To color the resin, stir in a small amount of the acrylic crafts paint. If resin covers the button holes, remove the button from the mold while it’s still rubbery (after a few hours), and use a pin to poke through the holes. Otherwise, let dry 24 hours before popping the buttons out of the mold.
Napkin Rings

Dress up plain napkin rings with resin craft embellishments. We used a mold designed for fondant to create these stylish flowers.
To make:
Stir acrylic crafts paint into a 1:1 mixture of epoxy resin and polyamine hardener.
Pour resin into a rubber mold and let dry for 24 hours.
To curve the resin around the napkin ring, remove the decoration from the mold before it hardens completely. Carefully bend the pliable resin over the curve of the ring, hot-glue to the ring.
Set aside to finish drying.
Cabinet Knobs

Refresh cabinet doors with flirty floral resin knobs cast in a contact lens case.
Spray the case with mold release (Craft Mold Release, $13, Michaels) and pour in the resin, then position a piece of vintage jewelry upside down in the mold.
When the resin has the consistency of gel (after about 20 minutes), top with a machine screw inserted at a 90-degree angle.
Let dry 24 hours before removing the knob from its mold.
Before installing, thread a machine nut onto the screw to create space between the knob and the cabinet door.
Related: 26 DIY Kitchen Cabinet Updates So You Don’t Have to Replace Them
Door Knob

Add a touch of glam and style to something as simple as a doorknob! Use resin to round out the style of a utilitarian concave-face doorknob in a few simple steps.
Punch a piece of scrapbook paper to fit the face of the knob and snip a slit from the edge to the center of the paper so the circle fits the curvature of the knob.
Adhere the paper to the doorknob, and seal with two coats of decoupage medium.
Once the decoupage medium is dry, place a decorative bauble at the center of the handle.
Working on a level surface, pour a 1:1 mixture of epoxy resin and polyamine hardener on top.
Wait 24 hours before installing the doorknob.
Picture Frame

Display a treasured photo in this easy frame.
Cut out your image. Cut a second paper circle and adhere it to the back of the photo to give it heft.
Seal both sides with decoupage medium; let dry. Spray a soap mold with mold release. Then add the resin craft medium, followed by the photo.
Use a toothpick to embed the photo facedown in the resin.
Let dry 24 hours before removing the frame from the resin mold.
To finish, cut pretty paper to fit the back of the frame and secure with spray adhesive.
Display the finished photo project on a mini easel.
Floral Paper Weight

Who would have thought a paperweight could be precious? Craft this pretty paperweight to secure stray documents on your desk or counter. All you need is resin, a bowl for a mold, and dried flowers to add a stylish touch.
Pour resin into a plastic paint-mixing cup coated with mold release. Use a toothpick to “float” dried flowers in the resin at various levels to give dimension (we used dried baby’s breath). Let it dry for 24 hours before popping the paperweight from its mold.
Suncatcher

Hang this sea-glass-inspired mobile in a sunny window to reflect light and color throughout the room. Use water-bottle ice cube trays, resin, and a few drops of food coloring to make this colorful creation.
Pour a 1:1 mixture of epoxy resin and polyamine hardener into the rubber ice cube trays.
Add one or two drops of food coloring into each resin mold and mix with a stir stick.
Once dry, remove the reflectors from the mold and insert a screw eye into the top of each.
Tie fishing line to the hooks and suspend the reflectors from a metal ring at varying heights.
For more Better Homes & Gardens news, make sure to sign up for our newsletter!
Read the original article on Better Homes & Gardens.

