13 Tips You Need When Making Glazes For Baked Goods
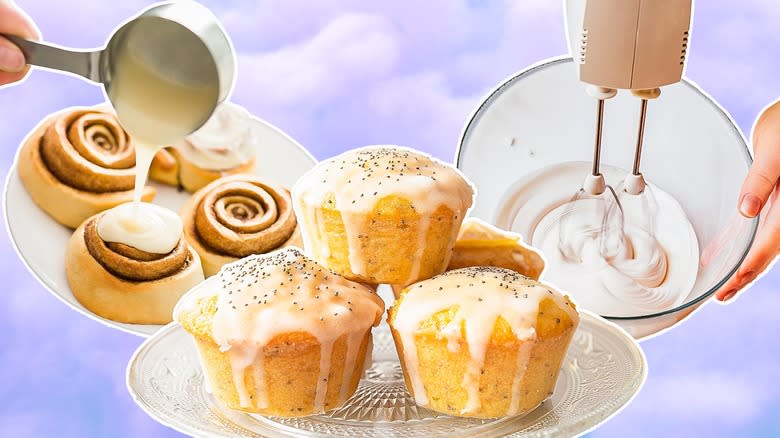
When it comes to baking there is rarely anything as simple and forgiving as making a glaze. You don't need to figure out any chemistry like you do in other baking recipes, it's usually just powdered sugar and a liquid of your choice. For anyone who loves to bake or is just learning the basics of baking, mastering a glaze is a useful tool to have in your repertoire. Plus it's the gift that keeps on giving because you can use it to decorate all kinds of baked goods, from cookies, cakes, muffins, and cupcakes, to doughnuts, and more. It's a deceptively simple process with an impressive result. For those who don't know what it takes to make that thick, sweet, glossy glaze, it's always a revelation when you find out how easy it is.
Once you know the basics, you can begin to play around with it and figure out different types, like how to glaze cookies with a glass glaze, versus a thicker frosting-type glaze. There are also different ways to glaze cakes, whether you want a drizzle effect, or a full-on, shiny mirror glaze. When it comes to a simple powdered sugar glaze, there are little ways it can go wrong if you don't add enough liquid or too much, or don't work it before it sets. There are a few things to keep in mind, to ensure a perfectly set and beautiful glaze. Here are some tips for making a foolproof glaze for baked goods.
Read more: 30 Types Of Cake, Explained
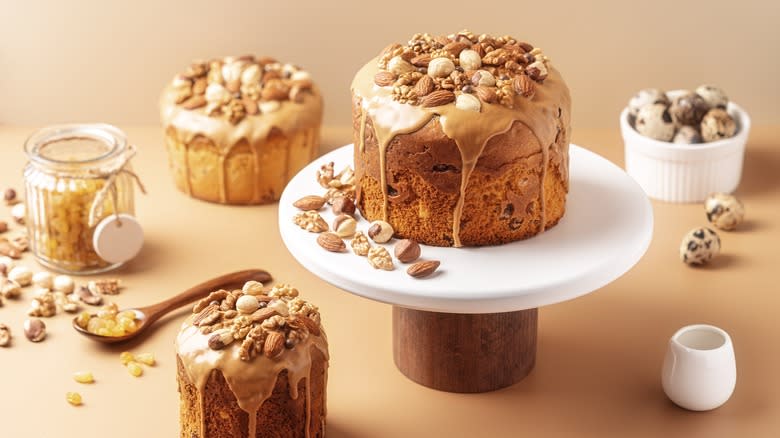
Make A Classic Powdered Sugar Glaze
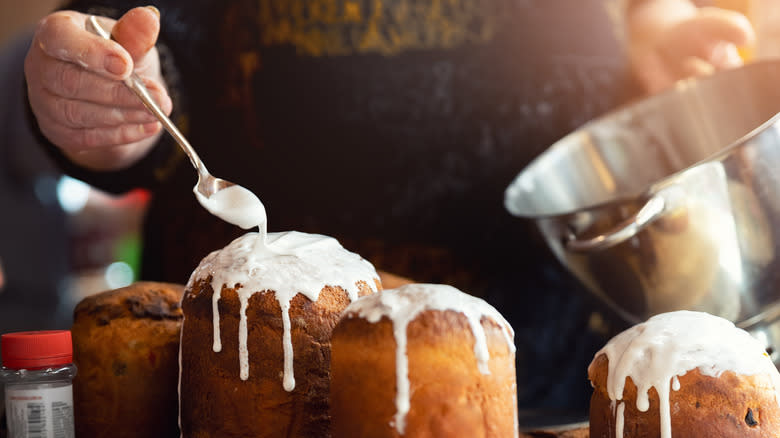
A basic sugar glaze is about the easiest magic you can make in the kitchen. When it comes to baking, there's very little you can just "feel out" the way you would when cooking (unless you're a seasoned baker). You always need to follow a recipe and measurements to a tee. With a powdered sugar glaze, you don't need to follow any recipe, and it is something you can use you can eyeball. Using a recipe will help you get the measurements right, or at least guide you with the ratios. However, if you start with a little powdered sugar, and some water and mix them up, you've got a glaze. You'll want to make sure it's not lumpy, so it's best to sieve your sugar or mix out any lumps well. Then, you can add more sugar or more liquid as you go to get it to the desired consistency. If you want it thicker, add more sugar, and if you want it runnier, add more liquid. It's as simple as that.
For the liquid, you can use water, dairy milk, plant-based milk, lemon juice, orange juice, or any other juice that would work well in terms of flavor. Lemon juice is a popular choice because the acidity of the lemon balances the sweetness deliciously. In truth, you can't go wrong. No matter which liquid you choose, you can make a yummy glaze with it.
Allow Your Baked Goods To Cool Completely
When you bake, you always need to be careful of temperature. For example, using cold eggs straight out of the fridge in a batter can affect your results and recipes often recommend letting them get to room temperature first. The same applies to milk and butter. When you want to glaze anything, whether it be a cake or cookies, you have to let them cool first. Any warmth will melt your glaze and make it run. Some glaze recipes call for using boiling water, so this will also affect the temperature of your glaze. Exercising patience and waiting until all your ingredients are at least at room temperature is key to making sure your glaze is flawless.
If you're making a more elaborate glaze like a mirror glaze, then you need to take an extra step. Before pouring your mirror glaze, make sure your cake is frozen. Your glaze needs to have come to room temperature for it to effectively solidify on the cold cake. It might sound tricky, but if you get the temperatures right, it's a cinch to master a mirror glaze with a striking sheen.
Try A Corn Syrup Glaze For A Glass Effect

If you love the effect of cookies with a beautiful clear glaze that makes them look like glass, you'll be excited to learn just how easy it is to do it yourself. Many people think it's some kind of crazy kitchen technique you need special gadgets for, but it's quite the contrary.
You can create a glass-like glaze for sugar cookies with just two ingredients, corn syrup and alcohol. Using strong alcohol like vodka will help thin out the corn syrup to the consistency you need. Mix them together using double the amount of corn syrup to vodka (or another strong alcohol of your choice). The alcohol will evaporate so don't worry about it tasting like liquor. Then evenly spread it onto your cookies using a piping bag or spatula. You'll need to leave your cookies to air dry overnight or for a few hours for the glaze to harden. Then, they're ready to be eaten and served.
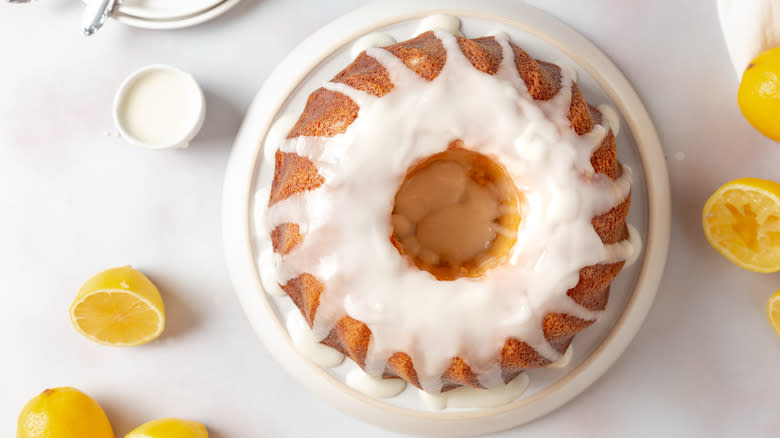
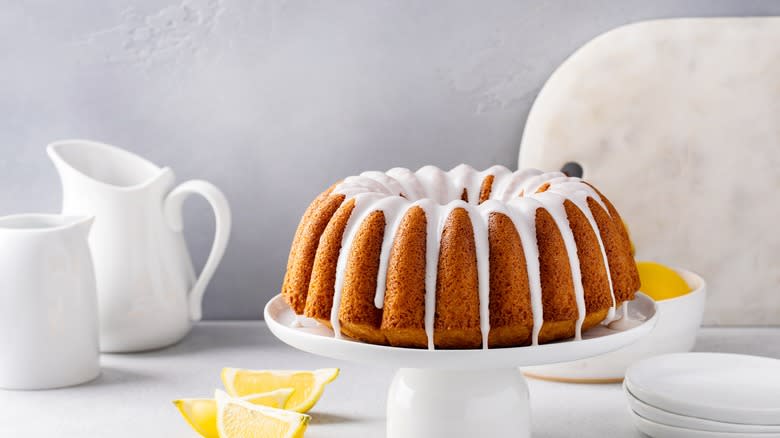
Your Glaze Should Be The Right Consistency
The consistency of your glaze is a really important factor in how well it will drizzle, spread, and set. As you're mixing it, you want to get it to the right level of thickness. You need different consistencies, depending on what you're glazing. If you're making a cake glaze, you'll want to get it to where it's just pourable. If it's too runny, it will pour straight off your cake and go to waste, or seep into the sponge, leaving barely any glaze on top. If it's too thick, it won't fall at all in a decorative way, and be too hard and sweet. Getting it to be just pourable allows you to apply it with control, it should drip in slow motion, as you gently guide it down. The right consistency glaze will set as it falls, without much excess wasted at the bottom of your cake.
Sugar-frosted cookies need a lot more powdered sugar though. You'll want to add enough so that it's a thick and stiff glaze, while still being pliable. You don't need it to be pourable as you'll be applying it to your cookies flat, but you should be able to easily spread it out with a spatula or spoon.
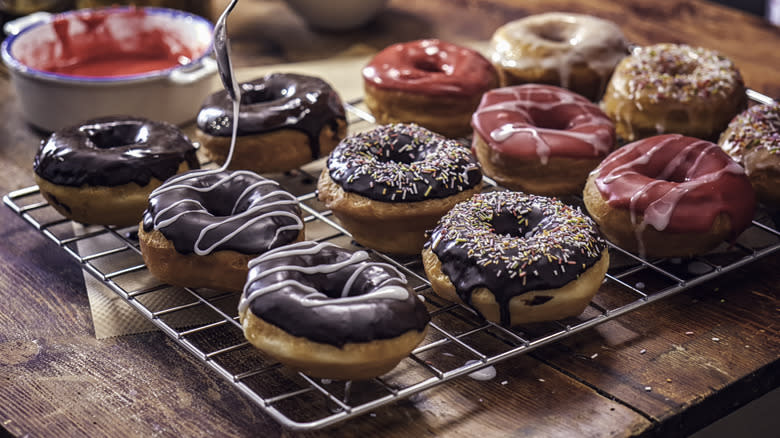
Decorate Glaze Immediately After Pouring
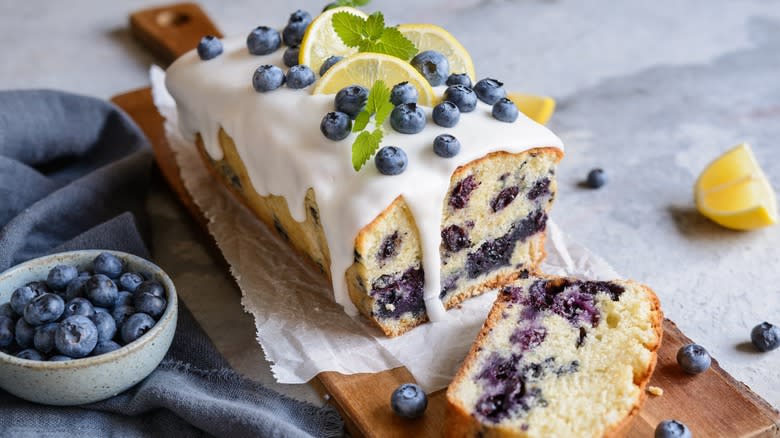
Glaze is already so pretty as a decorative addition to any baked good. Its milky and lustrous finish makes it look like your cake or muffin is a little snowy mountaintop, or that your glazed doughnut or cookies are store-bought.
What makes glaze even more exciting for decorating things is that it acts as an edible glue to any other topping you might want to include. You can add it straight onto the glaze for even more adornment, whether it's sprinkles, candied oranges, chocolate shavings, or simply, lemon zest. The trick to doing so effectively is to add the toppings just after adding your glaze, while it's still wet. It's important to keep in mind that a dry glaze won't have the same adhesive effect as a wet glaze, so use it to your advantage and get those extra bits on before the glaze sets.
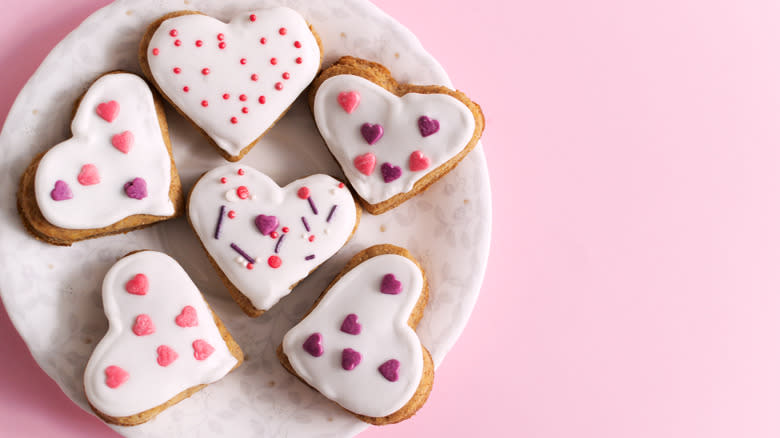
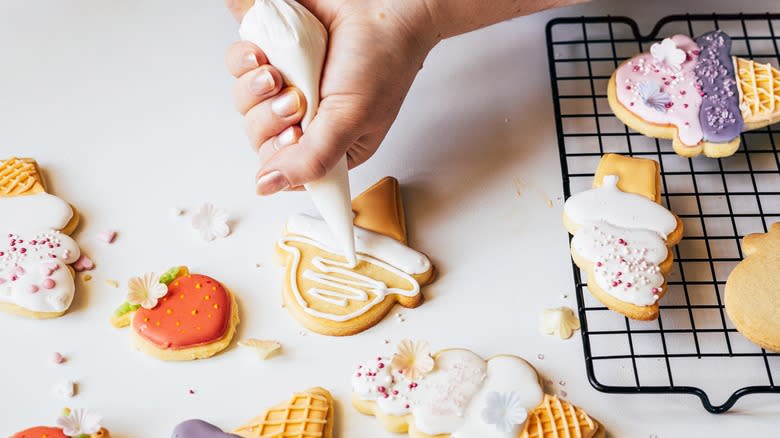
Play With Flavor And Color
Getting comfortable making glaze means you can get creative and start adding other ingredients to add color and flavor. Glaze is usually white or clear, making it super easy to add any type of color. Depending on the type of food coloring you use, you only need a drop or two to get a brightly colored glaze. This is ideal for icing cookies, and you can separate the glaze into multiple bowls before so you can add more than one color to decorate with.
Adding flavor to the glaze is another way to make it pop, and since it's just sugar, most flavors work well. You can keep it simple by adding fruit juice like cranberry or orange juice, adding a fruity taste and a pretty color. You can also add melted chocolate to your glaze, jams, caramel, or even tea or coffee. One of our favorites is coffee because it instantly transforms your glaze into an elevated dessert. Instead of another liquid, simply use coffee to upgrade your favorite baked goods with a rich coffee glaze.
Work Quickly After Making Your Glaze
With any type of glaze, the longer it sits the more it hardens. That's why you should apply it as soon as you get it to the desired consistency. The only exception is a mirror glaze or a glaze that's been made with hot liquids, these should be cooled to room temperature. (Even with these you'll need to apply them as soon as they're at room temperature because if they get any cooler, they'll start to set before you've piped them on).
Make your glaze just before it's time to decorate your baked goods. Then, work quickly to apply it to your cookies or cakes while it's still wet. This will make your life easier when piping it, as it will be easy to fix any mistakes, and it will dry with the shiny finish you're after. If your glaze has started to set before you've decorated with it, then it will look messy and "grainy" rather than glossy. Not to worry though because in most cases it can be salvaged if it's started to harden. You can add a little more liquid and mix until it's thinned out and wet again.
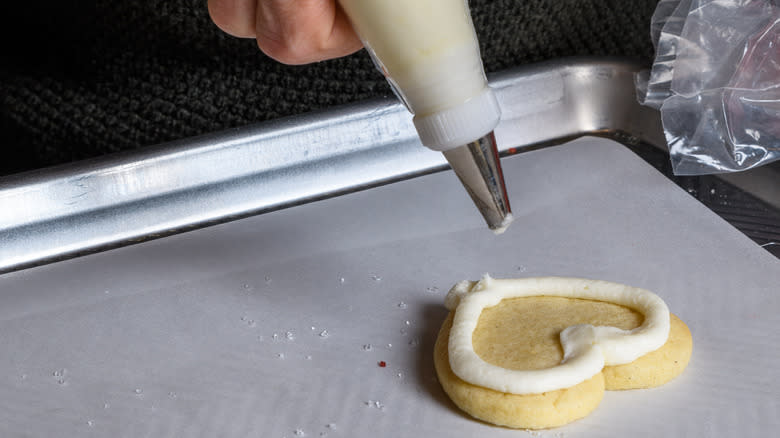
A Piping Bag Is Your Friend
There are many ways to apply your glaze, but one of the ways that will give you the most control is to use a piping bag. A piping bag can be used for thick frostings and pourable glazes, so it's a nifty tool no matter the type of glaze you're using. While there are plenty of great piping bags on the market, you can also make your own one at home if you don't have one. Simply snip off one of the bottom corners of any ziploc bag and it can be used to pipe your glaze beautifully. The bigger the hole you cut, the bigger the pipe, so it's always best to start with a small cut and try it out first, because you can always cut it bigger.
Open your bag and add your glaze inside, while keeping it tilted slightly diagonally so that it doesn't drip out of the hole you've snipped. Aim the hole to where you want to start adding glaze, and gently press down on the glaze as you push it toward the opening. Then, pipe away!
Patience Is Everything

We all know how difficult it is to wait until our baked goods have cooled down or set until we can have our first taste. It takes a lot of discipline not to immediately cut a slice, or take a bite. It's no different for glaze, and you don't want to bite into something that's still too sticky or will run down your hands. Perfect glaze icing takes patience.
An average of about two hours is your safest bet. Sure, it can differ from cookies to cinnamon rolls, but waiting at least two hours will allow the sugars in any glaze to harden and solidify into the well-set icing you're hoping for. You can speed it up slightly by placing your treats in the fridge, but they may dry out, so if you have the option to wait it out, practicing restraint will get you the best result. Take note that if it's warmer than usual in the room or in the height of summer, you'll probably have to refrigerate.
Always Start In The Center
As with anything, glazing your baked goods neatly and evenly takes practice. A good rule of thumb is to always start from the center and then work your way outward. This applies to cakes and cookies alike. Whether you're using a piping bag or a spoon, apply your glaze to the innermost part first. Gently spread it out to the edges using a spatula or a spoon. If it starts to thin out near the edges and you need more, just add a little more to the center and repeat.
For decorating cakes, muffins, or buns, this will allow you to get the drizzle effect, as the glaze drips slightly at the edge. You can encourage it along lightly with a spatula if it's a thicker glaze — otherwise, let time and gravity do their work. The naturally dripping effect will look good on the exterior of virtually any baked good you're glazing.
Lay Parchment Paper To Catch The Excess
Bakers know that using parchment paper is one of the most underrated hacks for avoiding extra washing or sticky surfaces. So before you glaze anything, lay some parchment paper down, because it's likely that some will drop off your cake as it starts to drizzle down.
To avoid a big, sugary mess, and to save any of the excess glaze that runs off, parchment paper, or a tray underneath will catch any run-off or mistakes. It works especially well for frosting cookies because there won't be oodles of excess glaze, but it will be thick and harder to clean. Parchment paper can be rolled up and thrown away without fuss. However, it won't be sufficient for a runny glaze like a mirror glaze. For that, you'll need to place a deep tray underneath your cake, because there'll be major excess glaze running off.
Use Leftover Glaze In Creative Ways
It's not easy to make the exact right amount of glaze for your intended baked goods, especially as you keep adding to it to get the right consistency. The good news is, there are so many ways to use up leftover glaze. It can also last for about a week in the fridge and three months in the freezer, so you can keep it for future bakes. When you want to use it, take it out and leave it at room temperature, it'll melt fairly quickly, but you can add a teaspoon or two of hot water to get it soft and ready to use.
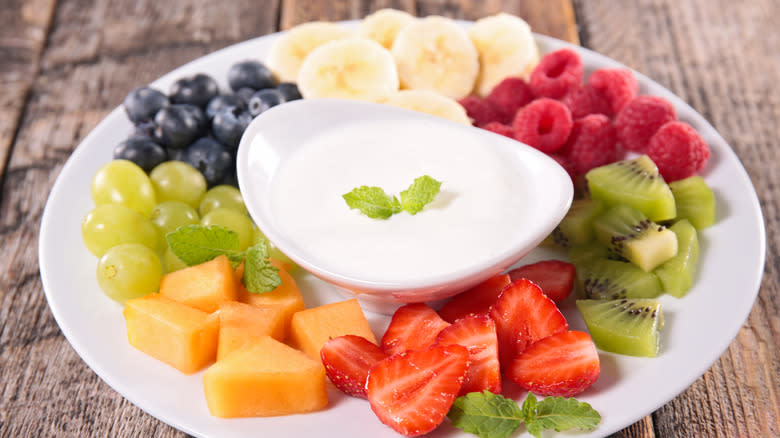
There are plenty of possibilities for all the different ways to use extra glaze. You can jazz up store-bought baked goods like pound cakes, muffins, or brownies. You can add some coloring to it and make a cookie decorating station for kids (or adults!). You can also use it in unexpected ways like making a whiskey glaze for baking bread, a sweet dip for fruit sticks, or sweetening beverages like coffee, milkshakes, or cocktails.
Gelatin Sheets Are Best For Mirror Glaze
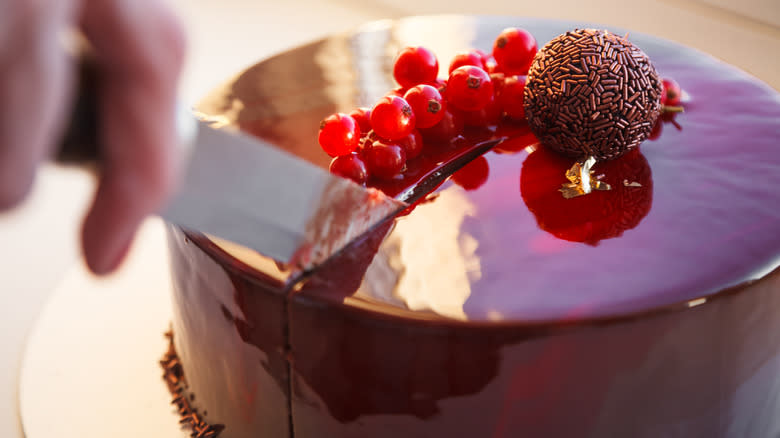
Making a breathtaking mirror glaze is not as difficult as it seems. This decorating technique has gone viral on social media over the past couple of years. There are thousands of videos online showing people pouring their multicolored glazes over cakes. The effect is a galaxy-like look that's incredibly striking. While it looks really impressive, all you need is sweetened condensed milk, a liquid, and gelatin (plus chocolate and food coloring if using). Using the right kind of gelatin can help you ensure a successful result. The absolute best type of gelatin for creating a perfect mirror glaze is gelatin sheets. Gelatin powder can have mixed results because it can clump and create lumps in your glaze, or cause an uneven glaze if not dissolved properly. Gelatin sheets on the other hand dissolve consistently and have a stronger gelling powder than powder. Their reliability will help you create that brilliant shine that will allow you to see your reflection in your cake glaze.
Gelatin sheets need to be bloomed in cold water first for about 10 minutes. When they're soft, remove them and gently squeeze out any excess water. Warm a small amount of the liquid you're using in your glaze and add in your sheets to dissolve them. Once dissolved, you can mix it into the rest of your glaze mixture, and watch the magic happen as you pour.
Read the original article on Tasting Table.

