The 13 Most Brilliant DIY Tips from This Year’s Before-and-Afters
Home renovations are no easy task — even when you call in a pro to lead the way. But if you plan to take them on solo, as full DIY projects? Well, that’s even trickier. But don’t let that stop you! Thankfully, there are plenty of intrepid DIYers who came before you and who have unveiled some pretty brilliant cheat codes to make projects faster, easier, cheaper, and more stylish.
Many of those intrepid DIYers have shared their projects with Apartment Therapy over the past year, and their tips were so smart that we thought they were worth a second look. These 13 DIY tips and solutions are the best of the best, brought to you by homeowners and renters alike who learned them themselves through trial and error. Read on to see what should make it to your own project list for 2024.
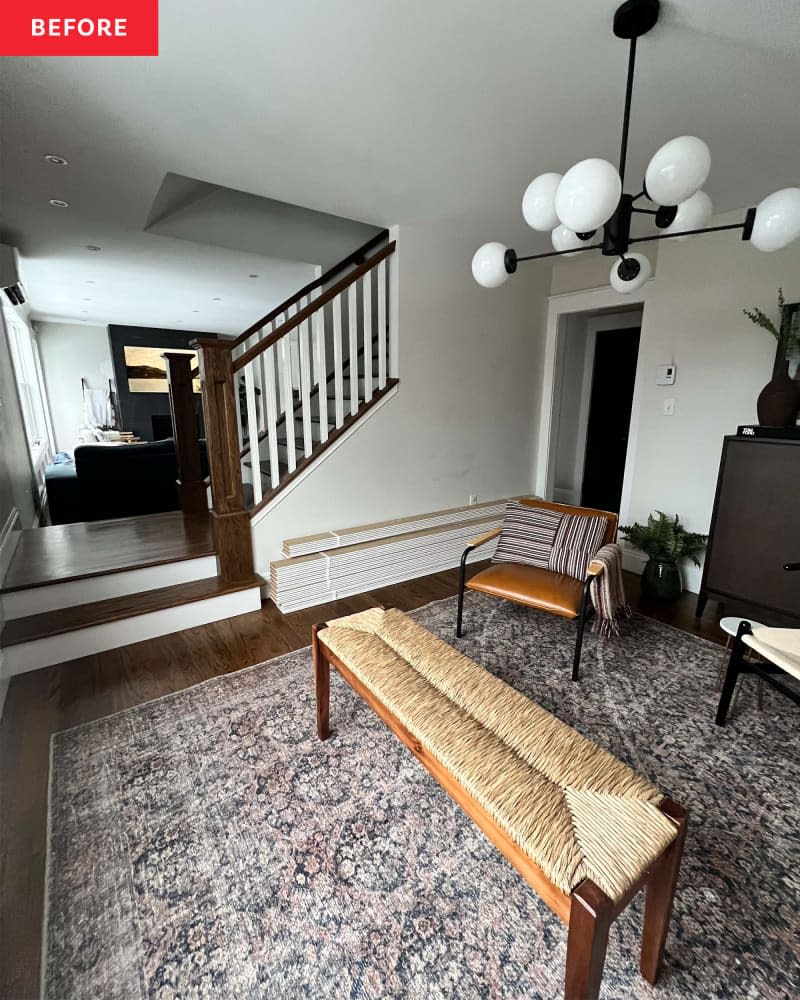
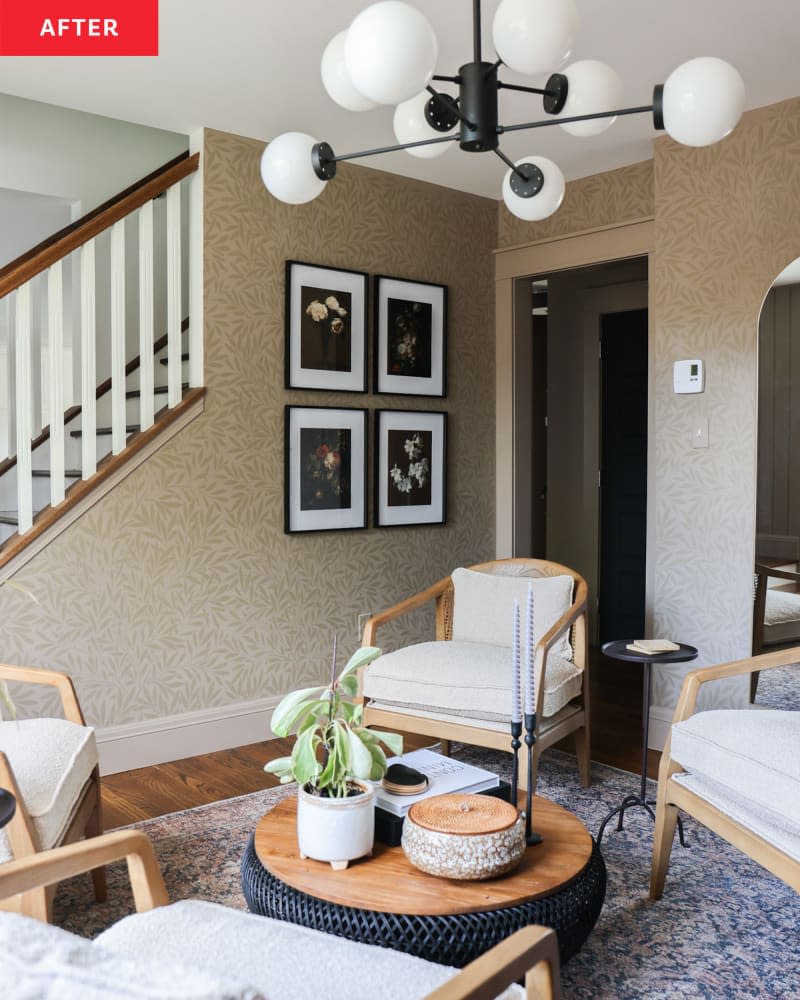
1. A two-tone paint-and-stencil job creates the look of faux wallpaper for less.
Wallpaper of any variety gets mentioned quite often for its versatility and ease, but it’s not for everyone — especially if you have your own pattern in mind. When you can’t find the look you’re imagining in your space, or you want something very cost-effective, then follow the lead of Krista Wells (@georgestownonmymind) and use a stencil on a wall. She created this dreamy sunroom for two friends using a verdant design, and she has this to say about its application: Take your time and be patient. Fill in all the space you can with the whole stencil before you start chopping up the stencil to get in the corners or small spots.”
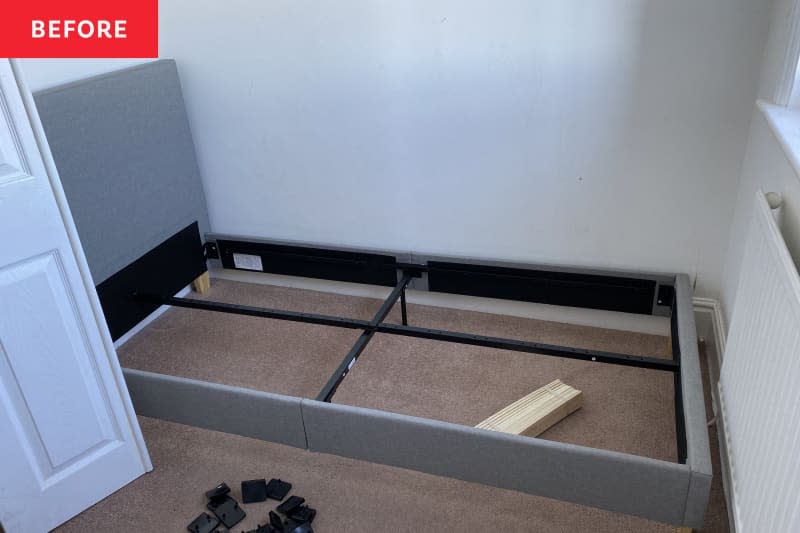
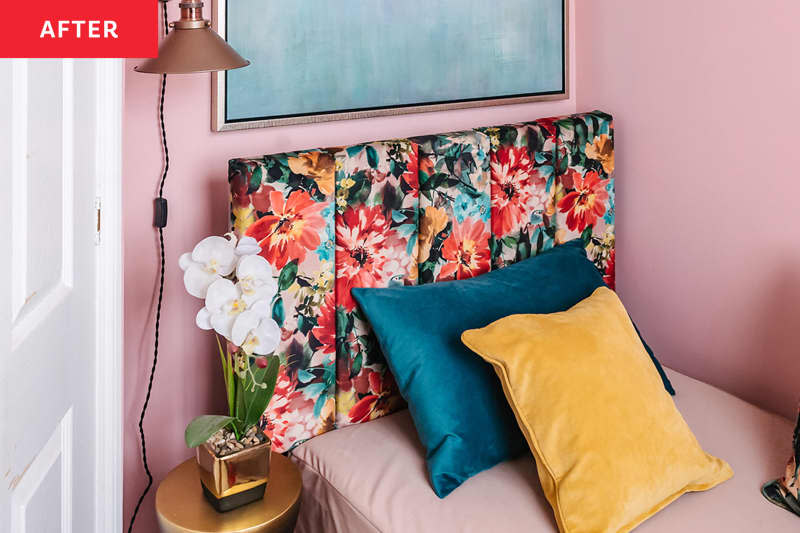
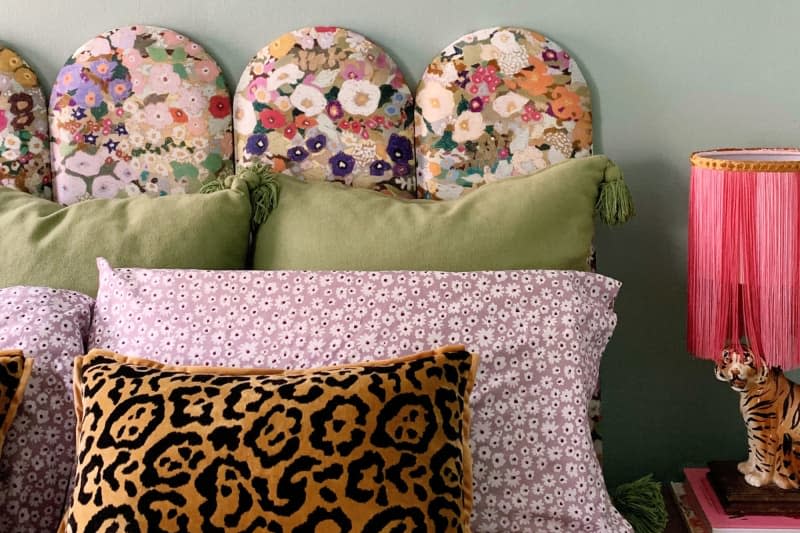
2. Velcro makes for clever (renter-friendly) upholstery projects.
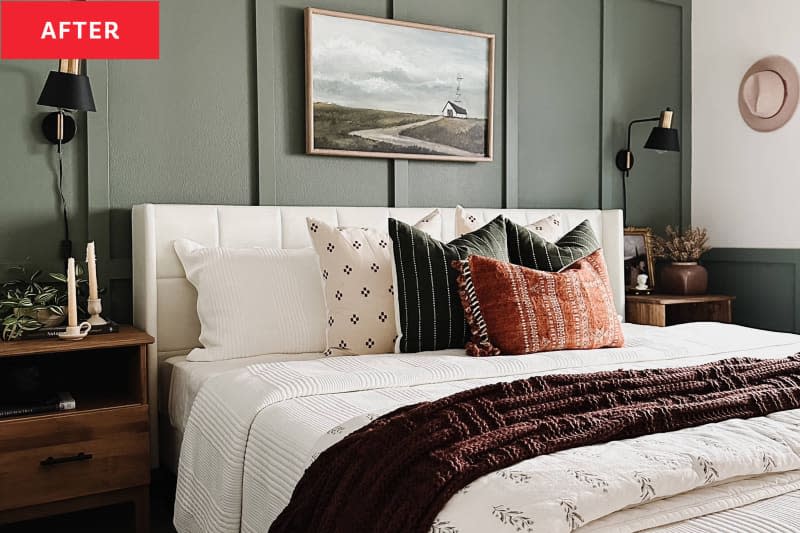
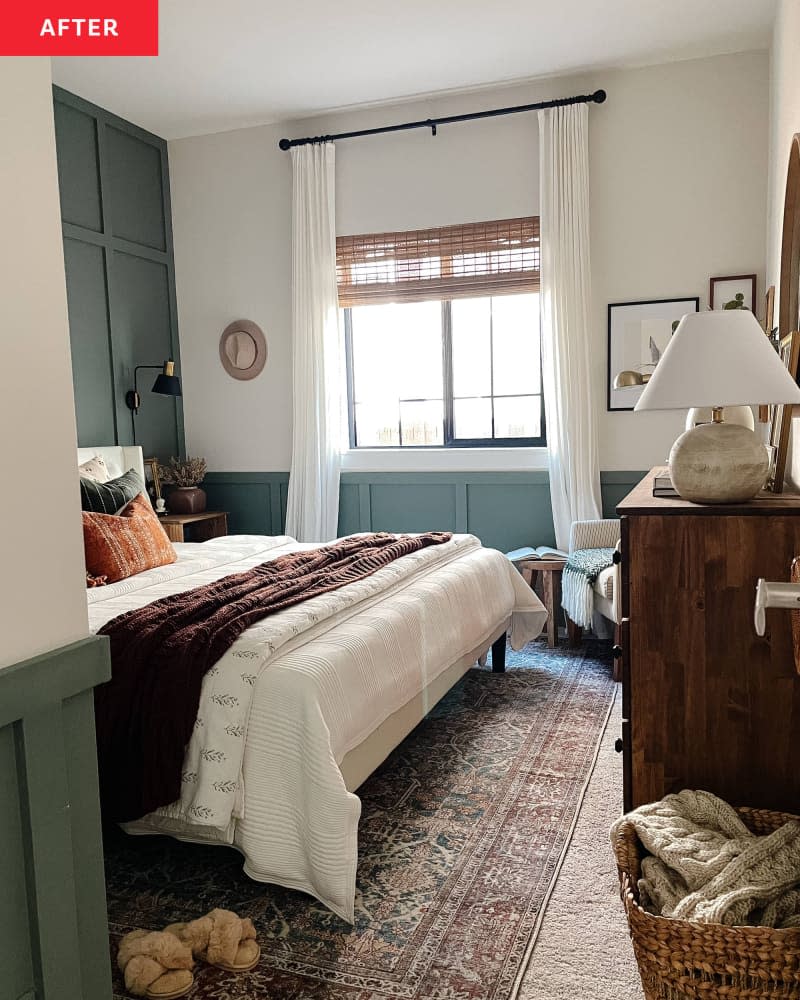
Buying upholstered furniture or redoing a piece in fresh fabric can get pricey fast, so it’s no wonder that DIY upholstery was such a consistent trend this year. In the case of Lily Sawyer’s bedroom (@layered.home), she managed to showcase the powers of self-upholstery in two projects: a headboard and a bench. But that’s not all. The real tip from this overall is that Lily made her upholstered pieces with Velcro, so each piece can be removed with ease when needed. “Make sure you choose the heavy-duty Velcro, as it really works,” Lily says.

3. Pom-poms are a perfectly good material for covering a dated dresser.
Upcycling a tired or dated dresser can be an easy way to add personality to a space without breaking the bank, while also building your DIY skills. And while nothing is wrong with a fresh coat of paint, there’s something fun about the spin Jessica Salvacion’s (@yayitsjes) put on this dresser. After painting it blue, she added pom-poms to the front — yep, rainbow pom-poms — making a textured rainbow on each drawer. If you’re a maximalist or a parent, this DIY is for you. “I know this isn’t everyone’s style, but I just knew I wanted to do something different,” Jessica says. “I love that it’s such a statement piece for my guest bedroom.”
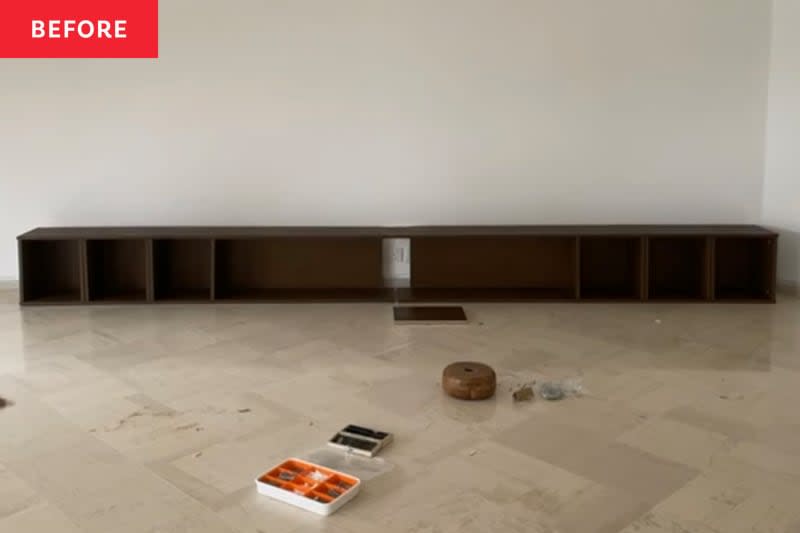

4. Bowls can be used as furniture feet for a chunky look.
You can never have too many bowls, and you can always find a new way to hack an IKEA BILLY bookcase. Those design mantras tend to ring true for most people, and for DIYer Dalia Aly (@dalia.ea), those concepts can be combined. She constructed a media console from three BILLY bookcases, and then added bowls to the bottom to act as feet, making everything look like a high-end furnishing. Not sure how she did it? Well, two wooden bowls make up the feet, and the furniture legs are concealed inside. “The bowl legs were almost exactly how I wanted them to turn out,” she says.

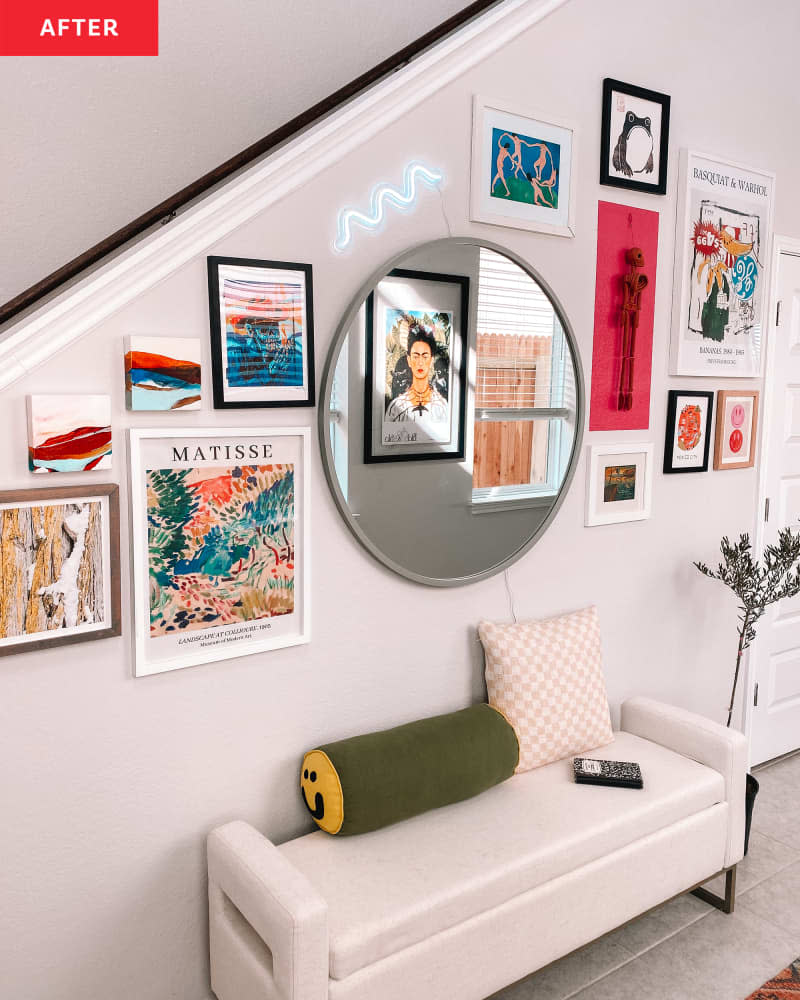
5. Unconventional objects can be incorporated into gallery walls.
Gallery walls have long been heralded as a great way to fill a blank space, but they’re also an ideal way to incorporate souvenirs and memories into your home, too. Take the place Lezeth Alfaro and her partner, Brian Hebert, own, which had an entryway with lots of potential for this type of project. “I didn’t want it to be so serious, so I mixed up the color of the frames, the sizes, and the orientations and incorporated different ‘textures,’ like the frameless skeleton, mirror, and the squiggle light,” Lezeth says. And perhaps the best part is that they framed a hanging skeleton in bright pink paint, as a nod to their love of Mexico City.
6. You can get the look of leaded windows with electric tape.
Moving into a new home presents endless opportunities for improvisation, but take a cue from Shweta Pathak (@houseofsuris) and her husband, Rajeev, when it comes to adding character to unadorned window panes. Shweta enrolled in the One Room Challenge for their empty guest room, and she set out to give it character in the form of sage-hued paint on wall moldings and wood accents alongside a bright bed. But if you look closely at the window, you’ll notice it has black panes that make it feel equally cozy and traditional, too. “I spray painted using Rust-Oleum’s Flat Black paint and used electrical tape to create the grids,” Shweta describes on Instagram.

7. A hula hoop works well for a small shower’s curvy curtain rod.
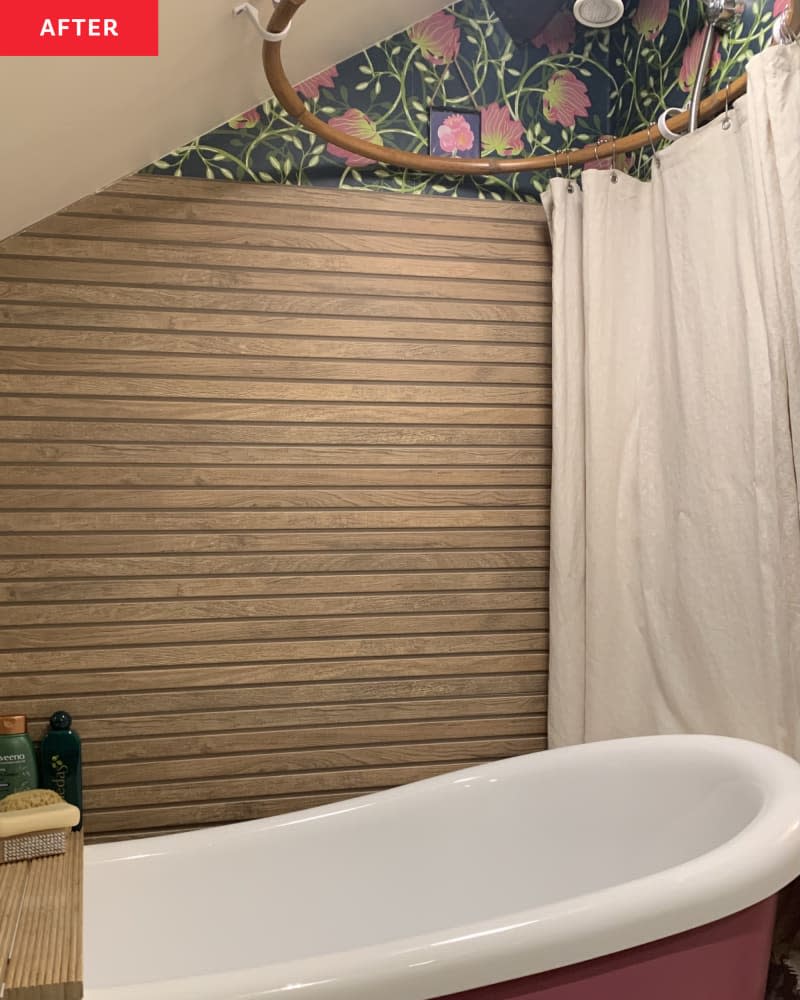
Sometimes, you gotta work with what you’ve got. And in Janette Smith’s quaint cottage, that meant she had to figure out how to create style and function in a bathroom that only measures 4.5 feet by 5.5 feet (with a sloped ceiling, to boot). A renovation reorganized the main features, and she installed a deep, pink-colored tub on one wall. This is the most clever part, though: Janette used a bamboo hula hoop as a custom curtain rod, ensuring that her new space would be protected from a splash.

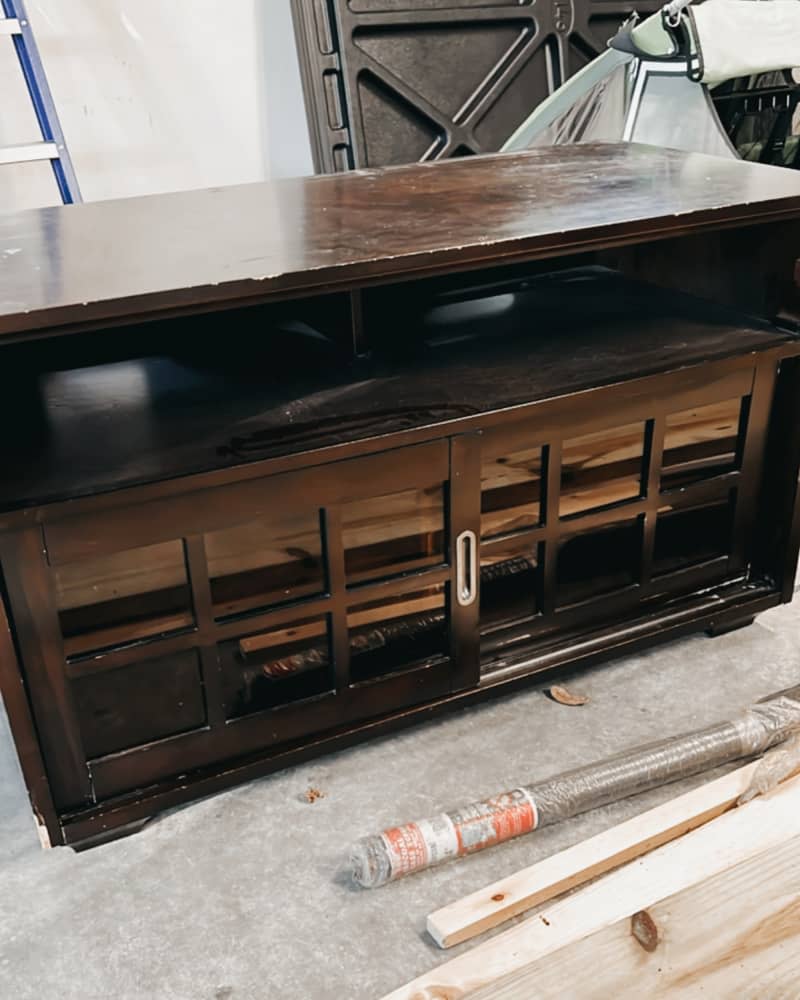
8. Wood from an old piece of furniture can be used to create something totally new.
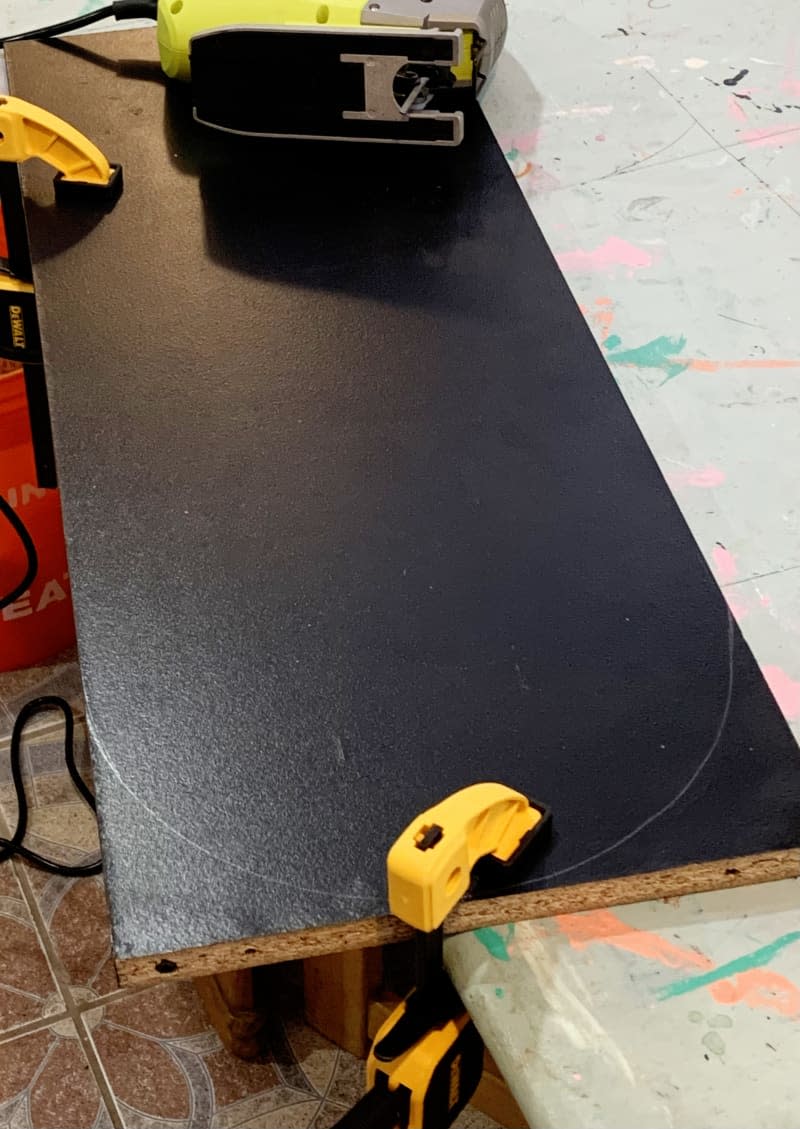
There’s so much furniture out there that has seen better days, and all you need is a little inspiration to turn it into something new. For Ashley Poskin, this meant turning a run-down bookcase into the base for her pill-shaped upholstered headboard, proving that wood can be reused in surprising ways. Ashley had this idea in her head for some time, but couldn’t find the will to cut new wood boards into shape. Enter: A bookcase she found online, which she disassembled, shaped, and covered in fun fabric. “This was the perfect money- and time-saving hack I’d been hoping for — and it’s one you can use, too, if you have an old shelf gathering dust or find a damaged one on the curb or online,” she writes.

9. Chair rail molding doesn’t have to be in a straight line.
Installing wall moldings to add character to a room has been a steady trend for some time, but let this project from Amanda Bowerman (@adangerm) help you think about this look in a new light. She had a boring, builder-grade bathroom with barely any style, and used wall moldings in an unexpected pattern to turn that blah appearance around. “Instead of regular molding, I bought these wooden hexagons from Amazon for only $16,” Amanda says. “It was so much cheaper to get the look I wanted rather than something with a cutout.” She painted the molding and half the wall in a rich black, and then put a brightly colored wallpaper on top. Now the space is far from boring!

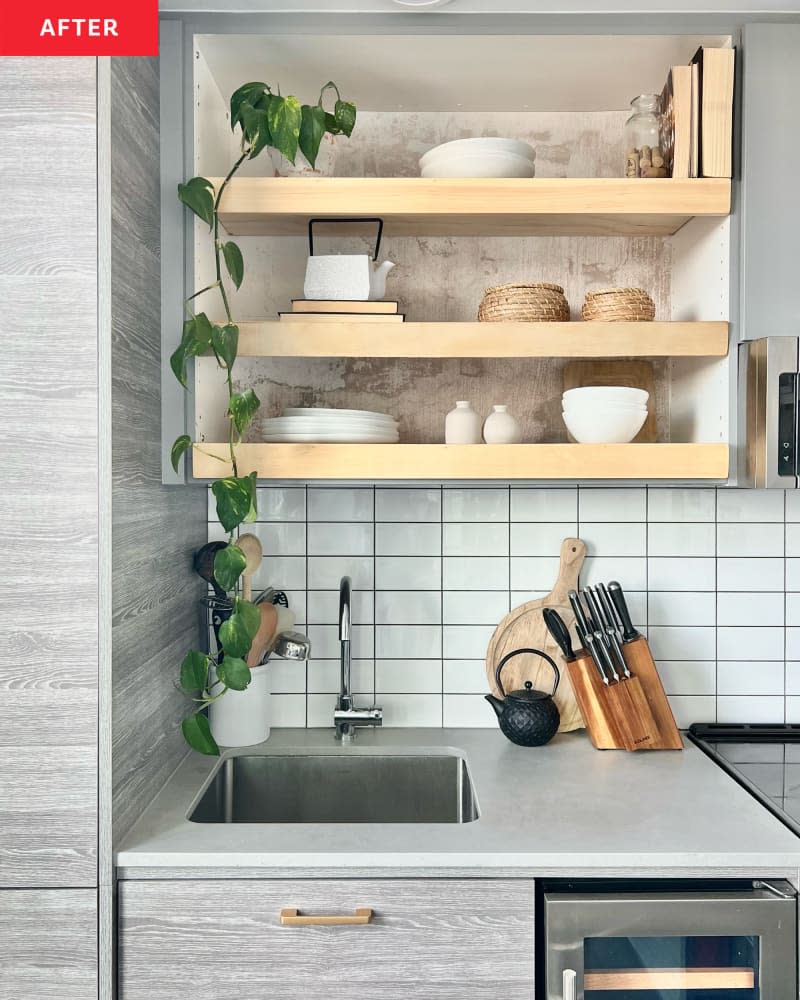
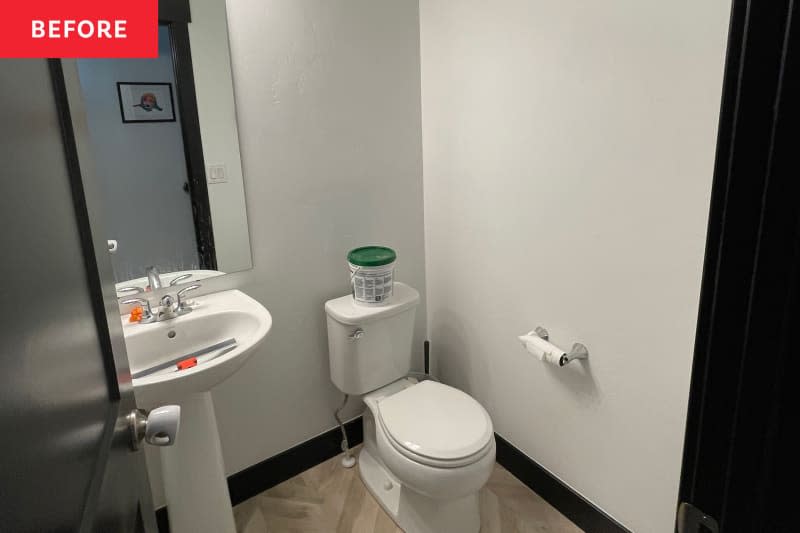
10. Chunky open shelving can indeed be renter-friendly.
Open shelving is usually off-limits to renters who don’t already have it in their kitchens, but Alicja Dworzak (@mynorfolknest) made it happen in her new-but-characterless space. To do this, Alicja removed the doors from a corner box of cabinetry, and installed three wood shelves she cut herself. “I was worried there were going to be gaps and imperfections, but after lots of sanding and staining, I was quite happy with how they turned out,” Alicja says. Consider it a loophole to finally get that vignette you’ve always wanted, while still renting your home.
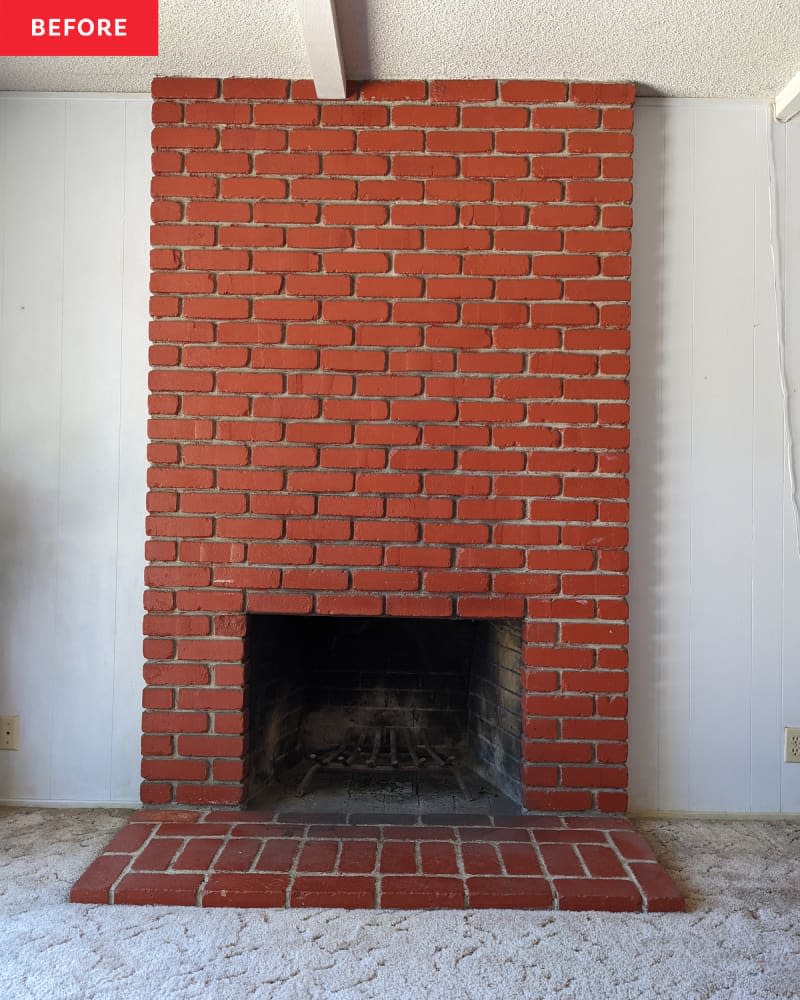
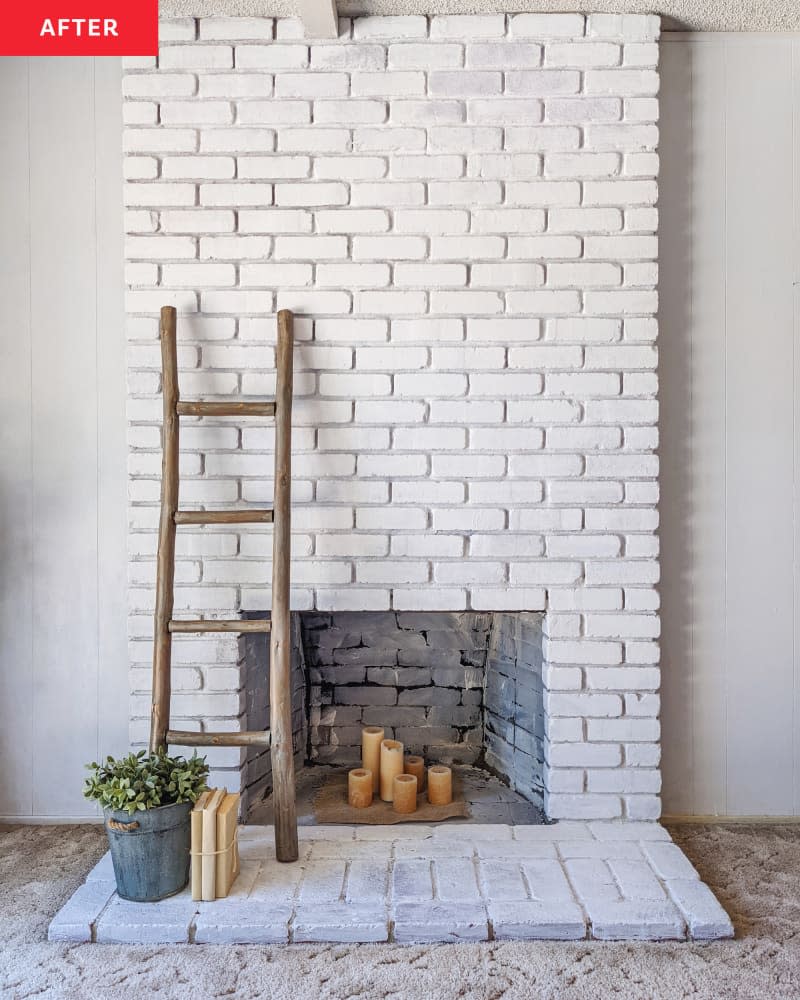
11. Grout mix makes for a perfect fireplace paint job.
There was a time when red bricks had a big moment, but as Julia Cole’s (@twentylot) mom knows, that was decades ago. Julia’s mom lived in this home for 30 years with a red-brick fireplace, and she never liked it. So Julia and her mom decided to make a significant change to her living area by concealing the bricks with a creamy grout mixture and a sponge. “Combine pre-mixed grout with your desired amount of water, sponge application on the brick fronts, and paint between the grout lines,” Julia instructs on Instagram. “Let dry, and voila! An easy and affordable upgrade that packs a punch.” One last tidbit: The whole transformation took all of 36 hours and around $20, making it possible to do something similar over a long weekend and go for a celebratory dinner after.


12. When you don’t need a whole roll of poll wrap, you can use a bamboo mat.
Gray bathrooms and chocolate brown vanities were all the rage about a decade ago, but these days they look rather dated. To make a change in their bathroom, Juliette (@the_shady_gal) and Scott Dellavia put up a floral peel-and-stick wallpaper from Amazon on three of the four walls, instantly energizing the space. They put up board-and-batten and painted that a blueish green, and then added interest to the vanity using a bamboo mat. All Juliette had to do was cut it up just so to cover each drawer, and then paint everything the same color. “Refinishing this vanity meant I had money to spend on the wallpaper, which can get expensive,” Juliette says.
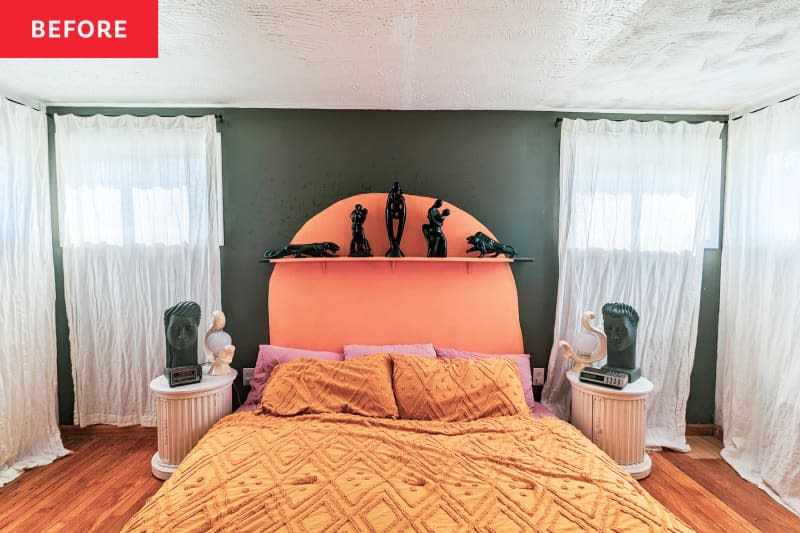
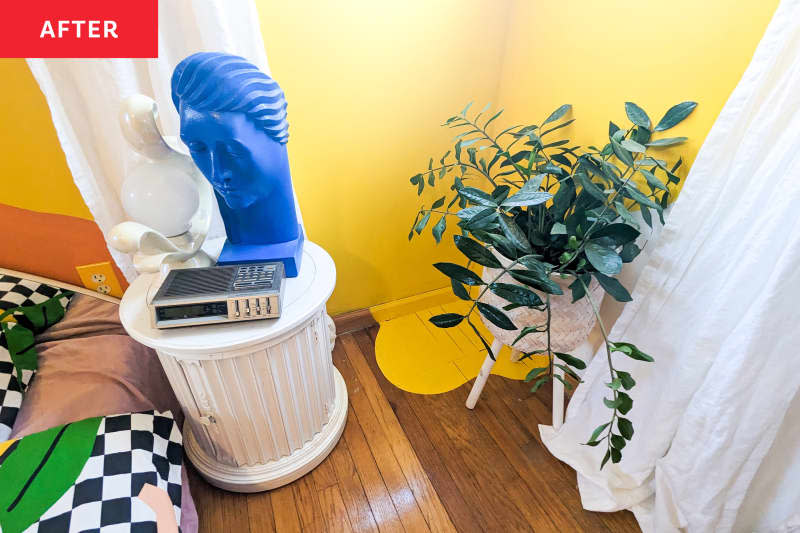
13. If you have a flooring error you want to cover up, you can continue your mural onto the floor.
It’s tough to know what to do with wood that isn’t quite as pristine as it could be. Ripping it out would be pricey, but leaving it would just continue to get under your skin. While it’s possible to conceal it with plants or textiles, you can go bolder and follow the lead of Claire Billingsley (@odetoanabode). She wanted to bring lots of fun colors into her bedroom, and decided to paint her walls bright yellow. To cover an unsightly wood patch (peep the back right corner in the room), Claire brought the paint down into an intentional puddle on the floor, adding a hint of whimsy. Just be sure to get your landlord’s permission first!

