12 Mistakes Everyone Makes When Using A Cookie Press
If you love to bake cookies with elaborate designs that typically require a piping bag and are looking to invest in a tool that can help you mass produce dozens of fancy-shaped cookies this holiday season and year-round, look no further than the cookie press. This clever extruding device resembling a caulk gun or a fancy grown-up Play-Doh Fun Factory likely dates back to the 16th century but was popularized by the Aluminum Goods Manufacturing Company of Wisconsin between 1930 and 1935.
The devices, sometimes known as a biscuit press, cookie gun, or Spritzcookie press, from the German word spritzen, which means squirt, are available in manual and electric varieties. Manual devices are more commonly found and less expensive. They can be made of plastic or metal and have myriad-shaped die-cut discs. A plunger or trigger apparatus is activated by a hand crank or lever that pushes dough through the molds for perfectly uniform cookies.
While these devices are convenient, they can often be temperamental to work with. They require a bit of know-how and finesse to use efficiently and consistently. If you have a cookie press and have had issues getting the cookies to come out right, read on to find out some of the most common mistakes people make when using one and how to avoid making them yourself.
Read more: 8 Baking Sheet Mistakes You Want To Avoid
Using The Wrong Kind Of Dough

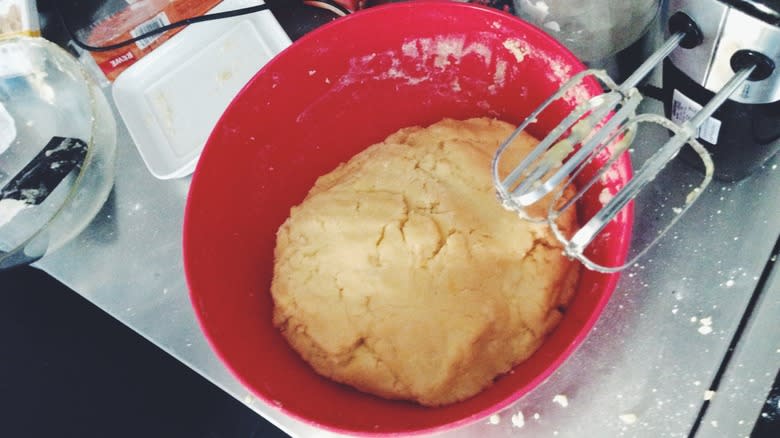
Perhaps the most common mistake people make when using a cookie press is choosing the wrong dough recipe for your cookies. The cookie press is designed to use a rich, butter-filled, pliable dough that is soft enough to pass through the die-cut discs easily but not so delicate as to dissolve and not hold its shape.
The ideal dough for this is a Scandinavian spritz cookie unless the cookie press model instructions contain their recipe you can use to make the optimum dough for that specific device. Regardless of which recipe you use, make sure you use the proper creaming technique with the help of an electric mixer. Beating the sugar and butter will help dissolve and aerate the two, ensuring your dough is light and fluffy. From there, carefully add the flour a little at a time, either using the beater or by hand, to ensure you do not overmix the dough.
If you notice your dough is too sticky, add more flour. Should it feel too hard, you can incorporate extra vanilla or almond extract or a teaspoon of water to loosen the dough up. Never incorporate add-ins that are overly chunky, like nuts or chocolate chips. These can easily get trapped in the die-cut discs and clog or break them. Stick with dyes, espresso powder, or spices to enhance the flavor and interest of your dough.
Greasing Your Cookie Sheet
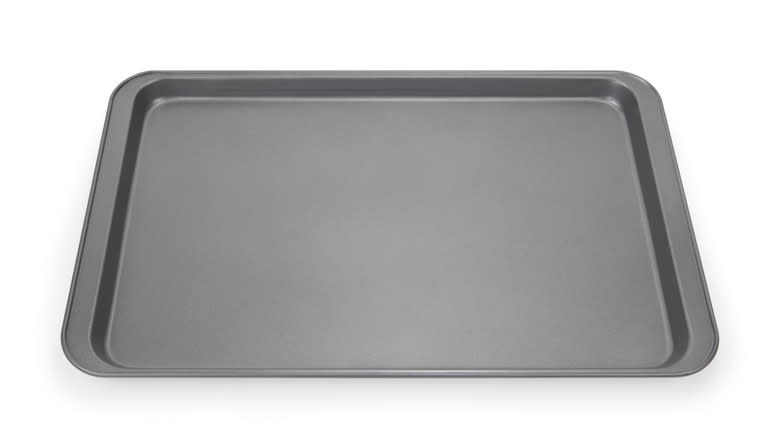
A couple of keys exist to getting your dough to adhere to your cookie sheet or baking pan. First, use a standard model, not a nonstick variety. A classic, heavy-duty, metal, non-textured cookie sheet or baking pan is in order. You can use either, and it does not have to be a fancy or expensive product. To improve the gripping capacity of your cookie sheet or baking pan, place it in the refrigerator for 20 minutes before extruding your cookies. The dough will grasp onto the cold metal surface much more readily than if you leave it at room temperature.
Perhaps more importantly, never grease your cookie sheet or baking pan or line it with parchment paper or a silicone pad, even if that seems counterintuitive. The goal is to allow the dough to stick to the baking pan so it holds its shape. Once the cookies have baked and cooled, they will naturally pull away from the baking pan because of the amount of butter in them. This is all a part of the design for the recipe and the cookie press.
Using Dough At The Wrong Temperature
A frustratingly frequent issue with using a cookie press is not being able to extrude the dough or the dough sticking to the die-cut disc, yielding a misshapen cookie. The culprit in both of these cases is the temperature of the dough. The ideal temperature for dough is between 65 and 75 degrees Fahrenheit. This may be a challenge to maintain, depending on the climate where you live or the season.
Additional factors influencing the dough temperature include stabilizing the tube with your hand, which can transfer heat to the dough, making it too warm and working too slowly. Speed and minimizing contact with the tube are crucial. If your model allows, try holding the trigger only while stabilizing the cookie sheet with the other hand. Otherwise, use your fingers only to balance the press.
If your dough is too firm, allow it to come to room temperature before using it, or you can easily damage more fragile plastic models. Should the dough be too soft, which is the more likely scenario, transfer it back into the refrigerator for about 20 minutes. Check the dough to see if it is evenly chilled by kneading it quickly to ensure the exterior is not colder than the interior. Don't handle it for too long, or you risk overheating it with the warmth of your hands. This process may take trial and error and a back-and-forth tango of transferring the dough in and out of the refrigerator to get the right temperature.
Not Assembling The Press Properly
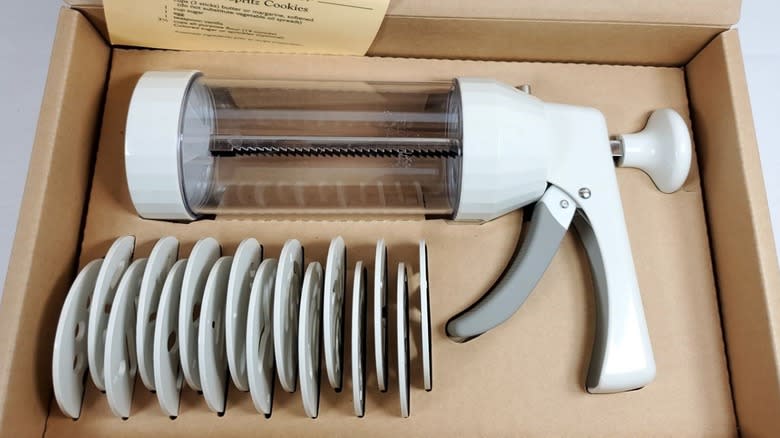
While this may seem obvious, if a cookie press is not functioning as it should, check to see if all the parts are assembled correctly. Every model of cookie press is distinct, and there can be too many moving parts that can seem like a jigsaw puzzle to put together for the first time or each occasion you take it apart to clean it. You should read the instruction manual before using your model to be sure you have all the parts identified and are inserting them correctly.
The first part that often gets improperly attached is the plunger. If it is askew, the trigger mechanism will not work correctly, inhibiting the dough from extruding. Inserting the die-cut disc upside down is perhaps the easiest mistake when assembling your cookie press. These discs only work in one direction, even if both sides feel similar. If you have trouble with it regularly, as we do, make sure you store your die-cut discs the same way every time so that you can quickly identify them and know which side is the top and which is the bottom.
Loading The Dough Incorrectly
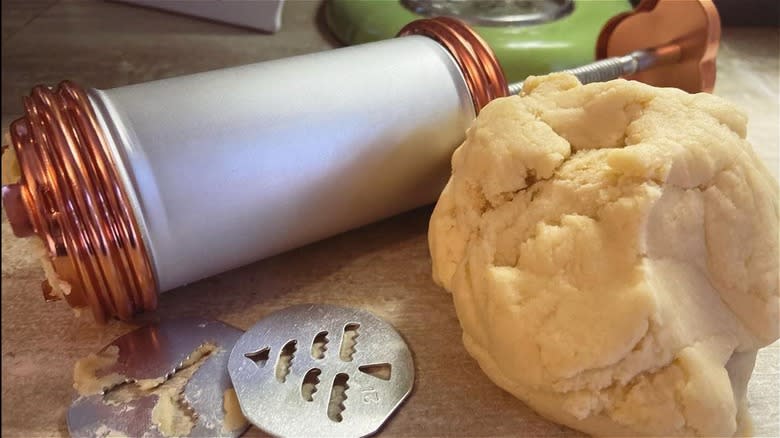
Loading dough effectively into your cookie press relies on speed, accuracy, and eliminating air pockets. To load the dough into your cookie press, remove the ring at the bottom of the barrel and pull the plunger to the top of the unit. Then, form the dough into a small log or scoop it a little at a time using a spoon or your hands into the barrel of your cookie press. Do this quickly, or the dough will heat up as you manipulate it with your warm hands.
Once you have formed your dough, pack it tightly into the barrel to eliminate any air pockets. After loading the dough, insert the chosen die-cut disc into the ring and tighten it onto the barrel. After you attach it, pump the plunger once or twice to push any remaining air pockets out of the bottom of the barrel and force the dough to the tip.
Cookie presses come in different shaft sizes capable of accommodating varying volumes of dough ranging from ¾ cup to 1 ¼ cup. The larger barrels may seem like they would save time but might be unruly for those with smaller hands to use comfortably. They can also require too much time to extrude your cookies, causing the dough to get too warm to use. While it may seem inefficient, you may be better off using a cookie press with a smaller capacity and refilling the dough frequently.
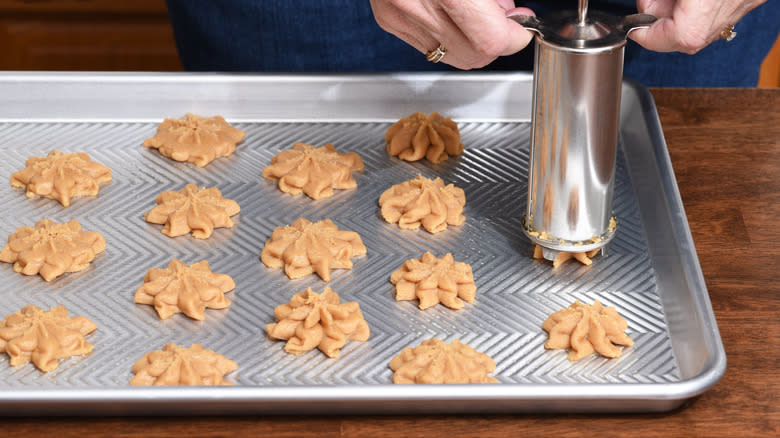
Not Keeping The Press Vertical

There is a distinct technique for getting your cookies to extrude correctly and come out in the right shape. Thinking of your cookie press like a caulk gun is quite effective. If you have ever used a caulk gun, you will understand that not consistently extruding the caulk will result in gaps or a bumpy end product.
When handling your cookie press, keep it completely vertical and do not tilt it in any one direction, or the dough will pool to one side or the other and not come out evenly, which can cause air pockets to form in the shaft of your unit. Once the dough is loaded and prepared, place the bottom of the press flat against the chilled, ungreased cookie sheet or baking pan and press the plunger or rotate the crank. After the dough is extruded, gently pull up to release the dough. For crank models, it may be helpful to rotate the crank in the opposite direction a quarter of a turn to coax the dough onto the cookie sheet.
Once you get going, do not stop. Establishing a consistent rhythm will ensure your cookies come out uniformly. And don't be alarmed if the first cookie or two turns out not looking right. This is normal. It may take a couple of tries to get the hang of the technique necessary for that specific die-cut disc. Toss the dough from any duds back into your bowl to reuse later.
Using The Wrong Size Or Pressure
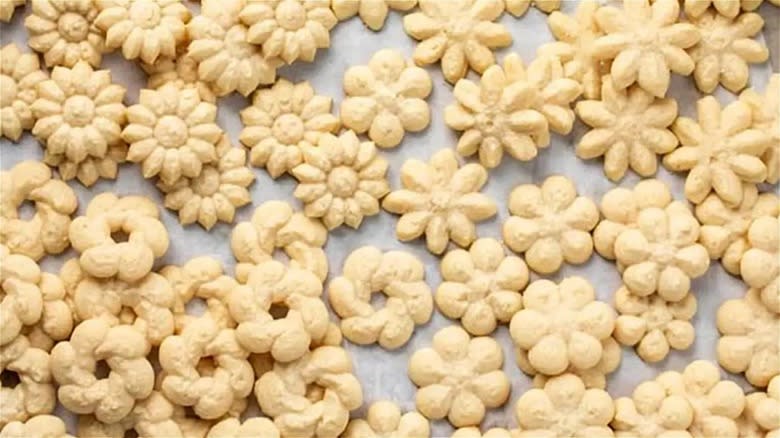
Every cookie press is designed uniquely. Some may have an adjustment lever for smaller or larger cookie shapes. Set this correctly based on the die-cut disc shape you want to use. While other cookie presses may not have a size adjuster, you will still need to accommodate different types of die-cut discs by pumping the trigger more than once to extrude enough dough for that particular cookie shape to turn out correctly.
Adjust the pressure within the cookie press barrel if the shapes come out inconsistently. The best way to do this is to extrude some dough while holding the unit in the air. Clear any excess dough clogging the die-cut disc with your finger or a paper towel and repeat as necessary until any air pockets have been removed and the pressure in the unit shaft has been balanced. Again, this is not unlike using a caulk gun.
Not Cleaning The Press Thoroughly

One hiccup that is easy to avoid is not thoroughly cleaning and drying your cookie press before use. Cookie dough can get stuck in crevices of every part of your cookie press, particularly the die-cut discs used to extrude the individually shaped cookies. Any gunked-on dough from a previous round of making cookies is unsanitary and can cause your cookies to come out looking irregularly shaped.
Unscrew the ring at the base of the barrel, dislodge the die-cut disc, and remove the barrel from the handle before washing your cookie press. Once all the pieces of the cookie press are disassembled, clean them in hot, soapy water. Rinse the washed pieces thoroughly before drying them. It is always recommended that you allow them to air dry rather than using a towel, which can harbor bacteria. Never reassemble your cookie press before the pieces are thoroughly dry, or they may rust.
Do not disinfect a metal cookie press using a bleach solution, as this can cause adverse reactions that damage the pieces, particularly the delicate die-cut discs. If you are concerned about disinfecting your cookie press, soak the pieces in boiling water for 10 minutes before drying them.
Crowding Your Cookies
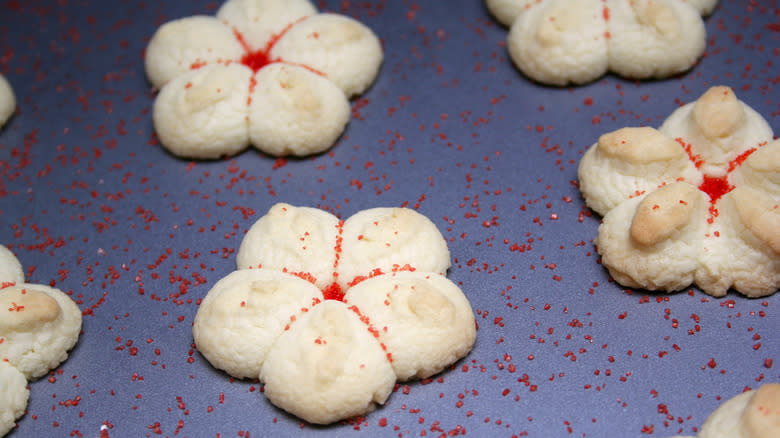
Most cookie recipes recommend two inches of space between each cookie on your cookie sheet or baking pan. While this may seem unnecessary, do not try to crowd more cookies onto your cookie sheet than is suggested. There are a couple of reasons for this. First, cookies will bake more evenly when adequate airflow is allowed around each cookie. This will ensure that all your cookies bake at the same speed and look identical.
More importantly, even cookie dough that doesn't rise extensively will expand and puff up some in the oven. Allow cookies plenty of space to spread without impeding on one another. If you crowd cookies too tightly, they will not hold their shape and will stick together, defeating the purpose of using your cookie press in the first place.
Lastly, while it may seem like a good idea to reuse the same cookie sheet to bake multiple batches of cookies so that you do not have to wash as many dishes, don't. You need a cool or cold baking sheet for cookies to adhere correctly to your baking sheet. Have multiple cookie sheets you can use in succession to guarantee the perfect cookies every time.
Not Reading The Instruction Manual
How often do we purchase a gadget for our home, take it out of the box, and attempt to put it together and use it without ever looking at the instruction manual first? Instruction manuals can be long, repetitive, and confusing. In certain situations, you may be just as well off not looking at the instructions, but this is ill-advised when using a cookie press.
As we have established, the types of cookie presses available are varied in type and functionality. While they all work using the same basic premise, each will have its peccadillos that you will need to factor into creating the perfect cookie. This requires reading the instruction manual before ever whipping up a batch of cookie dough.
Many instruction manuals will include commonly reported issues with their devices and troubleshooting instructions to help you navigate the best way to use that specific model. They will also provide details on individual parts, how to attach them, and what to do if they break. Ultimately, your success with using a cookie press relies on doing your homework ahead of your cookie-baking marathon.
Not Practicing Enough

Like with anything else in life, practice makes perfect when it comes to using a cookie press. Don't give up if your first go around using it is unsuccessful. Go through what worked and what did not and make the necessary adjustments. Once you master the basics, you will gain confidence and be able to produce quality cookies like a commercial bakery.
Additionally, don't be dismayed if you run into a random hiccup. A million factors can influence how the dough comes together and bakes, ranging from the specific flour, butter, and sugar you use to humidity or altitude. If you have ever made pancakes or crepes, you almost always throw away the first batch. Using a cookie press is the same. It is a bit like riding a bicycle. You might never forget how to do it, but it does take a bit of a refresher to get back into the swing of things, especially if it has been a while since the last time you used your cookie press.
Not Allowing Your Cookies To Completely Cool

Spritz dough, and doughs soft enough to use with a cookie press tend to be on the delicate side. They are high in fat and somewhat higher in moisture than denser types of cookie dough. For this reason, you are advised to cool these cookies on the cookie sheet or baking pan rather than transfer them to a cooling rack.
When cookies come out of the oven, they continue to harden while moisture proceeds to evaporate. If you want a crunchy cookie, you will want to remove it from your baking pan and put it on a cooling rack to encourage airflow around the cookie and increase moisture loss. For a chewy cookie, leaving it on the cookie sheet traps the moisture on the bottom, forcing it back into the treat and keeping it supple.
While the batter for a Spritz cookie is similar to shortbread, it contains eggs, which makes it less susceptible to crumbling and more tender. Let the cookie cool completely to encourage this tenderness before gently removing it using a thin metal spatula.
Read the original article on Daily Meal.

