12 Frosting Hacks From A Bakery Pro For Stunning Cakes
We may receive a commission on purchases made from links.
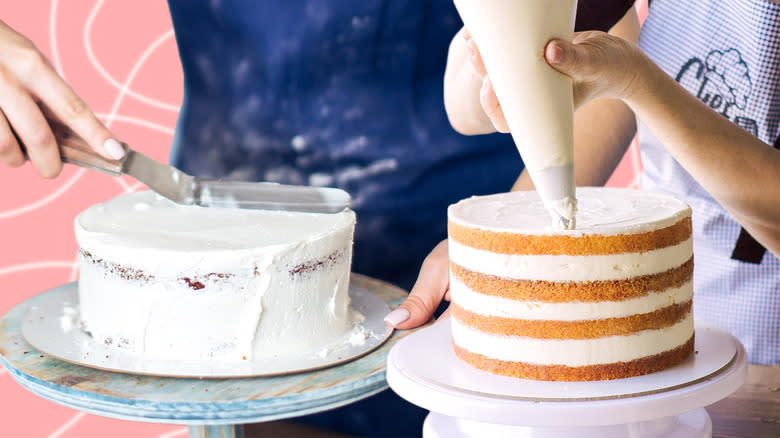
Have you ever stared at a beautifully frosted professional cake, yearning to recreate that smooth, perfect finish at home? Fear not, baking novice! Frosting a cake may seem intimidating, but with a few simple tips and tricks, you can transform your humble homemade treat into a masterpiece.
We spoke with Emma Shaver, a Washington, D.C.-based bakery veteran and former general manager of Buttercream Bakeshop, who has handled her fair share of professional baked goods. From temperature control to the importance of a good crumb coat, she revealed her favorite tried-and-tested hacks (including a few tools she uses and loves) to keep your homemade cake looking like it belongs in a bakeshop window. As a devoted home baker myself, I can personally attest to her prowess. These handy crumbs of advice (pun intended) have helped me immensely, and my cakes have never looked better.
By the end of this guide, you'll be equipped with the knowledge and confidence to not only frost a cake well but to express your cake-decorating creativity. Vibrant colors, playful borders, delicate piping — the possibilities are endless! Grab your favorite recipe, pull out your mixing bowls, and get ready to practice, practice, practice.
Read more: 30 Types Of Cake, Explained
Level Your Layers
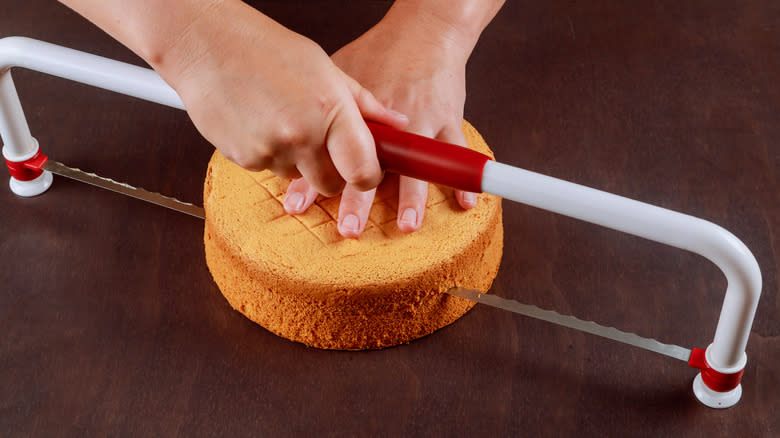
The last thing you want to worry about while decorating a cake is making it look pretty while the edges droop and slide around. Proper leveling is the answer. Cutting each cake layer so that they all lie perfectly flat makes the frosting and decorating process so much easier in the long run.
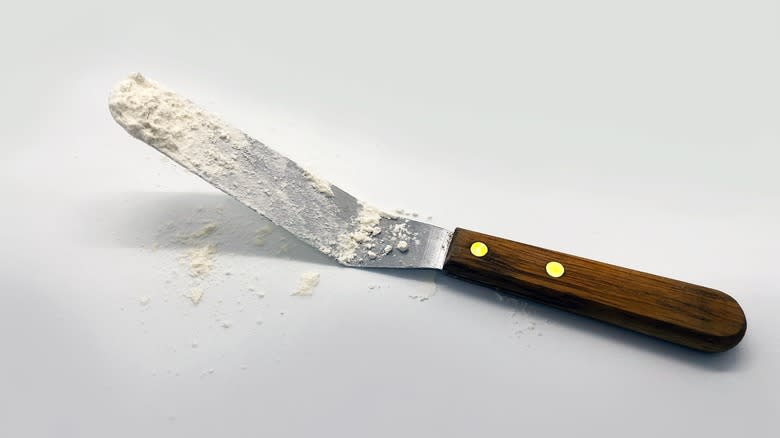
One of the biggest mistakes people make when baking cakes is to ice them while they're still warm. You'll want to make sure the cake is completely cool before you make a small initial cut at the desired width, then hold the cake steady as you go. Some folks prefer a good sharp knife to do this, but I've never had much luck with that method.
"There are tools you can buy that will help you," says baker Emma Shaver. "The ones that I have used are adjustable to different sizes and are a wire that you slide through your layer to get an even, level layer." Line up the wire at the first cut you made in the cake layer, hold the top steady with your hand, and carefully saw the wire tool back and forth to gently remove the rounded top of the cake. Once it's fully cut through, you can remove the top portion to reveal a flat, even surface that will make stacking and frosting layers so much easier. You'll also be left with leftover cake pieces that you can use for decorations or snack on.
Find The Right Temperature
Frosting a cake is twice as hard when things start melting. Never ever touch a cake with frosting until your cake layers have cooled completely, but don't let them get too cold either! For easier and mess-free cake frosting, you'll want to make sure it's cool to the touch, but not frozen.
"There is a sweet spot for how cold the frosting is," Emma Shaver tells us. "You don't want it to get warm, but too cold is also really hard to work with." Beware of sticking a freshly baked cake in the fridge or freezer trying to cool it down quickly because once the surface is too cold, applying frosting becomes tricky. It can harden unevenly and be very difficult to spread, which will affect your ability to get a smooth finish.
Aim for room temperature, and be sure that both the cake and the frosting are as close to the same temperature as possible. This will help prevent the frosting from clumping and make for a much more straightforward process.
Try A Stabilizer
Adding an already stable ingredient like marshmallow fluff keeps homemade frosting from splitting or curdling, and it's a big help when you're in a time crunch. "This is a great hack for getting easy, quick frostings," says Emma Shaver. Tasty and time-saving? We're in.
Marshmallow fluff, in particular, has a light and airy texture that translates beautifully to your frosting. Its gelatin content helps prevent your frosting from becoming loose or runny, especially in hot or humid environments. Marshmallow fluff also plays well with others. It can be incorporated into all kinds of frosting recipes, from classic buttercream to cream cheese frosting, and the subtle sweetness of the fluff complements different flavor profiles without overpowering them. For beginners looking to achieve better spreadability in their frosting with a lower degree of effort, having this trick in your arsenal is a game changer.
Keep in mind, though, that a little goes a long way. Start with a small amount of marshmallow fluff and adjust based on your desired texture and stability. Remember, too much can make your frosting overly sweet or too soft.
Keep Your Cake From Sliding
The last thing you want as you're in the middle of frosting is for the cake to start slipping around the plate, but there's a super-handy, three-second trick that has saved me from many such a fumble: frosting the bottom of the cake. It sounds a little weird, but believe me, it works wonders.
Putting a small dab of frosting right in the middle of the plate or cake round before adding the first layer is a huge must. Having that dollop of 'glue' between the bottom layer of the cake and the surface you're decorating on helps keep the whole structure still as you build it up and prevents it from scooching around as you frost.
Emma Shaver calls this a "super easy way to keep the cake in the right place." A little goes a long way, though, so don't feel like you have to waste more than a tablespoon's worth of frosting on this step; just a dab will do.
Try A Cake Board Or Some Parchment Paper
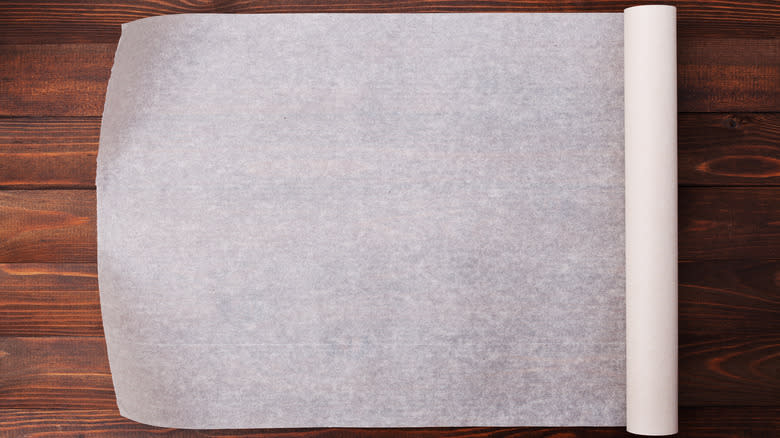
If you're worried about keeping the bottom edge of your cake clean of frosting mishaps, try starting on a base you don't mind getting a little messy. Frost the cake on a cake board (also called a cake round) or a sheet of parchment paper (waxed paper works, too) before moving the whole creation to the final plate in order to keep your cake's bottom edge neat and free of stray frosting globs. Or, you can add a section of baking paper under the cake round to catch any mess, then slide the cake round with the cake right off!
Fair warning, though: If you are planning to move a sizable layered cake from a piece of parchment paper to a more decorative final plate, I highly recommend having a friend help you. Some cakes are much heavier than you might realize, and it's easy to lose control of something as malleable as a cake if you don't have a second pair of hands and eyes to keep things under control. First, put your second landing point as close to your work surface as possible. Using a large offset spatula (or even a normal spatula that's thin enough to get between the cake and your work surface), carefully slide the blade under the cake and lift, gently peeling the parchment paper off underneath. Then, with a helper spotting you, drag the cake onto the new plate.
Protect Your Layers With A Frosting Border
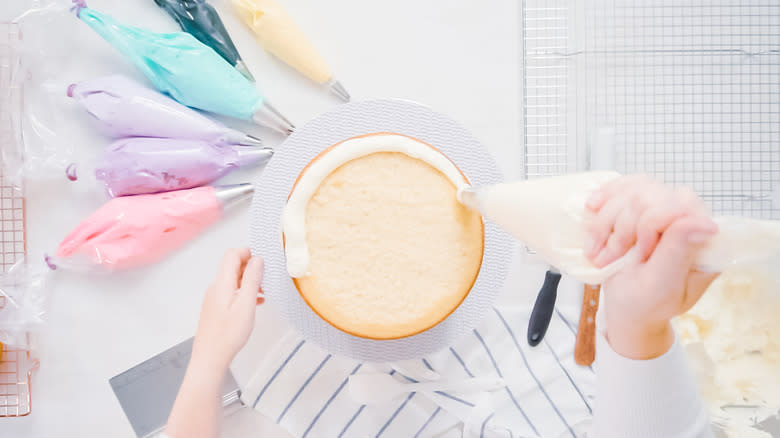
Piping a border of frosting around the edges helps to prevent fruit, cream, or jam from dripping from the layers. "This is essential to keeping the crumb coat, and therefore, the final cake clean so that you can decorate it without worrying about the fillings leaking out over the sides," says Emma Shaver. A lot of cake fillings are softer and runnier than most of the other ingredients, so if that frosting retaining wall is missing, your ooey-gooey centers are likely to get squeezed out of your layers.
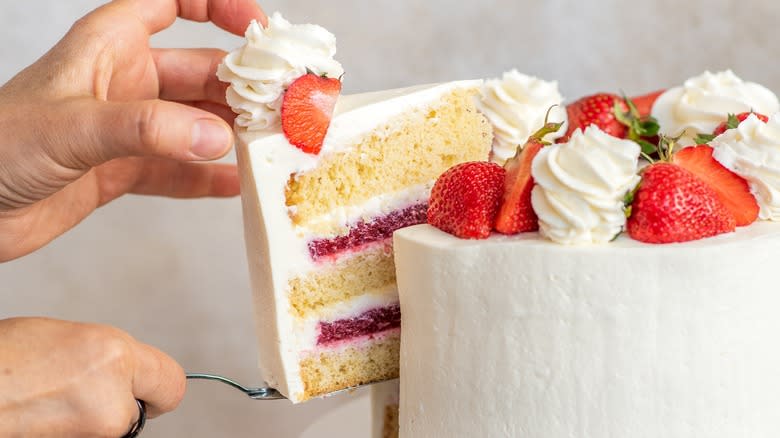
I am a big fan of adding jam between each layer of cake, and I've found that this border step is absolutely crucial for keeping my cakes neat. Add a generous amount of frosting to a piping bag, and create a sturdy, consistent line around the inner edge of each cake layer before filling the center with your additions. Any piping tip will do, but since no one will see this part, I tend to just snip the end off the bag and go to town.
Don't worry if a little of this border squishes out the sides just a little as you stack the layers. This will all get smoothed out when you apply the crumb coat later on.
Give Your Cake A Gentle Squish
Once you've protected your layers with frosting borders, added your filling of choice, and stacked your next layer on top, press on the cake just a little to keep things aligned and stuck together as you go. This may sound a little contrary, but it helps! The keyword here, though, is "gently." A light press on each layer essentially acts as a glue and helps to bond the cake layers together. Do this between every layer so that the bottommost layer can get used to holding the weight of the rest of the cake before you stack it.
"This will help when you are building the cake," Emma Shaver reveals. "You want to use your hand to level the cake by squishing it down gently as you build the layers, and this will prevent any filling from squeezing out the sides [when the cake is fully assembled]." This trick, she says, "helps prevent too much air in between the layers." Otherwise, you'll risk destabilizing your cake. Simply stacking your layers without this step risks too much air and a cake that is likely to wobble. No matter how many layers you wish to add to your creation, pressing down a little between each one before adding more frosting or filling helps a lot with the final result.
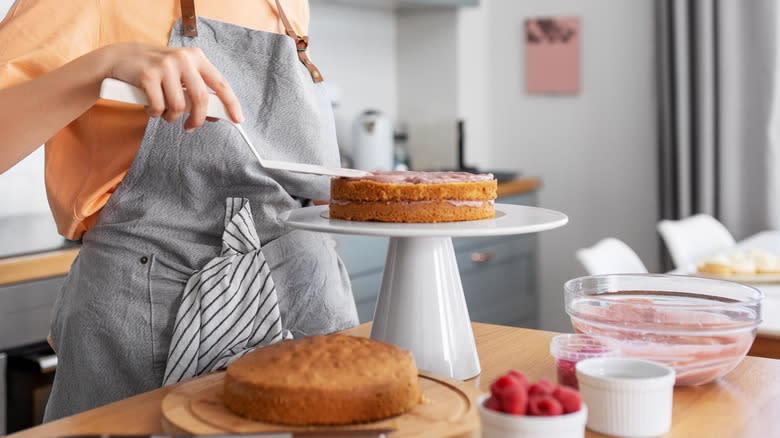
Your New Best Friend Is An Offset Spatula
The right tools are worth their weight in gold, and an offset spatula allows for far better control than a butter knife or a rubber spatula. The offset handle keeps your knuckles clear of the cake's surface and allows for a comfortable and controlled grip. This is especially important when working on the sides of a cake, preventing smudges or accidental handprints on your delicate frosting!
The angled blade of this kind of tool also allows you to apply frosting with remarkable precision. You can easily maneuver for a clean, even spread without scraping or damaging the cake itself. The tool comes in all sizes, and each size has its value.
"[An offset spatula] is great for getting the frosting on the cake and then doing most of the smoothing work," Emma Shaver tells us. "The small ones are great for more delicate details, and the larger ones are great for getting the frosting on the cake and smoothing the sides and top."
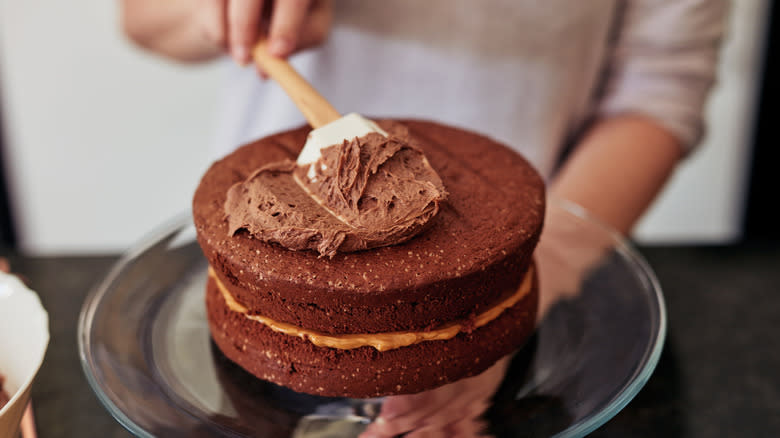
Don't Skip The Crumb Coat
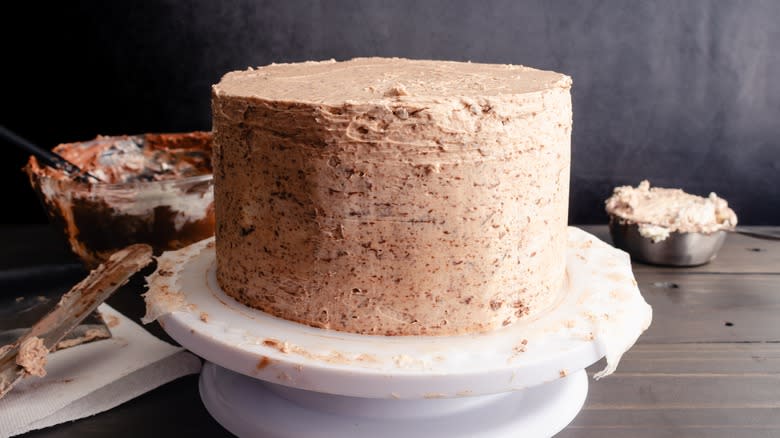
A crumb coat is a thin layer of frosting that acts like a magic primer for your cake, trapping stray crumbs that would otherwise peek through your final masterpiece. It creates a hidden layer that acts as a flawless canvas for your final frosting.
I prefer to start with a large heap of frosting right on top of the cake. Then, I use an offset spatula to smooth it to the edges and let the excess gently fall off the edge to the sides. This gives me better control, and I can start with a thin layer (which is all a crumb coat really needs). It also allows me to patch up any "holes" where the cake is showing or to get a smoother base. Another option is to use a piping bag to distribute frosting evenly across the top and sides of the cake before smoothing it out with an offset spatula or bench scraper.
Emma Shaver notes you can add "crumb coat, and then let the cake set in the fridge, and then you can decorate to your heart's content!" This process creates a chilled, stable base for the final frosting layer, making it easier to achieve a flawless, professional finish. Spending a few minutes on this step will make a world of difference in your cake's appearance. Only once the crumb coat is fully set should you move on to the second layer of frosting.
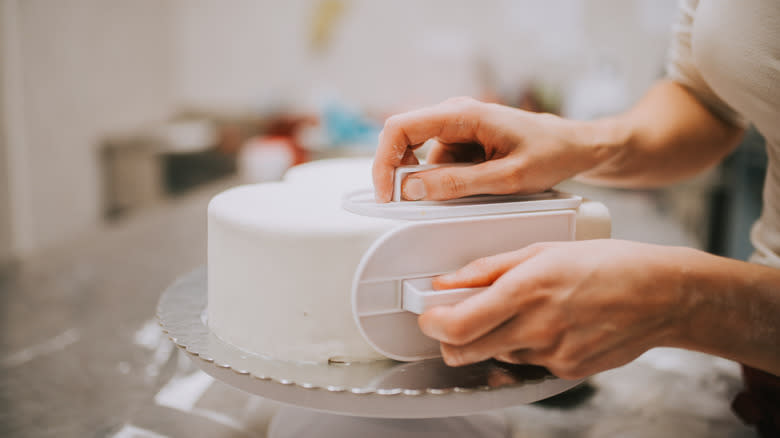
A Bench Scraper Can Save Your Sides

An offset spatula does a lot of the heavy lifting for both the crumb coat and the final frosting layer, but for anyone looking to achieve perfectly smooth sides, investing in a bench scraper is always a good idea — mine has definitely come in handy more times than I can count. Once all of the frosting is applied to the cake, the flat edge of a bench scraper stays even and level around all sides of the cake for a flawless finish.
"The bench scraper is great to use as a finisher for even and smooth edges," Emma Shaver shares. "There are also cake decorating combs or icing combs that have texture that make it very easy to get very fancy, professional looking cake sides with very little effort."
Don't want to spend time worrying about perfectly smooth sides? A favorite icing comb of mine carves a neat set of evenly spaced lines into the frosting for a textured look, and once you get plenty of practice in, these kinds of tools can pave the way for a second color of frosting to create consistent stripes.
Sprinkles Cover Any Number Of Sins
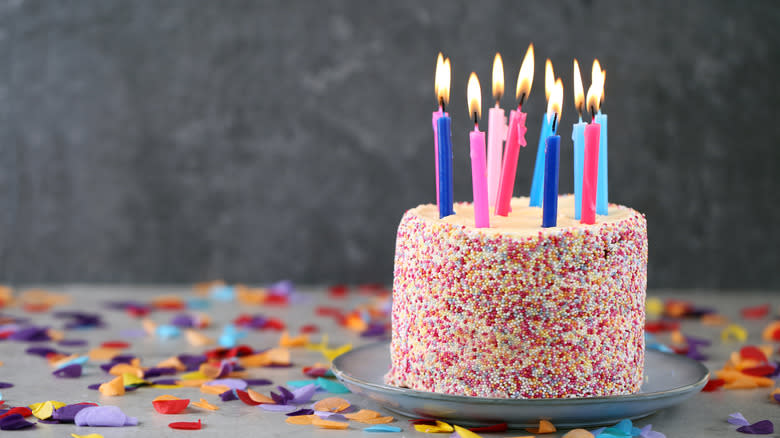
When in doubt, you can cover any uneven or inconsistent frosting with sprinkles or nuts help to disguise the mess. Colorful sprinkles are great for a festive birthday cake, while sliced almonds or crushed pecans suit the outsides of a weeknight dessert.
"I would recommend sprinkles or nuts to press to the sides of a cake to cover an uneven coat," says Emma Shaver. "I would recommend putting the cake in the fridge for a couple of minutes to make sure [the frosting] sets a little before using your hands to gently press the sprinkles or nuts to the sides. If you feel comfortable, it is easiest to do while holding the cake at an angle over the bowl of toppings so that whatever doesn't stick to the cake falls right back into the bowl."
No matter the occasion, a sprinkle coating can elevate any size or shape of cake, making it look so much more special than the average beginner's uneven frosting layer. It's also super helpful when you're short on time.
Avoid Fondant As A Newer Cake Decorator
Have you ever seen a professional cake that's so flawless and velvety smooth that you know for sure it can't possibly be frosting? It's likely covered with fondant: a type of sugar-based dough used to create smooth, sculpted finishes and decorative elements on cakes and pastries. You'll even see little figurines made from fondant on some cakes.
Fondant, especially for newer bakers and cake decorators, is one of those things that looks nice but can be incredibly tough to work with. Until you have a lot of practice with it, it's better to steer clear of fondant (whether store-bought or homemade), as the results can be pretty hit-or-miss. "Fondant is very finicky and temperamental," Emma Shaver says, "especially for folks who haven't used it before. It can dry out and get an 'elephant skin' texture (dry and scaly) really quickly if you overwork it, which happens very suddenly."
Personally, I enjoy cutting shapes and letters out of bits of fondant (and I've even sculpted a little teddy bear or two) to add a small decorative element here and there, but even after many years of baking and decorating, I avoid draping it over cakes at all costs. It's thick, it wrinkles a lot, and it can look really messy if you don't have a technique down. If you do want to explore it, I highly recommend trying a simple shortcut fondant recipe yourself so you can better control the consistency.
Read the original article on Tasting Table

