11 Tips for Repotting African Violets to Get More Flowers
Repotting African violets regularly helps them grow and bloom better.
Bob Stefko
African violets are long-lived plants that can grace houseplant collections for up to 50 years. However, repotting African violets (Saintpaulia ionantha) occasionally goes a long way toward keeping these plants healthy and blooming prolifically through the years. Signs that your violets need repotting include stunted growth, reduced flowering, pot-bound roots, and drooping leaves. The following essential tips for repotting African violets will help you complete this task successfully so you can enjoy many more years with your plants.
11 Tips for Repotting African Violets
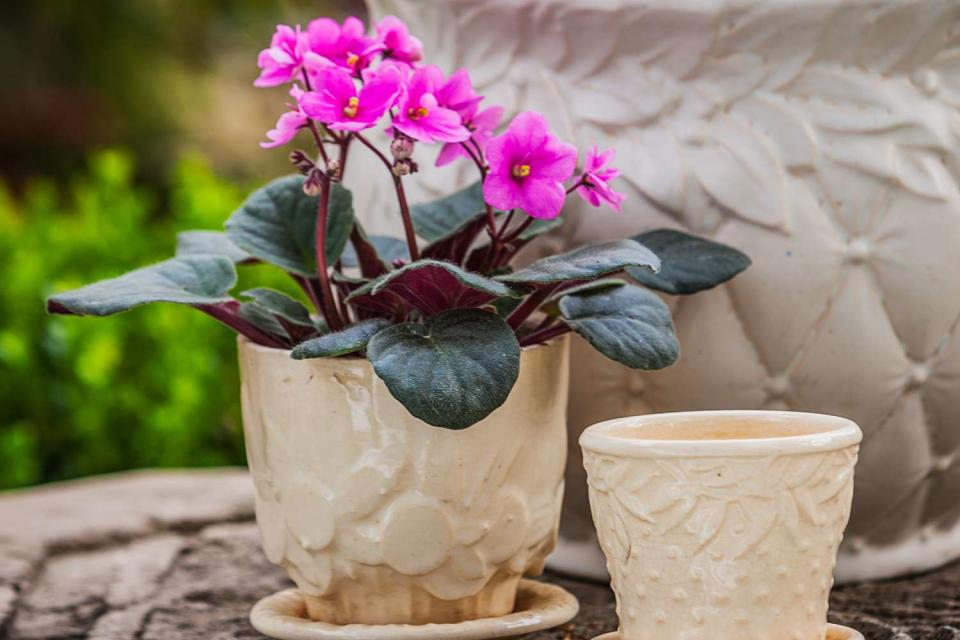
Repotting African violets freshens their soil, prevents leggy stems, and encourages flowering. Plus, it's an opportunity to try out new pots and remove dead leaves so that your plants look their very best.
1. Know when to repot.
African violets can be repotted at any time of the year, although it’s best to avoid repotting plants when they’re in flower. Most African violet enthusiasts recommend repotting every six months. This is especially helpful if a plant has developed unsightly long "necks" or stems, which can be corrected when repotting. The plants might also need to be repotted if they’re growing in a pot that is too large. Oversized pots are more susceptible to overwatering, which leads to root rot.
2. Choose the right pot size.
When repotting African violets, reuse your old pot or select a new growing container. However, if your African violet needs a different-sized vessel, repot it in a container one size smaller (or larger) than the plant’s original pot. Plants with elongated necks usually fit back into their original pot, but you may need to cut away a few of their lower roots so they sit lower in the pot and their leaves are just above the soil line.
3. Add drainage holes.
Regardless of whether you grow African violets in pots or self-watering planters, make sure the plant’s pot has plenty of drainage holes. The goal is to prevent water-logged soil and make it easier to rinse the potting mix if salts and minerals accumulate. Adding rocks and other items to the bottom of plant pots doesn’t improve drainage, but you can add drainage holes (if needed) with a power drill and a masonry drill bit.
4. Try an azalea pot.
You can keep African violets in plastic, terra-cotta, or ceramic pots and planters, but if you’d like to make your African violets even happier, grow them in azalea pots instead. Azalea pots are shallower than the average terra-cotta pot, so they perfectly accommodate the short root systems of African violets and prevent overwatering.
5. Sterilize old pots.
If you repot your African violet plant into an old pot or planter, it’s best to sterilize the planter first. Old pots can sometimes harbor harmful nematodes or bacteria that may interfere with the health and growth of your African violets. To sterilize old pots, submerge them in a 10% bleach solution for 30 minutes.
6. Select quality potting mix.
When it’s finally time to repot your African violets, use a fresh potting mix that’s well-draining. Many stores sell potting mixes specially formulated for African violets, but you can also make potting mix with coconut coir (or peat moss), vermiculite, and perlite. Having a loose and well-draining potting mix is essential for the health of African violets, as these plants have small, delicate roots that can be overwhelmed by heavy soil.
Related: The 13 Best Potting Soils for Indoor and Outdoor Plants
7. Be gentle.
Removing African violets from their original pots can be tricky, but handling the plants with care is necessary if you want to avoid broken stems and leaves. Try inverting the plant pot over your hand and gently shaking the African violet out. If the plant is stuck in the pot, moisten the soil with a little water or gently poke a pencil into the pot’s drainage hole and push the plant’s root ball free.
8. Remove damaged leaves and old flowers.
Repotting is the perfect time to clean up the lines of your African violets and pinch away dead flowers. Use clean pruning shears or scissors to cut off dead, damaged, or broken stems and leaves, and deadhead old blooms. This helps your plant conserve energy and makes it easier for it to adjust after repotting.
9. Water your plant.
After you repot your African violet into a rich, well-draining potting mix, give the plant a deep drink of water to help it settle in. You don’t need to fertilize African violets for at least six weeks after repotting since most potting mixes contain added plant nutrients.
10. Boost humidity.
African violets can sometimes suffer from transplant shock after repotting. This is even more likely to occur if the plant’s roots were heavily disturbed or pruned during the repotting process. Reduce the likelihood that your African violet will go into shock by covering the newly repotted plant with a clear plastic bag or humidity dome for one week. This boosts the humidity levels around the plant and helps it acclimate more quickly.
11. Experiment with propagation (optional).
Even with careful handling, a stem or leaf may break off during the repotting process. If this occurs, don’t throw out those broken stems and leaves. African violets can be easily propagated in both soil and water using healthy stem and leaf cuttings.
Related: The Best Ways to Help New Houseplants Acclimate to Your Home
For more Better Homes & Gardens news, make sure to sign up for our newsletter!
Read the original article on Better Homes & Gardens.

