11 Front Door Décor Ideas That Celebrate Everything We Love About Autumn
Usher in the cozy season with these welcoming front door fall décor ideas.
Autumn is a favorite holiday for good reason. It offers a burst of vibrant fall foliage, festive pumpkins around every corner, and a nice chill that contrasts perfectly with your favorite sweater and warm beverage. Of course, the season also lends itself to some picture perfect front door fall décor.
From DIY wreaths and seasonal plants to flickering lanterns and the obligatory display of gourds or Halloween decorations, we're sharing our best tips and tricks for building a front door display that celebrates the season.
Related: 40 Fall Décor Ideas to Get Your Home Ready for Autumn
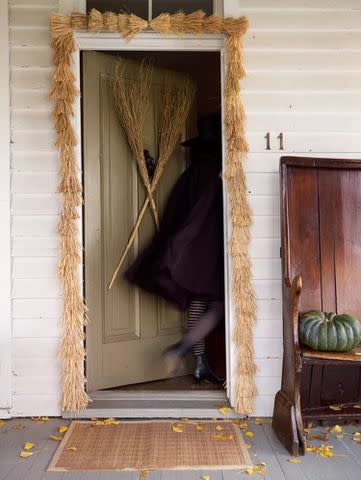
Broom Garland Doorway
Lucas Allen
Transform your stoop into a witchy entry by criss-crossing two wired brooms across the center of your door. It's a simple front door fall décor idea, but one that'll definitely lend a nice boost of spook to your neighborhood. For good measure, add a border of tiny broom heads around the perimeter of your door.
Make It Yourself
The border of broomheads, seen here, are actually bundles of raffia. To recreate the look, simply cut the raffia into 7-inch sections, gather at one end, then secure with florist's wire and wrap with twine.
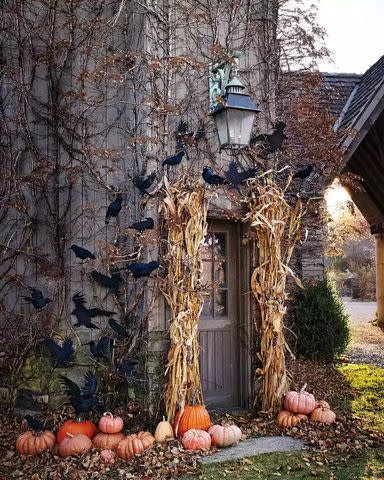
Dried Corn Stalks
Ngoc Minh Ngo
A bundle of dried corn stalks on either side of your door offers the right amount of autumn whimsy to your entry. If you want to make it feel a little more Halloween-inspired, try attaching bats, black birds, or even witch hats.
Autumnal Dried Caspia Wreath

This natural autumnal wreath is made from dried bundles of caspia in rich colors. The incorporation of various textures and monochromatic red-and-pink tones make this front door fall décor a real showstopper.
Make It Yourself
Start creating yours by cutting caspia stems to be approximately 3 inches long; then, bundle three or four stems together before inserting it into a grapevine wreath base using floral wire. Alternate the red stems with orange stems until the wreath is completely covered.
Next, spray a few miniature pumpkins with copper paint, and let it completely dry. To prepare your gilded pinecones, apply one coat of liquid gliding to each pinecone, and let it completely dry. Secure both pumpkins and pinecones to your wreath with hot glue.
Corn-Husk Wreath
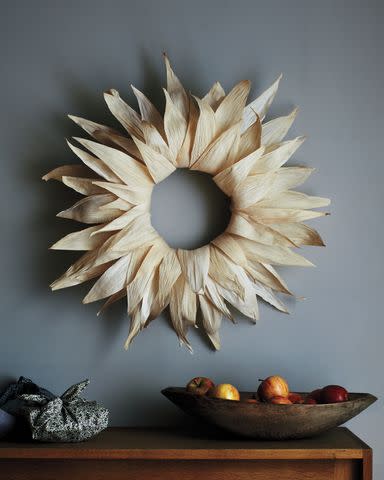
This wreath, made with tamale wrappers from the grocery store, is a rustic nod to autumn. Best of all, it's inexpensive to recreate and makes for a fun DIY project.
Wheat Cluster

For an easy, lightweight decoration that evokes the glorious fall harvest, try whipping up these dried wheat bundles, which are wrapped in colorful waxed twine and wooden beads.
Make It Yourself
Begin by bundling together 3 to 10 stalks of wheat; then, wrap the stalks of wheat together in twine. Leave about 3 feet of twine hanging off the bunch in a tail, and cut your stalks to approximately 3 inches in length.
Repeat for as many bundles as desired. Then, push the twines tail through a chosen bead, loop its ends and tie it in a knot. Trim any excess twine and slide the bead up to cover your knot.
Dried Foliage Wreath
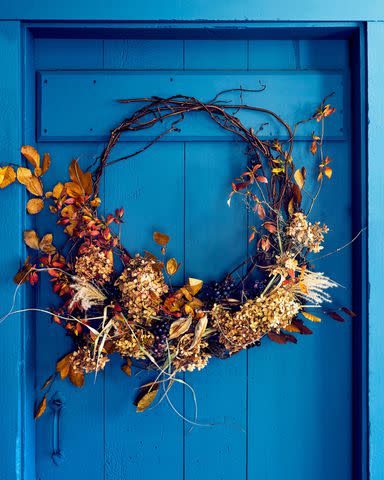
Hydrangea bows and dried foliage showcase the very best elements of fall. They look particularly lovely when threaded into a grapevine or twig base—leave a bit of the wreath bare to embrace the nature of the season.
Get the Dried Floral Wreath How-To
Black Magic Wreath

This October, add some eerie elegance to your usual cobweb-and-spider porch display with a bewitching ebony wreath. We gave this one a DIY makeover that works like magic.
Make It Yourself
Start by laying out the dried grapevine wreath onto a flat work surface—on top of a heap of used newspapers before you spray paint it. Snip faux flowers away from stems, and arrange them onto the grapevine wreath before securing them with hot glue. Then, spray the entire wreath with black paint and let it dry.
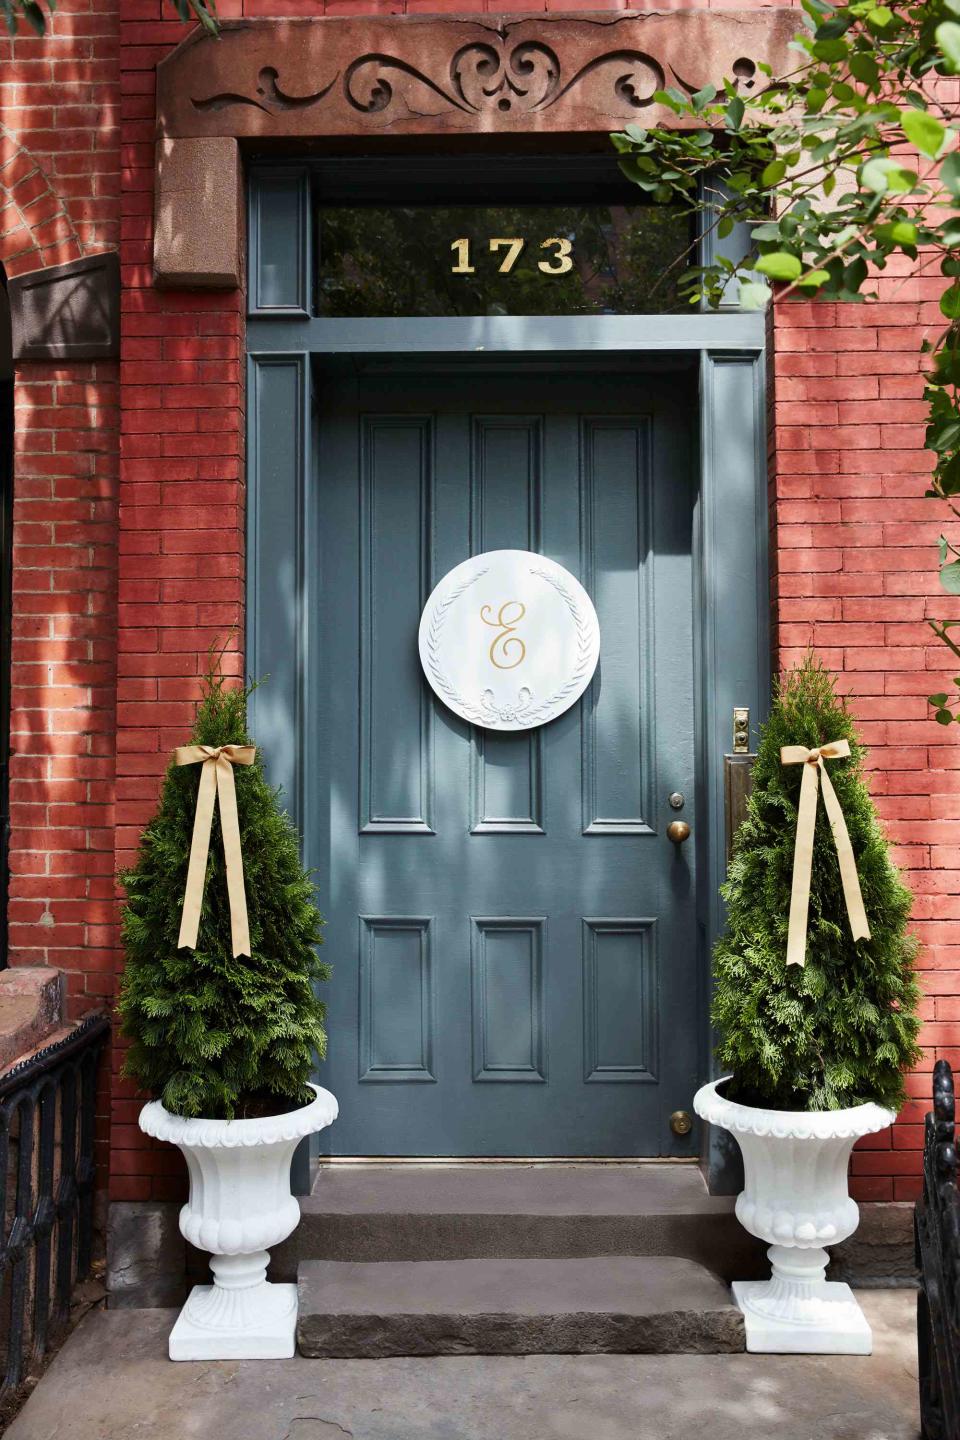
Chalk-Painted Monogram Wooden Plaque

Welcome the cooler season with a signature greeting. All you need are a few basic craft and garden supplies—which you may already have on hand—and a coat or two of matte finish white chalk paint that create a vintage effect. This project will definitely turn your stoop into a stunner.
Get the Chalk-Painted Monogram Wooden Plaque How-To
Cone Wreath
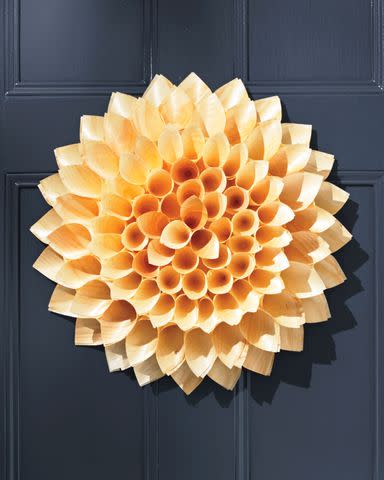
Unlike fresh wreaths, this sculptural piece will last for years and visitors will never guess how easy they are to assemble. Plus, the unique shape draws in the eye and makes a bold statement in your autumn-themed entryway.
Make It Yourself
Begin by tracing the outer edge of an 18-inch craft ring right onto a piece of poster board and cutting it out. Glue the poster board to the ring form and position 7-inch wood cones to slightly exceed the edge of the form—then, glue it in place with hot glue.
To create a second ring, stagger 7-inch cones and hot glue them to the first ring, tacking to each other as you go. Repeat with 4-inch cones, working towards the center. The cones will gradually become more upright as you go.
Finally, tack the points of the innermost cones to the poster board, as well as to each other, and let the creation dry completely for about five minutes.
Nutty Wreath
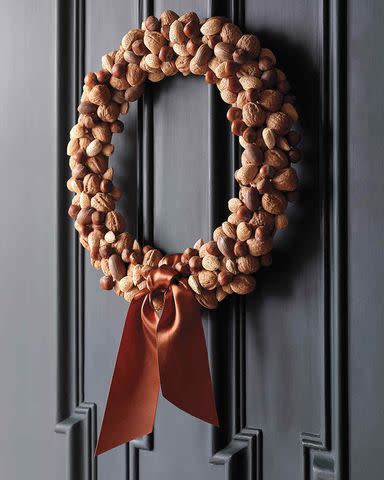
Turn seasonal hard-shelled nuts into a festive wreath in just a few simple steps. Follow along as Martha demonstrates in the how-to below.
Wood Flower Wreath
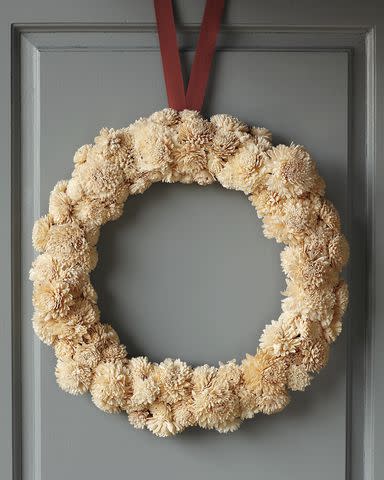
Flowers are lovely on a wreath, but they may wilt in cooler temperatures. However, the tapioca wood flowers used in this easy-to-make wreath remain in "bloom" throughout the season's holidays and the years to come.
Make It Yourself
To start, set your wreath form on a flat surface, and glue tapioca wood flowers as close as possible to each other so the form doesn't show through.
Stagger the size of the flowers to create a more visually interesting wreath. Then, glue the center of a length of ribbon to the back of the wreath. Use tacks to pin the loose ends to the top of the door.
Related: How to Hang a Wreath Without Making Holes in the Door
Read the original article on Martha Stewart.

