11 Foods You're Probably Cooking On Too High Heat, According To A Chef
On my first day of culinary school, the chef instructor defined cooking as "the thermodynamics of heat transfer as it relates to food." The class regarded him with blank stares, which did nothing to encourage him to elaborate or explain what that meant. Four decades later, I can explain cooking like this: Heat can exist as energy in air, liquids, or solid cooking surfaces, which transfers to your food, heating it and ultimately cooking it.
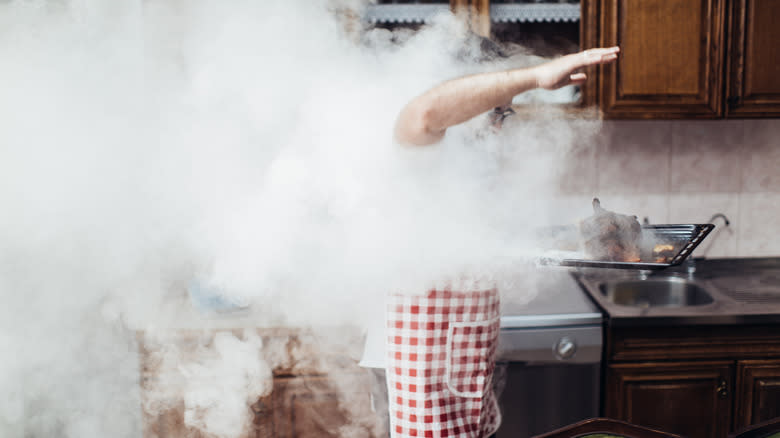
Heat energy exists in different quantities, measured in degrees, and intensities, measured in British Thermal Units (BTUs), which is the amount of energy required to raise the temperature of one pound of water (one pint) by one degree Fahrenheit. Chefs stressed to me the importance of cooking in hot sauté pans and I, like many of my contemporaries, looked at the stove burner knob and cranked it to its highest setting for a high temperature and intensity. What this approach needs is something resembling a degree of subtlety.
In most cooking scenarios, we start with a preheated oven, grill, pan of water, or frying pan. Preheating creates a reserve of energy that won't deplete as soon as cooler-temperature food touches it. The amount of that reserve and the rate at which it's replenished impact how quickly the exterior of your food cooks, affecting heat transfer to the interior. We tend to cook too hot much of the time, with adverse effects, and these are just some of the foods we make this mistake with.
Read more: The 20 Best Olive Oils For Cooking
Eggs

There are devotees of crispy eggs, for whom nothing said here will change their minds. The two parts of a "fried" egg (sunnyside up, over easy, etc.) cook at different temperatures. The whites cook between 140 and 149 degrees Fahrenheit, while the yolks set between 149 and 158 degrees Fahrenheit. It doesn't require high, intense heat to reach these temperatures. Starting with a pan over medium heat will let the whites set nicely, and the yolks cook to your desired degree of doneness.
On the other end of the spectrum lie scrambled eggs. Cooking your scrambled eggs too hot can result in browning, rubberiness, and sometimes turning the same green as an overcooked hard-boiled yolk. There are a few schools of thought, from the straightforward scramble to the custardy slow scramble. In either case, the burner temperature never climbs above medium. When the eggs hit the pan, they should never sit still, either. The more straightforward method is the starting point for omelets too, and whether you're stuffing the middle or just making some fluffy eggs, controlling the heat and keeping the eggs moving is key to airy, non-scorched eggs. One failsafe method is heating a tablespoon of oil in a non-stick pan over medium heat until it shatters a bit. Pouring the eggs onto the hot oil allows them to ride on top of the oil, rather than making contact with the pan. Then, quickly stirring until they resemble cottage cheese curds finishes the process.
Onions
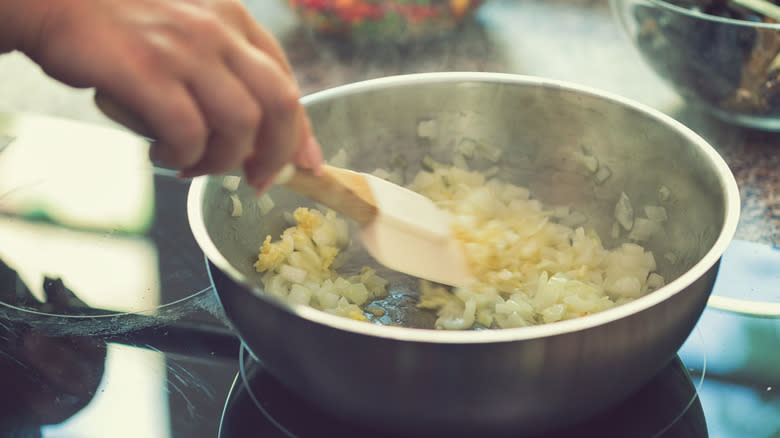
Most recipes should be more realistic about onion cooking times. When we cut onions, we rupture cellular membranes, allowing previously separated chemicals in the onions to combine, creating a volatile sulfur gas. Cooking tames that gas, but that's not all it does. As onions cook, they develop a deep umami that richens a dish.
The two most common ways to cook onions are to sweat them, which most people call sautéeing, and to caramelize them, which draws out their sugary components and turns them sweet. Inaccuracies in cooking time result from not allowing the onions to develop their full flavor by cooking them at too high a temperature.
Start with a preheated pan over low or medium-low heat when sweating an onion. You don't want the pan to ever get hot enough to brown the onion. When adding the onion with a little oil to the preheated pan, you'll note a slight sizzle, which is good. A pinch of salt at this point will work with the onion, and it might expel its water by osmosis. Some of the water will evaporate, some will draw back in. When the water disappears, you're still not done. Taste the onion; it will still have some raw flavor and crunch. Let the onion cook until the rawness and crunch are gone — about 15 to 20 minutes. Caramelizing onions follows the same process; just let them cook longer until deeply brown. Allow 45-60 minutes for complete browning and full flavor.
Garlic

Recipes calling for "browning" garlic are doing a disservice to cooks. We cook garlic for the same reasons we cook onions — to tame its sulfur compounds and develop umami. But there's a point where garlic starts to brown if cooked too high or too quickly, and it turns bitter.
In an exception to the "hot pan" rule, starting garlic in a bit of oil in a cold pan over low to medium-low heat is best. Try not to rely on visual cues when sauteeing garlic; your nose is your best guide. When the garlic starts cooking, its acrid aroma from its sulfur compounds will intensify. As the garlic continues to cook, the acidic bite to your nose diminishes until it takes on a pleasant, slightly sweet, and nutty smell. That is the perfect spot for "browned" garlic. If you observe the color, it's more golden than brown, and it's from there that the misnomer derives. If starting with a hot pan or cooking over high heat, it's highly likely you'll overshoot that golden sweet spot before you have a chance to notice it. The acrid flavor of the overcooked garlic will leach into whatever food you're adding to it, so slow and steady wins this race.
Skin-On Poultry
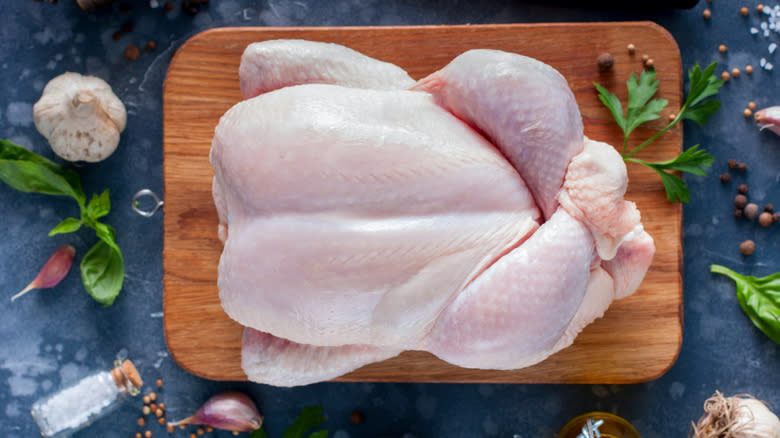
Flabby chicken or turkey skin is a textural nightmare. Almost all poultry — chicken, turkey, duck, quail, or other game birds — have a subcutaneous fat layer under their skin. Without considering that, many people look at poultry and assume they should sear the skin as they would a steak. Searing like that quickly cooks the skin's exterior but does nothing about the underlying fat layer, resulting in flabby skin.
Low-temperature cooking melts the fat under the skin in a process called rendering. The melted fat escapes from under the skin, drawing it closer to the meat and allowing it to fully crisp, resulting in a crunchy texture that contrasts with the meat and is possibly the best part of the bird. The accumulated melted fat, also called schmaltz, creates a natural basting medium for your bird. Drizzling a few spoonfuls of the melted fat over your meat while it cooks infuses it with umami richness and flavor. You don't risk scorching the schmaltz by cooking at a low temperature and can save it for other purposes when you finish cooking.
Steak
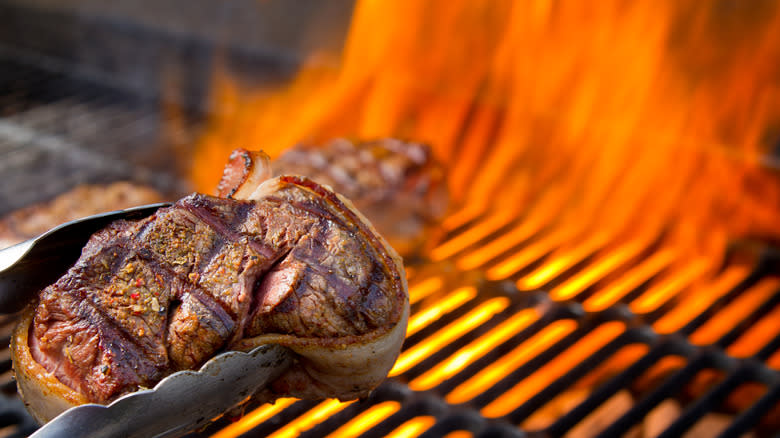
A well-developed crust on a ribeye or NY strip is a thing of visual and textural beauty. However, too much of a good thing can backfire on you. There is no shortage of social media footage of people charring their steak to extremes, sometimes directly in the fire. What can happen from creating this over-developed crust in such a manner is that the crust interferes with heat transfer.
The crust is hot, and that heat should radiate inwards, right? Not always. The hot crust can insulate the steak and only allow a small amount of heat to travel towards the steak's interior. That focused heat can result in a dry, brown ring just underneath the crust because the heat only intensely radiates that far into the steak. The middle slowly absorbs the heat that makes it past that point, while the meat just under the crust dries and turns jerky-like.
Heat a heavy skillet over medium-high heat (or use a similar grilling temperature) for the best results for about five minutes. This heating method makes a hot pan (or grill) with plenty of heat reserves. Sear the steak on each side until you've developed a nice char — a couple of minutes per side should do it. Then, move the skillet to the oven or a cooler zone on the grill, and let the less intense heat penetrate the steak's interior until reaching your desired temperature.
Hamburgers
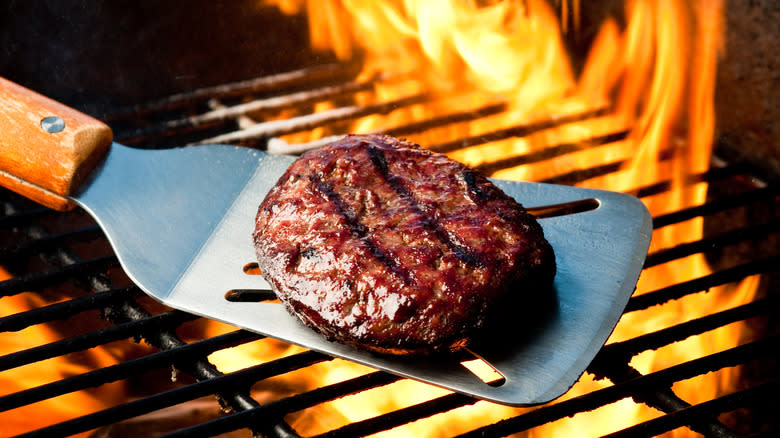
Notwithstanding the popularity of smash burgers, which benefit from high-temperature cooking, many grilled backyard burgers suffer the indignity of over-charring. Not understanding the concept of dual-zone cooking or being unable to use it, many people try to cook their burgers on a high-temperature grill (or pan). The burgers quickly build an insulating exterior char that blocks heat transfer to the interior. This approach is particularly dangerous with store-bought ground beef because the burger's interior remains at an ideal temperature to allow pathogens like E. coli or listeria to multiply while the burger struggles to cook.
Creating a hot searing area and a lower-temperature cooking area allows you to cook juicier burgers (even when well done) faster than using high-heat alone. Sear the burgers in the hot area (or a skillet heated on medium-high heat for about five minutes) for three to four minutes per side. The burger will tell you when it's ready to flip when it releases from the grill, and you don't have to scrape it off the grates. Move the burger to the cooking area and allow the heat to work on its interior until it reaches your desired degree of doneness.
Fish
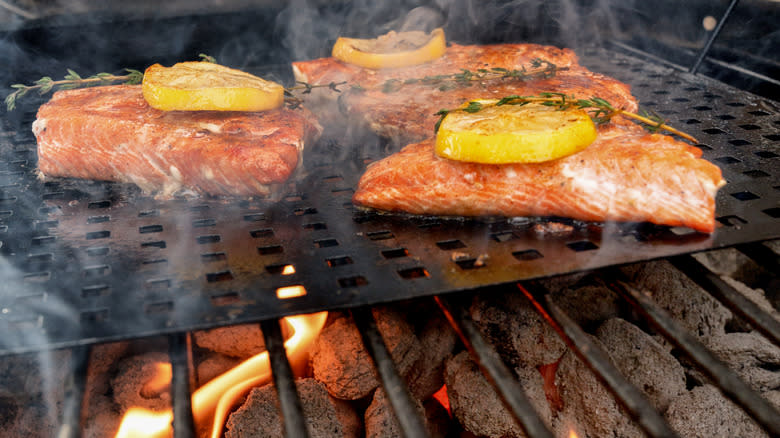
Fish seems like a complicated protein for many people to cook; typically, they cook it too hot. The key is to start with an oiled, well-heated pan (or grill) over medium-high heat. This heating method keeps the pan hot but not at a temperature where the fish will scorch. The oil should shimmer but not reach a point where it smokes. If cooking skin-on fish, the first step is to get the skin crisp by starting with that side down. Ideally, you'd start with the fleshy side for skin-off fish simply because it looks better on the plate. The fish will release itself from the pan or grates with a sufficiently heated pan or grill, and that's your signal to turn it over.
Lower the heat under the pan or move the fish to a cooler spot on the grill, and turn it over to let the other side cook. Many people go wrong by not lowering the heat at this point. First, the flesh can dry and char over the intense heat while the interior stays raw. Second, when cooking fatty fish like salmon, mackerel, or jacks, the beneficial fats volatilize and burn, depriving you of their benefits and resulting in the "fishy" flavor that turns many people off.
Shrimp
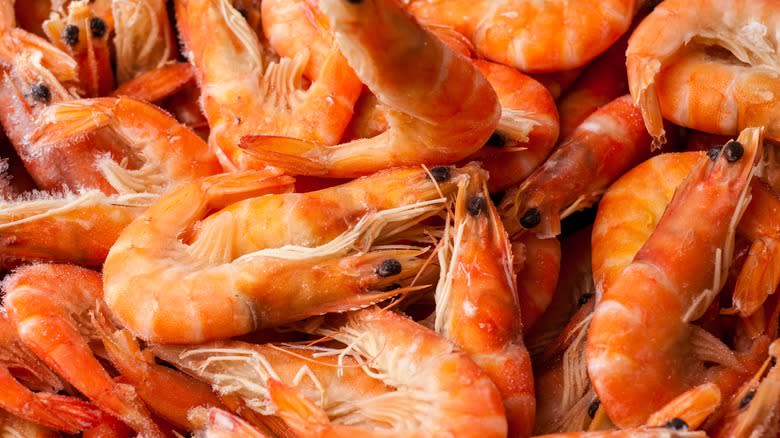
There are three popular ways of cooking shrimp, and all of them require heat moderation to meet with success. The first is grilling. Grilling shrimp with their shells on protects the shrimp's delicate flesh. The shells retain moisture and flavor compounds that will absorb into the shrimp under proper conditions. By quickly charring the shrimp on the grill, the moisture rapidly evaporates and infuses the flavors into the shrimp. At that point, it's best to move them to a cooler part of the grill to finish cooking. Leaving the shrimp over high heat will scorch the shells, sometimes causing them to stick to the flesh, and the scorched flavor will permeate the whole shrimp.
A well-heated pan over medium heat is the best bet when sauteeing shrimp. Cooking them at a high temperature quickly dries their exteriors, turning them tough and chewy while the interiors cook. Boiling shrimp, meanwhile, is a horrible misnomer. To "boil" shrimp, prepare a flavorful broth using citrus, vegetables, spice blends, sausage, or a combination of these ingredients. Don't forget to season the water with salt. When you've developed the broth's flavor to your liking, turn the burner to high and bring the broth to a rapid boil. Add your shrimp and immediately remove the pot from the heat. Let the shrimp cook in the hot broth until their interior is opaque — three to four minutes in most cases, then immediately remove the shrimp from the broth.
Roasted Vegetables
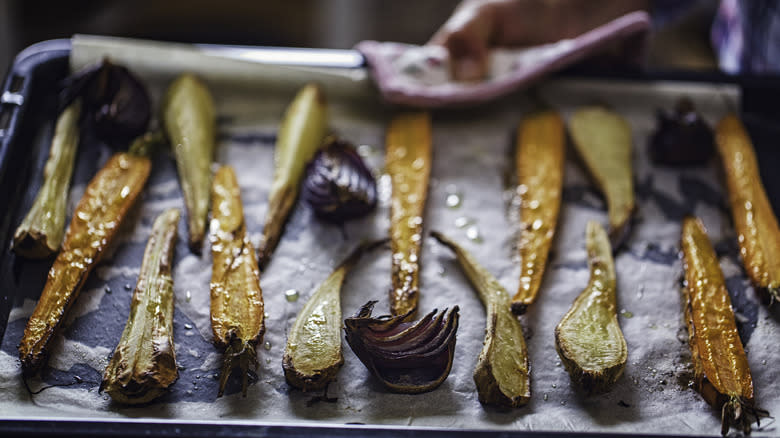
A common misconception about roasting vegetables is that they require high heat to brown. Chefs have espoused this method for ages without considering key factors. When applying high heat to a food's exterior, the outside cooks quickly, while the interior does not. Given that we don't simply blast meat with high temperatures and hope for the best, why should we do so with vegetables?
High heat dries a vegetable's exterior quickly, and the resulting caramelization is pleasant. But taking it further to cook the interior dries out the exterior, often taking it past a pleasant texture and flavor into charred and desiccated, while the inside retains a raw crunchiness. To avoid this, roasting vegetables at about 300 degrees Fahrenheit allows the moisture to evaporate at a lower speed and from the entirety of the vegetable, not simply the exterior. As the heat transfers and the moisture evaporates, the interior cooks and the outside slowly caramelizes, yielding the texture and flavor usually expected from roasting the vegetables at a higher temperature.
Tomato Sauce
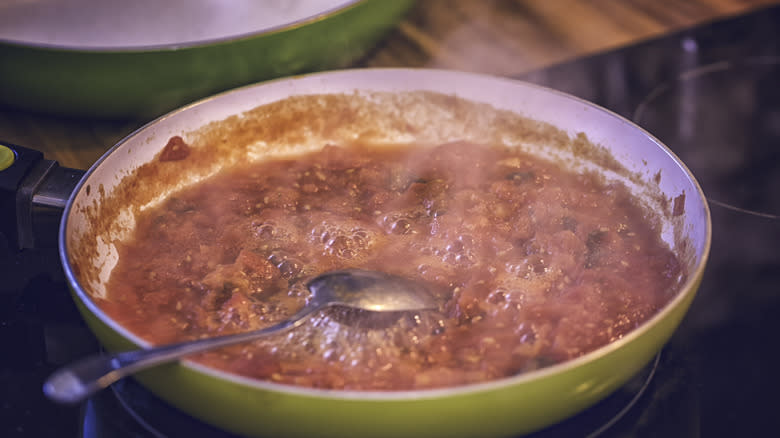
People have been fighting over how to cook tomato sauce for centuries. Generational knowledge and traditions sometimes take precedence over science, though. A tomato is roughly 90 to 95% water, and converting a watery substance into a sauce requires some manipulation. In most cases, cooks rely on evaporation to thicken the sauce. The solid components of the tomato hang in suspension in the liquid, and the goal is to reduce the quantity of liquid to concentrate the solid. That doesn't mean you should boil the sauce, though.
The most contentious point of tomato cookery is how long and at what temperature to cook tomato sauce. Because of the suspension of solids in the liquid, gravity will eventually take effect, and the solids will fall to the bottom. Even the most gentle cooking methods require frequent stirring to prevent these solids from sticking to the bottom of the pot and burning. At the very least, boiling tomatoes for a length of time deteriorates their color, leaving you with a brownish version instead of a vibrant red.
Tomatoes are also high in citric and malic acids. Rapidly boiling the sauce can quickly over-evaporate the water from the solids, concentrating those acids, leading to sour flavors and gastric disturbance for some people. Slow and steady is the best course of action; gently simmer your tomato sauce for about 90 minutes, stirring frequently to thicken it while preserving the color.
Grilled Cheese
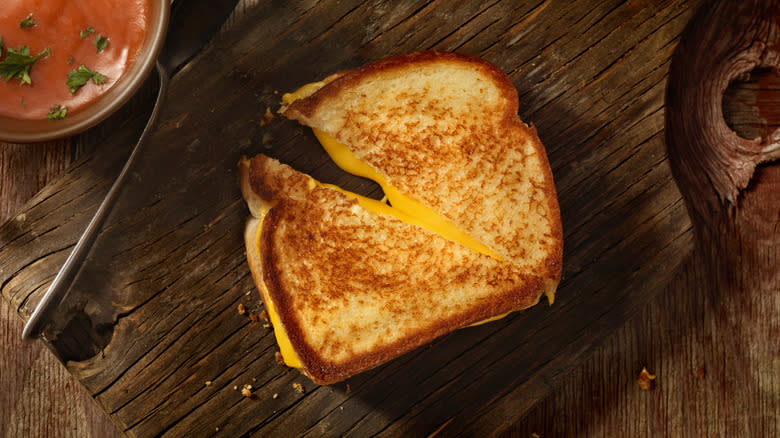
A proper, crisp, melty grilled cheese is a thing of beauty. Overcooked bread and slightly warmed cheese are technically grilled cheese but are the embodiment of disappointment. The key to the former is allowing time for heat to penetrate the cheese and melt it before the bread overcooks. While that may sound like alchemy, it's simple physics.
You want your pan warm, with enough energy reserves that it doesn't immediately cool when you add your bread and cheese. Medium heat is a good starting point. That medium heat will melt the butter or other fat, like mayonnaise or schmaltz, to toast and flavor the bread without superheating it. The fat moistens your bread, but it's also a good heat conductor, and as it seeps into the bread, it brings heat along with it. That heat will work on your cheese, starting to melt it. Lower the heat to medium-low when the first side is crisp, and it's time to flip the bread. Doing so will maintain heat in the pan while lessening its intensity, allowing more time for the second side to toast and for the heat to continue melting the cheese without running the danger of burning the bread. If your pan gets too hot, you can save the day simply by removing it from the heat so the sandwich draws down the energy reserves in the pan, avoiding burning.
Read the original article on Tasting Table

