11 Common Mistakes People Make When Using Yeast
I'll be honest: I haven't always been good at making bread. Mixing flour and water is fine, and I think kneading by hand is fun. It's the yeast that causes trouble.
Yeast is essential to good bread, but it is as finicky as it is interesting. Yeast is a living organism with a single cell. It belongs to the fungus family, and its purpose in bread dough is to turn starch and sugar into carbon dioxide and alcohol via fermentation. To put it simply, it eats the sugar in the dough, then its gaseous waste products cause your bread to rise and get fluffy. But this process only happens under certain conditions. If your water, dough, or room is not at the right temperature, the yeast can't do its job. It also won't work correctly if your dough has too much of one ingredient, if something is added at the wrong time, or if it isn't given enough time to rest.
I am proud (and only slightly embarrassed) to say that I have made basically every mistake there is to make when using yeast. So, I am here to tell you how to avoid these mistakes, so that you and your little fungus can work together to make the best bread possible.
Read more: 14 Liquids To Add To Scrambled Eggs (And What They Do)
Mistake: Not Knowing The Difference Between The Different Types Of Yeast

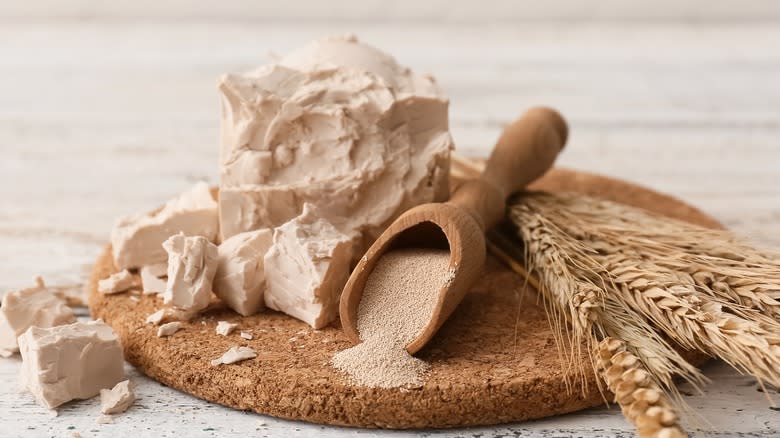
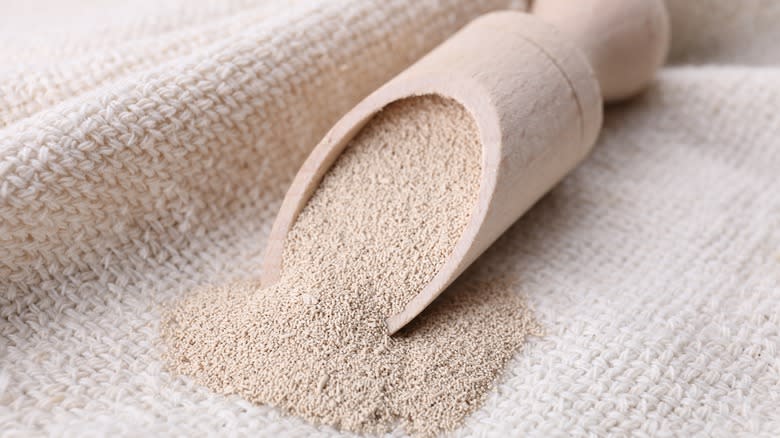
Did you know there are over 1,500 species of yeast in the world? Luckily, we don't need to know about all of them. However, one of the biggest mistakes people make when using yeast is not knowing which one they are working with. Active dry yeast, for example, is perhaps the most popular yeast called for in recipes. It comes in dry, dormant granules that need to be "woken up" with lukewarm water before being added to your dough. This type is best for long rises and is very sensitive to temperature and moisture.
Instant yeast is sturdier, faster-working, and smaller than active dry yeast. Instant yeast doesn't necessarily need to be activated with warm water first, but many bakers do it anyway to ensure that the small pieces are spread evenly throughout the dough. Fast-acting yeast (also labeled as "quick-rise" or "rapid-rise") is a type of instant yeast that is made to work even faster, making this one ideal for bread products that require one rise -- most breads require at least two rises.
Then we have fresh yeast, which must be kept refrigerated. Unlike the previous types of yeast mentioned, this one isn't dehydrated. It is composed of yeast and water. It doesn't last long in the fridge, but it's handy when making doughnuts.
Mistake: Not Testing Your Yeast To See If It's Still Active
One of the things I hate most about yeast is its fragility. Not only can you accidentally kill it with the wrong temperature or ingredients when mixing your dough, but it can also die in the pantry or fridge before its expiration date. This means that, even if you do everything else right with your dough, it still won't rise. I can't tell you how many of my breads have turned into bricks due to inactive yeast. Luckily, I eventually learned that you can test your yeast before adding it to the dough so that you will know whether or not it will grow.
To do this, you can use a process called proofing. Add some yeast to ¼ cup lukewarm water and a teaspoon of sugar. If you see bubbles on the surface after leaving it alone for 10 minutes, your yeast is still good. If nothing happened, your yeast has passed on. Unfortunately, this doesn't work the same way as baking soda -- which can still be used as a deodorizer even if it's no longer good for baking. If your yeast is inactive, all you can do is throw it out.
Mistake: Trying To Activate Your Yeast With Boiling Water

Most people know that many types of yeast (especially active dry yeast) need to be mixed with warm water before being added to your dough. However, some bakers also get a little too overzealous and confuse "warm water" with "scalding hot water." Yeast, as you know, is delicate. If it is exposed to boiling water, it will die. Then you will just be adding poor little fungi corpses to your dough, which won't contribute anything to the rising of your bread.
If you want living, breathing, and working yeast, your water should be between 100 and 120 degrees Fahrenheit when you add the yeast. At 120 degrees Fahrenheit, yeast begins to suffer. If your water is as hot as 140 degrees Fahrenheit, all your yeast will likely die. So, it's best to get the water slightly warm, but not so warm that it burns your finger when you touch it.
Mistake: Letting Your Dough Rise At The Wrong Room Temperature
Have you ever mixed up your bread dough, kneaded it, then left it to rest, only to come back hours later to find that it hasn't risen? This is due to another common yeast usage problem: resting your dough at the wrong room temperature.
Yeast is happiest at a room temperature of 75-78 degrees Fahrenheit. If that temperature is any higher, the dough will rise too fast. If that temperature is any lower, it won't rise at all. But as you are probably aware, it's difficult to keep a room at that exact temperature range. Air conditioning may make the room too cold, and a sunny day may make the room too hot.
That's why I and other bakers recommend covering your dough and putting it in a place with a more controlled temperature, like inside your oven. The oven should be turned off, of course. However, if the dough is getting too cold, you can also heat the oven very briefly to warm it up. Some bakers even find that turning the light on inside the oven can be enough to raise the temperature to the right level. You can also place the dough on a high shelf or atop the refrigerator. These spots may be warmer than other parts of your kitchen.
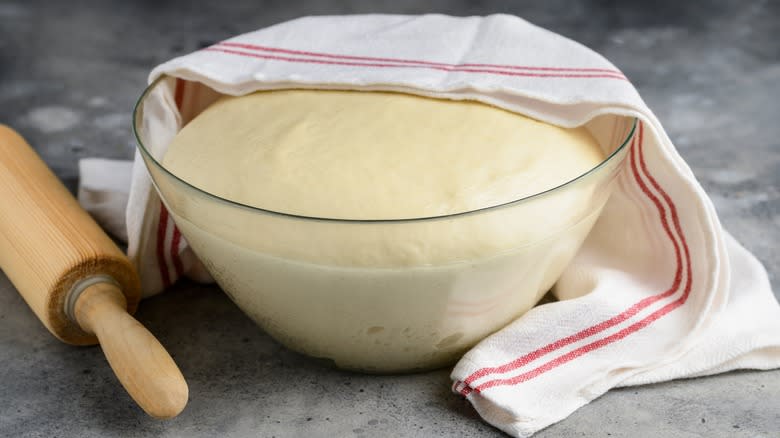
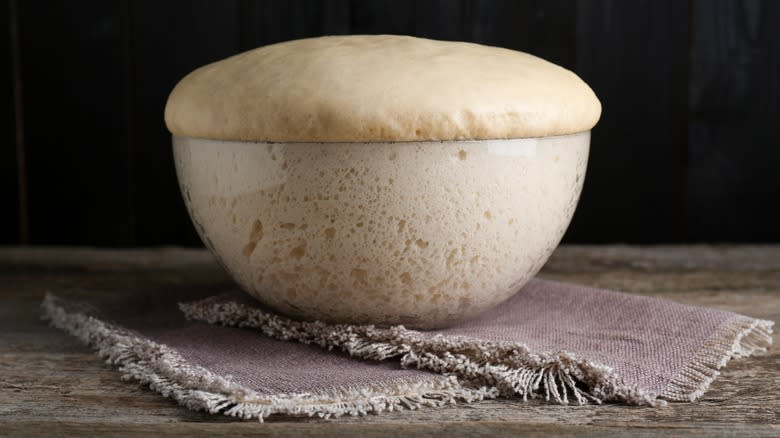
Mistake: Not Giving Your Dough Time To Rise
Yeast differs from baking powder and baking soda, which are chemical leavening agents that react instantaneously. Yeast, though, is a living thing, so its reactions aren't immediate. Almost every type of yeast requires at least a little bit of rising time to make your dough fluffy and your bread soft. If you don't give it this time, your bread will be flat, hard, and tasteless.
The rising process starts when dormant yeast is awakened by warm water. Once it becomes active again, it's mixed with other ingredients. Then, the yeast starts eating the sugars released from the flour's starches. As it digests, carbon dioxide is released as gas bubbles. This -- with the help of the gluten created by your flour and water mixture -- makes your bread rise.
This reaction is similar to the one caused by baking powder or baking soda, but since there is a living organism involved, it takes place over a longer period. Letting your dough rise once for an extended period (be sure to check the yeast package or recipe to know how long) is essential, but many bakers let their bread dough rise numerous times to allow the gluten to develop and the yeast to do its thing. During this time, the yeast also adds flavor to the bread. When you catch a whiff of that delicious, warm bread aroma coming from your oven, you can thank yeast.
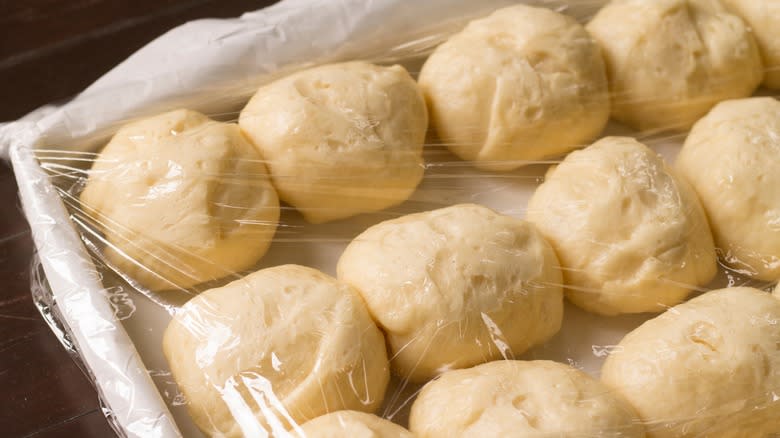
Mistake: Letting Your Dough Rise Too Much Or Too Fast
Too much of a good thing can be bad. If you let your dough rise too much, too much of the sugar in the dough is broken down. This makes it smell and taste sour and alcoholic. It can also make the bread less stable, meaning it may collapse when you bake it. To prevent this, check your dough toward the shorter end of the recommended rising window. If, for example, your recipe says to let it rise for 90 minutes to two hours, check it at the 90-minute mark by pressing two fingers into the surface. If the dough doesn't fill in the dent you made, it's ready to put in the oven.
Letting your dough rise too fast can also cause problems. This can happen if you add too much yeast to the dough, or if you leave it to rise in a room that is too warm. If your dough is supposed to rise overnight, but you find that it has already nearly doubled in size after an hour or two, you have two options. The first is that you can go ahead and bake it, which may not always fit your schedule. Your second choice is to slow things down by putting the dough in the refrigerator. Since the temperature in there is colder, the yeast won't be as active. This will allow you more time before you need to put the dough in the oven.
Mistake: Adding Salt To The Yeast Incorrectly

Salt is an important part of the breadmaking formula. But, if you listen to many bakers who have been making bread for decades, it can also be the death of your yeast, if added incorrectly. The theory is that, if you let salt come into direct contact with yeast, it will kill it. Some refute this statement, but from my experience, it's true.
While salt's deadly effect on yeast may be up for debate, the crux of the matter is not: Salt does inhibit fermentation. The whole reason you put it into dough is to keep it from rising too much, too fast, or in an uncontrolled manner. Salt slows things down so that the dough can rise properly, which improves its texture and taste.
Adding too much salt to your bread can slow things down too much, and adding it at the wrong time can (allegedly) kill your yeast and keep your dough from rising at all. Whether you believe in salt's killing powers or not, it's highly recommended that you add salt to your dough only after the yeast granules have been incorporated into the mix. And even then, mix your salt with some water if possible, so that the dry salt crystals never touch any dry yeast.
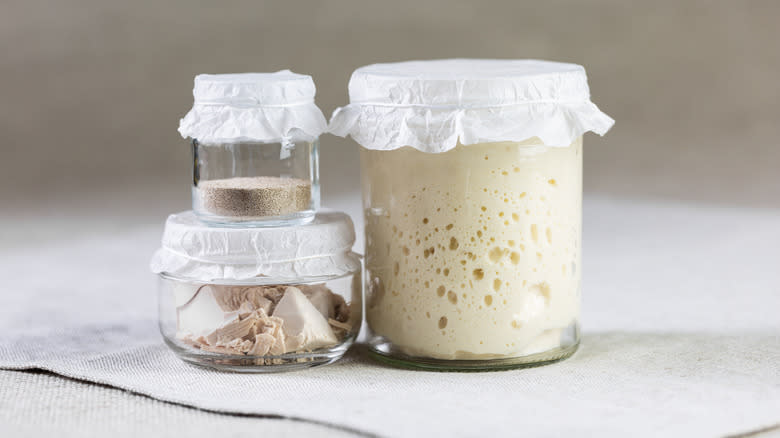
Mistake: Not Making Your Own Yeast

Have you ever baked so much bread that you ran out of yeast? If so, there's no need to run to the store -- you can make your own yeast at home with just flour, water, and quite a bit of time.
First, I'll explain the science behind making your own yeast. You may not know it, but yeast is everywhere. It's in the air around us and comes from flowers, trees, fruits, vegetables, and more. Making your own yeast (usually called "sourdough starter") consists of "trapping" some of these free-floating bits of yeast, which can then be grown into colonies along with lactobacilli bacteria.
Now, I'll explain how to do it. First, combine two tablespoons of pure, distilled water and three tablespoons of whole wheat flour inside a glass jar. Loosely cover said jar so that oxygen can get in and carbon dioxide can get out. Leave it at room temperature for 24 hours, stirring two to three times. For the next three to five days, repeat this process, feeding it the same amount of yeast and water once a day, until it starts to get bubbly and releases the familiar smell of yeast. At this point, you can bake with it, but to keep the rest of it alive and usable, you have to feed it daily (if kept at room temperature) or weekly (if kept in the fridge).
Mistake: Not Storing Your Yeast Properly
The most notorious killer of yeast is incorrect storage. In my experience, this is where things go wrong most often. If you don't keep your yeast from coming into contact with air or moisture, your bread will come out flat and you will most likely only get one use out of your full package of yeast before you have to toss it all in the trash.
Active dry yeast and instant yeast can last for around two years in a dry, room-temperature pantry before opening. After the package has been opened, press all the air out and fold down the top before sealing it with tape. Then, place it in a Ziploc bag that doesn't contain air either. Alternatively, you can pour your yeast into a glass jar and seal it tightly. Either way, you should then store these types of yeast in the fridge or the freezer.
Fresh yeast, on the other hand, must be kept in the refrigerator even before it is opened. It can last around two weeks there. The exception is homemade yeast, which can theoretically remain good for as long as you continue feeding and caring for it. But if the yeast turns hard, crusty, or changes color, it's no longer good. You should also toss it if you see any mold.
Mistake: Thinking All Yeast Requires You To Add Extra Sugar
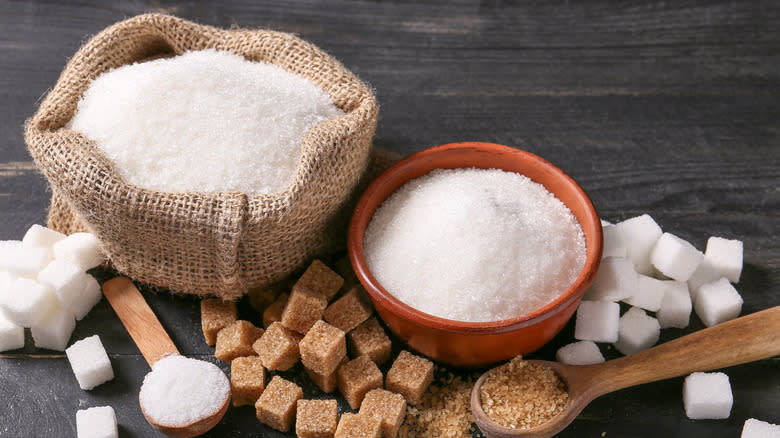
There are a lot of old wives' tales going around about yeast. Perhaps the most harmful one for your diet is that sugar is a necessary addition to all dough. Yeast indeed eats sugar and that helps dough rise. It is also true that, if you are testing your yeast to see if it is still active, you should put it in some warm water with sugar. But the reason why sugar is needed in that specific case is because there is no flour present.
You see, yeast does need sugar, but it doesn't need the kind that comes in sugar packets. Unless you are baking bread that is supposed to have a sweet flavor, there is no need to add other sugar to the dough because the yeast gets all it needs from the starches present in the flour. So, when making regular bread, all you need to add is flour, water, yeast, and a pinch of salt. The yeast and flour will take care of the rest.
Mistake: Thinking You Always Need Yeast To Make Bread
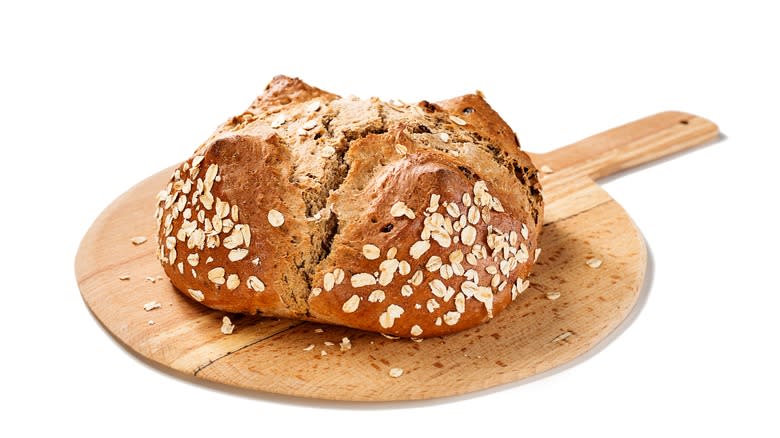
Now that you know how to avoid making mistakes with yeast, I will tell you another secret: You don't necessarily need yeast at all. While fluffy, yeasty bread will always be a favorite, it's not the only type of bread out there. Take, for example, flatbreads. These (usually) unleavened breads are just as delicious as "regular" bread, but without the need for yeast or other ingredients to make them rise.
When it comes to breads that don't use yeast but do rise, we have Irish Soda Bread, which uses baking soda to create the bubbles needed to make it rise. It doesn't actually use the type of soda that you drink. Aside from the baking soda swap-in, the only other real change to this recipe from your usual bread recipe is the addition of buttermilk.
You can also make bread with baking powder instead of yeast. An especially famous one comes from a cookbook published in 1932 called the Five Roses Flour Company cookbook. This one only needs flour, salt, sugar, baking soda, milk, and peanut butter to create a sweet treat that is as easy to make as it is to eat. So, even if you are out of yeast, don't despair! You can still bake up some delicious bread anytime.
Read the original article on Daily Meal

