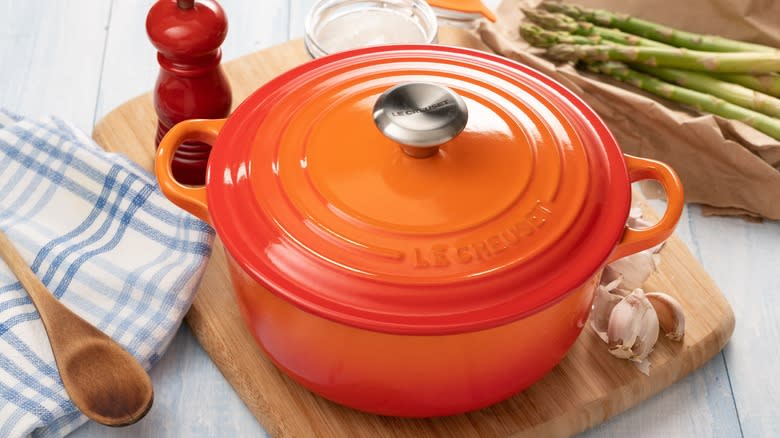
10 Crucial Tips For Cleaning Your Dutch Oven
Every time you turn around, it always seems as if there's a new kitchen gadget touted as the next step in cookware evolution. From oil-free frying to boiling plastic bags, there's no limit to the human imagination when it comes to culinary possibilities. That said, as impressive as innovation can be, practical time-tested cookware is often more impressive. Take Dutch ovens for example: The design is simple, it's sturdy, and no additional attachments are required. It's a wonderful piece of cookware that can last you a lifetime -- if you take care of it.
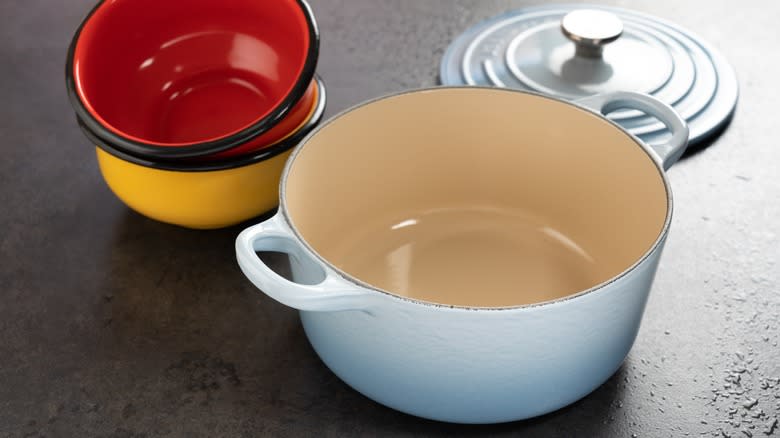
Along with being super durable, Dutch ovens can be used for indoor and outdoor meals. There are several types that each offer distinct benefits: Cast iron, enameled, and stainless steel are popular varieties. They also come in a wide assortment of color options. That's why they're so fun to cook with. There is a catch though; Dutch ovens require maintenance. Using them incorrectly can drastically shorten the lifespan. Unlike other cookware, you can't just toss them into the washer and walk away. From how you cook with them, to how you clean them, Dutch ovens deserve special attention.
The extra bit of care is totally worth it though. Whether you use it weekly or have let it acquire dust in your cabinet, you should know these crucial tips for cleaning your Dutch oven.
Read more: The 20 Best Olive Oils For Cooking
Paper Towels Work For Quick Cleans
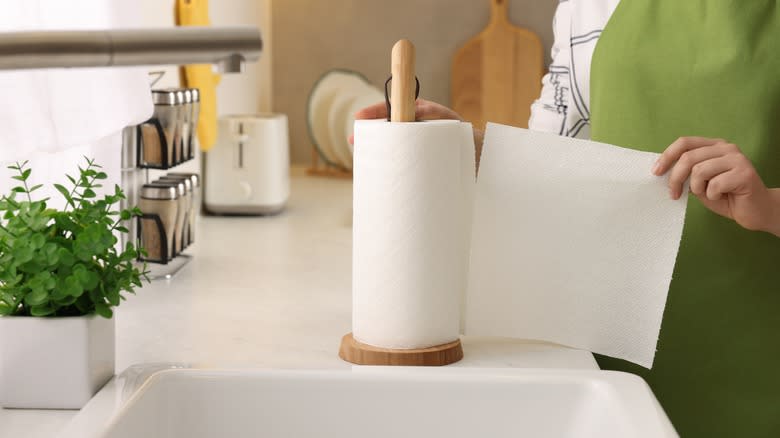
Cast iron Dutch ovens must be seasoned before use. Seasoning coats the pot with a thin layer of oil, which protects the surface from corrosion and also makes it somewhat non-stick. Ceramic and cast aluminum-made Dutch ovens, on the other hand, come with a non-stick surface. The surface makes it easier to wipe away foods without having to apply much elbow grease. Paper towels are more than capable of quickly cleaning your Dutch oven, so long as it doesn't have burnt and charred remnants of food.
Drizzle the paper towel with a little water (you can add a drop of dishwashing liquid too), use it only when minimal oil is used, rinse the pot, then dry it with another paper towel. We also recommend using paper towels when you'd like to save the oil that's infused by the previous night's dinner. You can remove any remaining pieces of food, while retaining the flavor, and use the paper towel to evenly lather the inside of the Dutch oven with oil as well.
Allow Ceramic Ovens To Cool Down Before Washing
Depending on the material that your Dutch oven is made of, there are different factors to take into consideration. Ceramic Dutch ovens are as durable, but like lots of cookware, they are susceptible to drastic temperature changes. When you put a hot Dutch oven in cold water, it undergoes thermal shock, which is what happens when materials of different temperatures interact. The subsequent interaction can damage the ceramic enamel. If it's made of 100% ceramic, it can ruin the pot itself. It's always suggested to allow your Dutch oven to cool down before cleaning it with water.
With so many amazing one-pot recipes to make, the last thing you want is your delicious stew leaking through a massive crack. Ceramic ovens absorb heat slowly, yet do an awesome job at holding it in. Even heat distribution makes them perfect for cooking. That's also why you should never use high heat when cooking with them either -- too much heat absorption and your Dutch oven becomes ineffective.
Always Hand Wash With Soft Non-Metal Sponges
Another easy way to damage the surface of your ceramic Dutch oven is by using metal scrubs. The thin layer of non-stick enamel isn't made to withstand steel-wool cleaning pads, which can cause it to chip. Trust us, nobody will be happy chowing down on some ceramic-spiced pasta. Dutch ovens require a particular type of care; you should always hand wash them with non-metal sponges or brushes with a gentle abrasion. A sponge, warm water, dish liquid, and your hands are all you need for quick clean-ups. For tougher cleaning jobs, there are other methods that you can use.
Although some manufacturers sell "dishwasher-safe" types, we never suggest putting your Dutch oven in the dishwasher. This rule of thumb goes for ceramic, cast iron, and cast aluminum ovens. Extended exposure to water in the dishwasher can wear away at the enamel on ceramic Dutch ovens. Loose utensils can potentially damage them as well. Cast iron is pretty self-explanatory; putting those in the dishwasher is a one-way ticket to Rustville. Cast aluminum may fare the best, but even then, we recommend a simple hand wash.
Boil Water To Remove Burnt Bits

Sometimes you're faced with a tough cleaning job that calls for a particular set of skills. With the versatile cooking capabilities of a Dutch oven, learning how to remove burnt bits is a must. Thankfully, this next uncomplicated cleaning trick works for Dutch ovens of any material: Boil water to remove leftover charred and burnt food. It's perhaps the easiest Dutch oven cleaning method (some would argue foolproof) and will save you from having to realign warped utensils.
Along with saving you time, it'll help preserve it longer. That means delicious recipes for years to come. It's easy, just fill the oven with tap water halfway and bring it to a boil on the stovetop. Make sure to leave the lid off while it boils, and let the hot water work its magic for at least three minutes. After that, switch off the eye and remove the burnt bits from the sides and bottom with a wooden spoon or spatula. They should loosen easily into the water, which you can then discard. Hand wash the pot with warm water and soap.
Use Kosher Salt And Water
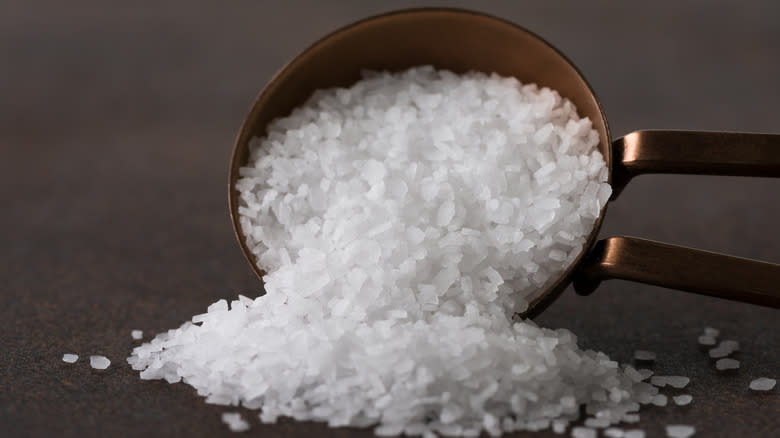
Another effective way to clean burnt food from Dutch ovens is with kosher salt and water. Kosher salt is basically sodium chloride, which, according to Healthline, is an essential compound that helps our bodies absorb and transport nutrients, maintain blood pressure, and more. Ironically, in addition to its benefits, it's also excellent at cleaning pots, preventing mold, and removing stains and grease. Kosher salt has nowhere near the char-removal capabilities of baking soda, but it's much more effective than simply using warm water and soap.
When using it to clean your Dutch oven, we recommend first filling it up halfway, or up to the highest burnt bit. Pour two to three tablespoons of kosher salt in and bring the water to a boil on high heat. The water and coarse salt will work together to loosen the stuck pieces so that you can easily remove them with a wooden spoon, or soft scrub. If you're unable to remove everything the first go-round, you can rinse and repeat the same steps.
Boil Water With Baking Soda For 15 Minutes
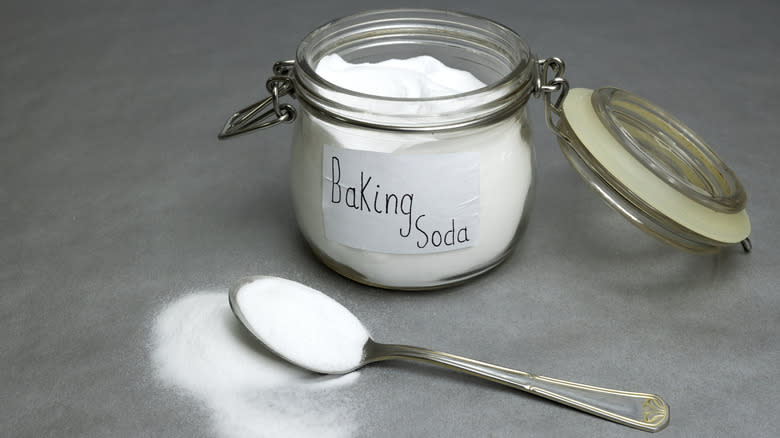
On the off chance that simply boiling water doesn't loosen the charred grip of burnt foods, baking soda is a hack for a squeaky clean Dutch oven. The tip was revealed on TikTok by @neat.caroline, where it went viral, blowing the minds of home chefs everywhere. When you're left with the savory remnants of a perfectly cooked recipe, using boiling water and baking soda will give you a shiny and spotless Dutch oven. The instructions shared in the viral video are simple and straightforward: Fill it up with water and bring it to a boil, add some baking soda, then turn off the heat, cover it with a lid, and let the baking soda work its magic for 15 minutes.
Baking soda is composed of mild abrasive properties and has an alkaline pH that neutralizes and loosens acidic burnt foods. Combining it with boiling water does a better job of removing resistant foods than just water alone. Prepare your Dutch oven for years to come by using this quick and simple tip.
Bar Keeper's Friend Will Keep It Spotless
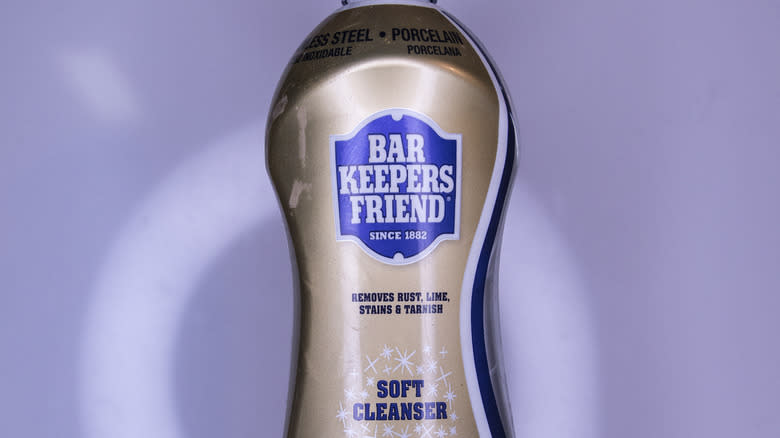
While baking soda is great for moderate cleaning jobs, for burnt foods that are seemingly glued to your Dutch oven, you'll need something a bit stronger. Enter Bar Keeper's Friend; it's a super strong cleaner that resembles baking soda but can handle the jobs that baking soda can't. Another name for it is oxalic acid, a strong alkaline substance that reacts to calcium, lime, rust stains, and iron deposit buildups. Baking soda, on the other hand, is sodium bicarbonate, which has similar, though considerably inferior, cleaning capabilities as Bar Keeper's Friend.
To give you an example of the power difference between the two, Bar Keeper's Friend will damage the enamel of your Dutch oven if it's used incorrectly. Take it from celebrity chef Michael Symon, he uses it not only for its cleaning skills but also because it's easy to find and costs less than ten dollars. It's actually a popular go-to for many professional chefs. The Bar Keeper's Friend's website does offer some advice: Only use it on enameled cookware, not cast iron. You should also be careful not to touch your eyes or skin when using it -- this stuff isn't for kids. Brillo's cameo cleaner works great too!
Spray It With Oven Cleaner
Aside from super strong cleaners like Bar Keeper's Friend and Brillo's Cameo cleaner, you can also use traditional oven cleaners. One thing that they have in common is a high alkalinity content, which gives them super caustic powers that can break down strong substances. Before you use oven cleaners, it's important to read the instructions thoroughly. They're poisonous to human beings and should never be consumed, inhaled, or come into contact with your skin -- you run the risk of tissue damage and/or burns. Simply put, we suggest wearing gloves and a face mask too, because the fumes are toxic and not to be played with either.
After you've taken proper safety precautions, oven cleaners are one of the most reliable ways to remove charred foods. All you have to do is spray the affected area and let it sit for 30 minutes to an hour, depending on the job. It'll loosen the food so that it's easy to clean. If your Dutch oven has lots of stains from years of use, this easy oven cleaner hack will remove them and make it look brand new.
Make Sure To Dry It Immediately
Cleaning your cast-iron Dutch Oven thoroughly is only part of the process. After you finish, it's very important that you dry it off immediately. Doing so will prevent rust from forming, which, aside from making it look ugly, can compromise its structural integrity. Cast iron Dutch ovens not only need to be hand washed but they must be dried thoroughly and seasoned properly. You should never soak them in water, let them air-dry, or put them into your dishwasher. And, when you do use soap, it should only be a small amount — using too much will remove the seasoning.
If it's a quick clean and the seasoning is left intact, then all you need is a towel to dry it. If you need to apply a fresh coat of seasoning, we suggest drying it directly on the stovetop. That way, you can season it right away before putting it back in storage.
Wipe Down With Oil Before Storing
If you've never owned cast iron cookware, you're missing out on a whole world of deliciousness. On one hand, we don't blame you, cast iron cookware does require more maintenance than other types of cookware -- but it's completely worth the extra work. Seasoning is basically carbonized oil. Through a process called polymerization, which occurs when oils or fats are heated at high temperatures, the surface of cast iron becomes slick and hardened. That hardened surface is what's called "seasoning" — it's molecularly bonded to the iron which prevents rust and corrosion.
If you looked under a microscope, you'd see that the surface of cast iron is uneven and jagged. Seasoning evens out the surface by bonding with the uneven parts of the texture. It's the original non-stick. When done correctly, it gives your cast iron a pretty black patina. Some brands sell pre-seasoned cast iron cookware. To season, you'll need to first heat your Dutch oven on the stove. The heat will open the pores in the iron, allowing for better oil absorption. Next, apply a thin layer of neutral oil across the surface, interior, and exterior of the pot with a paper towel. After that, put it back into the oven upside down for an hour at 350 F. Make sure to set it atop a baking sheet, or foil, to prevent oil from dripping into the oven. Make sure to wipe off excess oil before storing.
Read the original article on Tasting Table.

