5 Tips to Make the Prettiest Gingerbread Cookies Ever
Today: A few tips for show-stopping gingerbread cookies.
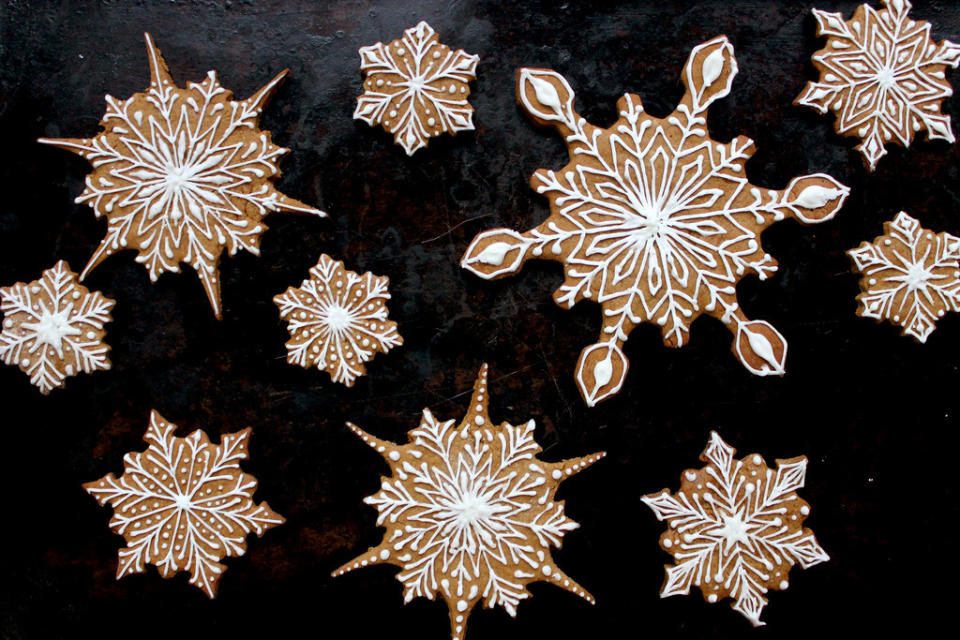
Aren’t they beautiful? (Photo: Anna Hezel/Food52)
I know that Christmas isn’t supposed to be a competition, but it can’t hurt to have the prettiest gingerbread at the party, right?
Related: 12 Cookies Worthy of Cookie Monster
Decorating gingerbread is one of my favorite holiday tasks because you can just hunker down with a few episodes of Breaking Bad and a tray of cookies, and before long, you have a stack of lovely edible gifts. It’s far more relaxing than gift-shopping, picking out a tree, or, heaven help me, hanging garlands.
Related: 5 No-Brainer Ways to Make Better Cookies
Here are some tricks that will work for any size or shape of snowflake cookie cutters. Mix and match these for a whole batch of unique snowflakes. If you want to hang these on your tree as decorations, you can use a plastic straw to punch a hole in the cookie before baking it, and afterwards string some ribbon through it.
Related: 10 Cookies to Move to the Top of Your List
Snowflake cookies. (Photo: Anna Hezel/Food52)
1. Get your frosting right: The ideal frosting for icing cookies will have the texture of melted chocolate at room temperature. I like to cream together 2 tablespoons of unsalted butter with about a cup of powdered sugar, and then add one or two tablespoons of milk, until the texture is right. You can also take a tip from Alice Medrich and skip the frosting altogether.
Related: 12 Recipes that Celebrate the Chocolate Chip Cookie
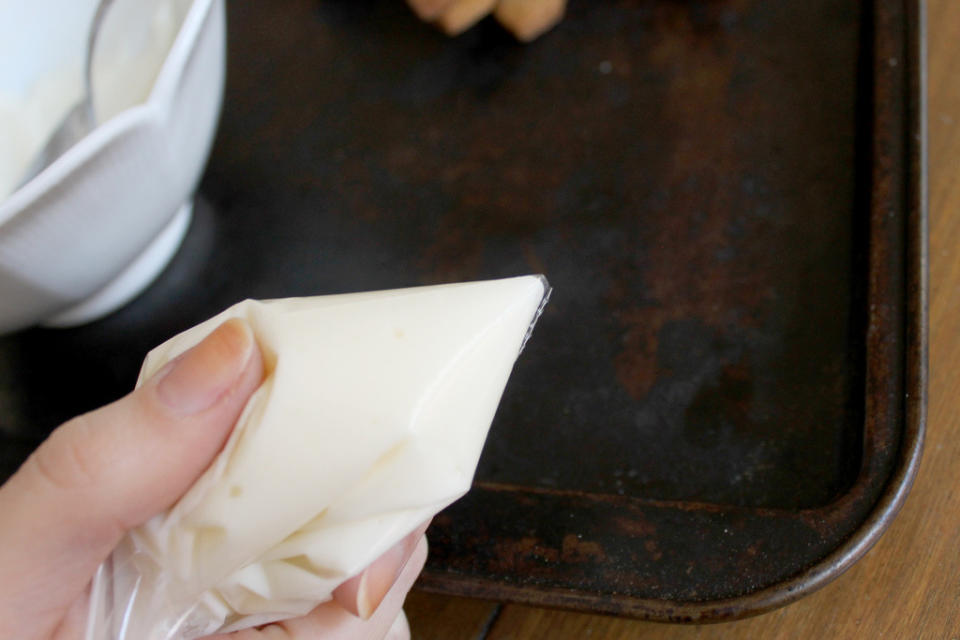
Get your frosting ready. (Photo: Anna Hezel/Food52)
Scoop about ¼ cup of the frosting into a small ziplock bag. Squeeze out any air bubbles and seal the bag. Cut a tiny hole in one corner (about 1 millimeter wide).
Related: Our Essential Chocolate Chip Cookie Guide
2. Creating a template: Make a small dot of frosting in the very center of the cookie. Draw steady, straight lines connecting each of the six (or twelve, if you like) most prominent points of the cookie to this center dot. This will give you a helpful starting template for your snowflake design.
Related: White Chocolate Peppermint Cookies with Vanilla Salt
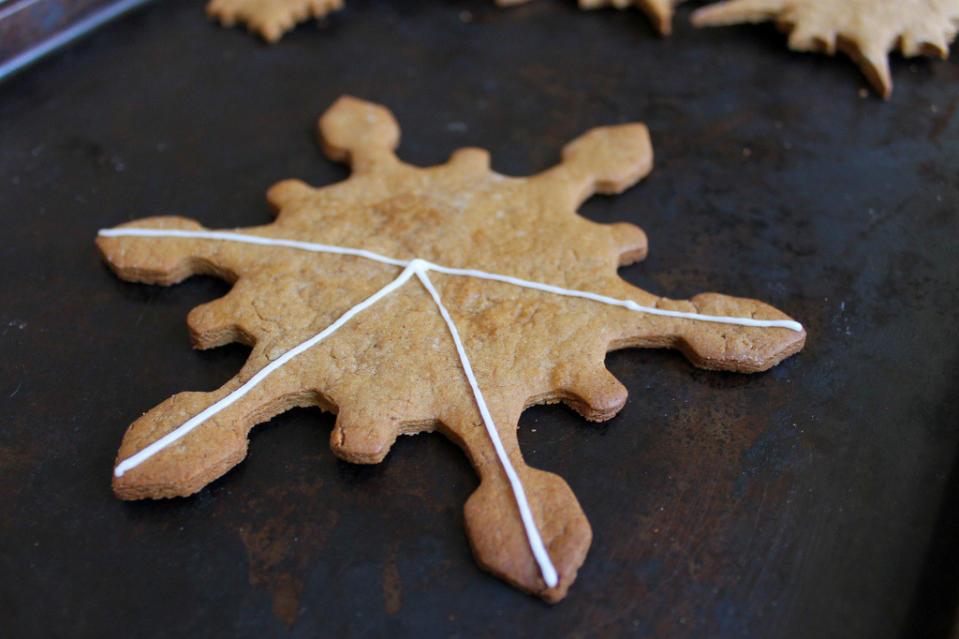
Get creative. (Photo: Anna Hezel/Food52)
3. When in doubt, start with Vs: To get started, draw sets of 3 or four stacked V’s at the snowflake’s points, with the angular end pointing towards the center of cookie. You can be a little creative here and make your Vs frilly or curly, but it looks best if they are all more or less uniform.
Little details will make it come together. (Photo: Anna Hezel/Food52)
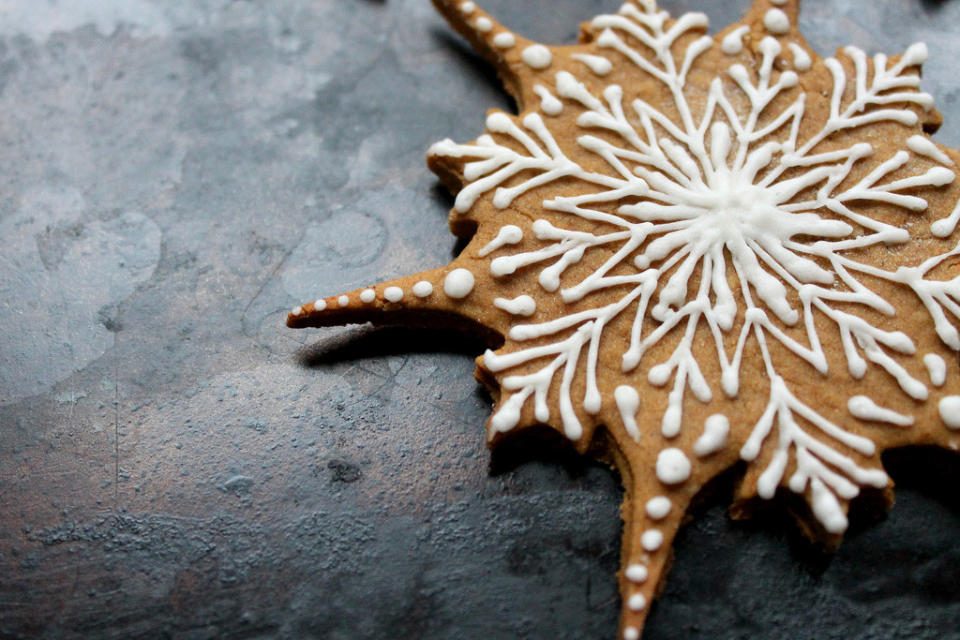
4. Diamonds, dots, and teardrops: Once you’re done with the basic lines of the snowflake, try filling in the empty spaces with little diamonds, dots, and teardrops to make the design look more detailed. Diamonds look great at the very tips of the stars’ points, and dots and teardrops are helpful for filling in oddly-shaped spaces.

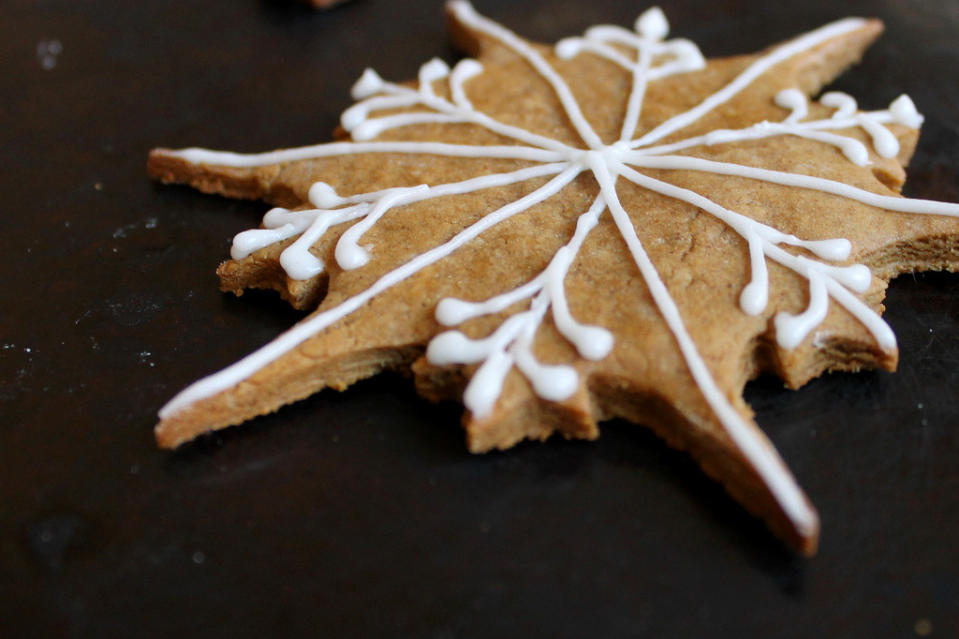
Your finished product. (Photo: Anna Hezel/Food52)
5: The sixpoint star: The middle of the cookie can get a little messy with all of those lines meeting in one place, so I like to cover it up with a little 6 point star. I just make a big dot of frosting in the middle, and then taper it outward into 6 points.
By Anna Hezel.

