Shipping Your Bike Can Be Effortless With These 3 Steps
"Hearst Magazines and Yahoo may earn commission or revenue on some items through the links below."
With coronavirus restrictions lifting, you’re probably itching to take that far-flung bike trip you planned seemingly ages ago.
And while traveling now is less fraught than it was last year, there’s still no way around it: shipping a bike is nerve-wracking. When you transport your bike with your car, you can at least keep a close eye on it and avoid any potholes that might jostle or damage it.
Join Bicycling All Access for more tips and tricks
When you send it off on a plane or a FedEx truck, on the other hand, you risk your ride getting dropped, rolled, or otherwise wrecked in transit—which is a big deal, since your bike’s not only precious cargo, but sometimes necessary cargo (i.e., if you’re traveling to a race).
But before you abandon the whole shipping headache and instead map a 24-hour-plus drive to your destination, get to know a little more about it. Here, we’ve broken down the three steps for shipping your bike—and your options for each part—to get you through the process.
1. Pick a shipping method
If you’re not driving with your bike, you can either check it on an airplane or ground-ship it.
If you are flying, make sure to check your airlines to see how much the likely charge will be. While added fees are getting a little cheaper—American, Delta, and most recently United have dropped them altogether—many airlines still charge upwards of $150 to check in a bike, and often your cargo is at the mercy of rough baggage handlers. Checked bikes can also be lost when transferring airlines, which could leave you stuck without a bike for days on end.
Another option is shipping your bike through a ground-shipping service, such as BikeFlights. BikeFlights will guarantee on-time delivery and offer a refund if the bike is late. (Though due to shipping delays caused by the coronavirus pandemic, BikeFlights is not currently offering its delivery guarantee.)
To ship your bike through BikeFlights, you simply enter your current city and destination city on its website, the size and type of shipping container, the container contents (full or partial bike) and value, the level of protection plan you’d like (free basic plan or upgraded), and your reason for shipping. You’ll then get a quote for the shipping cost (for example, sending a road bike in a medium-sized bike box from New York City to San Francisco runs you about $80 plus fees for five-day shipping) and can input a shipping date. If you want your bike to arrive sooner, you can select a faster (though more expensive) delivery option.
Once you select your quote, you can either schedule a pick up or drop your packed bike off at an affiliated UPS center, and let the shipping crew take it from there.
For an alternative to BikeFlights, Shipbikes.com offers a similar service.
If you’d rather not use a bike shipping service, you can take your bike directly to carriers such as FedEx or UPS, who each offer different prices for transporting bikes. Of the two, FedEx is usually the most budget-friendly choice—and it offers sweet doorstep pickup and delivery options.
Whichever shipping option you pick, consider paying a little extra to protect your bike. While most services won’t cover any damages that occur because of improper packing, some, such as BikeFlights, offer a premium protection plan for if your bike is battered in transit. This will give you a little peace of mind while you wait to reunite with your bike.
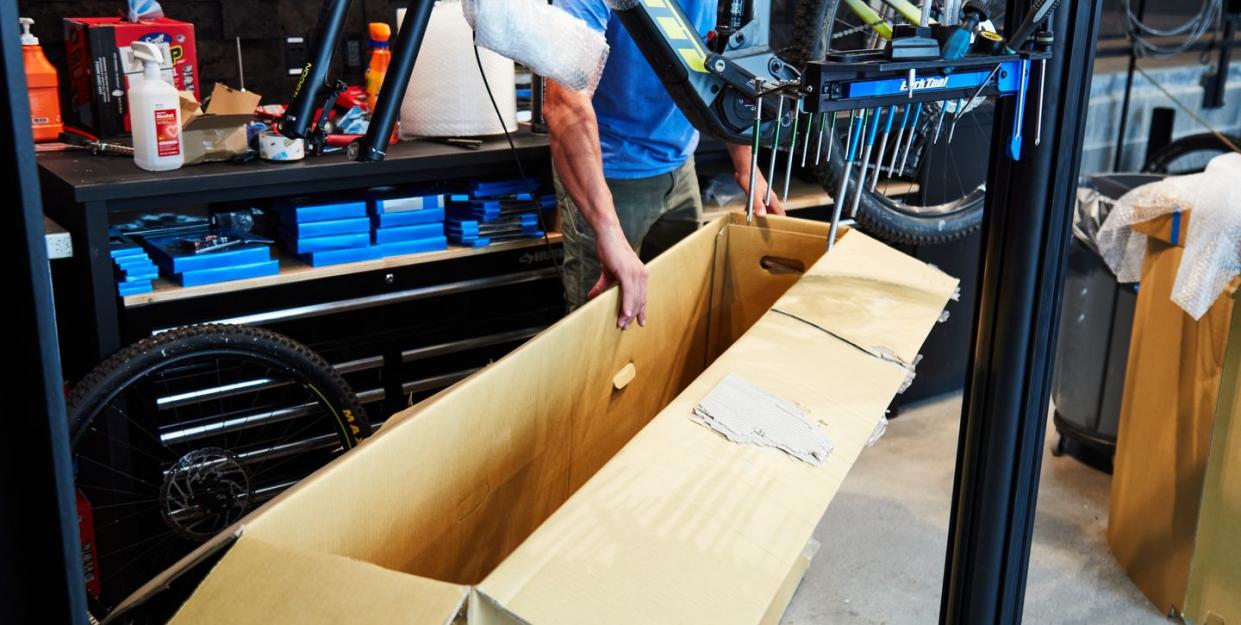
2. Choose your case
The shipping container—whether it’s a cardboard box, soft shell, or hard shell case—is the first line of defense for your bike, so you should consider your vessel carefully.
Cardboard is the cheapest avenue to take, and these boxes are usually available at local bike shops or through sites such as BikeFlights and ShipBikes. Just make sure to select only new or lightly-used boxes, as they break down and become less protective with time. For budget-friendly cyclists or those who don’t travel with their bikes often, a (well-packed) cardboard box is all you need.
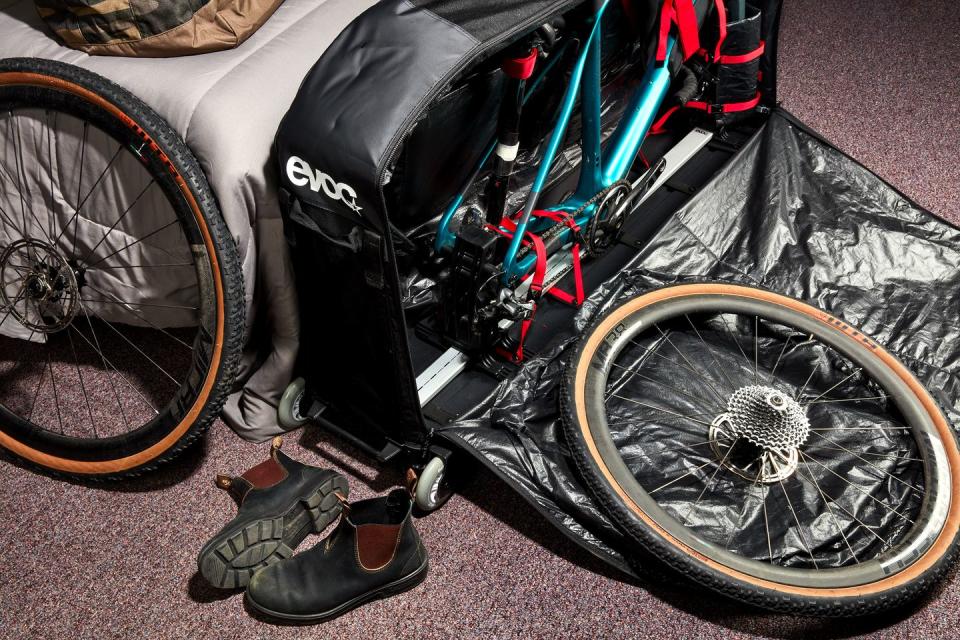
For those who travel more often, you might want to invest in a soft shell case (such as EVOC’s Bike Travel Bag), which contains built-in foam padding and a fairly protective exterior, but isn’t as heavy as a hard shell. Those seeking maximum protection should opt for a hard shell case (like Thule’s Round Trip Sport Bike Travel Case), which comes with built-in padding and is shielded with tough, durable armor.
If you’re flying with your bike, you might want to go with a hard shell case or cardboard box, as airlines usually prefer these carriers.
3. Pack your bike
Once you know how you are shipping your bike and you have your case, it’s time for the most important part: packing your bike. Because no matter how protective your carrier is, if you carelessly load your bike in without wrapping it properly, it could be disastrous.
Packing a bike requires disassembling it, which involves removing or protecting a lot of fragile pieces, including your rear derailleur, pedals, and seatpost. If this is your first rodeo, have a dismantling process in place, like the one outlined in the video below:
Placing everything in your case, wrap any fragile parts in a protective covering (like foam tubing), and give the container a good shake to see if everything’s secure. If you hear a rattling sound or something sliding around loose, check your work and adjust as needed.
If you’re nervous about packing your bike yourself—or just want to save time—you can take it to your local bike shop and have a mechanic pack it for you. For a seamless ground-shipping process, you can take it to a shop affiliated with BikeFlights and let the folks there pack your bike and ship it to your destination.
Happy travels!
You Might Also Like

